
UnsophistiCook.com shows you how to make homemade butter.
Do you have a fun and frugal DIY idea to share? I’d love to hear about it! Read the submission guidelines and submit it here.

Saving Families Money Since 2007


UnsophistiCook.com shows you how to make homemade butter.

If you missed Part 1, be sure to read it here before you read Part 2 below.
As women, we often are prone to take care of everything and everyone else before we take care of ourselves. The problem is, if we do this for months on end, soon we are going to end up so worn down and fatigued that we won’t be able to take care of anyone.
Make your health a priority — even if it means you must say “no” to other seemingly important commitments. In the long run, it will be every bit worth it.
In addition to making sure you’re getting enough sleep, make sure that you are nourishing your body with good foods. I’ve found that I feel so much more energetic if I eat at least one big salad everyday. If I don’t eat one for lunch, I eat one for dinner. Some days, if I’m feeling like I really need the extra nutrition and energy boost, I’ll eat one for lunch and dinner.
I don’t eat all these salads because I always feel like it, I eat them because I know that I won’t like how I feel if I don’t eat them. So I down the greens — and I always am thankful I did afterward. 🙂
If you can, chop up some veggies or wash and tear lettuce on the weekends. Then you don’t have to spend a lot of prep time throughout the week. And, you also have fewer excuses for getting in your greens when you make them more easily accessible. 🙂
I know, I sound like your mother, but taking a good multi-vitamin can really make a difference in how you feel. I also recommend taking fish oil, too.
There are lots of other vitamins out there to consider taking, but do your research before you just start popping pills. Too much of a good thing can sometimes be just that — too much.
I used to be really, really bad about consistently taking vitamins. Then, I learned a trick: I had to make it part of my routine. Instead of just trying to remember to take my pills sometime during the day, I made pill-taking part of my evening routine.
Now, it’s become such a habit, that I pretty much can’t go to bed unless I’ve taken my pills. And I feel so much better as a result!
Many, many of our physical ailments can be the result of just not drinking enough water. Headaches, constipation, weight gain, leg cramps, exhaustion, and much more can often be related to the fact that one is dehydrated. So before you spend a lot of money on products to help you with your physical problems, make sure you’re getting hydrated.
If you struggle to drink enough water throughout the day, you might find it helpful to track your water intake either online or on your phone — or just on a notebook in your kitchen. You could also fill up a pitcher of water or two bit water bottles before you go to bed at night and then commit to drink all of it by the time you go to bed the next night. You could even set a timer to go off periodically throughout the day to remind you to drink water.
Or, you can do what I do and try to always have a glass of water nearby wherever you are. I’ve found that the physical presence of that glass of water encourages me to constantly be taking sips of it throughout the day. And before I know it, I’ve downed 8 or 10 glasses of water!
If you’re already fatigued, it might seem counterintuitive for me to be suggesting you start exercising. However, instead of exhausting you, exercise can often actually increase your energy.
If you aren’t regularly exercising, set really small goals at first: such as jogging or walking for 10 minutes three times a week. Track your progress on a site like SparkPeople to help you stay motivated. Or, find an exercise accountability partner to exercise with you or to check up on you throughout the week to make sure you’re sticking with your plan.
For those who feel like exercising is such a boring and dull thing, may I encourage you to try some new things? Join an exercise class, try biking, or check out some exercise DVDs from the library. Keep experimenting with different things until you land on something you enjoy.
And if you’re Type A like me, find a way to multi-task so that it feels more productive. I’ve found that I’m much more likely to hop on the treadmill if I have a good book I’m reading during my warm-up walk and a good podcast or audiobook to listen to while I’m running.
…to be continued tomorrow.
What suggestions or tips do you have for simple things a busy woman can do to take care of her health? I’m looking forward to hearing your ideas!

Are you ready for another week of filling your freezer? This week, we’re tackling dinners.
Here’s my plan for making Freezer-Friendly Dinners this week. Remember that you are more than welcome to substitute any or all of the recipes listed to make this what best fits with your budget and family’s preferences:
Tuesday — Double Recipe of Barbecued Meatballs
Wednesday — Double Recipe of Lasagna Casserole
Thursday — Double Recipe of Pizza Dough
Friday — Double Recipe of Chicken Broccoli Rice Casserole
Monday – Double Recipe of Italian Chicken
(I rounded up on the amounts needed, just to be safe. You probably have many of these items already on hand. You’ll want to double-check that you have the correct amounts, though.)
5 pounds ground beef
5 cups flour
6 eggs
2 cups milk (I’m using milk instead of evaporated milk in the Barbecued Meatballs)
2 cups quick oats or old-fashioned oats
4 onions
2 cups ketchup
1 jar spaghetti sauce
2 15-oz. cans diced tomatoes
16 ounces of dry pasta (we prefer rotini pasta, but any kind will work)
2 bottles of Italian Dressing (or your favorite homemade Italian Dressing)
12 chicken breasts (boneless/skinless or bone-in — can also substitute two whole chickens, if you prefer)
Chicken (enough for 4 cups chopped chicken)
3 bags of frozen broccoli (or 8 cups fresh chopped broccoli florets)
4 cups cottage cheese or ricotta cheese (we prefer cottage cheese and it’s typically much cheaper — especially if you can find it marked down!)
16 oz. mozzarella cheese
16 oz. cheddar cheese
2 cans cream of chicken soup (or make your own cream soup)
2 cans cream of mushroom soup (or make your own cream soup)
Liquid Smoke, optional
5 cups uncooked brown rice (or white rice)
Salt/Pepper
Chili Powder
Garlic Powder
Parsley
Yeast
Oil
Sugar
Foil
Plastic Wrap
10-12 large ziptop freezer bags
2-4 glass or aluminum pans (to freeze Lasagna Casserole in, and Barbecued Meatballs, if you prefer.)
Something to label packages with (marker to write on bags, labels, and/or tape)
Click on the “Print This” tab at the top of the list to generate a printer-friendly list. (If you’re reading via email or a feed reader, you may need to click through to the post to print the list.)

Last week’s goals:
Family/Mothering Goals
1. Finish reading Quest for Truth:Taken aloud to the children.
Start reading Spy for the Night Riders.
2. Spend at least 30 minutes everyday doing something fun together as a family.
3. Write a love note to Jesse.Personal Goals
4. Finish reading Escape from Saddam. Start The Referral Engine.
5. Run at least five times.
6. Listen to 2 hours of The Little Big Things.7. Write and send two handwritten notes.
8. Sleep for at least 7.5 hours every night.Home Management
9. Follow my Freezer Cooking plan and blog about it.Business Goals
10. Get my “to answer” email file all cleaned out.
This week’s goals:
Family/Mothering Goals
1. Finish reading Quest for Truth:Taken and Spy for the Night Riders aloud to the children.
2. Start our summer schedule.
3. Write a love note to Jesse.
Personal Goals
4. Finish reading Escape from Saddam. Start The Referral Engine.
5. Run at least five times.
6. Listen to 2 hours of The Little Big Things.
7. Sleep for at least 7.5 hours every night.
Home Management
8. Follow my Freezer Cooking plan and blog about it.
9. Make Homemade English Muffins.
Business Goals
10. Write one article for another site.
How did you do on last week’s goals? What are your goals for this week? I’d love to have you share your progress on last week’s goals and your goals for this coming week in the comments. Of, if you’ve blogged about it, leave your direct link below. Let’s cheer each other on to live purposeful and productive lives!
You can download a free customizable weekly goal-planning sheet here.

Breakfasts
Granola bars
Berry Smoothies, Waffles from the Freezer
Oatmeal
Scrambled eggs, Cinnamon Roll Biscuits, fruit salad
Better for You Banana Bread, hard-boiled eggs, fruit
PB&J With Bananas, Strawberries, and Granola on Tortillas
Egg-in-hole, fruitLunches
Peanut Butter & Jelly Sandwiches from the freezer
Cereal & Milk
Leftovers x 2
Cheese Quesadillas, carrots, fruit
Salad, Hard-boiled eggs, toast, fruit
Snack-y lunchSnacks
Fruit/veggies
Popcorn
Chocolate Waffle Ice Cream SandwichesDinners
Dinner with extended family x 2
Southwest roll-ups, steamed veggies, sliced oranges & apples
Homemade pizza, tossed salad, fruit salad
Dinner out
Ham & Cheese Pockets from the freezer, fruit salad, steamed veggies
Chicken, Broccoli, Rice Casserole, fruit salad, tossed salad, Better for You Banana Bread
What’s on your menu this week? Share details and/or your link to your menu plan in the comments.

iWriter.com is a site that connects writers with websites that are looking to pay for content. If you have writing skills and are looking for extra paid work, this might be something to look into.
It looks like their pay is very much on the low end of the scale (it says you’ll earn up to $15 per article), but this might be a great opportunity to build your writing portfolio and experience, while also earning a little money, too.
Does anyone have experience working for this company? If so, I’d love to hear your thoughts.
Looking for more ways to make money writing? Here are three other articles to check out:
How to Make Money Writing for eHow.com
Earn Money Writing for Examiner.com
5 Ways to Use Your Blog as a Springboard to Earn Additional Income
Thanks, Work At Home Market!

If you’re looking for an easy weeknight dinner that everyone will love, give these homemade hot pockets a try!

Today’s recipe is one that was one of our favorite law school recipes.
Our budget was so tight when Jesse was in law school, so I only made this recipe when I was able to find ham on some amazing closeout price. Every once in a while, Dillon’s would have it marked down to $0.49 to $0.99 for the small packages of thin-sliced lunchmeat.
I usually had a coupon to pair with this deal, so I rarely paid over $0.50 per package of lunchmeat. I could stretch one package to 5-6 Ham & Cheese Pockets and they were a special treat since we didn’t eat a lot of meat during that season of life.
Since we have more wiggle room in our grocery budget these days, I splurged on thick-cut ham this time around, and these turned out SO good!

For the dough:
For the filling:

If you don’t want to make your own dough, you can use storebought refrigerated dough (pizza crust dough, crescent roll dough, etc.) You could also buy frozen bread dough and defrost it.
For the filling, you can use almost any type of deli meat or leftover meat for this recipe — and almost any type of meltable cheese works too. Feel free to clean out your meat and cheese drawer and see what combination your family likes best!
Meats like sausage, salami, and pepperoni taste great with mozzarella cheese and a little pizza sauce are also a tasty treat.

To make dough in bread machine:
1. Add ingredients in the bread machine in the order listed and run on the dough cycle.

2. Check about halfway through to see if you need to add a little extra water or flour to make a soft dough.

To make dough by hand:
1. Dissolve yeast in warm water.
2. Stir in salt, sugar, and dry milk.
3. Add flour and stir until dough pulls away from the sides of the bowl.
4. Dump dough onto a floured surface and knead for around 5 minutes, until a soft dough forms.
5. Add a little more flour, if needed.

To make Ham & Cheese Pockets:
1. Divide dough into 10-14 balls.

2. Roll each ball into a rectangle.

3. Put ham and cheese on half of the rectangle.

4. Fold dough over and pinch sides to seal tightly.

Bake pockets on a greased cookie sheet at 350º for 15-18 minutes, until lightly browned.


Make sure you pinch the dough tightly to prevent the melted cheese from escaping.
Also, watch the tops of the dough pockets so they don’t burn — especially your first time making them if you aren’t exactly sure how long to bake them.
These honestly taste great with almost anything. They are a filling main dish on their own, but could also pair wonderfully with soup, a salad, raw veggies, fresh fruit, etc. They are a great meal for cleaning out the fridge — just serve these with whatever else you have on hand!

These leftovers taste amazing warmed up for lunch throughout the week. Simply store them in an air-tight food storage container (or ziptop bag) in the refrigerator.
Let cool completely. Freeze in airtight ziptop freezer bags for up to 2-3 months.
Remove desired number of pockets from the freezer and warm them individually in the microwave for about two minutes or until heated through.
Or, warm on a cookie sheet in a 350º oven for 20 minutes, or until heated through.


Make sure to share and save it on your favorite platform below!
Meal time just got so much easier!

I love my role as a stay-at-home mom, but I am just burned out. I wander aimlessly. I know I need my routines again, I know I need structure, but this once big-time routine-oriented mama is now struggling to get up out of bed. Do you have any advice or suggestions for how I can break out of this rut I’m stuck in? -Chrissy
My heart goes out to you, Chrissy! I am so sorry that you are struggling and feeling so exhausted and burned out. I can’t promise that I have any miracle solutions for you, but I will share some things I’ve learned from my own journey through postpartum depression and burnout two years ago.
Sleep is vitally important to your overall health and well-being. If you’re short on sleep, it can affect many areas of your life — including your moods and motivation.
Make sure you are getting at least 7 hours of sleep almost every day. If you’re up at night with a baby and it’s impossible to consistently get a good night’s sleep, do the best you can do and let anything go that isn’t a necessity so that you can make sleep a priority. You’ll be much more productive and energetic when you are awake if you give yourself the grace to step away from the to-do list and get some shut-eye instead.
Go to bed early. Studies have shown that those who stay up late and get up late are more likely to struggle with depression. I’ve also found that I feel much more rested (and am more efficient the next day!) if I go to bed early rather than trying to stay up and get stuff done when I’m exhausted, only to wake up feeling all groggy in the morning.
Take power naps. If you can’t get a long stretch of sleep at night because your husband works weird hours and your babies are up multiple times throughout the night, try power naps. I used to think I wasn’t a napper, but I’ve found that if I feel tired in the afternoon, lying down and sleeping for just 20 or 30 minutes can really re-energize me for the rest of the day.
Find your sleep number. No, I’m not referring to the sleep number beds, but to your personal number of hours of sleep that you need to get every night to function at maximum capacity. For most people, it will be somewhere between 7 and 9 hours.
Experiment with getting 7 hours of sleep every night for a week and see if you feel rested and energetic all day long. If not, increase to 7.5 hours of sleep for a week. Continue to experiment until you land on what works best for you and then make that number a priority every night, as much as you possibly can.
If you haven’t been to the doctor to get your thyroid and hemoglobin checked and other bloodwork done, I recommend picking up the phone and making an appointment today. Many times, what might feel like an emotional imbalance — or what you might think is just some lack of motivation on your part! — is actually a physical issue that can be easily treated and fixed.
Read God’s Word. If you are a Christian, make spending time in God’s Word and prayer on a daily basis your number one priority. If there’s one thing I’ve learned as a mom, it’s how much I need God — every single moment of every single day.
I encourage you to start your day with at least a few moments in God’s Word and prayer. Take five or ten minutes to pray over your day, asking God to give you strength and grace to face the tasks before you. I also highly recommend reading a good devotional book, along with a passage of Scripture. (I’ve loved Amy Carmichael’s devotionals and am being very blessed by Jesus Calling right now.)
Read good books. Books such as Calm My Anxious Heart or Today Matters, can help encourage, inspire, and re-invigorate you when you feel worn out and lifeless. Even reading just one page per day or listening to three minutes of an audiobook each day can give you a little extra boost — and the motivation to keep on, keeping on. You can see a list of all of the Books I Read in 2011 here and the Books I’ve Read So Far in 2012 here.
Listen to music. When I’m down, I’ve found that music can be a huge pick-me-up. Even if I don’t feel like listening to music, if I turn it on, I usually can’t help but be uplifted. And singing along with some of my favorite songs can also be a big mood-brightener.
Count your blessings. It’s easy to become discouraged if we focus on everything that’s wrong or difficult in our life. However, instead of dwelling on the negative, challenge yourself to think of at least three to five things to be thankful for. It’s amazing how a grateful spirit can change your mood — and even your whole outlook on life!
…to be continued on Monday
What has helped you overcome burn-out or exhaustion? I’d love to hear your thoughts and tips!

Guest post from Amanda of The Frugal Greenish Mama:
One day while my son was holding my hand I started thinking to myself, “My goodness how he has grown. His hand is nearly the size of mine and he is only four!” Somehow it got me thinking of hands and I thought… wouldn’t it be a great idea to make a family tree using the children’s hand print cutouts as leaves.
I started by tracing Austin’s right and left hands on a piece of paper. Next I did the same for my daughter Addie. I wrote their names in the middle of each print. Then I cut out the hand prints and we matched them up to the photos we wanted to use.
Having the hand prints cut out allows you to move it around the photo until you are happy with the results. You can either trace with a pencil the outline of the hand print or cut the hand print out of the photo around your pattern. I cut a total of six hand prints, two of Austin’s and four of Adalynne’s. This could vary depending on the size of your family.

I used two pictures of each of the children, one for their right hand and one for their left hand. Since Austin’s hand prints are larger, I stacked his photos on the bottom. The photos of Adalynne were on the next tier up.
Then for the top two hand print leaves, I used just my daughter’s hand print since they are smaller and I wanted to overlay a family photo. I had two of the same photo made and cut out my husband holding my daughter and then myself holding my son. We then overlapped the image to look like they were one larger image.

I used a white piece of card stock to start with. Then we simply used a piece of brown card stock to cut out a trunk image. I glued the trunk to the white card stock. I started with the bottom of the tree and using acid free glue, glued Austin’s hand prints in place. Then I added the next tier to our family tree by arranging Addie’s hand prints. For the top of the tree, I overlapped the two hand prints and glued them in place.
Add a simple frame and you have yourself a one of a kind family tree full of memories!
Amanda is a wife and mother of two striving to return to her roots to live a simpler life the way God intended it. She loves to cook from scratch, bake, and craft. She blogs at the Frugal Greenish Mama about her love of gardening, her journey to a more self-sufficient lifestyle and saving money while trying to eat organically.

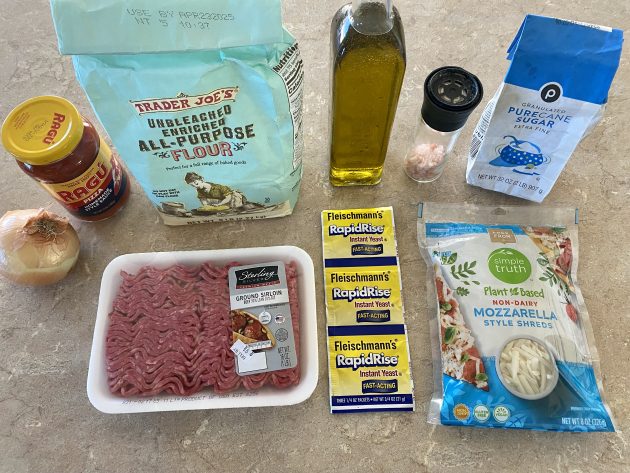
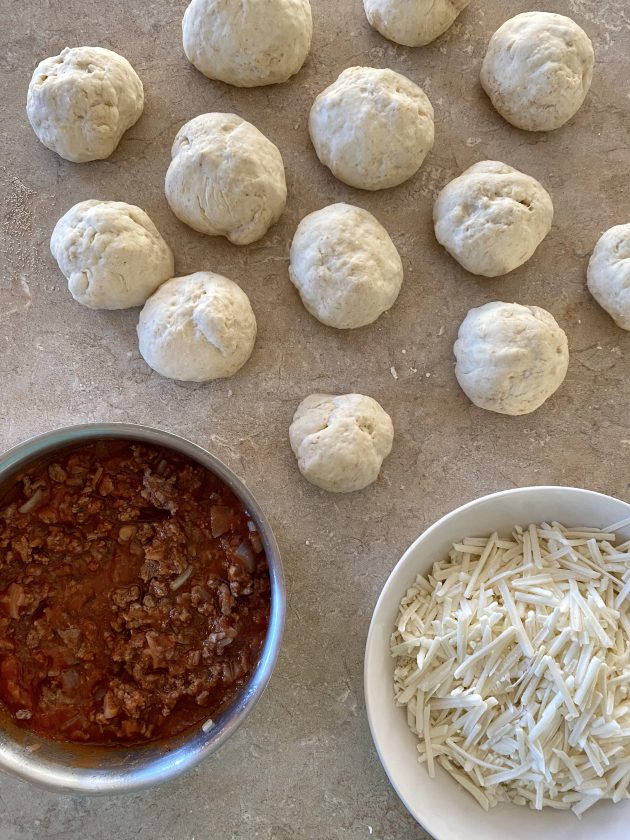
These homemade pizza pockets are SO yummy and super easy to make!

They are fairly quick and easy to make in bulk — and kids can help too.
Plus, they taste amazingly delicious and can easily be customized based on your family’s taste preferences (or whatever meats and cheese are on sale that week!)

For the Dough:
For the Filling:
To make dough:
1. Mix the yeast into warm water until dissolved.
2. Add sugar, salt, oil, and flour.
3. Mix well with a spoon.
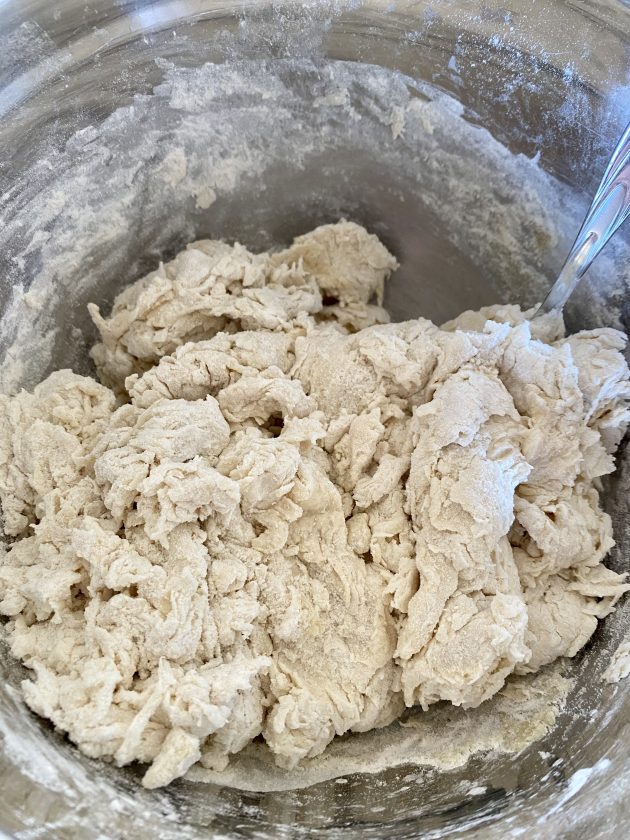
4. Dump onto a floured surface and knead for 3-5 minutes or mix in a stand mixer.

To make filling (I browned this while mixing up the dough):
1. Brown ground beef with onion and green pepper. Drain.
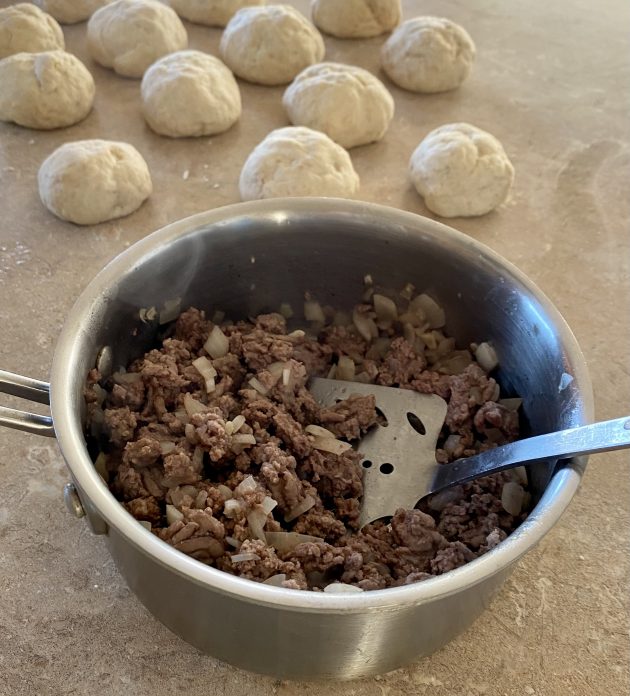
2. Add pasta sauce and mix together.
3. Add other optional filling ingredients, if desired.
To make Pizza Pockets:
1. Divide dough into 15-20 pieces.

2. Roll pieces into balls.

3. Flatten balls into circles with a rolling pin.

4. Dollop a few tablespoons of filling onto dough circle and sprinkle with cheese.

5. Fold over and seal tightly.

6. Bake on a greased cookie sheet at 500ºF for 10-15 minutes, or until browned.

Cool completely and store in an airtight zip-top freezer bag for up to 2-3 months.
Remove desired number of pizza pockets from the freezer and warm them individually in the microwave for about two minutes or until heated throw.
Or, warm on a cookie sheet in a 350º oven for 20 minutes, or until heated through.


Make sure to share and save it on your favorite platform below!

These Pizza Pockets, inspired by Amy’s Finer Things and Pocket Change Gourmet, turned out beautifully today!
Did you do any freezer cooking today? If so, I’d love to see the results of your efforts! Link up your blog posts below or tell us about your success in the comments.
 Guest post by Sarah Mae
My husband has been dreaming of having a truck since I married him nine years ago. He not only loves the idea of having a truck, but it is actually quite practical for a handyman like my man.
But alas, we had no money to spare for a truck. We shared our used van and a motorcycle my dad gave to him as a gift early in our marriage. We lived on about $300 a month for groceries for our growing family of five, and every spare penny went to paying off school loans and collecting homeschooling supplies.
Did I mention my husband cut up all my credit cards when we got married? Oh, yes he did.
Of course, he had them paid off a few months later through his diligence with our budget and not spending what we didn’t have. There were nights I begged him to order a pizza because it was so much more convenient than cooking up a meal, but he stood his ground. We didn’t have the money, period.
My husband’s vision was that if we could scrape by, save, and not spend what we didn’t have in the bank, we would one day be able to pay off debt and have the opportunity to give more. His goal has always been to be able to be generous givers, but it wasn’t going to be possible if we were in debt.
So he worked hard, and he worked overtime, and he stayed focused.
Eventually, I began to earn some money through blogging, and that money went towards books for the babes while he continued to add whatever extra he made to our savings to plan ahead for the unforeseeable.
We had $12,000 of school loan debt and it felt like we were wasting our time just putting an extra $10 towards it here and there, but over the course of the year he was able to look back and see that we were making progress. I’m telling you, the man was diligent and determined.
I’m so proud of him.
The truth is, had I been in charge of our finances (I was for a while — bad idea), we’d be sunk. I’m the spontaneous “oh, we’ll get the money” type. I’d probably have ten credit cards and piles of debt by now.
Thankfully, that man of mine stayed true to taking care of our family and providing. I love him so much for his steadfastness. Because of his focus and self-discipline, our loans were decreasing and he kept us out of additional debt.
All of this allowed me to buy him a truck!
Wait, back up the truck (funny, no?). How did I possibly have the money to buy my husband a truck in cash?
The very fact that my husband kept us out of debt and paid down our debt every step of the way paved the way for the purchase. Through blogging and writing a successful eBook that led to publishing deals, I was able to use one of my advance checks to buy him the truck (a used truck, mind you).
I never would have been able to do so if we still had debt. By this time, we had paid off our used van and school loan debt. I had the freedom to give him a very special gift, one that I had always wanted dreamed of giving him.
Not only are we out of debt except for our mortgage (that’s next!), but he has his dream work truck and we now have the freedom to give more! It’s wonderful, and I have my husband to thank.
Sarah Mae is the author of several eBooks and two soon-to-be-published books, Desperate (Thomas Nelson) and Having a Martha House the Mary Way (Tyndale). She is the owner of the community site Allume.com and the co-host of the national Christian women’s social media conference, Allume Social. Sarah Mae spends her days homemaking, home-educating, writing, reading, and drinking smoothies (now that she’s given up coffee). Her family embraces life in the beautiful Amish countryside of Pennsylvania. You can find her writing almost daily at sarahmae.com.

From a quick lunch on the go or an effortless freezer-friendly dinner for busy weeknights, these beef and bean burritos are a must for busy families. Everyone will love them, and you’ll love how easy they are to make!

If your family loves burritos, you need to try this recipe. It’s one of my husband’s favorite grab-and-go foods!
What I like best about this recipe is that, not only is it filling, but it’s also fast. You can have a piping hot burrito in less than two minutes — straight from the freezer. It’s perfect for those times when my husband wants a late-night snack or some hot for lunch on the weekends.
These are on the spicy side for my liking (keep in mind that I’m also the girl who likes extra mild salsa!), but my husband loves these. In fact, he was so excited I was making them again this week.


1. In a large skillet, brown ground beef with onions.
2. Drain meat mixture and return to pan with all remaining ingredients (except tortillas and cheese).
3. Bring the meat mixture to a boil. Reduce heat, cover, and simmer for 20-30 minutes.

4. Spoon 1/4-cup of the meat mixture onto each tortilla, sprinkle with cheese, fold sides in, and roll up tightly.

5. Wrap them individually in aluminum foil and place them in a gallon-size zip-top bag for the freezer.

6. When you’re ready to heat them, simply remove the foil and microwave a single burrito for about a minute, or leave the foil on and heat one or more burritos in a 350ºF oven for 30 minutes or until heated through.

There are countless ways to customize this easy recipe, based on what you already have in the house, what’s on sale at the grocery store, or even what your family prefers.
Here are a few ideas:
Pull out the desired number of burritos, remove the foil, and heat a single burrito in the microwave for about a minute. Or leave the foil on and heat one or more burritos in a preheated 350-degree oven for 30 minutes or until heated through.
Serve them with lettuce, diced onion, diced tomatoes, sour cream, salsa, and guacamole — and don’t forget the chips!

These burritos are freezer-friendly, so you can easily whip up a batch for the freezer and just defrost as needed!
Wrap each burrito in a piece of aluminum foil and then place in airtight ziptop freezer bags and store in the freezer for 2-3 months.
When you’re ready to heat the burritos, simply remove one or more from the freezer and heat in the microwave (without foil) for 1 minute. OR, keep the foil on and heat them in a 350ºF oven for 30 minutes or until heated through.

It depends on how much meat, cheese, and beans you use — and what toppings you add. However, this recipe, as written (without additional toppings) is roughly 300 calories per burrito.
Let the chicken/bean mixture cool to room temperature before adding it to the tortillas. You could also put the burritos in the fridge before freezing them, so they don’t have as much condensation. And finally, you might try wrapping each burrito in a paper towel first and then in aluminum foil. The paper towel will absorb extra moisture.

Make sure to share and save it on your favorite platform below!
Did you do any freezer cooking today? If so, I’d love to see the results of your efforts! Link up your blog posts below or tell us about your success in the comments.
Meal time just got so much easier!

4 packages of tortillas — $0.99 each
4 bags of baby carrots — $0.49 each
7 packages of cheese — $1.79 each
2 cucumbers — $0.29 each
1 package mushrooms — $0.79
1 bag boneless, skinless chicken breasts — $5.49
1/4 boneless ham — $6.67
Total with tax: $34.31
Also shown, 2 cans of enchilada sauce from Dillon’s (I forgot to get these yesterday.) — $1.81 total

Melissa emailed in the following tip:
Many times we buy our household and personal care items at drugstores because of their great bargains; but if you take moment to look, the deals at your local grocery store might surprise you.
Since food is the main thing grocery stores sell, many of the household and personal care items need to be “cleared” off the shelves after a certain amount of time. The item in the photo above was marked 50% off and I had two coupons that doubled to $1.00 — so this purchase became free plus $0.30 overages for me!
So next time you’re at the grocery store, keep your eye out and your coupons handy; there just might be some “gems” waiting for you to find. -submitted by Melissa from BravelyFrugal

Today’s question is from Jill:
What are your favorite free/inexpensive ideas to keep young children busy during the long summer days (I have a 2-year-old son and 1-year-old daughter)? -Jill
Do you have a question you’d like to ask Money Saving Mom® readers? Read the submission guidelines and submit it here.