

Looking for an easy homemade slime recipe with glue? This DIY Shaving Cream Slime is SO simple to make and is a great Valentine’s Day gift!

Homemade Slime Recipe
Kaitlynn has been making batches and batches of Homemade Slime recently. This stuff is so fun to play with, it makes great gifts (kids have been begging her to make it for them!), and it’s really popular right now.
She recorded a Facebook Live video with me a few weeks ago about how to make Homemade Slime and so many of you asked for the recipe. So she helped me put together this post for you all today on how to make Homemade Slime.
If you’ve never made this before, you have to try it! It’s SO cool and kids of all ages (and adults!) love playing with it. It’s great for stress relief and for kids who have trouble concentrating if their hands aren’t busy.
Jesse and I have fun playing with it with the kids and seeing who can make the biggest slime bubble that pops the loudest (does that mean we are kids at heart or just weird??!).

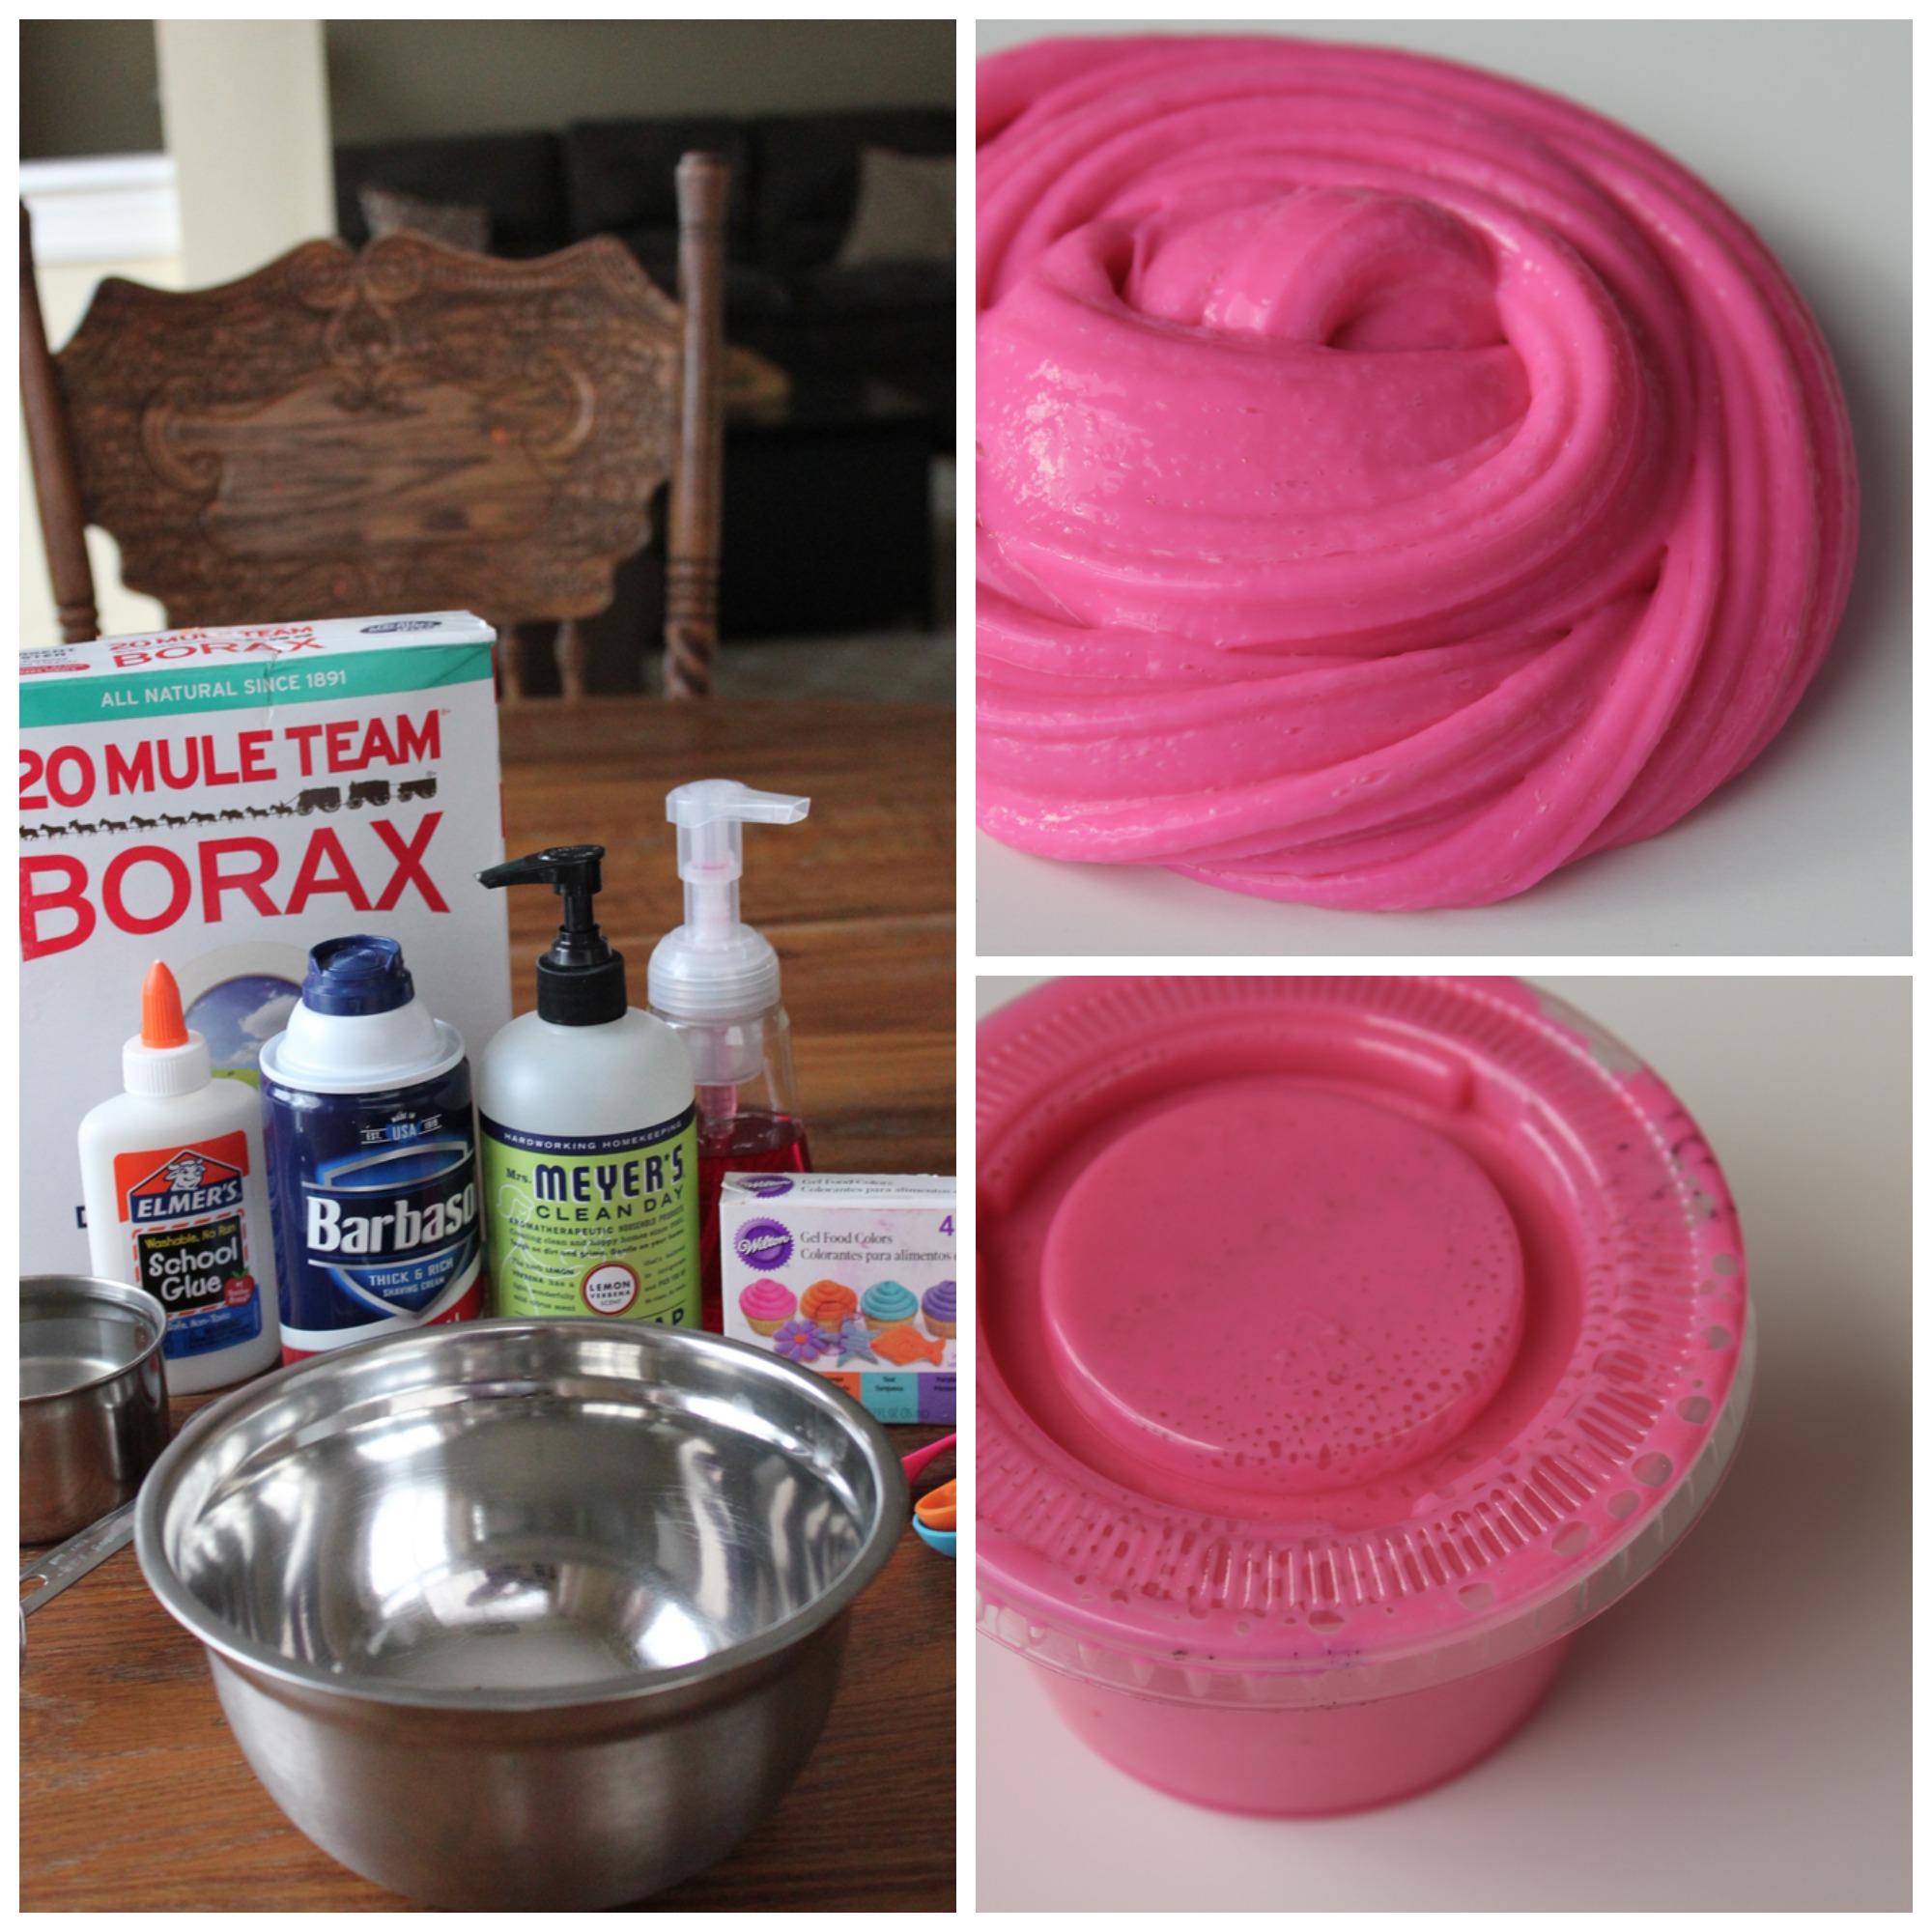
DIY Slime Ingredients
Ingredients for “Slime Activator”:
- 1 cup hot water
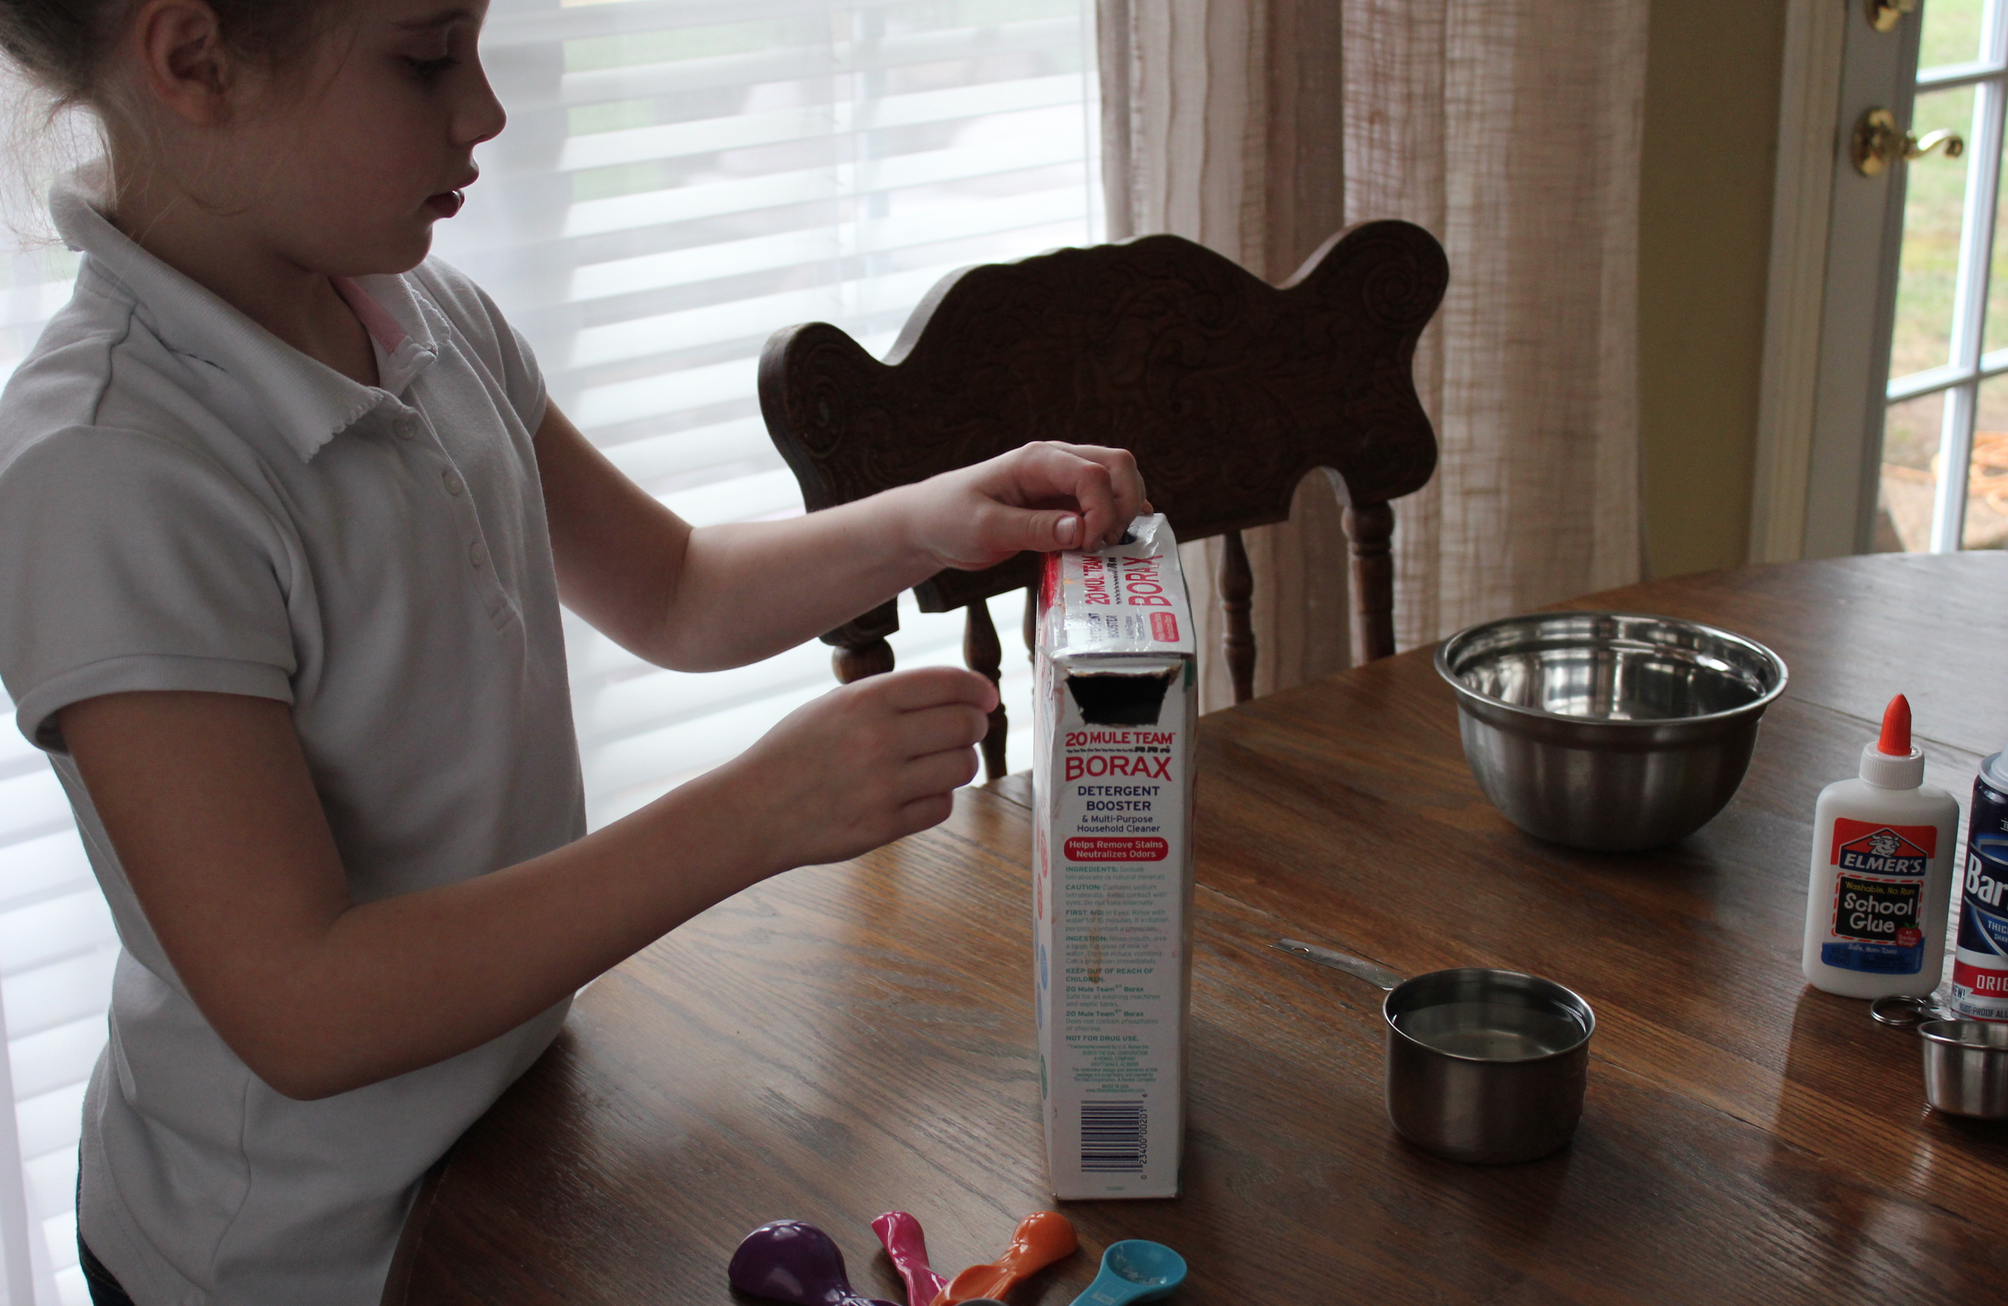
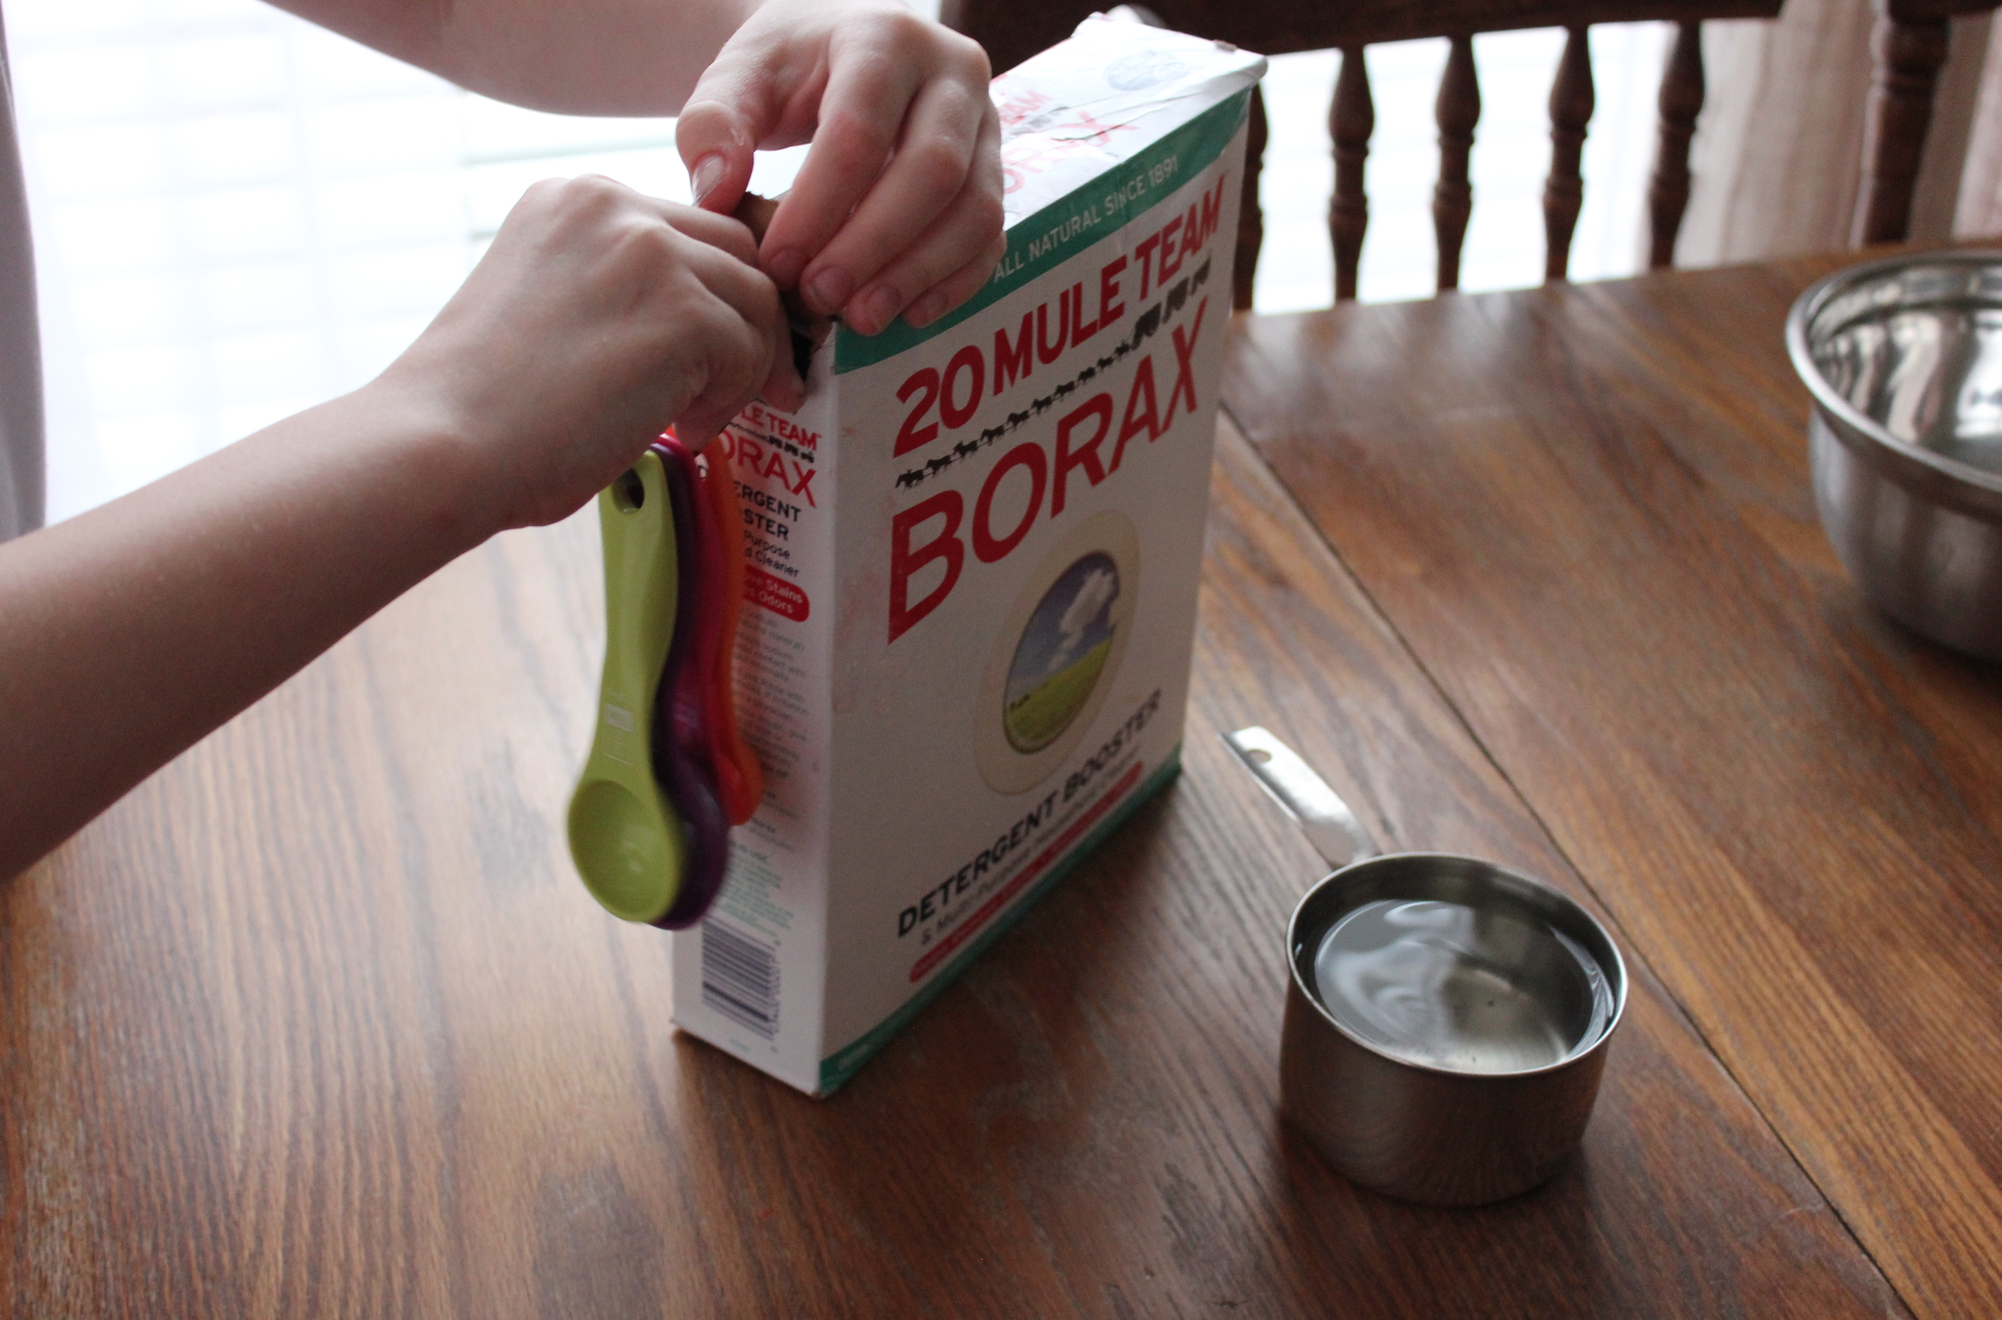
- 1 tsp. Borax
Ingredients for Slime:
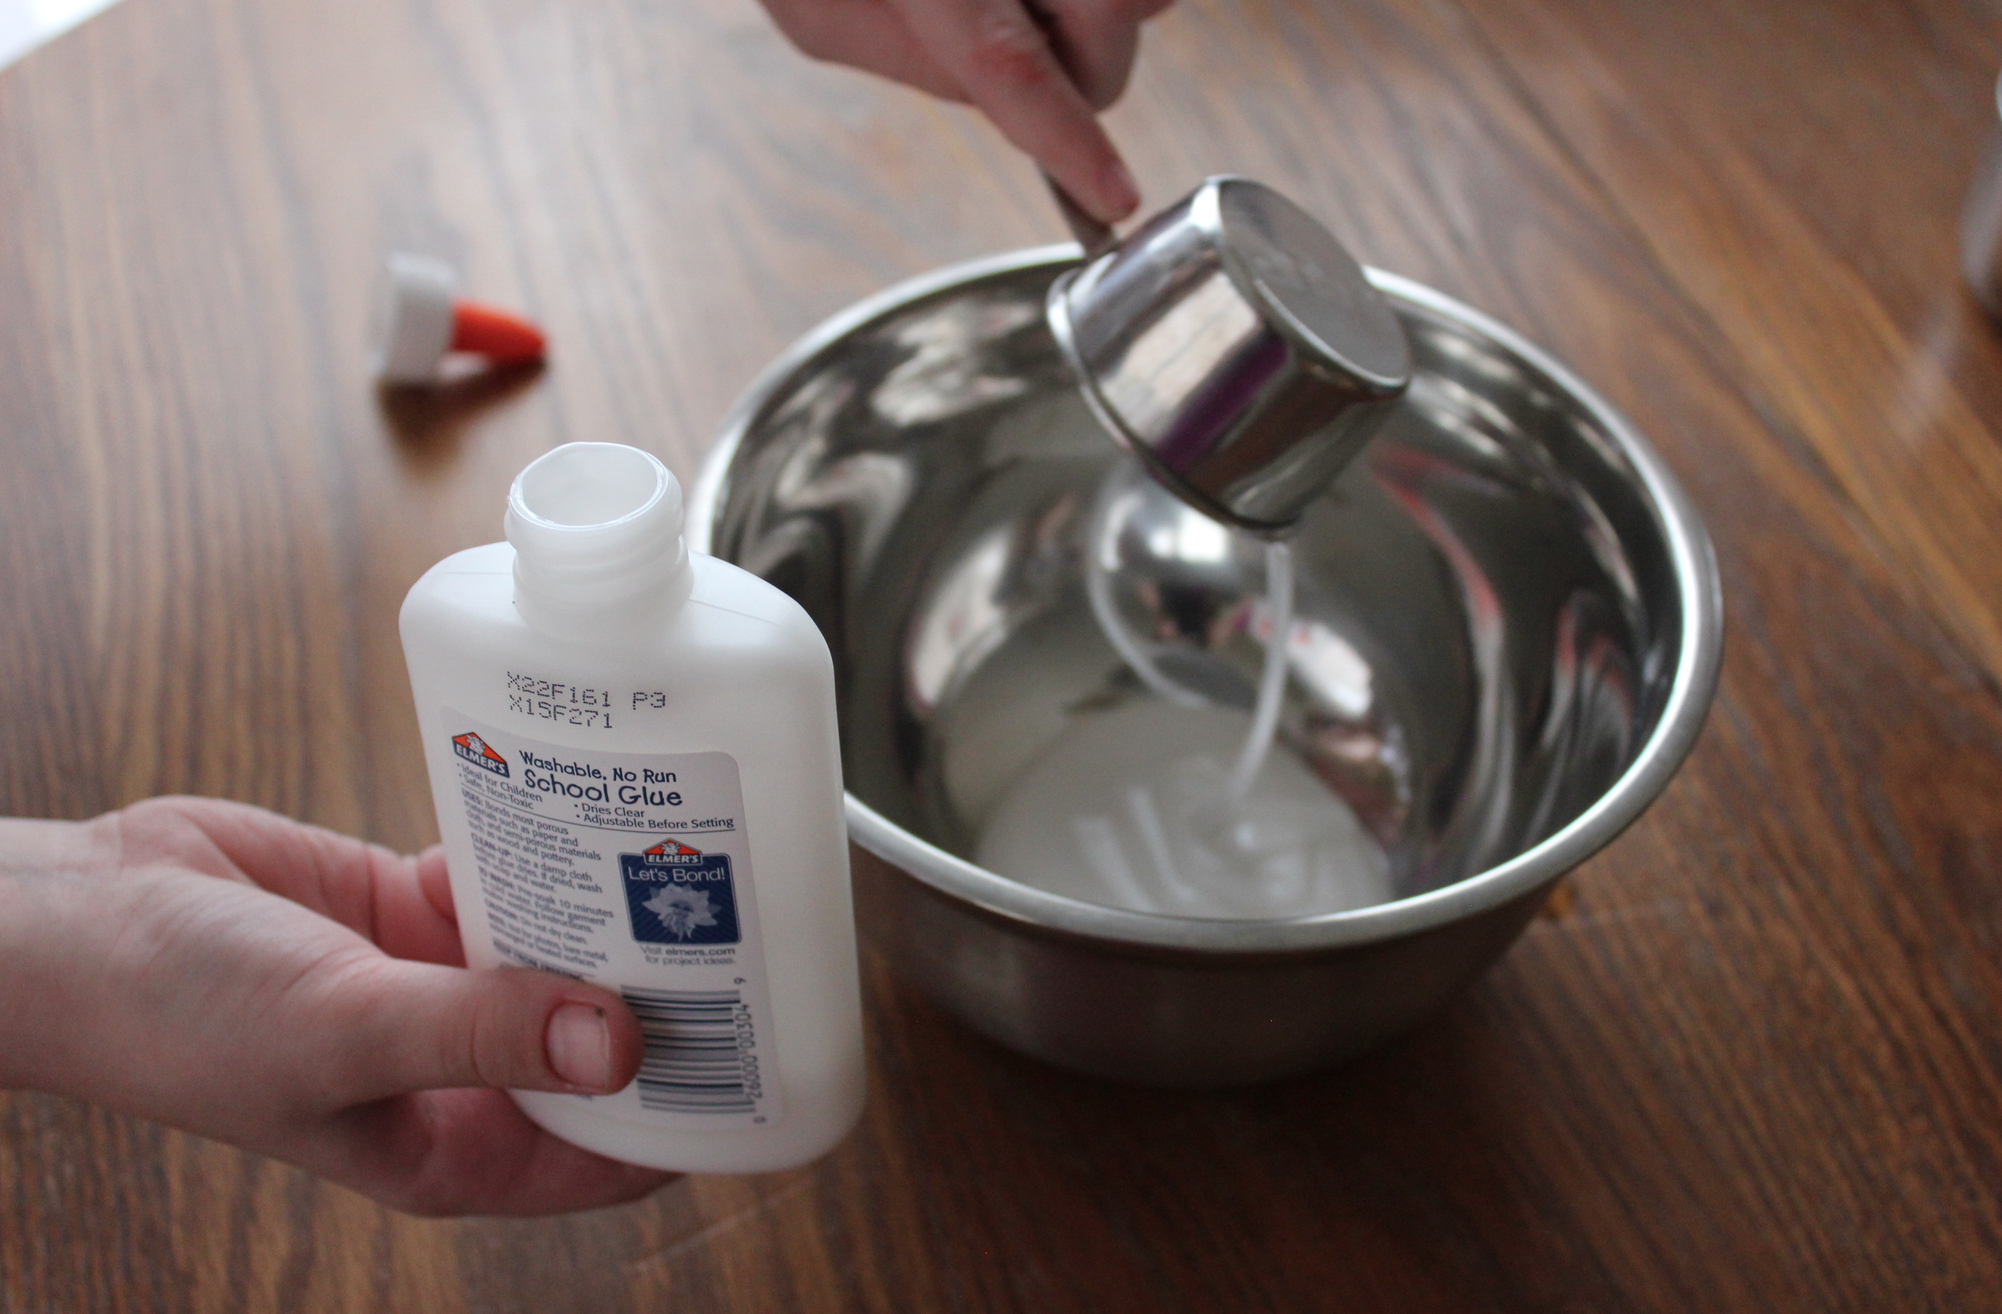
- 1/4 cup Elmer’s glue (don’t try this with other brands of glue)
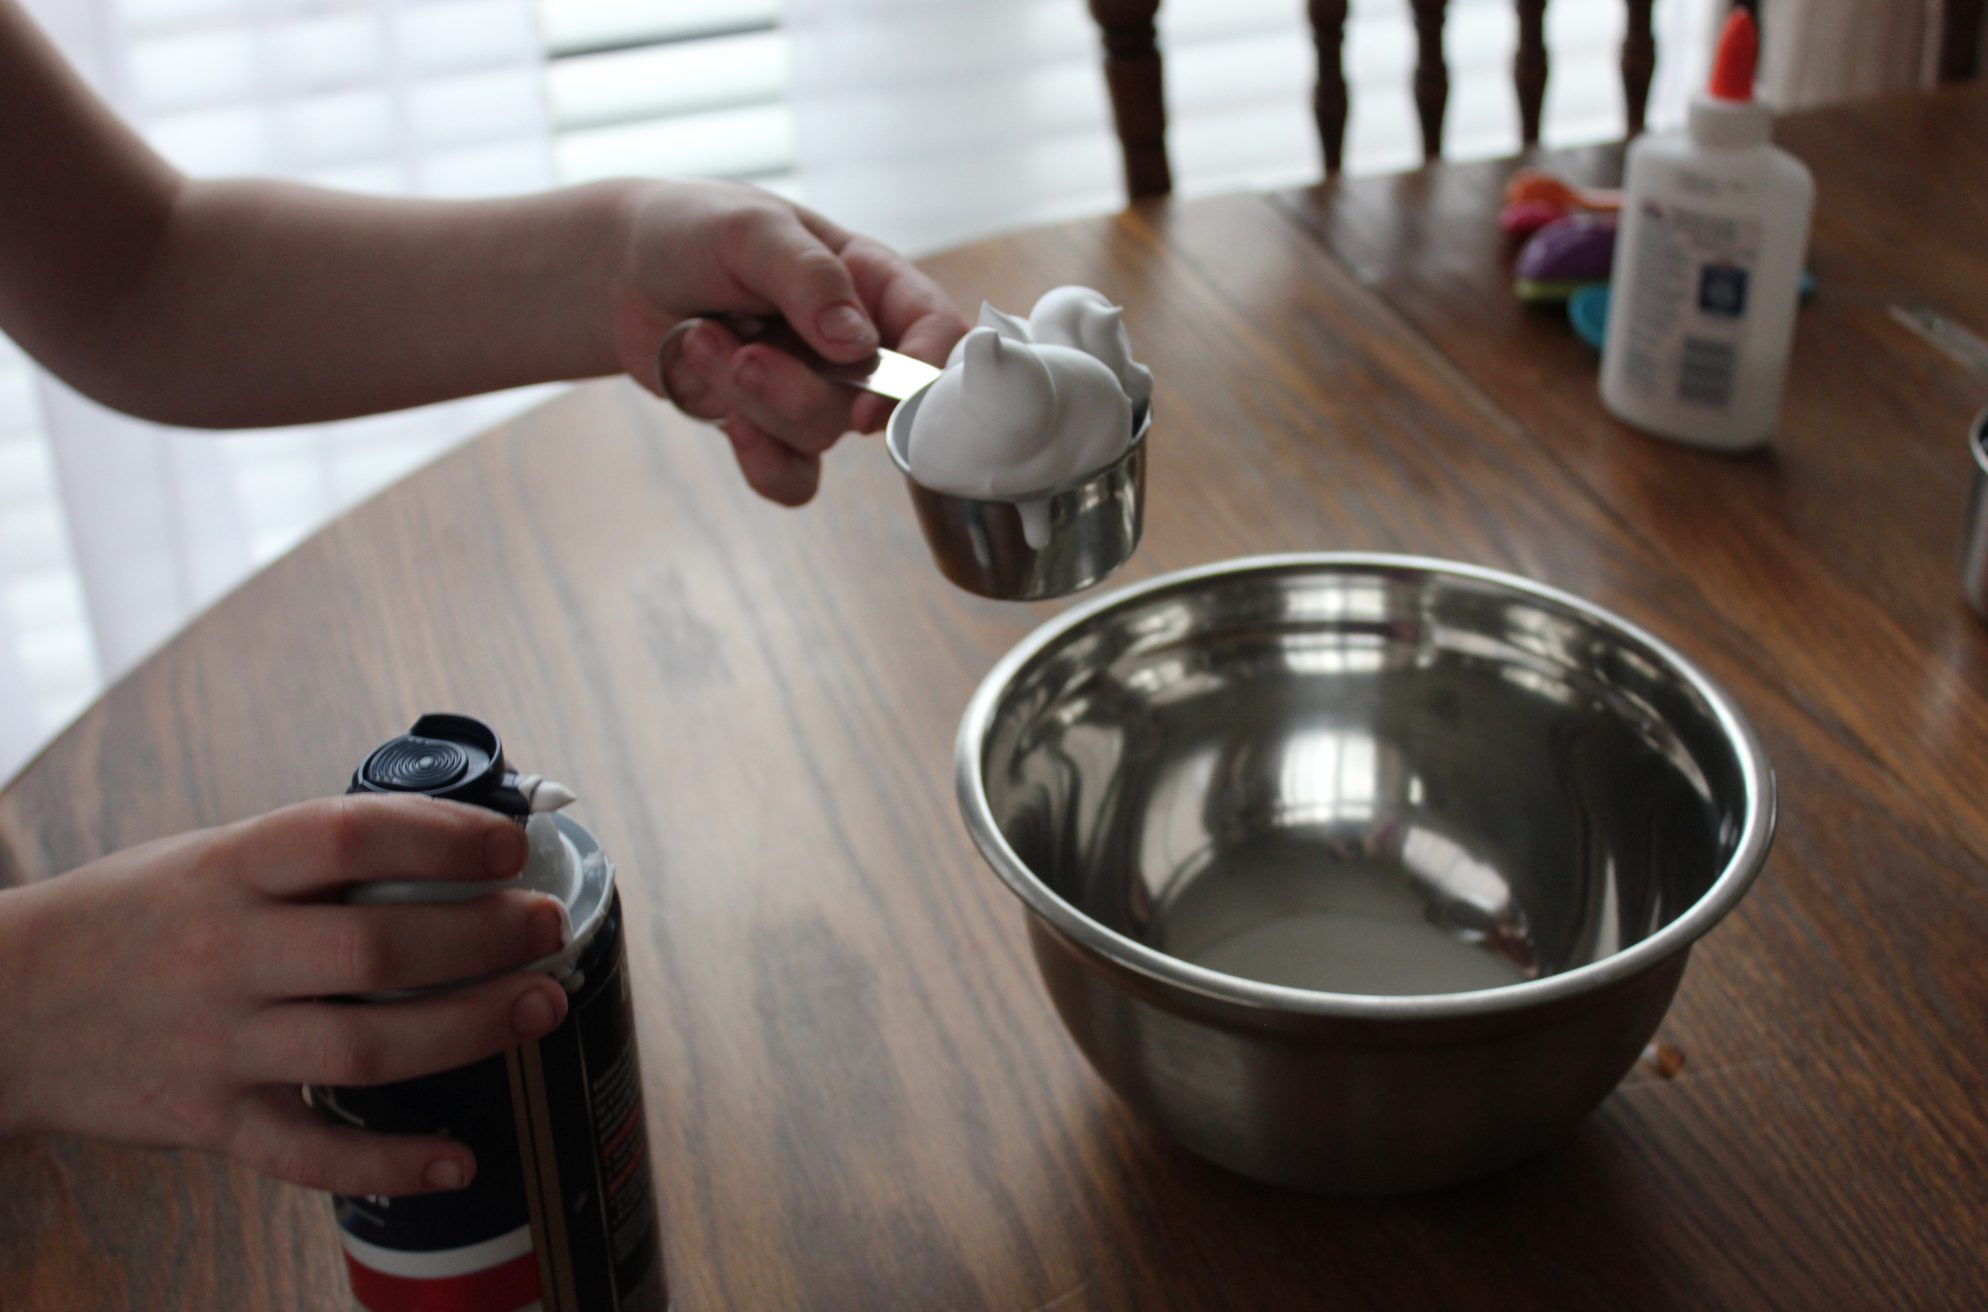
- 1/4 cup shaving cream
- 1/4 cup foaming hand soap
- 3 pumps regular hand soap
- Food coloring (optional)
- Slime Activator — 1 tsp. at a time
- 2 pumps body lotion (optional)

Slime Recipe Variations & Additions
You can try all different colors, but make sure you only use one color per ball of slime, otherwise the colors will mix and you’ll get an army green/brown color!
Use scented lotions for sweet-smelling slime or unscented lotion for unscented slime.
As noted above, there is something specific about Elmer’s glue that is perfect for this slime recipe. We don’t recommend using a different brand as it often doesn’t set up properly.
Slime makes a fun Valentine’s Day or Easter gift idea, too!

Substitutions for Slime Activator
If you don’t have Borax in the house (or don’t want to buy a giant box), you can substitute 1 tsp. laundry detergent, liquid fabric softener, or liquid starch (as long as they contain “boron”).
How to Make Slime with Glue
1. In a small bowl, make the slime activator by mixing 1 cup hot water with 1 tsp. Borax laundry booster; stirring until fully dissolved. Set aside.
NOTE: You can keep the Slime Activator for a few weeks in an airtight container if you are planning to make multiple batches of Homemade Slime.
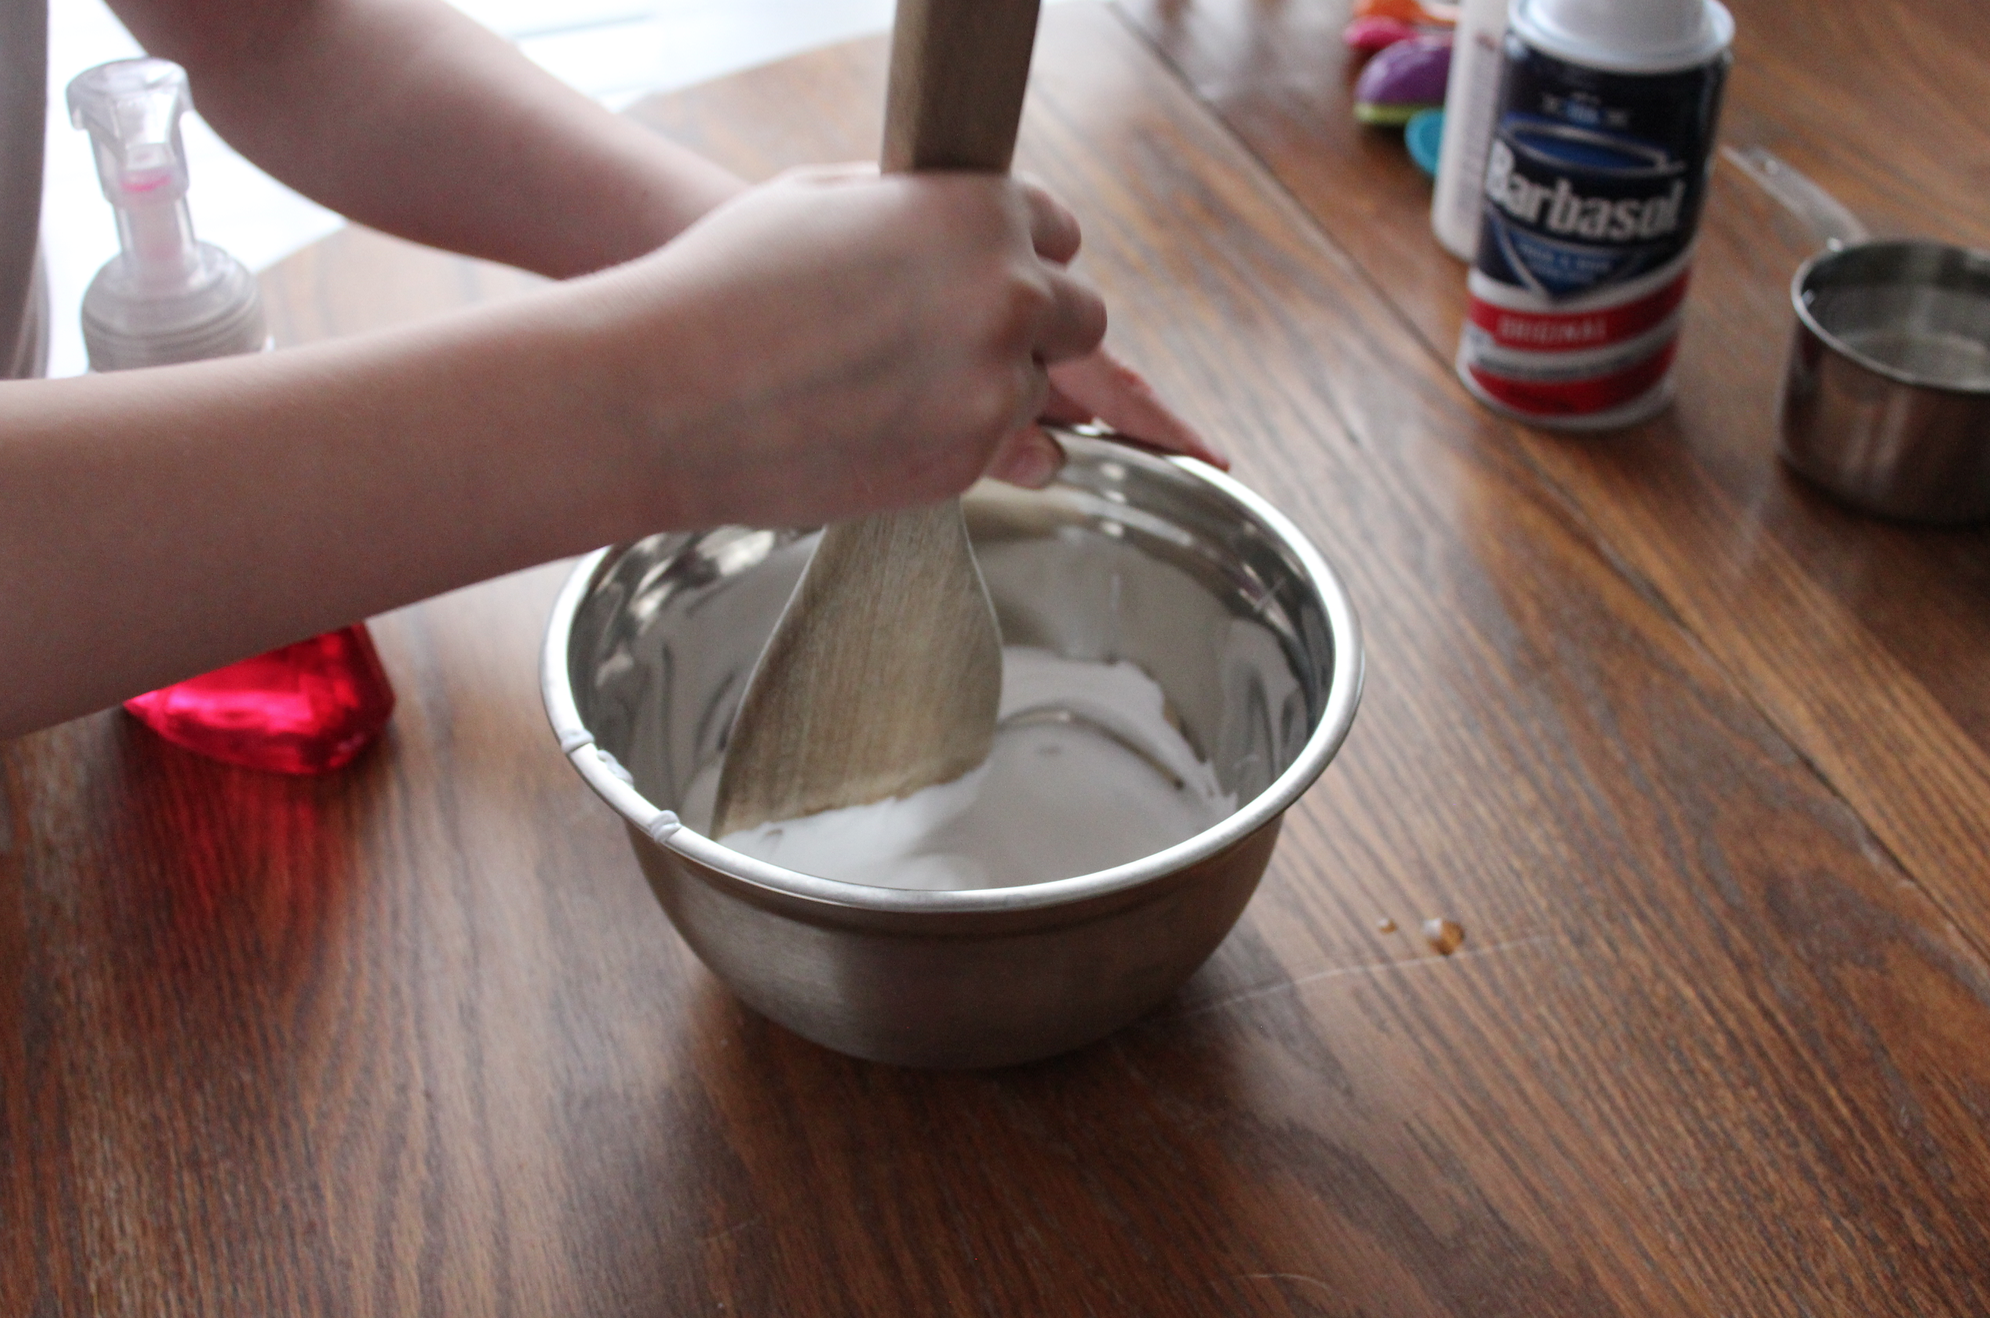
2. In a large bowl or container, add Elmer’s glue, shaving cream, foaming hand soap, and liquid hand soap. Mix well.

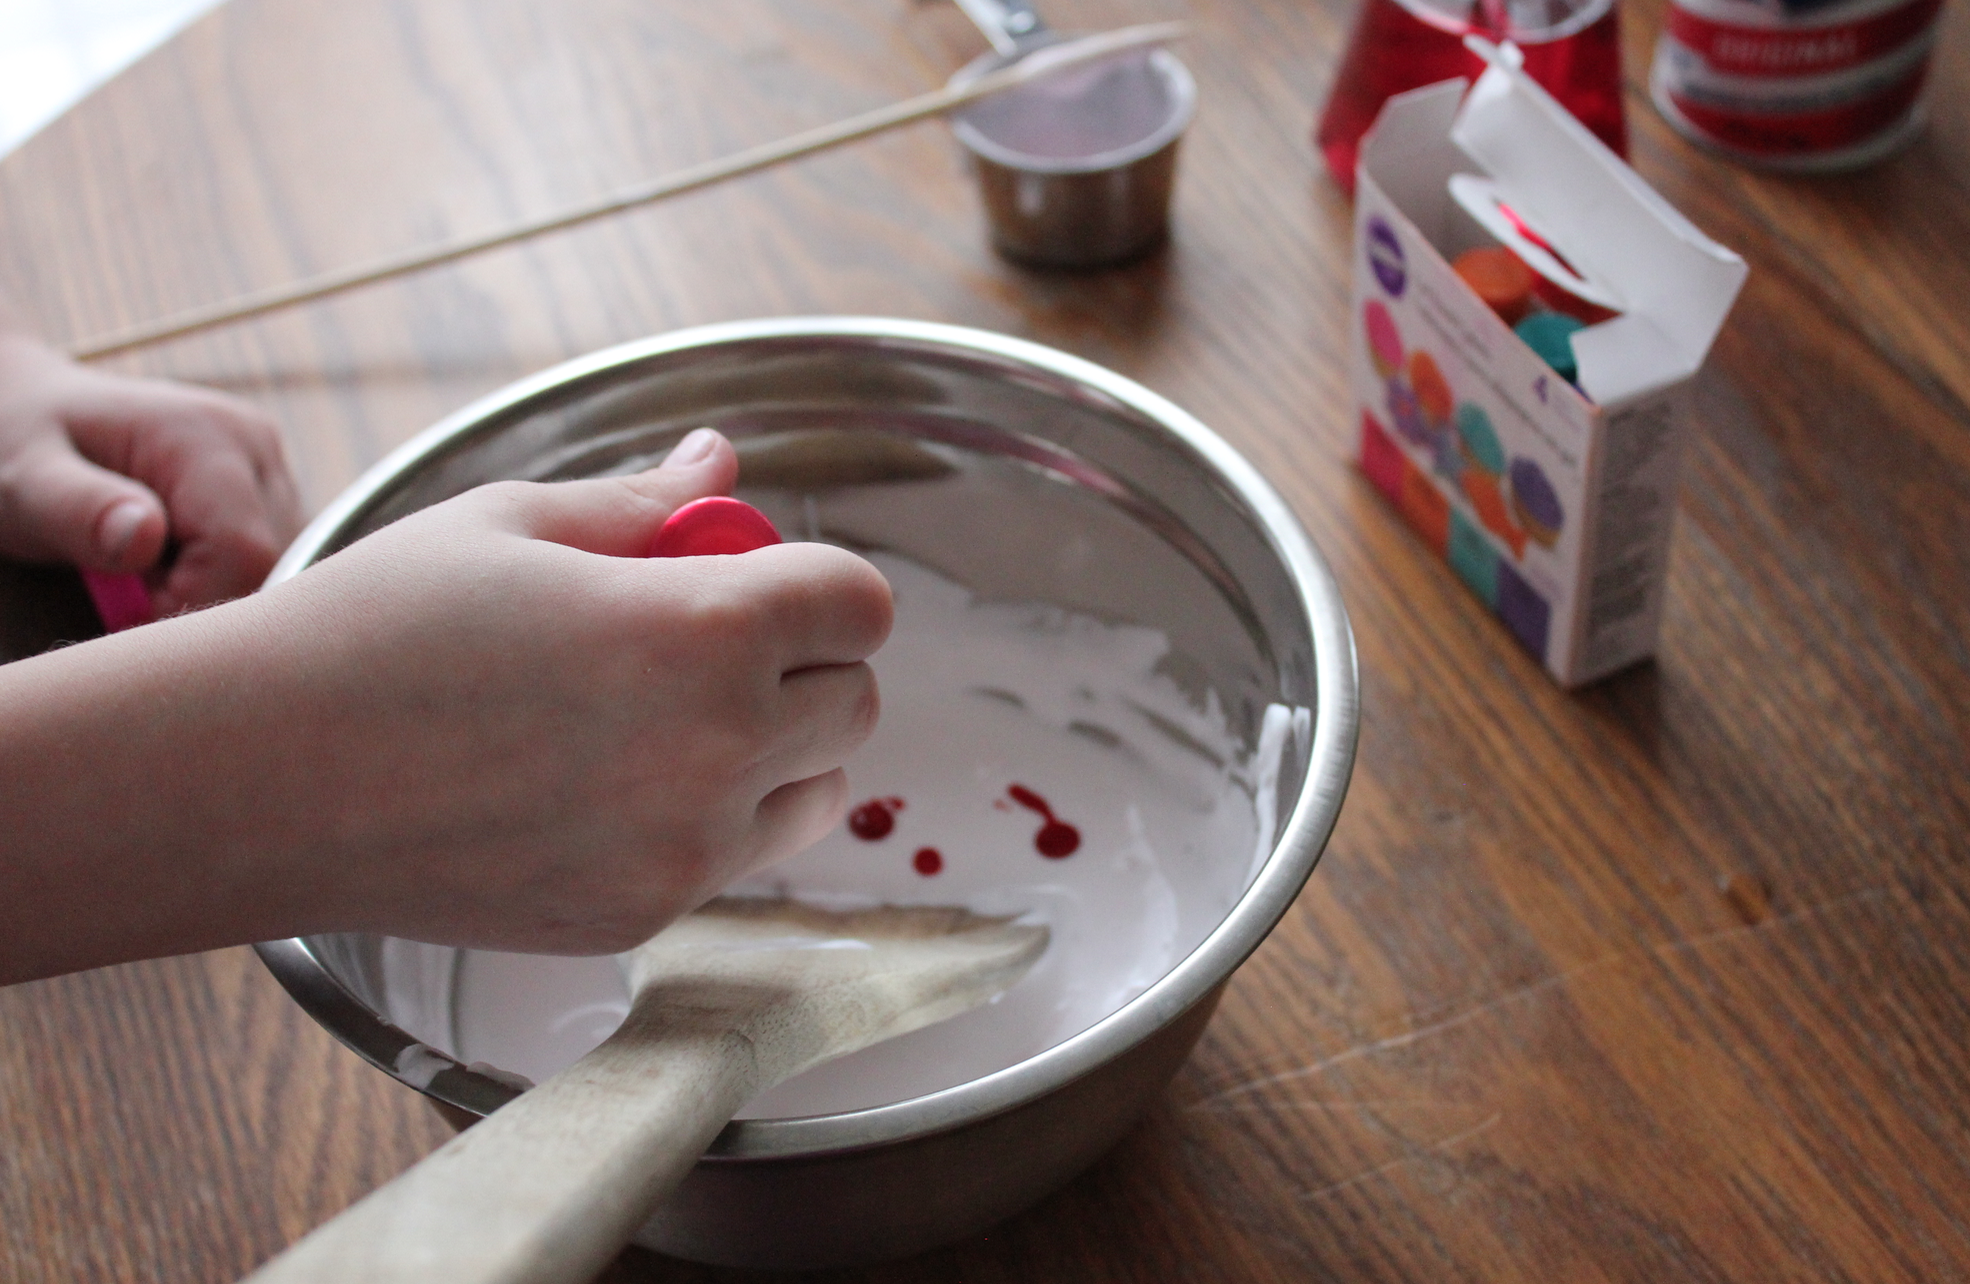
3. Once the glue mixture is stirred well, add 2-8 drops of food coloring (optional) to make the slime whatever color you’d like. Kaitlynn has made all sorts of fun colors.
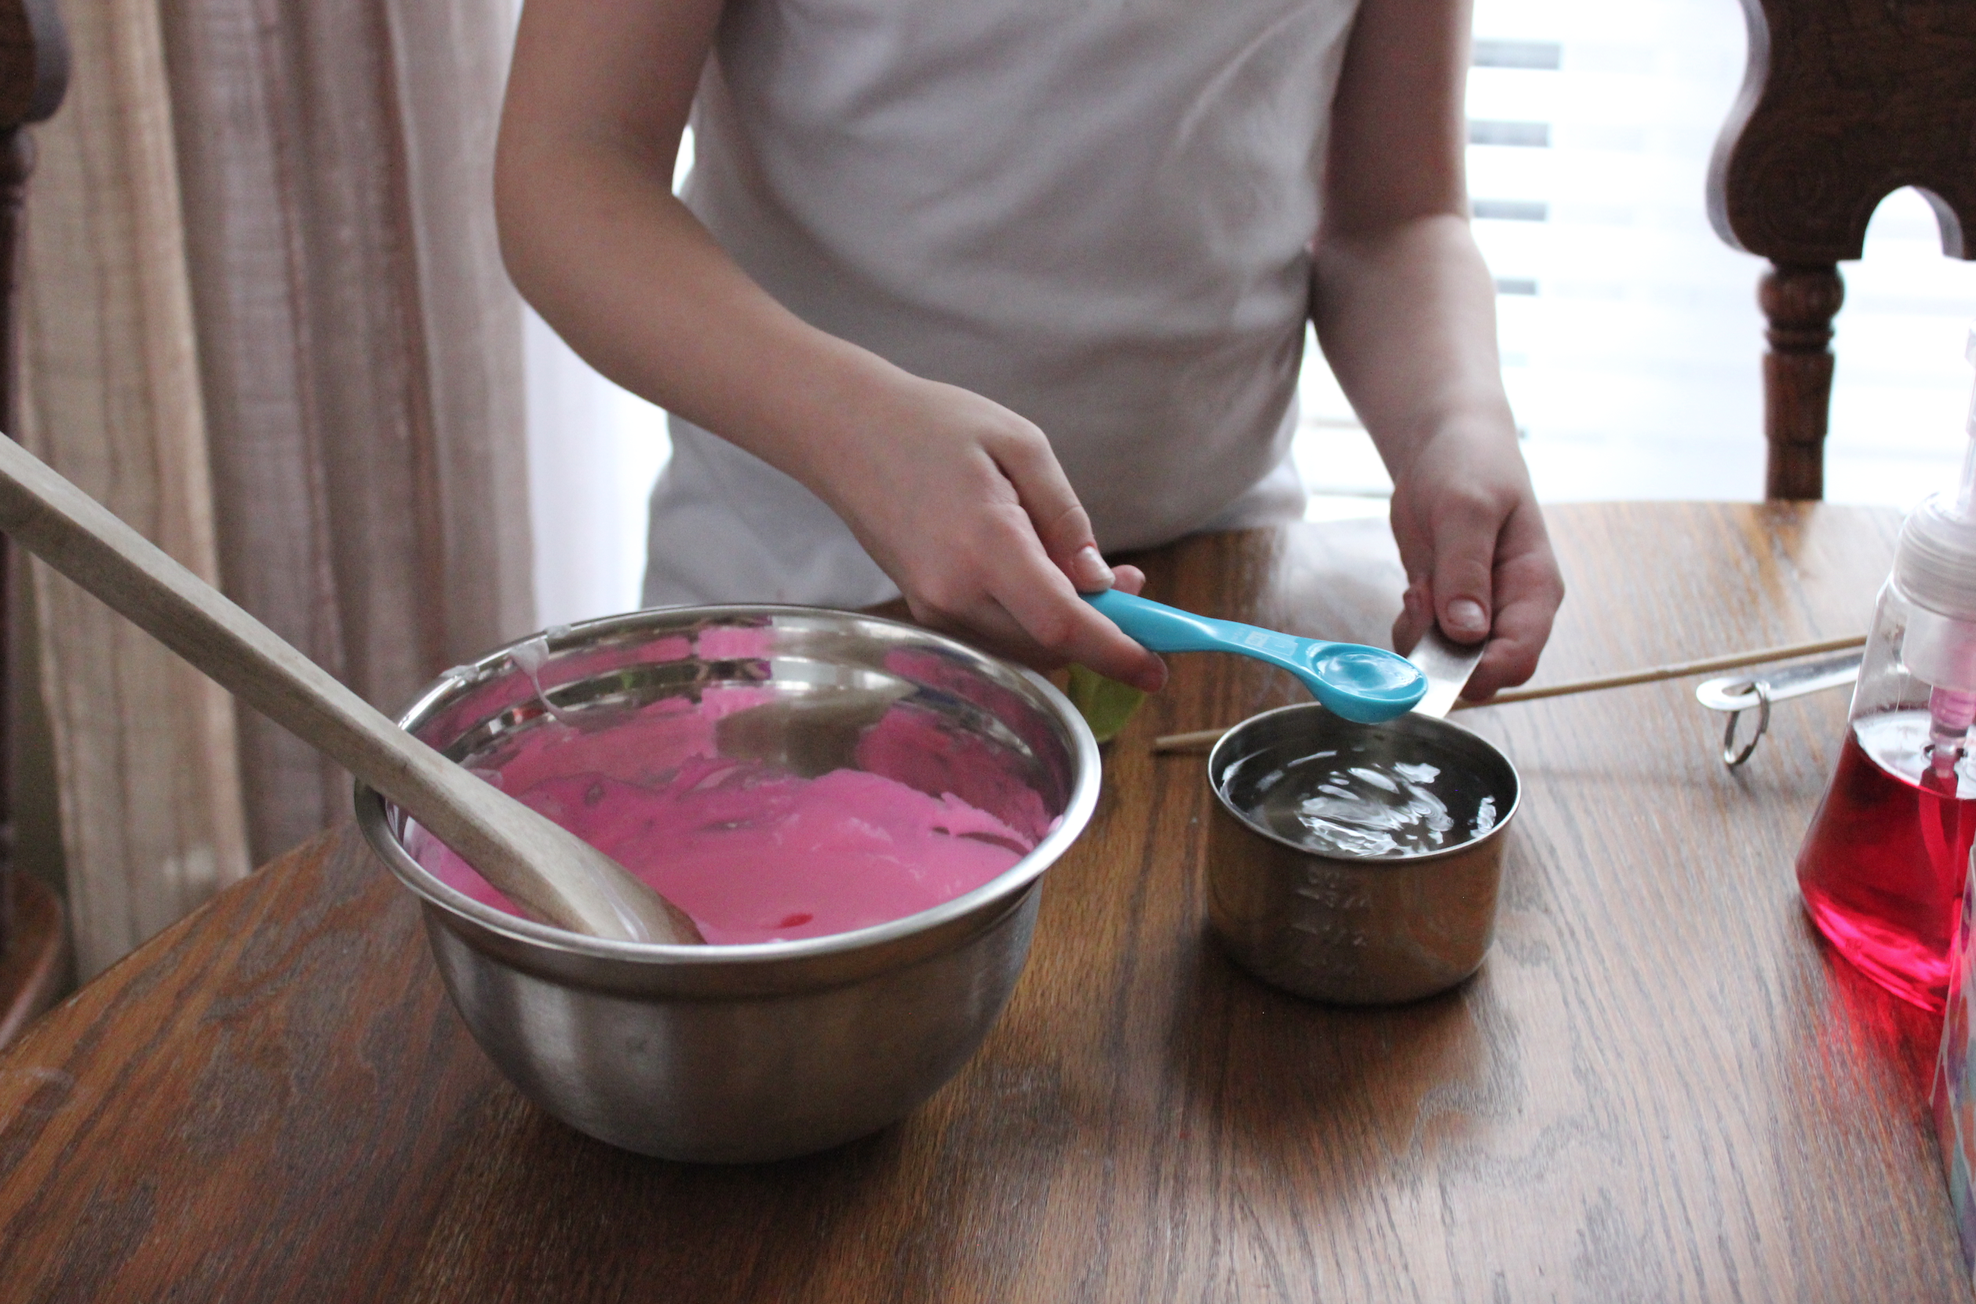
4. Once the color is fully incorporated, add the Slime Activator ONE tsp at a time, stirring continually, until the slime forms into a ball (it only takes a few seconds).
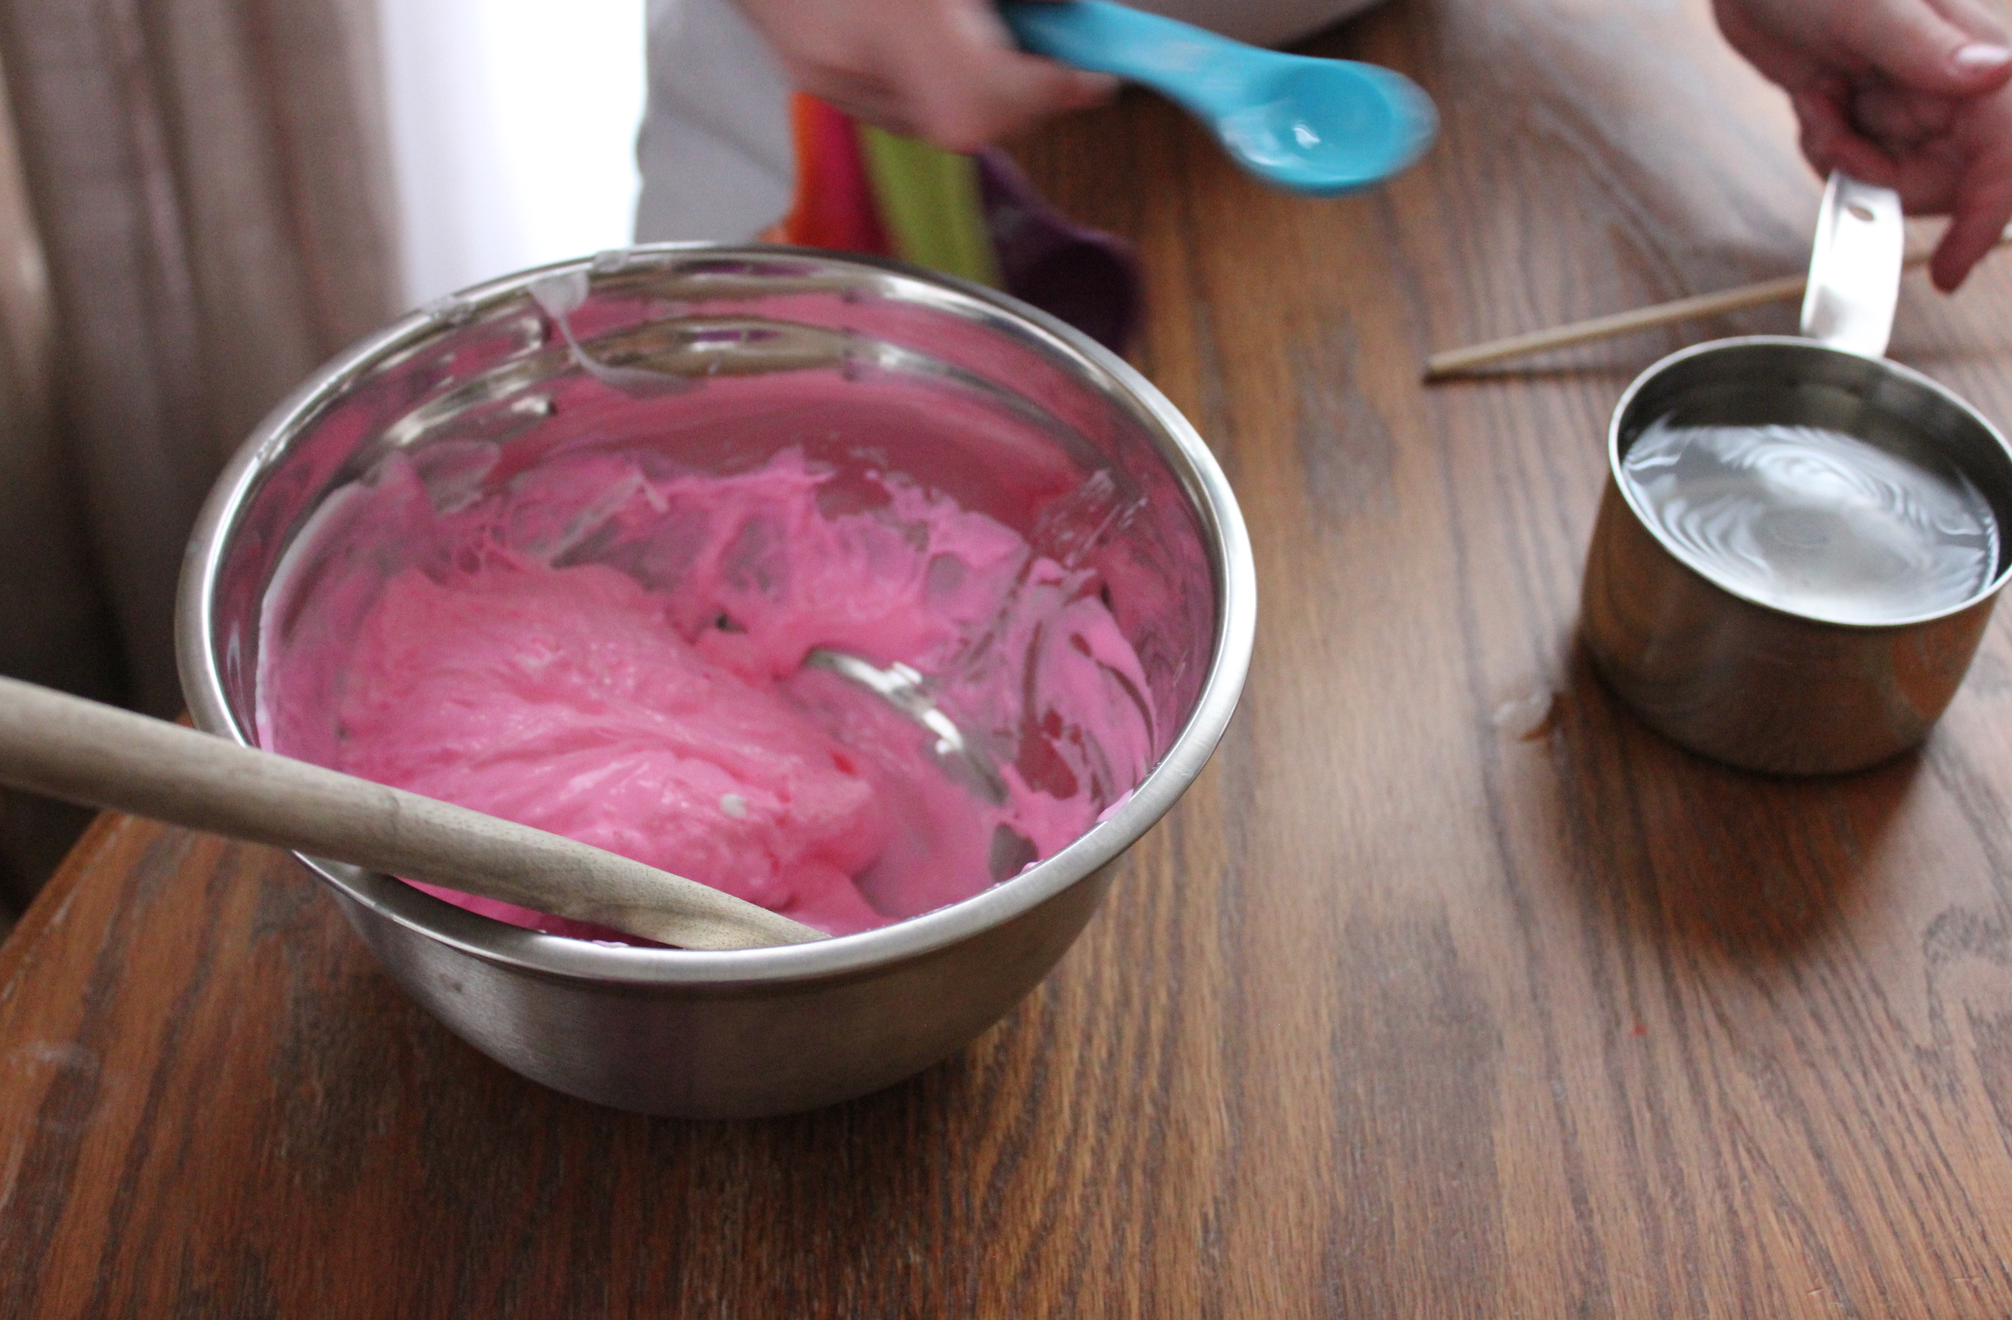

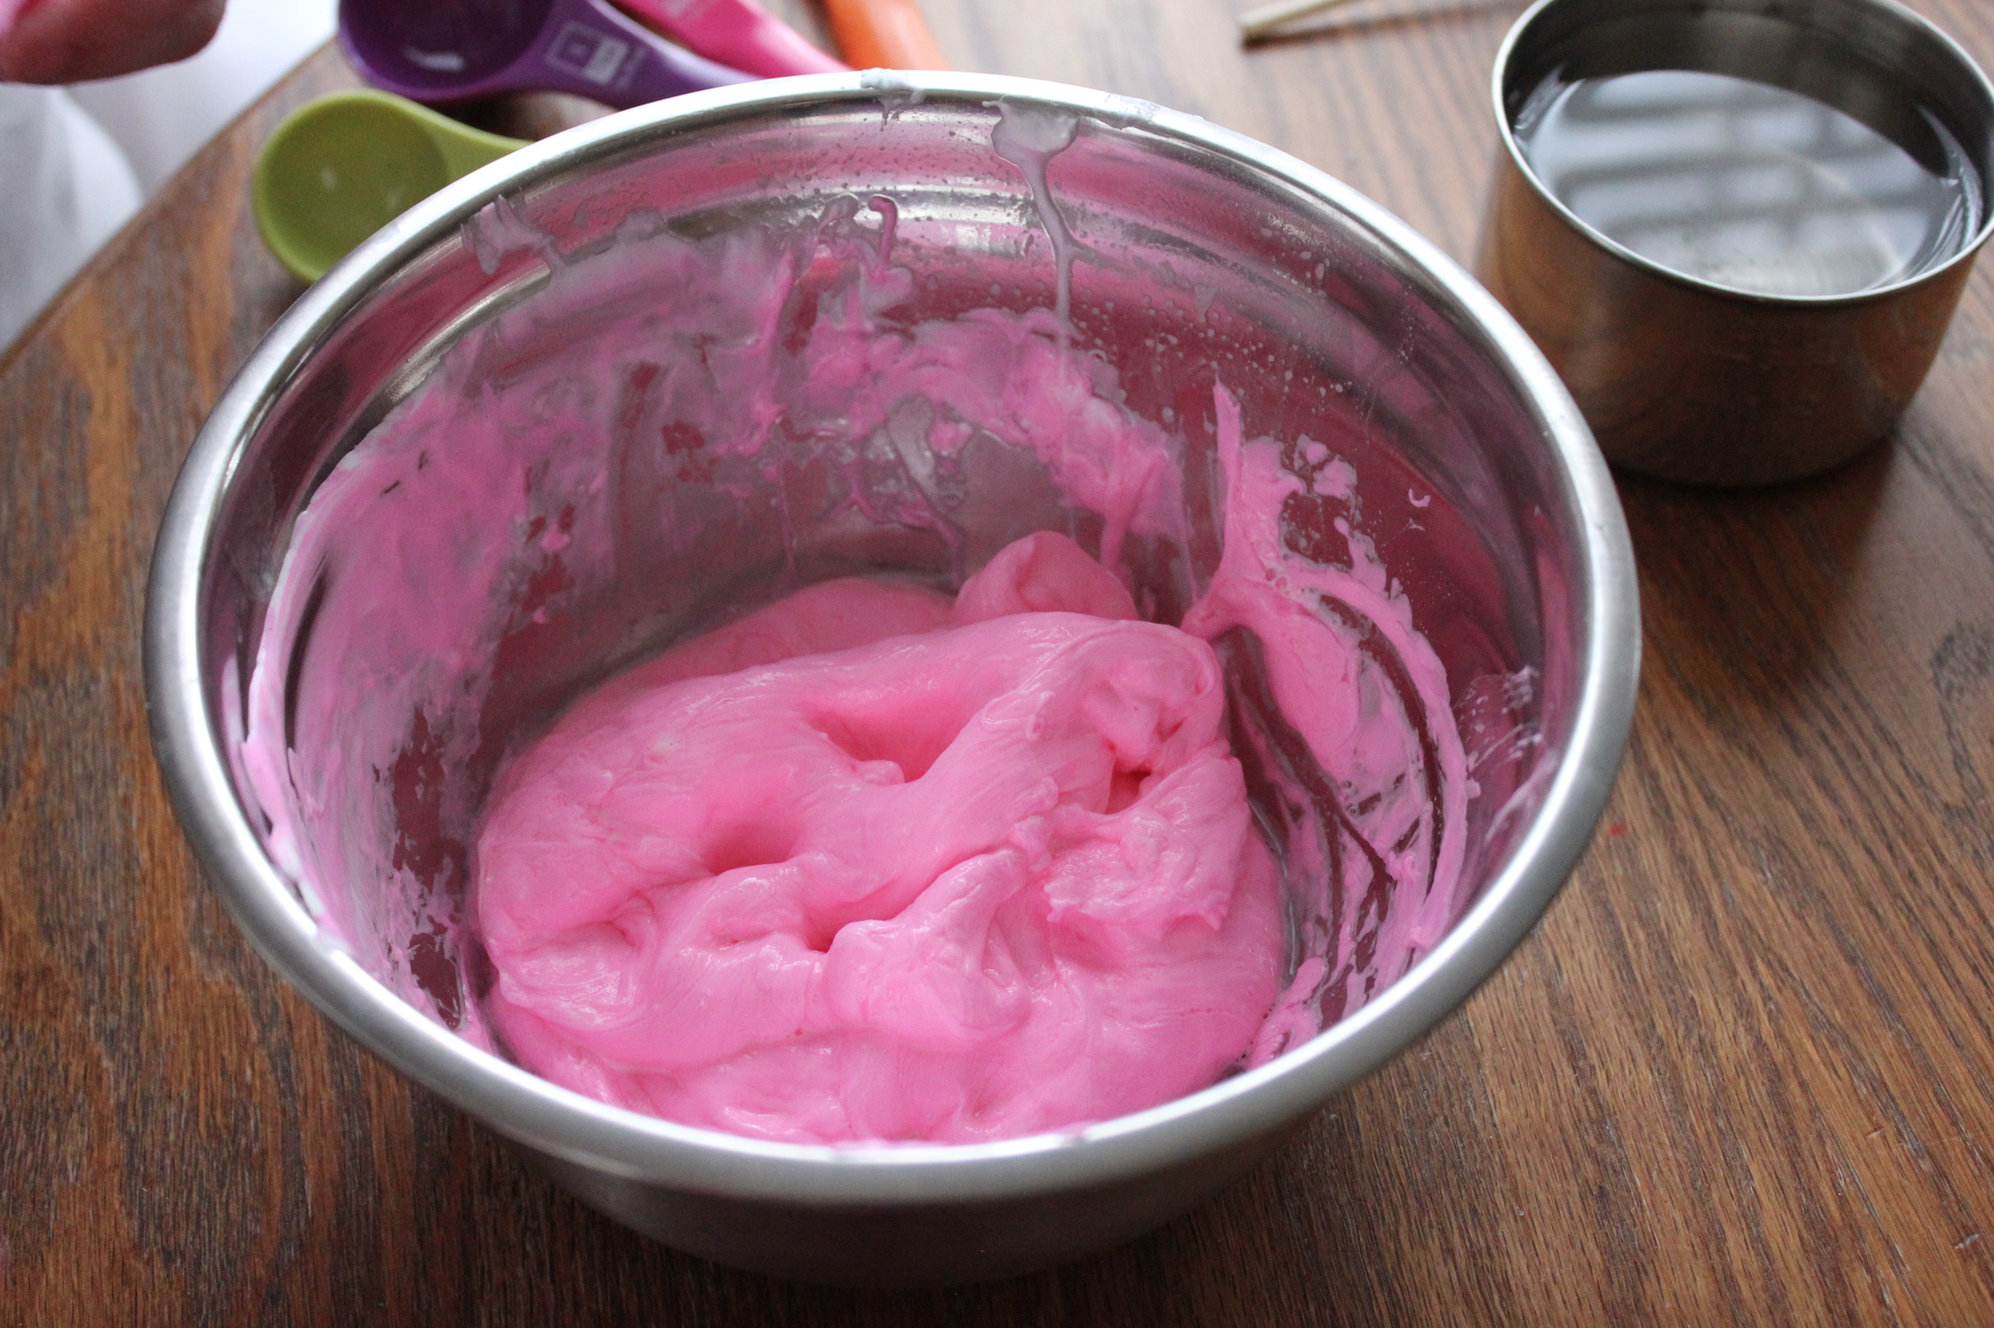
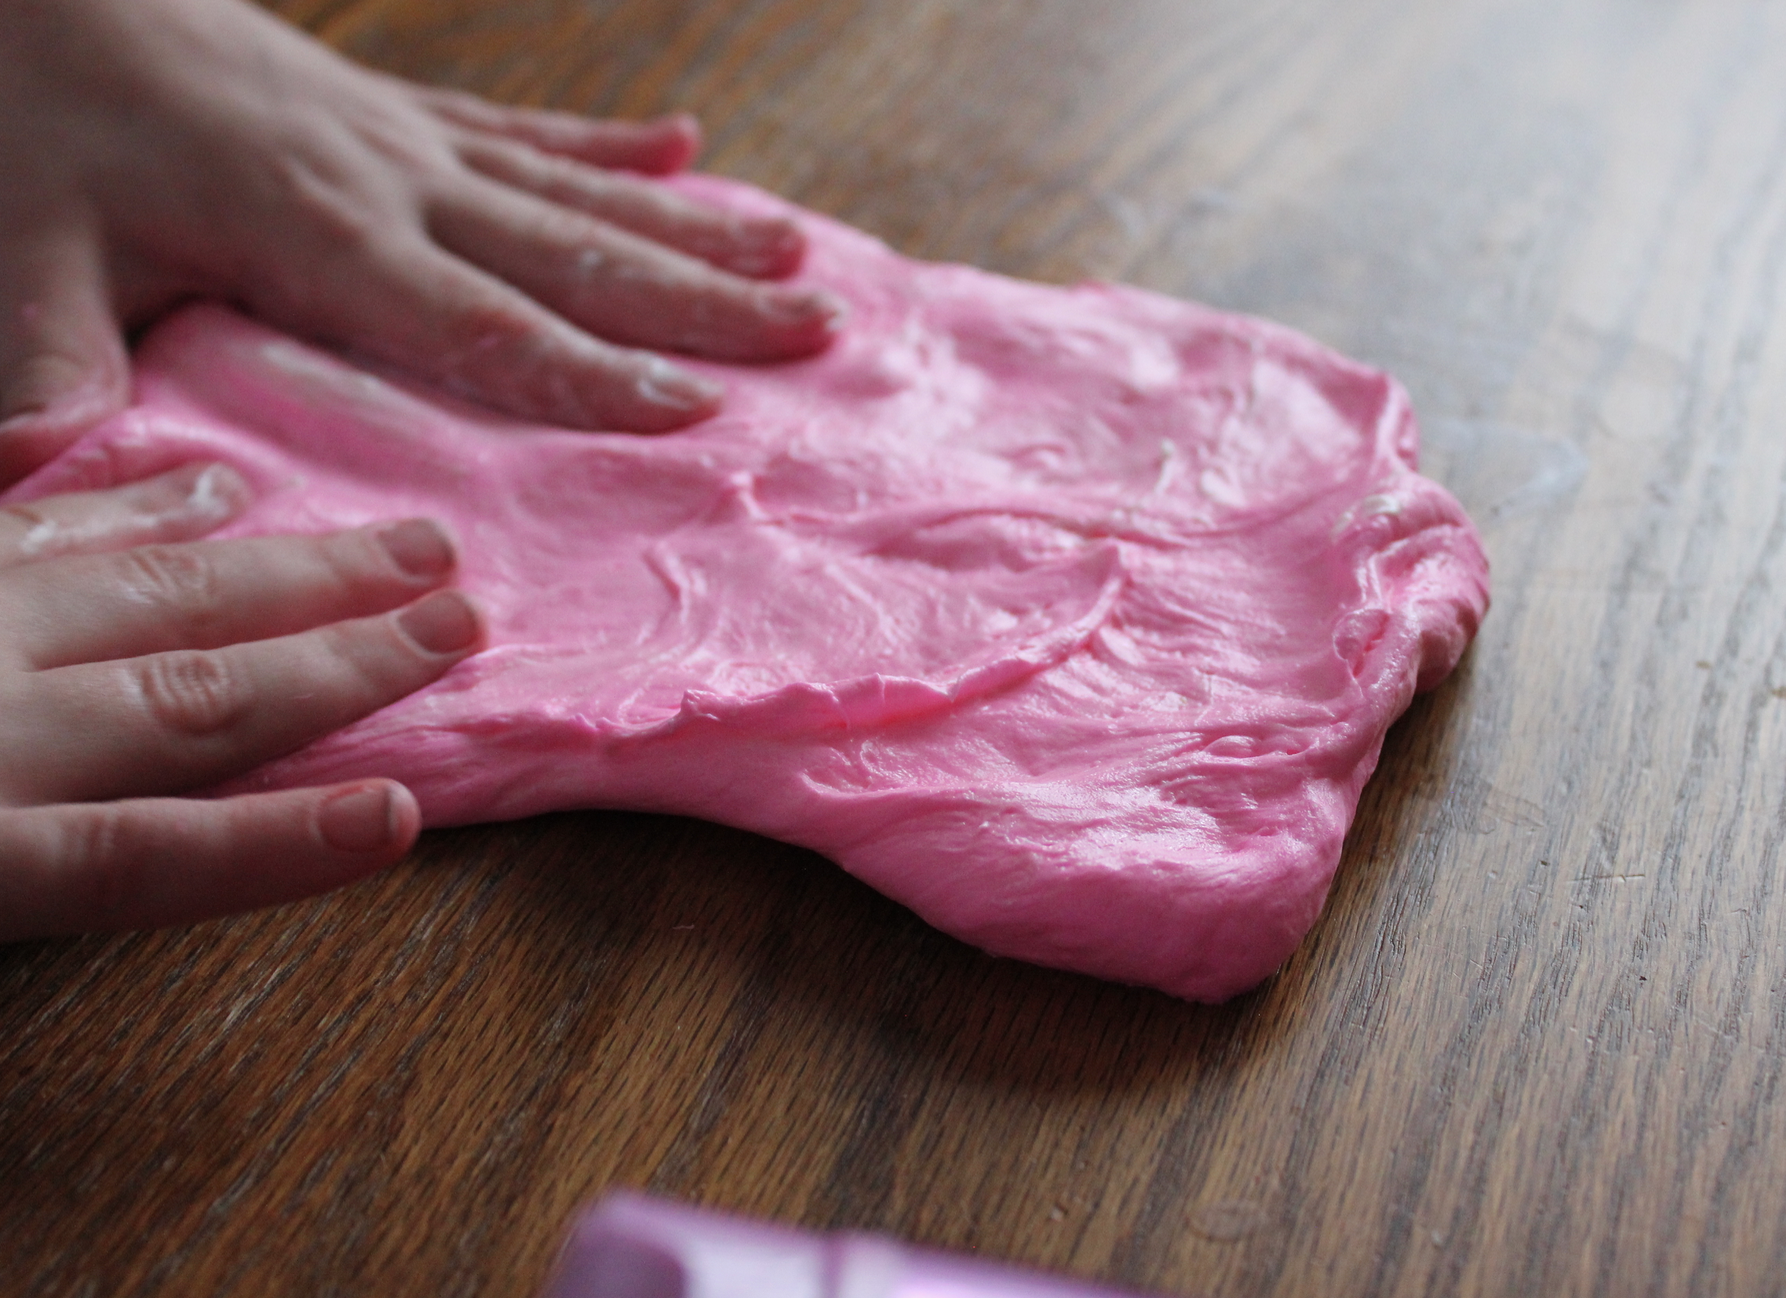
5. Once your slime has formed into a shaggy ball, take it out of the bowl and start kneading it on the table (just like bread dough).


DIY Slime Recipe Substitutions
If you’d like your slime to be more stretchy, you may add a little body lotion and knead it in until you get it to your desired stretchiness.


How to Store Shaving Cream Slime
When you’re finished making (and playing with) your slime, you’ll want to store it in an air-tight food container or zip-top bag to keep it from drying out.
If it’s stored properly, it should last for a couple of months — however, it WILL eventually get very sticky and stringing — that’s when it’s time to throw it out and make new slime!
Slime does not need to be refrigerated.

Slime Recipe with Glue FAQs
Mix 4 ounces of Elmer’s glue with 1 cup of shaving cream until combined. Then add 1 Tbsp. contact lens solution and mix until it forms a fluffy ball. Add optional food coloring if you want.
You will need some type of “activator” but it doesn’t have to be Borax. You can mix 1/2 tsp. of baking soda with 3 T. contact lens solution and add that to the slime mixture 1 tsp at a time until a soft ball forms.
This slime is NOT edible! Other than that, it is safe for kids to play with. However, if they have very sensitive skin, the Borax could cause a rash or itchiness.
Hand sanitizer can be used to make the slime stretchy and moisturizing, just like lotion. But it’s not an activator on its own.
Adding a few squirts of hand lotion to your slime will make it extra stretchy (and it will smell nice!)

Shaving Cream Slime Recipe
Materials
Ingredients for “Slime Activator”:
- 1 cup hot water
- 1 tsp. Borax
Ingredients for Slime:
- 1/4 cup Elmer’s glue don’t try this with other brands of glue
- 1/4 cup shaving cream
- 1/4 cup foaming hand soap
- 3 pumps regular hand soap
- Food coloring optional
- Slime Activator — 1 tsp. at a time
- 2 pumps body lotion optional
Instructions
- In a small bowl, make the slime activator by mixing 1 cup hot water with 1 tsp. Borax laundry booster; stirring until fully dissolved. Set aside.
- In a large bowl or container, add Elmer’s glue, shaving cream, foaming hand soap, and liquid hand soap. Mix well.
- Once the glue mixture is stirred well, add 2-8 drops of food coloring (optional) to make the slime whatever color you’d like. Kaitlynn has made all sorts of fun colors.
- Once the color is fully incorporated, add the Slime Activator ONE tsp at a time, stirring continually, until the slime forms into a ball (it only takes a few seconds).
- Once your slime has formed into a shaggy ball, take it out of the bowl and start kneading it on the table (just like bread dough).
Notes
Love this craft?
Make sure to share and save it on your favorite platform below!


Psst! This is a great gift idea for Valentine’s Day! Read this post for how to gift slime!

A Peek Into My Life This Week (and the very good reason why this post is late!)
A Peek Into My Life This Week (and the very good reason why this post is late!)
Welcome to my weekly Sunday post where we take a break from money-related posts and I share about what I’m loving right now and give you a little peek into our life from the past week.
****Why This Post is Late****
I’m late in getting today’s post up — for a very good reason! I spent the last two days almost completely offline just soaking up special one-on-one time with Kaitlynn attending the U.S. Figure Skating Championships.
One of the big things I’m saying yes to during my #YearofYes is more one-on-one fun and adventures with my kids. As you probably know, I’m not naturally a spontaneous mom who chases fun.
But as my kids are getting older (Kathrynne turns 12 this week!!), I’m realizing more & more how fleeting these years are and how important it is that I take time to really listen to my kids, care about what they care about, and to step into their worlds with them.
So that’s why Kathrynne and I are having weekly dates (quality time is her love language), why I’m watching football with Silas (he loves, loves to explain all the plays and the positions to me and have me get all excited about the game!), and why I just spent the last two days in Kansas City with Kaitlynn taking in our first U.S. Figure Skating Championship together (I didn’t know it was possible to be so intensely passionate about something when you’re 9 years old. But this girl lives and breathes skating!)
I want to be more than just a spectator in my kids’ world. I want to make their world my world — even if their interests (hello, football!) aren’t naturally “my thing”. And thanks for your patience when real life trumps blogging! 🙂


What I’m Watching
We watched some of the Inauguration on Friday. Not all of it like we would have wanted to, because we were traveling a lot of the day, but we caught some parts of it and have had some lively political and worldview discussions as a result. It was such a good opportunity for so many important conversations with our kids.
I didn’t do much other watching this week except for hours and hours and hours of live figure skating! It was incredibly inspiring to see such talent on the ice and to see the determination and grit of skaters when they would fall and get right back up again. It was also so fun to get to be there live and in person to cheer the skaters on.
At the championships, there were so many new-to-me skaters I fell in love with and skaters I’ve long admired that I loved getting to see perform in person. Best of all, we actually had the opportunity to meet and interact with a number of the skaters either through the autograph signings or through just finding them out and about during the event.
Of all the skaters we met, I’d have to say that Jason Brown is the one who most impressed me. He was incredibly kind, genuine, and gracious… and Kaitlynn and I talked later about how much we can learn from his example.
What I’m Reading
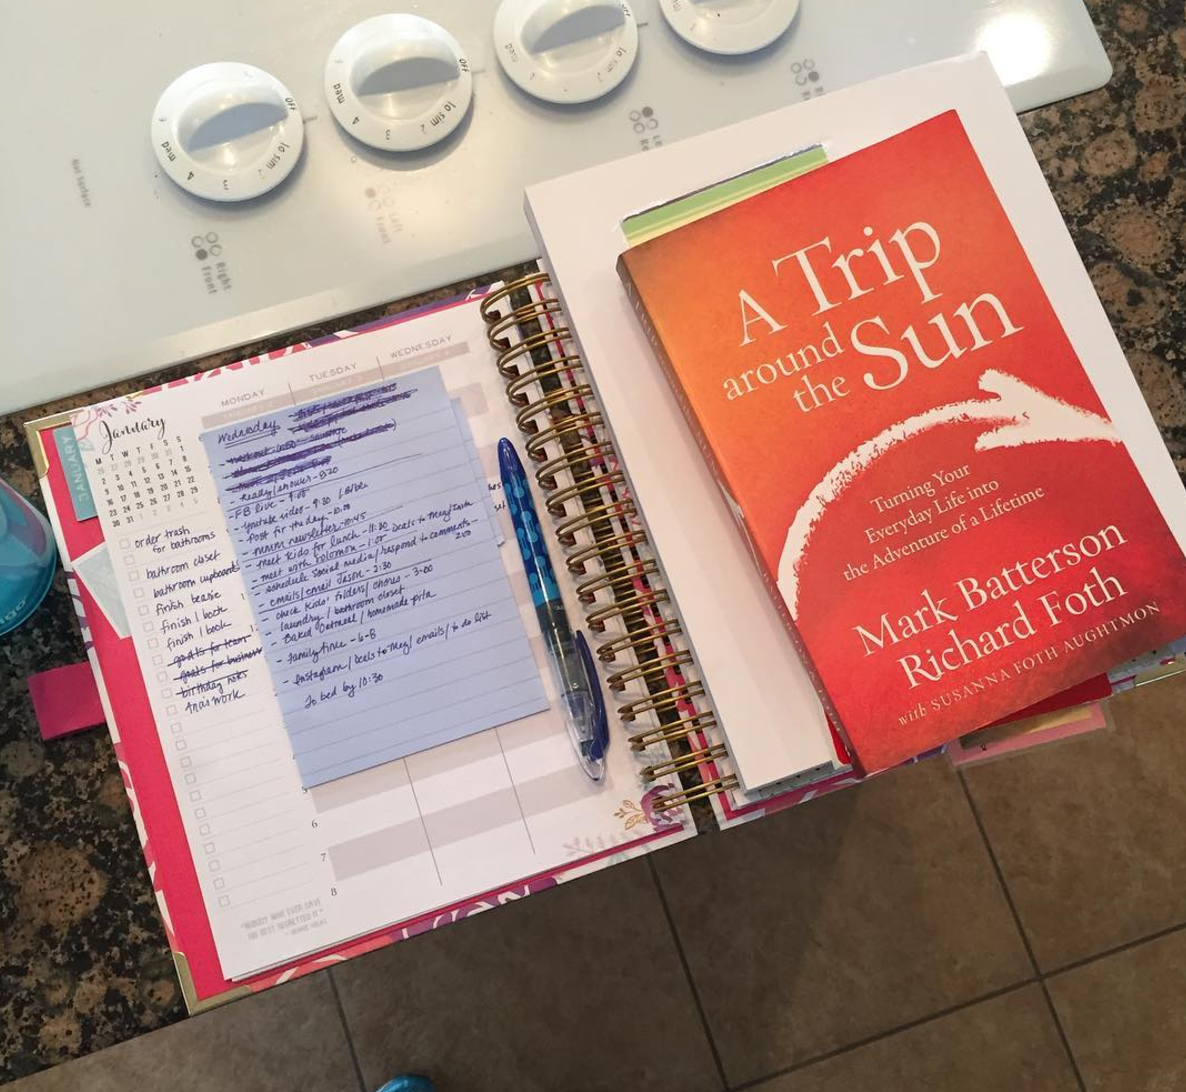
I finished two books this week: Time Well Spent and A Trip Around the Sun. Both were very inspiring to me.
I read Time Well Spent while running on the treadmill (I figured out a way I can keep a good pace and still get in some reading on my phone!!) and thought it was packed with valuable insight. I ended up ending some of my workouts with hurriedly writing down notes because I was learning so much from it and wanted to get my thoughts onto paper before I lost them!
As someone who has loved everyone Mark Batterson book I have read, it’s not surprising that I also enjoyed A Trip Around the Sun. He co-authored it with one of his mentors and I loved reading more about their relationship in the book and getting the perspective of someone who was 70+ years! If you are looking for some encouragement to live a life of more adventure and excitement and want to glorify God in all you do, I’d heartily recommend this book!
This week, I’m reading: Answers to Prayer (an old Christian reprint), Be Real (a spiritually encouraging book), Settle for More (a story-driven book), and Thirty Chic Days (a book on life improvement).
I’m hoping to finish Settle for More and Thirty Chic Days. I’ll let you know how that goes next week! {See my Reading Goals for 2017. Also, see the 8 books I’ve read so far in 2017 here.}
 What I’m Pondering
I woke up feeling discouraged and inadequate one morning earlier this week. I had a really long to do list. I had a number of must-do projects. And I was tired and worn out from a few really full days and some discouraging situations.
I felt like snapping at everyone about silly things, I felt frustrated that I was behind on projects, and I felt stressed about everything I felt I needed to cram into that day.
I then remembered the words of our pastor last Sunday, “God has an abundant supply of everything you need — if only you will but ask.”
Talk about a truth bomb!! I felt Him prompt me to trust Him with my to do list, release my stress and discouragement to Him, and literally rest in Him by going back to bed for 30 minutes.
Guess what?! When I woke up, I felt like a different woman! And He was so faithful to carry me through the rest of the day, provide enough time to do what needed to get done, shower me with unexpected encouragement, and to even give me some extra breathing room.
How often I miss these opportunities to see God show up and show His love for me because I’m trying to do things in my own strength — which only results in stress and frustration. His strength is definitely so much better than mine!
In Case You Missed It
My Posts This Week:
- How to Beat Winter Colds With Essential Oils
- 10 Simple Ways to Cut Your Grocery Bill by $50 This Week
- How I Drink a Gallon of Water Every Day
- How to Actually Stick With Your Grocery Budget
My YouTube Videos This Week:
What are you watching, reading, or pondering this week? Leave a comment and let me know!

Reader Tip: Get Cash For Your Unclaimed Property!
Devon emailed the following tip:
Each state has requirements that all banks, insurance companies, and other businesses report “unclaimed property” to the state after a certain amount of time (in California it is 3 years).
You can search for your name in the database your state set-up and see if there is any money the state is holding for you.
For instance, I had submitted a refund for lotion I bought many years ago, the company sent it to the wrong address and the check was essentially lost. My name was on the California Unclaimed Property database and I was able to file for the $3.00.
I know of other people who searched and ended up finding hundreds of dollars — so it’s worth a couple minutes to check and see if your name is there.
I would suggest doing an online search for “________ Unclaimed Property Database” and put your state in the underlined blank. Generally, you just fill out an online form and hit ‘submit’ or print out and mail in the form to your state controller’s office. It’s fairly simple and the turn around time was quick for my claim!
Here is the link to California’s database for unclaimed property if you want to see what it looks like. I’m guessing the forms for other states would be similar.
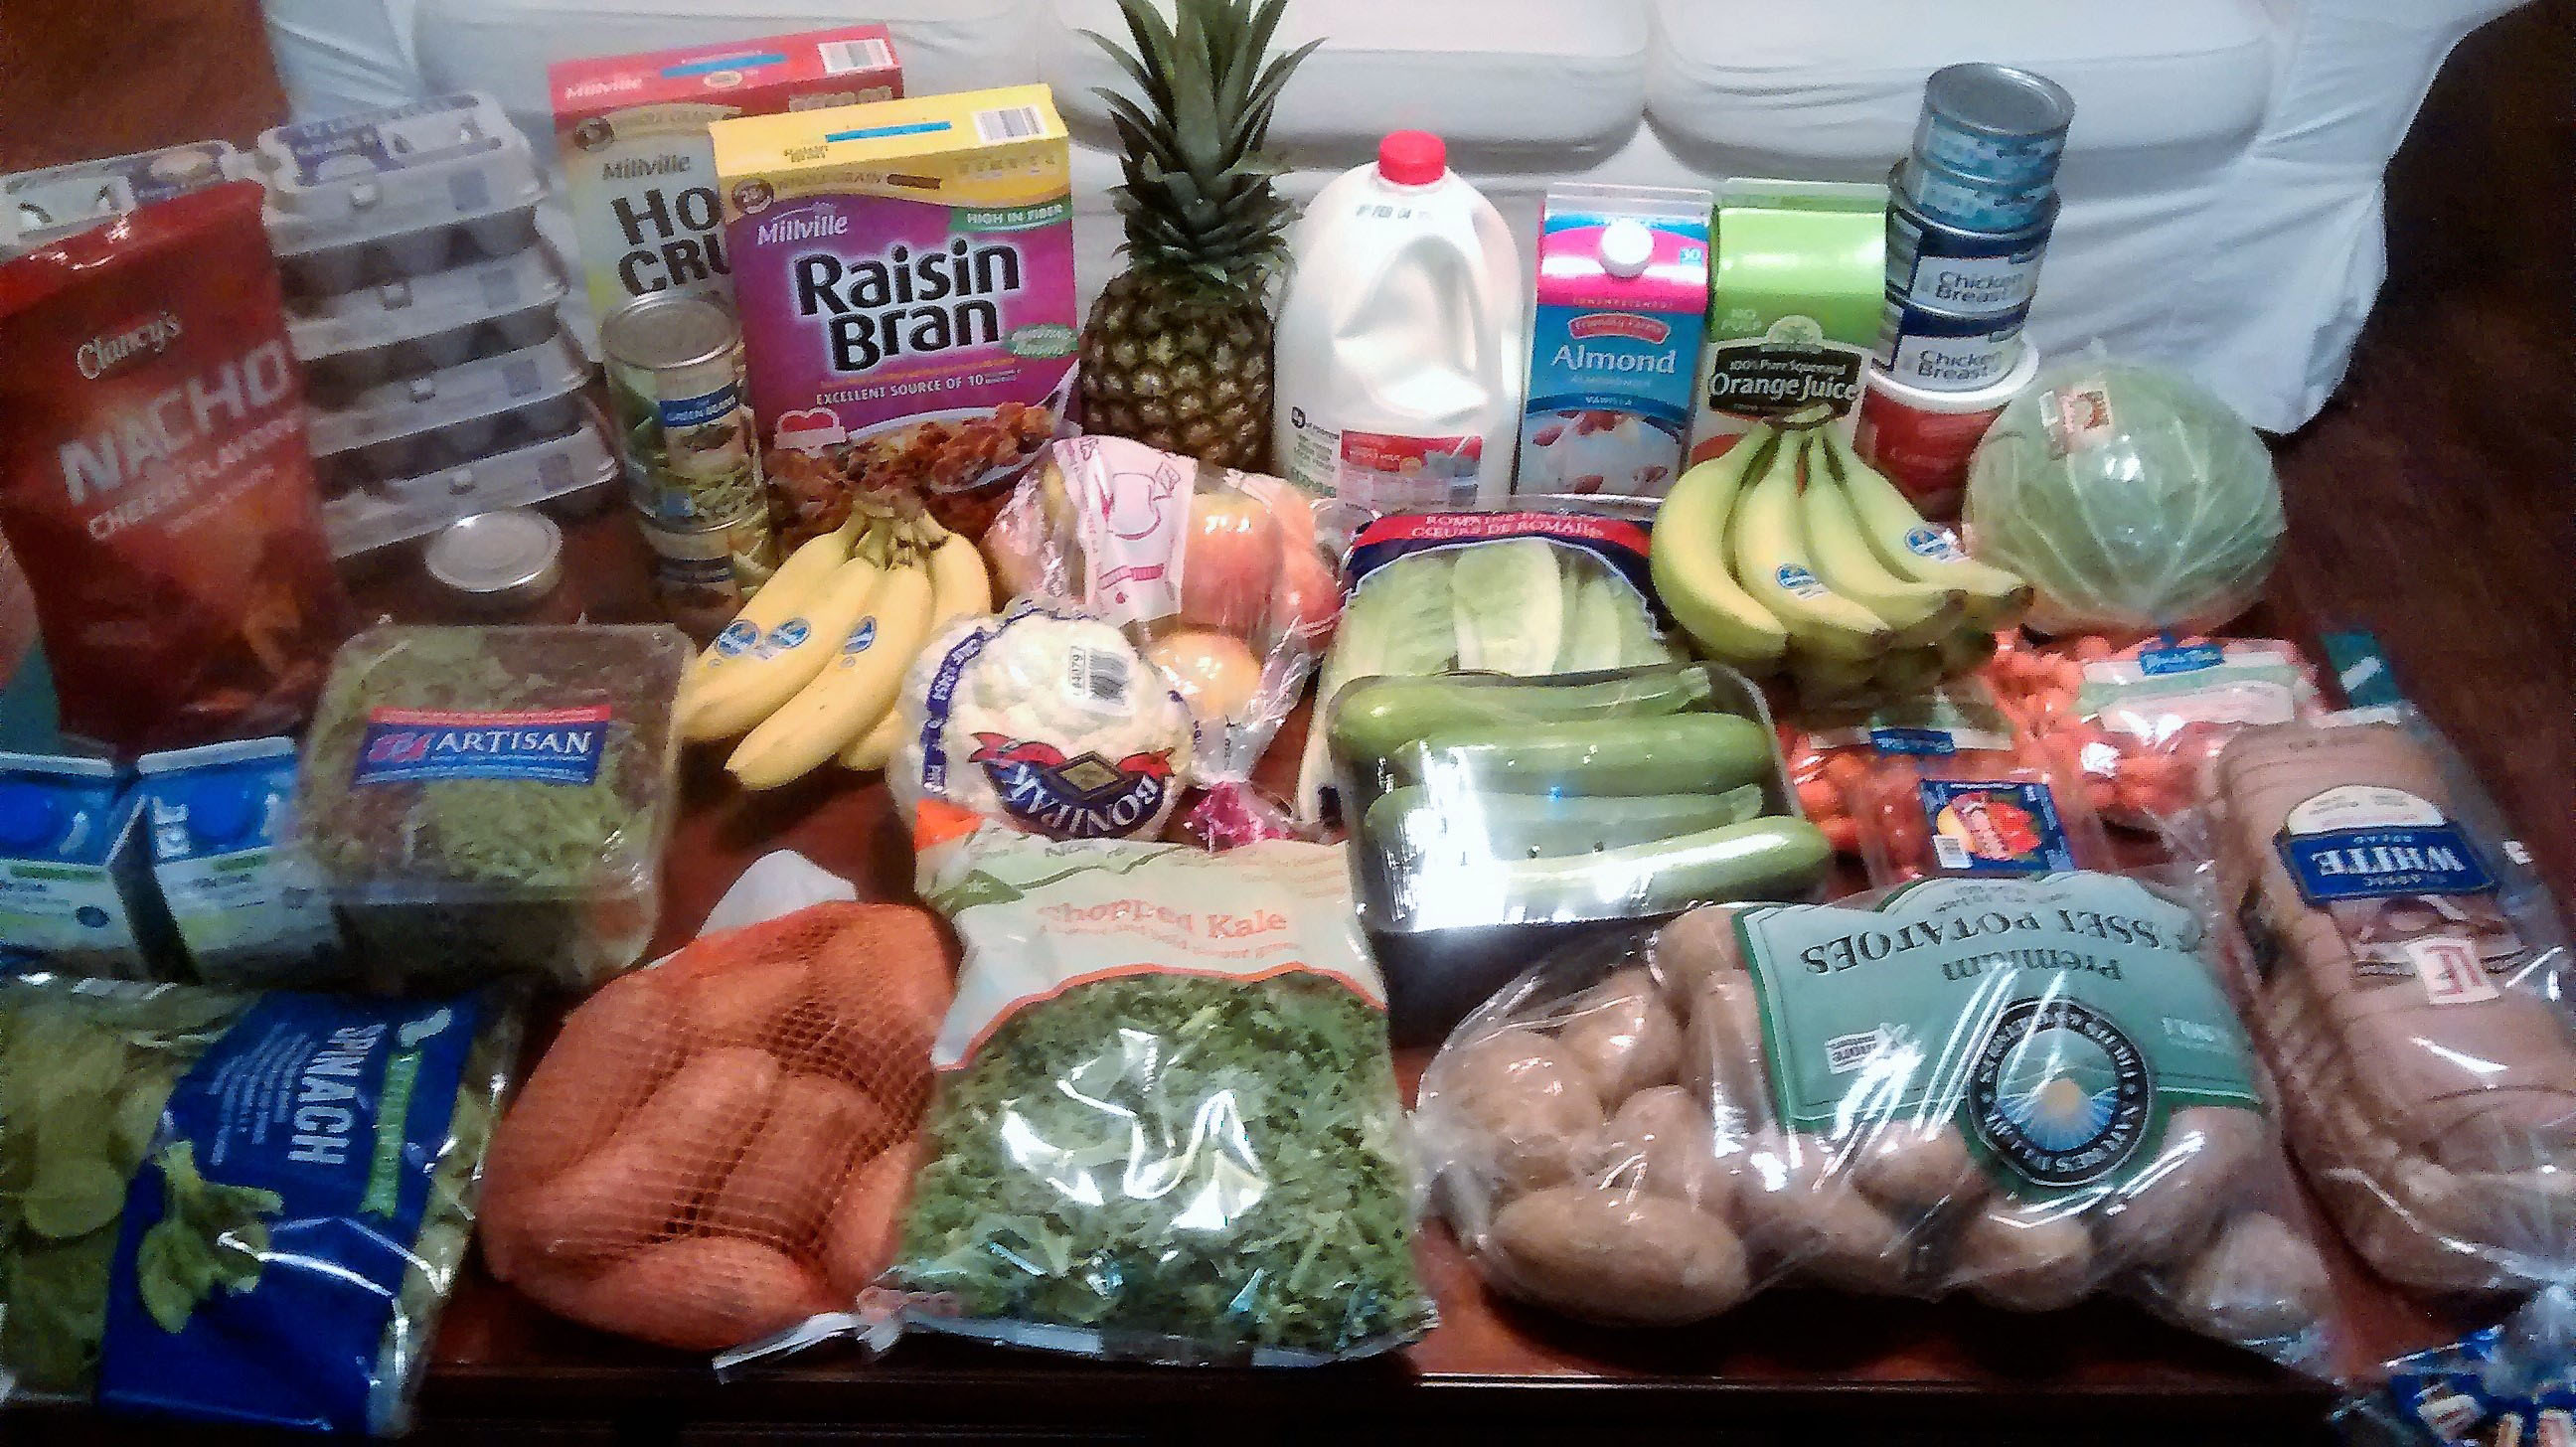
Brigette’s $78 Grocery Shopping Trip and Weekly Menu Plan for 6
Brigette’s $78 Grocery Shopping Trip and Weekly Menu Plan for 6
Aldi
2 cans tuna – $1.30
2 cans Chicken Breast – $3.38
1 bag Organic Kale – $2.49
1 pkg fresh Zucchini – $2.49
1 loaf Bread – $0.85
1 3-lb bag Pink Lady Apples – $2.99
1 bag Flat Leaf Spinach – $0.79
2 bags Romaine Hearts – $3.98
1 Artisan Lettuce – $1.99
1 bunch Bananas (2.64lbs @ $0.39/lb) – $1.03
3 bags Baby Carrots – $2.97
1 head Cabbage – $1.19
1 3-lb bag Sweet Potatoes – $1.79
1 pint Grape Tomatoes – $1.89
1 Pineapple – $1.19
1 head Cauliflower – $2.29
1 24-oz carton Cottage Cheese – $2.29
1 gallon Whole Milk – $2.35
1 64-oz carton Orange Juice – $1.69
1 64-oz carton Almond Milk – $1.99
2 16-oz carton Egg Whites – $3.98
2 cans Green Beans – $0.98
1 jar Organic Salsa – $1.99
1 box Honey Crunch Oats – $1.49
1 box Raisin Bran – $1.79
1 bag Nacho Tortilla Chips – $1.09
4 dozen Eggs – $3.56
1 10-lb bag Russet Potatoes – $3.49
Total: $59.30
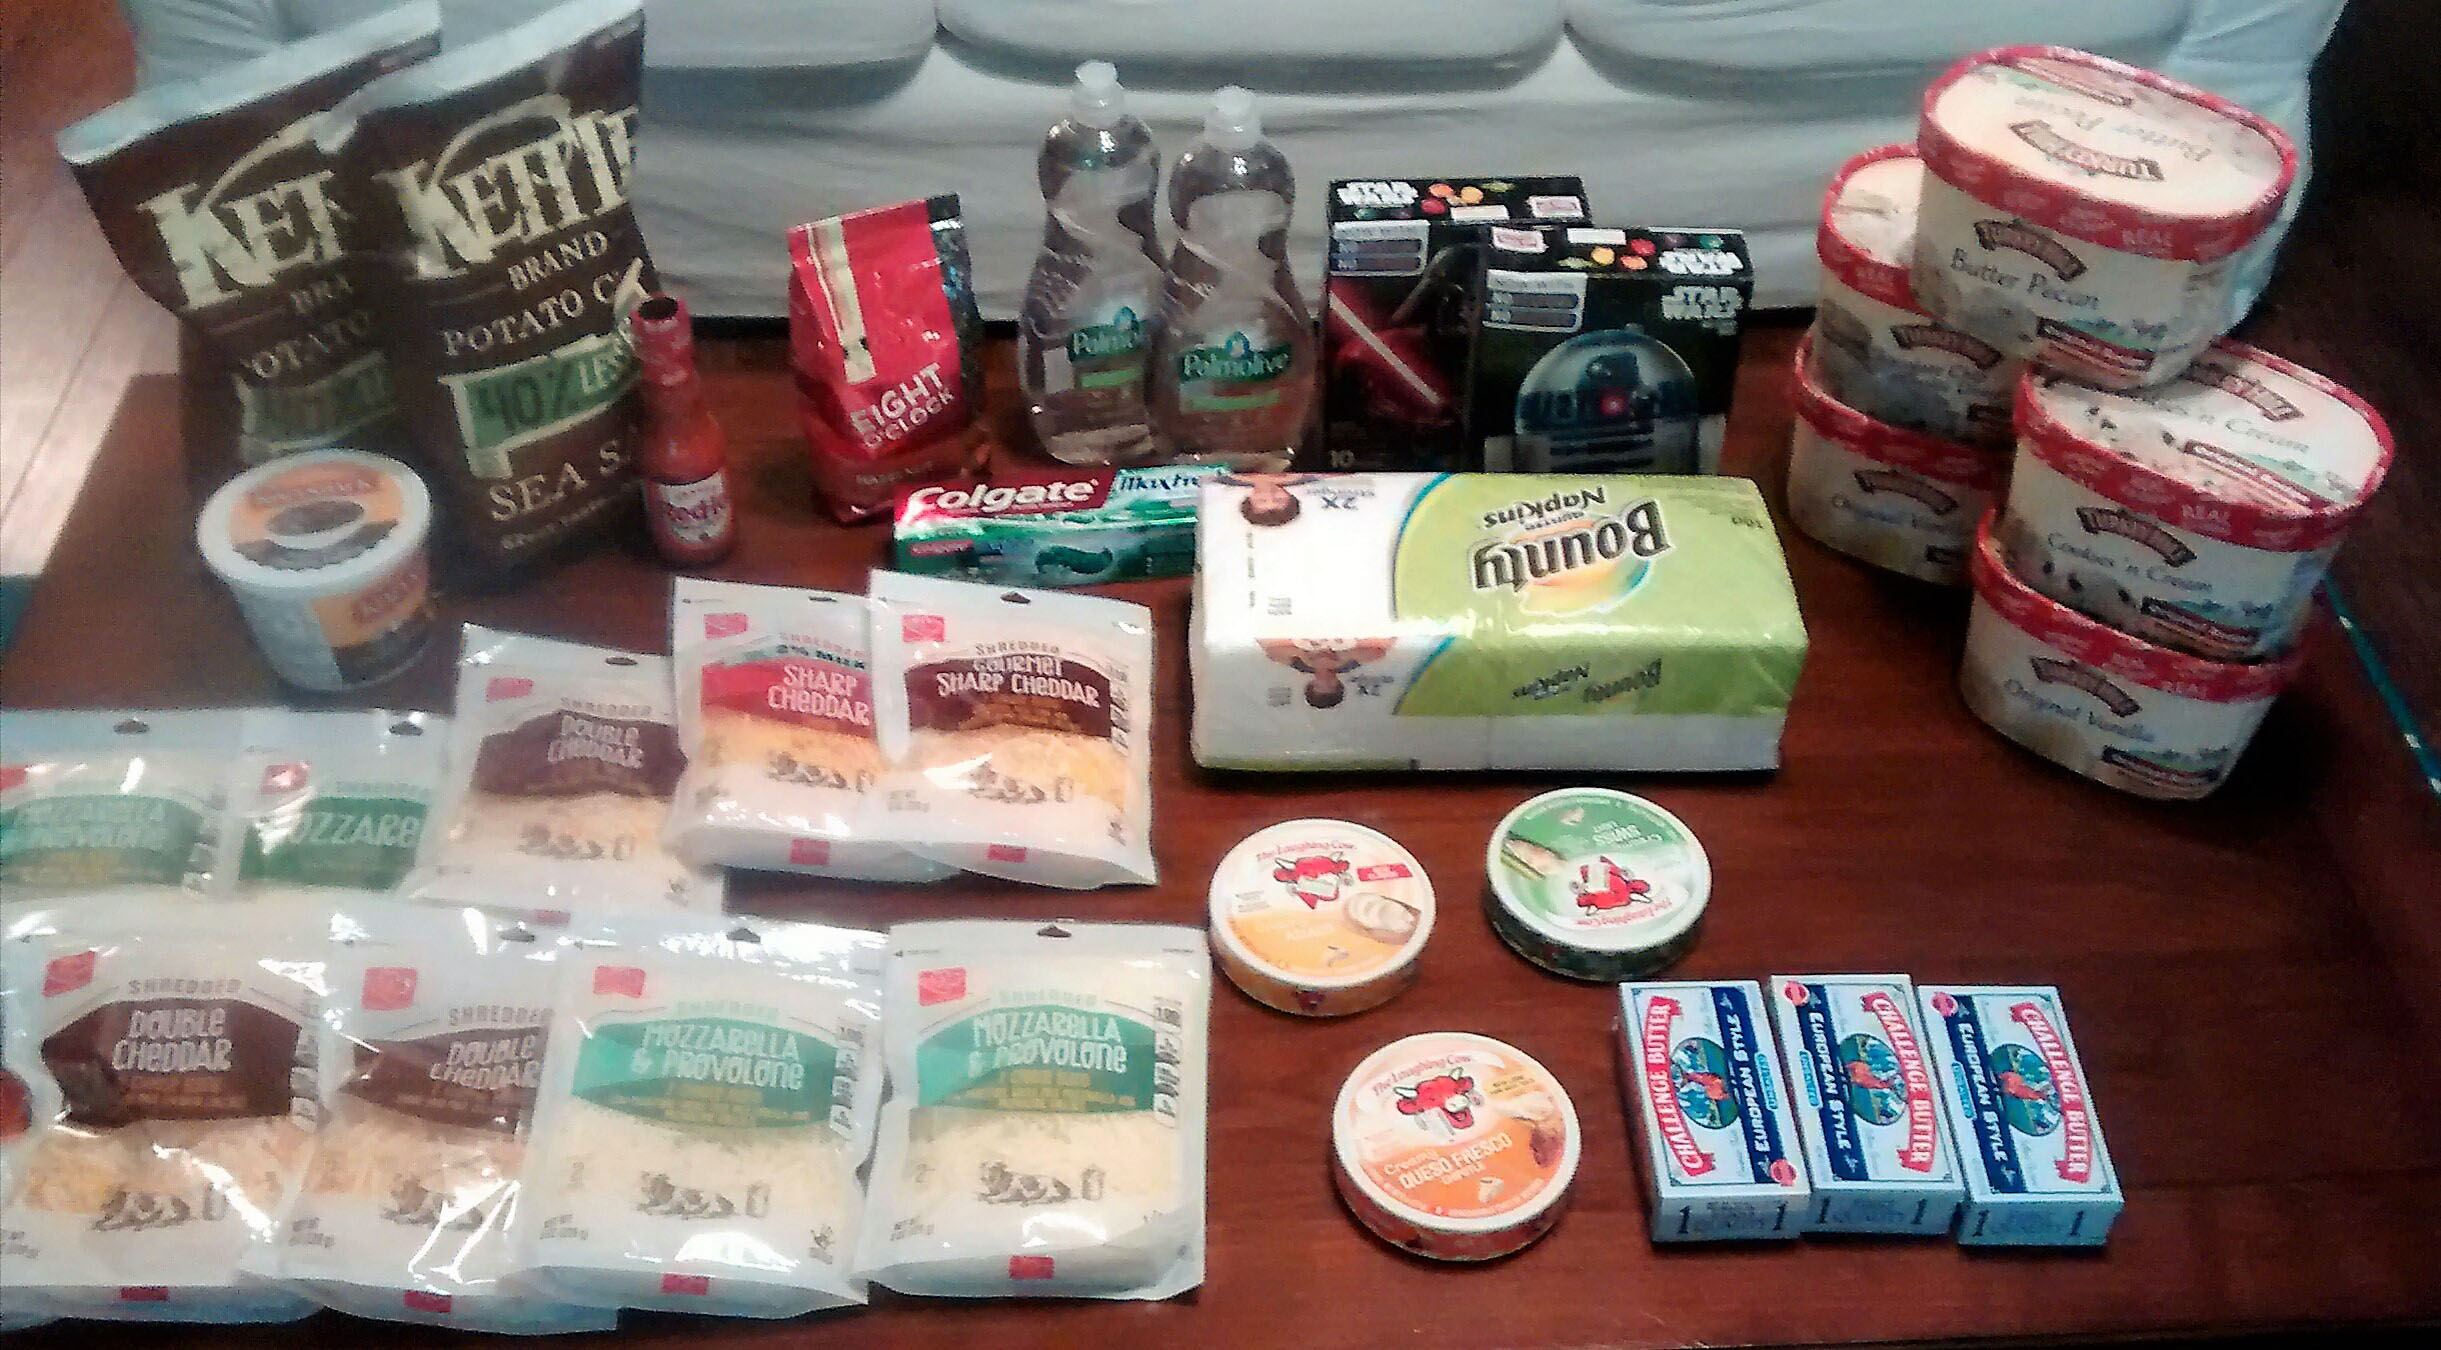
Harris Teeter
1 bag Eight O’clock Hazelnut Coffee – $2.89, used $1.50/1 printable – $1.39 after coupon
2 Betty Crocker Fruit Snacks – $2.89, used $0.50/2 printable (doubled), plus $0.50/2 evic – $1.39/2 after coupons
2 25-oz Palmolive Dish Detergents – $3.98 – used 2 $0.25/1 printable (doubled), plus receive instant $2 off (part of the buy 3, get $3 Colgate Promo) – $0.98/2 after coupon and instant promo (great price in my book!)
1 Colgate Max Toothpaste – $2.49, used $0.50/1 printable (doubled), plus receive instant $1 off (part of the buy 3, get $3 Colgate Promo) – $0.49 after coupon and instant promo
1 100-ct pkg Bounty Napkins – $1.89, used $0.25/1 printable (doubled) – $1.39 after coupon
1 bottle Frank’s Hot Sauce – $1.49, used $0.50/1 printable (doubled), plus receive $1 back from Checkout 51 – $0.51 MM after coupon and rebate
2 bags Kettle Brand Chip – $3.79, used $1.00/2 printable, plus receive $1 back from Ibotta – $1.79/2 after coupon and rebate
3 pkgs Laughing Cow Cheese – $5.97, used 3 $0.75/1 printable (doubled) – $1.47/3 after coupons
10 8-oz bags Shredded Cheese (B2G3) – $13.10
5 cartons Turkey Hill Premium Ice Cream (B2G3) – $9.98, used 2 $1/1 printable – $7.98/5 after coupons
3 8-oz pkgs Challenge Butter – $4.48, used 3 $0.75/1 printable (doubled) – FREE after coupons (free BUTTER??! Yes, please!)
1 tub Kozy Shack Pudding – $1.69, used $0.75/1 Kozy Shack Pudding – 1-15-17 SS (exp. 02/28/17) (doubled) – FREE after coupon
Plus received $10 off $75 evic (I have no idea where this came from, or how I got it – ??! But a super happy surprise! :))
Total after coupons, tax, and rebates: $19.47
Total for the Week: $78.77
Weekly Menu Plan
Breakfasts
Oatmeal and Fruit x 2
Cereal x 3
Hard Boiled Eggs, Morning Glory Muffins x 2
Lunches
Grilled Cheese Sandwiches, Oranges, Zucchini Fries x 2
Baked Potatoes with Cheese, Roasted Cauliflower
Tuna Fish Sandwiches, Carrots, Pineapple
Leftovers x 3
Dinners
Grilled Chicken, Italian Garlic Bread, Tossed Salad, Cheesy Hash brown Casserole, Ultimate Double Chocolate Brownies, Ice Cream (company for dinner)
Venison Roast in the Crockpot, Baked Potatoes, Carrots
Taco Salad, Apples
Simple, Perfect Chili, Cornbread
Chicken Gravy over Rice, Steamed Broccoli, Homemade Biscuits
Leftovers x 2
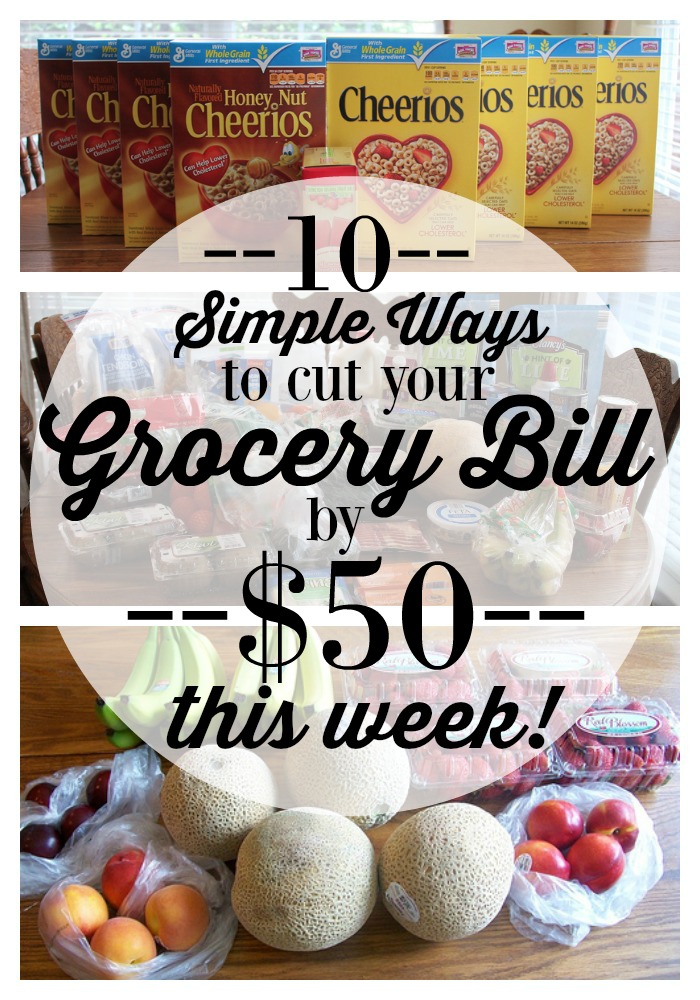
10 Simple Ways to Cut Your Grocery Bill by $50 This Week
This is Day 5 of the 5 Days to a Better Grocery Budget series. If you missed the previous posts, read Day 1 here, Day 2 here, Day 3 here, and Day 4 here.
Once you’ve set up your grocery budget and created some accountability to actually stick with it, it’s time to start considering some simple ways you could shave off some of your grocery expenses.
Groceries are one of the budget areas that are the very easiest to cut — and it’s the first place I encourage people to start if they are looking to get their finances in better order.
Why? Because the majority of Americans could make some simple changes in their lifestyle and grocery purchases that would pretty easily reduce their grocery expenses by $50 or more!
Now, here’s the thing: some of you don’t need to cut a penny off your grocery budget. You have worked hard to keep your budget low, you are couponing ninjas, you cook from scratch, you plan inexpensive menus, you cook with beans and rice, and you eat up all your leftovers.
This post is not for you (unless you want to share some of your wisdom in the comments — which we would love!). This post is for the average American who is feeling like they know they are spending way more on groceries than they should, but they just need some ideas as to how to get started lowering their budget.
I thought through a lot of grocery-saving strategies and came up with 10 simple techniques that could save you $5 per week if you employed them — for a total of $50 in savings every week!

If you’re looking for a little wiggle room in your budget, try a few of these ideas:
1. Use Up What You Have on Hand
When I plan our menu, I look through the cupboards, pantry, and fridge and freezer and see what we already have on hand. Maybe a recipe only used half a carton of something, maybe I have extras from an item I got marked down, or maybe there other items we didn’t use the week before.
I take note of these items and try to incorporate them into the menu plan for the following week. If you need some ideas on how to incorporate these ingredients into your menu plan, check out RecipeMatcher.com, SuperCook.com, or MyFridgeFood.com.
In addition, I often get creative in substituting items I already have on hand instead of buying something. Learning how to substitute ingredients has saved so much money and extra trips to the store. Here’s a great list of recipe substitutions. You can often Google for ingredient substitutions and get some great ideas.
Here’s an example of how I create menu ideas and recipes based upon what I have on hand. Check out this post for step-by-step help on How to Plan a Menu.
2. Look at Your Grocery Fliers Online
Planning your menu based upon what’s on sale at your local store(s) is where you really start to see the savings happening! Most grocery store chains have their weekly sale fliers available online. If not, you will often receive a copy in the mail. Or, you could even pick one up at the store if you’re going to be driving right by it.
Quickly browse through these sale fliers and see if there are any exceptional deals on items like meat or dairy or produce. Whenever possible, plan some of your menu based upon these sales!
Most of the time, the hottest deals of the week are listed predominantly in the front page of the flier. Oftentimes, these front-page deals are “loss-leaders”.
(“Loss-leaders” are deals which the store is actually breaking even– or losing money on! They are designed to be good enough to “bait” you into shopping at that store.)
Don’t neglect to look through the full flier, though. Sometimes there are great deals which are hidden on the middle pages. However, remember that just because something is listed in the sales flier it doesn’t necessarily mean it’s a great deal. Over time, you’ll start learning what are the “rock-bottom” prices for items you buy and how often they go on sale in your area.
3. Only Buy the Produce That’s on Sale
Produce prices can kill your budget — but they don’t have to! One thing we try to do is pretty much stick to buying what produce is in season and on sale. (You can print a Seasonal Produce Chart here.)
For instance, when apples are on sale, I’ll buy a few bags of them and that will be our go-to fruit for the week. When grapes are on sale, we mostly eat grapes for fruit that week. When carrots are on sale, we eat a lot of carrots.
Sure, this means that we eat a lot of the same kinds of produce in one week. It might seem boring, but it sure saves a lot of money. And over the course of the year, we’re eating lots of different fruits and veggies!

4. Print Some Coupons
Once you’ve made your shopping list based upon the weekly sales fliers, check the Coupon Database and Store Deal Match-ups on our site to see if there are any printable coupons available for products you’re planning to buy.
If you’re not familiar with these resources on our site, here’s how they work:
Coupon Database: Just search for the product name of what you’re already planning to buy and the Coupon Database will automatically generate a list of all coupons available for that product. It does all the legwork for you–all you have to do is type in the products you want to buy and print the coupons!
Store Deal Database: We have a listing of the best weekly sales and coupon match-ups at over 100 grocery store chains nationwide on the Store Deals Section of our site? Find and click on your store(s) logo here and it will take you to this week’s best deals list for your local store(s).
Quickly scan the list to see if there are any deals you’re interested in doing and print any coupons you’ll need for those deals. You can also click through the link at the bottom of each list to see an extensive sale and deal list put together by a blogger who lives in your area.
(Note: If you don’t want to mess with checking the Store Deal Section every week, you can sign up to have the list of the best deals for your local stores emailed to you each week when the sale ads come up. We’re all about saving you time–and money!)
Taking five minutes of your time to check the Coupon Database and Store Deal Match-ups when planning your shopping trip could easily save you $5 or $10–or more!

5. Ditch Breakfast in a Box
You can save a lot of money and feed your family more wholesomely if you ditch breakfast out of a cereal box! I’m a big fan of make ahead breakfasts — that way you don’t have to worry about cooking a hot breakfast every morning!
Pancakes and waffles can be made ahead of time and frozen. Just whip up a batch of pancakes or waffles, let cool, and then stick in airtight freezer bags. When you’re ready to serve, you can warm them in the oven, microwave, or toaster oven.
Breakfast burritos are a hearty grab-and-go food that teenage boys and men seem to especially love. Make a big batch on the weekends, freeze individually in foil, and then they can just be pulled out and microwaved before heading out the door in the morning. (Be sure to remove the foil before microwaving!)
We love muffins at our house! To make them ahead, just bake your favorite muffin recipe, let them cool, and stick them in an airtight freezer bag or other container. When you’re ready to eat them, just pull out however many you need and microwave or let them thaw for 15 or 20 minutes and they are ready to eat!
Love oatmeal? Make your own instant oatmeal packets! They are quick and easy to make, very inexpensive, and you can get creative adding in a variety of mix-ins.
Find a bunch of other Make Ahead Breakfast Ideas here.

6. Have One Meatless Dinner
If you cut your meat consumption by one meal per week, you’ll usually save close to $5! For most families, it wouldn’t be too hard to cut back on $5 worth of meat each week — especially if you’re willing to get a little creative.
Meatless doesn’t have to mean tasteless. Try making Bean & Cheese Burritos, breakfast for dinner, or even meatless lasagna. Need more ideas? Check out this list of 52 Meatless Meals that I posted earlier today. You can also read my post on How to Live on Beans & Rice for a Week.
If your family isn’t keen on the idea of going completely meatless, stretching your meat with legumes is a great way to save money while still eating meat. Mexican dishes, bean soups, and chili are recipes that you can pretty easily add in extra beans to replace some of the meat without most people realizing it.
Lentils hide especially well in taco meat, too. Just add in cooked lentils to your ground beef along with your usual seasonings and there’s a good chance your family won’t even notice!
Also, stop centering your meal around meat as the main thing and instead view meat as a garnish. Use it as a topping for pizza or salads, or stir some into stir fries or soups. The less the meal’s focal point is a big hunk of meat, the more you’ll likely save.
7. Cook 2 Things From Scratch
You can save so much money off your grocery bill by cooking from scratch. However, if you’re cooking from scratch solely for the purpose of saving money (not for the health benefits or because you enjoy it), make sure it’s worth the return on your investment of time.
If you spend hours in the kitchen and it’s only saving you a $1 or so per hour to make things from scratch, it’s likely not worth your time. That’s why I don’t make homemade tortillas.
I have a personal policy that I must be saving at least $20 per hour to invest my time in any money-saving tactic. This helps me to focus my energy and effort on those things that are really going to make a difference in our budget, instead of exerting half a day on something that really doesn’t change our bottom line.
It’s easy to think that cooking from scratch has to be a huge time investment, but that’s often not the case. In fact, in 10 minutes, you can easily throw a big batch of beans in the crockpot to cook and a loaf of bread in the bread machine.
You’ll never know how much time something will take you or how much you’ll enjoy making it until you’ve actually experimented with it. So go ahead, try making homemade refried beans, homemade go-gurts, freezer-friendly breakfast burritos, homemade baking mix, or homemade pizza.

8. Have a Leftovers Night
We try to have at least one or two leftover nights per week. It saves time, because we don’t have to plan a dinner or make dinner or clean up the dishes from dinner. And it saves money, because we don’t have to buy the ingredients for another lunch or dinner.
It’s such a simple, no-brainer thing, but saving money in simple ways on a regular basis adds up over time! We’ve also found that serving leftovers for dinner on busy nights cuts down on the temptation to grab carryout. So on busy nights, I’ll often set out all the odds and ends in the fridge and declare it a Leftover Buffet night.
For those of you who wish you had leftovers but it seems like your hungry teens or growing kiddos eat everything you make, consider doubling a casserole or soup recipe you’re making a couple times per week and sticking half the recipe in the fridge or freeze before you eat dinner that night. That way, you’re guaranteeing you’ll have “leftovers” to eat later in the week! 😉
My favorite part of eating leftovers for dinner? Less kitchen clean-up!
9. Save Up Your Swagbucks
When we buy specialty ingredients — such as protein powder and olive oil — and we get these with Amazon using gift cards earned through Swagbucks. It’s a great way to be able to afford a few of those high-quality ingredients we love to use in recipes.
I signed up with Swagbucks years ago and have since earned many, many gift cards from them. While much of my Swagbucks credit now is earned from referring readers here (thank you, all!), as I’ve written about, you don’t need to refer others to still earn at least $25 to $40 in Amazon gift cards from Swagbucks — which can be a huge help to your grocery budget!
10. Don’t Impulse Buy
Finally, the best way to save money on groceries is to make sure that you only buy what you planned to buy. Make a menu plan, make a grocery list, and stick with the list.
Also, you’ve heard it before, but it bears repeating: don’t grocery shop when you are hungry or when you feel like stress-eating. And, if you have family members who encourage you to impulse buy, leave them at home. 😉
*****Important Note*****
If you’re new to budgeting and to saving on groceries, please do not go and try to do all of these things this week. That’s a surefire way to set yourself up for overwhelm!
Instead, pick one idea and commit to do it for the next 4 weeks. If you like it and it saves you money, then make it habit. Once it’s a habit, add in another idea. And so on and so forth.
Don’t try to radically overhaul your grocery budget overnight. Focus on cutting it by 1-3% every month. It’s much more doable and sustainable this way — and there’s a good chance you’ll actually stick with it!
What are YOUR ideas for simple strategies to cut your grocery bill by at least $5 per week? Share them in the comments!

How I Drink a Gallon of Water Every Day (& how it saves money!)
How I Drink a Gallon of Water Every Day (& how it saves money!)

“You drink a GALLON of lemon water every day?!?!”
Yes, I do! And it’s completely changed my skin, my energy, and my overall health. (Well, that combined with a bunch of other dietary and lifestyle changes. You can read more about those lifestyle changes here.)
As I’ve alluded to this online and offline over the past 21 weeks I’ve been doing this, many people have asked a number of questions on how I manage to do this, what advice I’d have to help them drink more water, and if I spend all day long in the bathroom as a result! 🙂
For those wondering how on earth this is feasible, here are my tips:
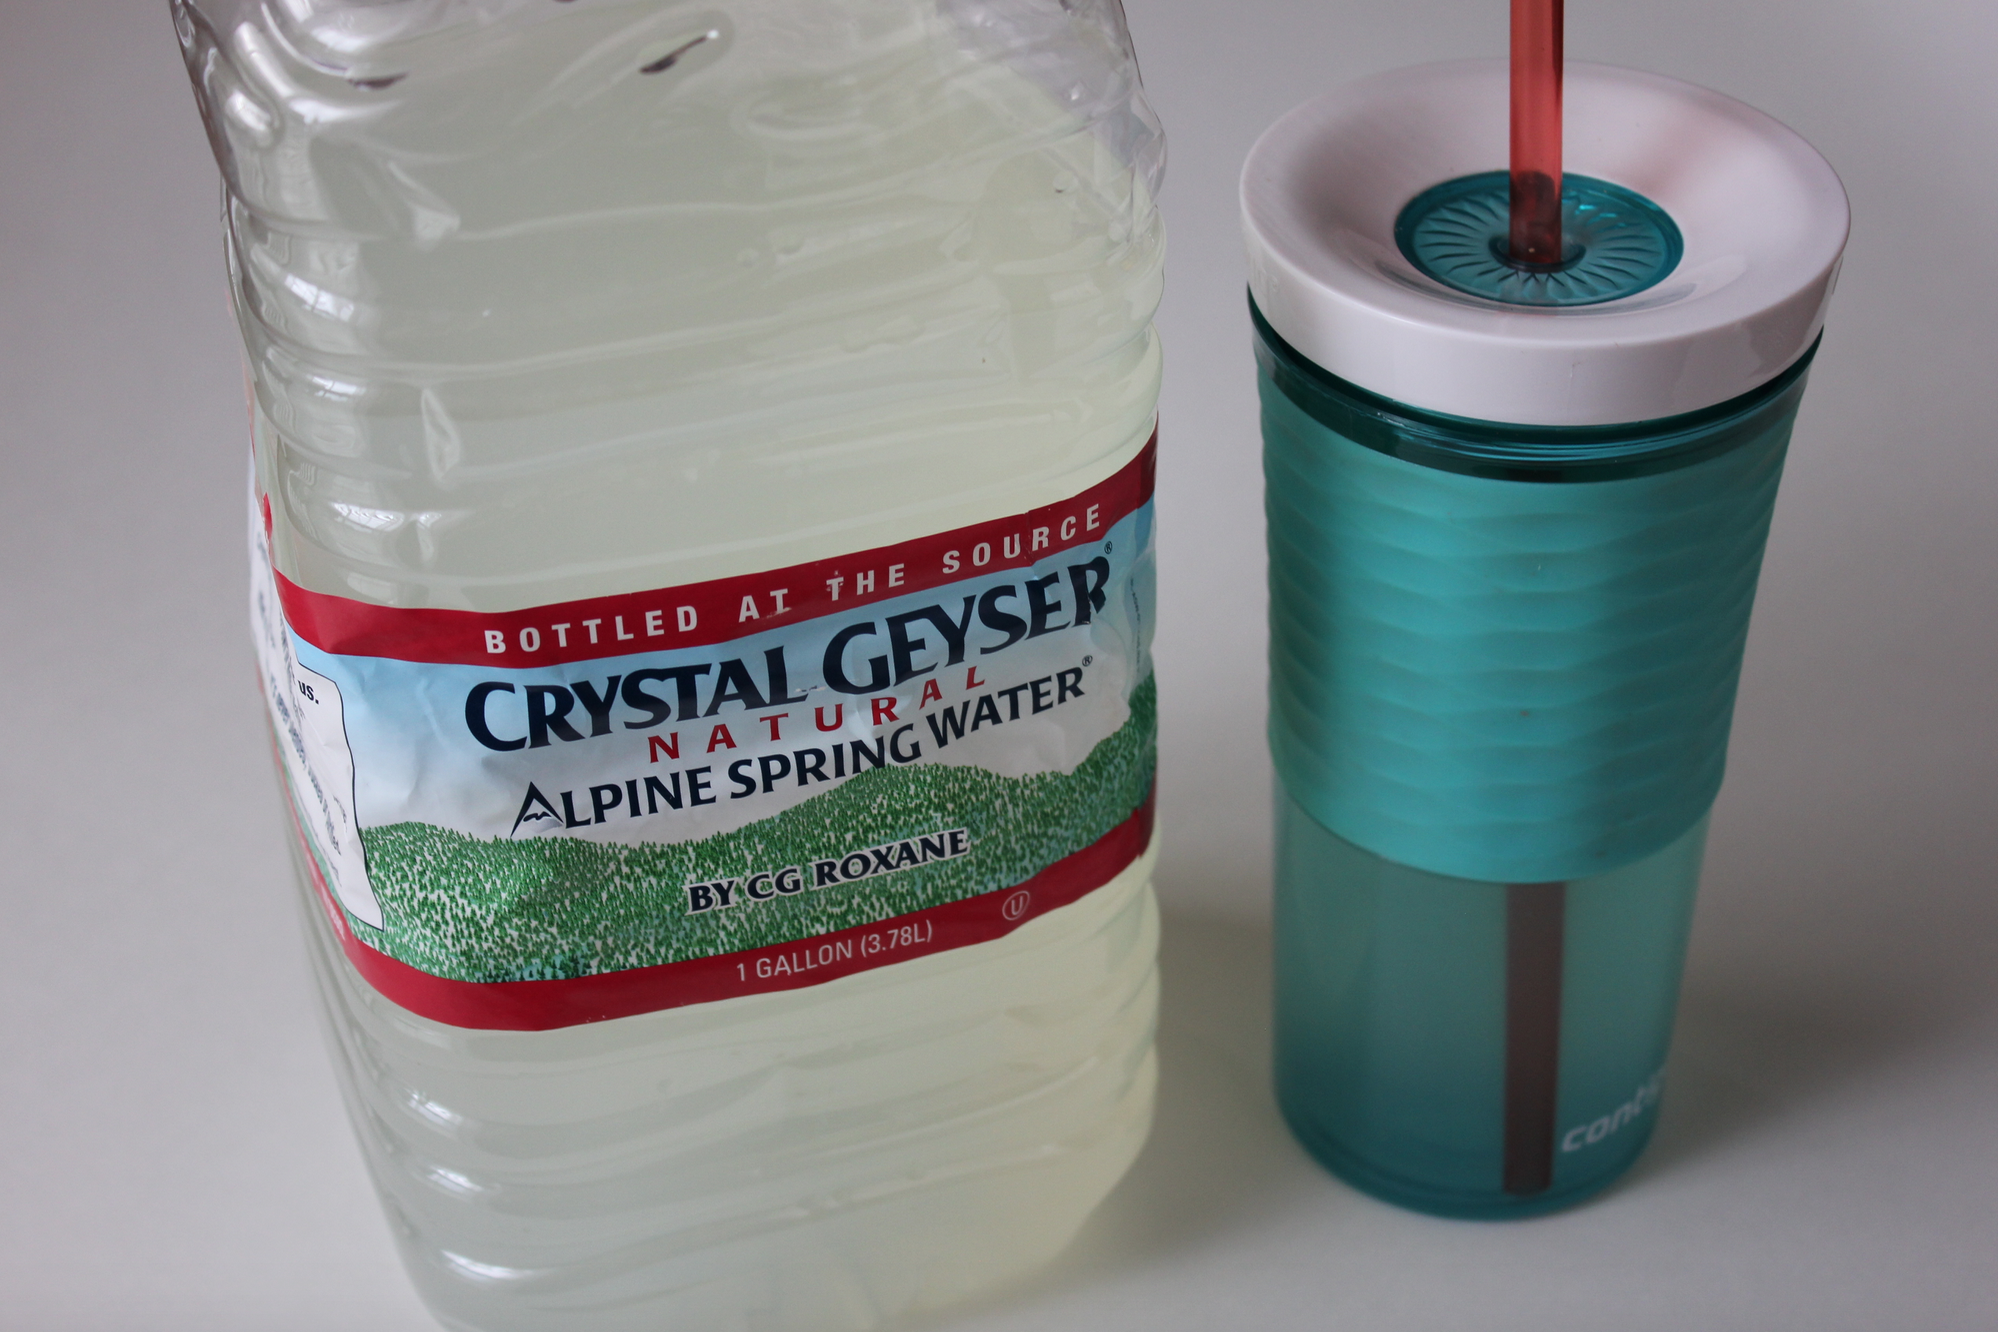
1. Use a Gallon Jug
I’ve found that it’s so much easier to track how much I’m drinking if I fill up a gallon jug every single morning and just drink from that all day long.
Because of the health benefits, I drink lemon water. So I fill up a gallon jug with approximately 10 Tablespoons lemon juice to 1 gallon water. I use bottled lemon juice most of the time, just to save time — and because I’d be going through a TON of lemons otherwise!
I buy a new plastic gallon jug every other week. I know some people recommend using glass instead of plastic, but because I take my jug with me much of the day, it’s more practical to use plastic. If I were home all of the time, glass would totally work.

2. Find a Tumbler You Love
One of the keys I’ve found for drinking more water is to drink from a tumbler that I love. I recommend getting a tumbler with a lid and a straw. It makes it easier for taking it with you everywhere, makes it more fun to drink, and prevents spills!
I use the Contigo tumblers. They are a little pricey to invest in but I use one all day every day, so it’s been very worth it to me. Plus they come in fun colors!
3. Sip Water All Day Long
Start sipping on water as soon as you get up. Your body is typically pretty dehydrated in the morning and drinking a tall glass of water within 30 minutes of waking will do wonders for your energy and will likely help you feel better, too!
I keep my tumbler next to me pretty much all day long and just sip on water as I’m working, as I’m cleaning, as I’m out running errands. I take my tumbler with me pretty much everywhere — even if I’m just running in somewhere for 30 minutes. And I take my gallon jug of water with me anytime I’m going to be gone for longer than an hour.
It makes me so happy to see the gallon jug of water going down all day long and I always do a little happy dance when I get down to the “bottom of the barrel”!
Note: I try to drink more water in the mornings. I find that I’m thirstier in the mornings — especially because that’s when I work out. Plus, I’ve found that it’s easier to drink more in the mornings. So I aim to only have 2-3 more tumblers of water to drink after 3 p.m.
In addition, this will help you sleep better at night — especially at first before your body has adjusted — because you’re not having to wake up every three hours to use the restroom.

4. Give Your Body Time to Adjust
It will be hard at first and you will feel like you go to the bathroom all. the. time. But don’t give up. Keep with it — even when you feel like you’re crazy for drinking so much water.
Your body will adjust over the course of a few weeks and you will no longer be heading to the bathroom twice every hour! 🙂 I promise!
In addition, if you’re anything like me, within a few weeks, your skin will start to look healthier and less dry, you will discover you have more energy, you have fewer aches and pains, you rarely ever have headaches, your digestive system is really regulated, and you are hungrier and thirstier — all while you may even lose a little weight!
And, if you’re anything like me, you realize that you probably have been dehydrated all of your life and you now love and crave the taste of water and don’t want to go anywhere without having a good supply of it with you!!

How Drinking Water Saves You Money
If you typically spend money on soda or coffee every day, switching to mostly drinking water instead can save you a significant amount of money!
For instance, let’s say you spend $1.50 per day on a coffee or a soda. If you switch to water or lemon water, you’ll save at least $450 per year. And that’s even adding in the cost of buy a bottle of lemon juice every other week (about $50 total — depending upon where you buy it from) + investing in nice tumblers ($20).
Need more proof? Read this post from a reader on how they save $500 per year by drinking more water.
In addition, if you switch from soda or coffee to mostly drinking water, you’ll likely have fewer headaches and cramps, you’ll probably have more energy, you’ll likely lose at least a little weight. Without spending a dime!
More inspiration:
Note: I’m not giving medical advice here, just sharing what has worked for me. Please do what is best for you and your body and get the advice of medical professionals if you’re not sure whether drinking more water is right for you or not. I’m just answering the question I’ve been asked over and over again the last 21 weeks I’ve been doing this!!
How to Actually Stick With Your Grocery Budget
This is Day 4 of the 5 Days to a Better Grocery Budget series. If you missed the previous posts, read Day 1 here, Day 2 here, and Day 3 here.
So far in this series, we’ve talked about: how there is no one right way to set up a grocery budget, how much you should spend on groceries, and how to track how much you’re spending.
Today, I want to tackle one of the most important parts of sticking with a grocery budget… namely, how to actually stick with it!
You can have all the best intentions in the world, you can set up an amazing grocery budget, and you can create a really good accountability system, but if you don’t actually follow through with it, you’ll never be successful at grocery budgeting.
Before we talk about some practical tips on how to actually stick with your grocery budget, I want to first address three things I don’t want you to do. Because if you do any of these three things, it could keep you from being successful in following through with your budget.
1. Don’t Make Excuses
I often hear people say things like, “I can’t have a grocery budget because we live in a high cost of living area.” Or, “We can’t stick to a grocery budget because we have variable income.”
Here’s the deal: You can sit there and make excuses or you can get up and do the best you can do with the situation you’re in and the income you have. It’s your choice.
If you need encouragement for setting up a grocery budget — even if you have a weird or difficult current life situation — be sure to read the comments on this post where folks all over the country tell about where they live, how many people are in their family, and what their grocery budget is. I think it will really inspire you.
You can do this, too! Nothing’s stopping you from success except your own excuses!
2. Don’t Stress Over Making Mistakes
Remember, if you’re brand-new to budgeting, you will make mistakes. You will probably find that there are times when it’s more difficult than you think it should be.
You will probably go over-budget some in the beginning. This is normal. This is how you learn and grow and get better.
When you make a mistake, don’t beat yourself up. Don’t call yourself a failure. Don’t throw up your hands and decide that this grocery budgeting thing isn’t for you.
Remind yourself that this is part of the learning curve, think about what you can learn from you mistake, and consider what you need to change or do differently so you don’t make the same mistake again. And then give yourself grace and get back in the game!
3. Don’t Worry if You Have to Tweak It
You will likely need to tweak the budget as you go — especially if you are new to budgeting and just picked a number that you think will work. As real-life happens and you are actually trying to stick with this number that you had initially thought would work, there’s a good chance you’ll find you need to change it.
That’s totally okay and acceptable. In fact, I always tell people that it usually takes 3-6 months when you’re brand-new to budgeting to really figure out what a good number is. Tweaking is part of the process!
In addition to the initial tweaking, you’ll also want to tweak your budget as your needs and your family changes. As time goes on, if the number you have chosen just isn’t working and is making your life miserable, it’s 100% okay to tweak that number again.
Like I said earlier in this series, a good grocery budget is one that works for you and your own family. So be sure to regularly re-visit the number you’ve chosen to see if you need to change it.
We’ve significantly increased our budget the past two years because that is what was best for our family. I don’t feel guilt about that. Instead, I’m grateful that we can do what is best for our own family and that we’ve found a grocery budget amount that works best for us right now.
2 Simple Tips on How to Actually Stick With Your Budget
Plan Your Menu With Your Budget In Mind — Think about how much items cost and keep this in mind when you are planning your menu. If you have no idea, start keeping a price book to help you learn the general prices of items so you can better gauge how much the recipes you’ve chosen on your menu plan are going to cost.
Use a Calculator At the Store — One simple way to save money on your grocery bill is to always bring a calculator with you when you shop. Since I use cash when I shop, it’s important to keep a tally of how much I’ve spent so far so that I don’t get up to the register and not have enough money to pay for my groceries. Keeping a running total also encourages me to carefully evaluate all purchases as I put them into my cart — and it helps ward off the temptation to make impulse purchases on things I don’t really need to buy.
For more inspiration:
- Brigette’s $39 Grocery Shopping Trip + Weekly Menu Plan for 6
- 2 Proven Systems to Track How Much You’re Spending on Groceries
- 6 Ways We’re Keeping Our Grocery Budget Low — Without Using Coupons
What help you to stick with your grocery budget? Do you have any great tips or tricks? I’d love to hear!

A Peek Into My Life This Week
Welcome to my weekly Sunday post where we take a break from money-related posts and I share about what I’m loving right now and give you a little peek into our life from the past week.
What I’m Reading
Last week, I finished three books — making my total for 2017 at 6 books finished so far — yay! (I have no idea if I can keep up this reading pace this year, but I’m having so much fun getting back into reading more again!!!)
I finished reading Candles in the Dark — an old reprint by missionary Amy Carmichael. Her writings are some that I’ve loved since the time I was in my early teens. I’ve read this book before, but it was years ago, so it was so good to re-read it.
I also read Grace Not Perfection. In all honesty, I didn’t think I’d like this book. The pictures throughout it just looked so staged and perfect to me that I was all, “How is this a book on grace not perfection?”
Yes, I might have had a bad attitude. But I read it anyway (I’m not even sure why I decided to actually read it with that kind of bad attitude going into it!) and I really ended up liking it and finding a lot of helpful encouragement and practical advice in it.
The author might have beautiful pictures throughout the book, but she doesn’t at all make you feel like she has it all figured out. And there is a lot of wise inspiration in it, as well as heaps of grace!
Finally, I read The Giver for the first time. And you guys, I don’t quite know what to say about this book. At first, I was so frustrated by the ending. That’s it?!?! No! There has to be more!
And then I had to ponder and ponder over the book. I couldn’t get it out of my brain. What am I missing? Why is it haunting me?
The more I pondered, the more I really started to love the book and the powerful way it reminds us that without pain and suffering, we can’t experience emotional connection or truly feel at a deep level. If we took all of the pain away from the world, it would also take away so much depth and the ability to experience life in full color.
I wished I would have read this book with a book club. And I totally understand why some people love it and some people don’t like it at all. Have you read it? If so, I’d love hear your thoughts on it.
This week, since I finished books from my bookshelf from three different categories, I’m letting myself have the freedom until February to read other books that I recently got that were not in my original stack. Answers to Prayer (an old Christian reprint), A Trip Around the Sun (a spiritually encouraging book), Settle for More (a story-driven book), and Thirty Chic Days (a book on life improvement).
I’m hoping to finish A Trip Around the Sun and Settle for More. I’ll let you know how that goes next week! {See my Reading Goals for 2017.}
What I’m Listening To
This week, I was excited that MacKenzie had a new podcast episode and I loved the episode!
It’s on Cultivating Your Mother Culture — which is probably only a term you’ve heard of if you are familiar with Charlotte Mason and/or Karen Andreola.
You can read this post by Karen for more on what the term means. I especially loved this quote from her post: “Mothers should cultivate their souls so that in turn they may cultivate the souls of their children.”
And I loved what Brandy and MacKenzie talked about on the podcast: That as moms, we should be reading, studying, thinking, and learning so that we can always have interesting ideas to discuss with our kids.
That’s one reason I love to read. Not just for my own personal growth, but so that I have interesting ideas and questions to discuss with my kids, too!
What I’m Loving
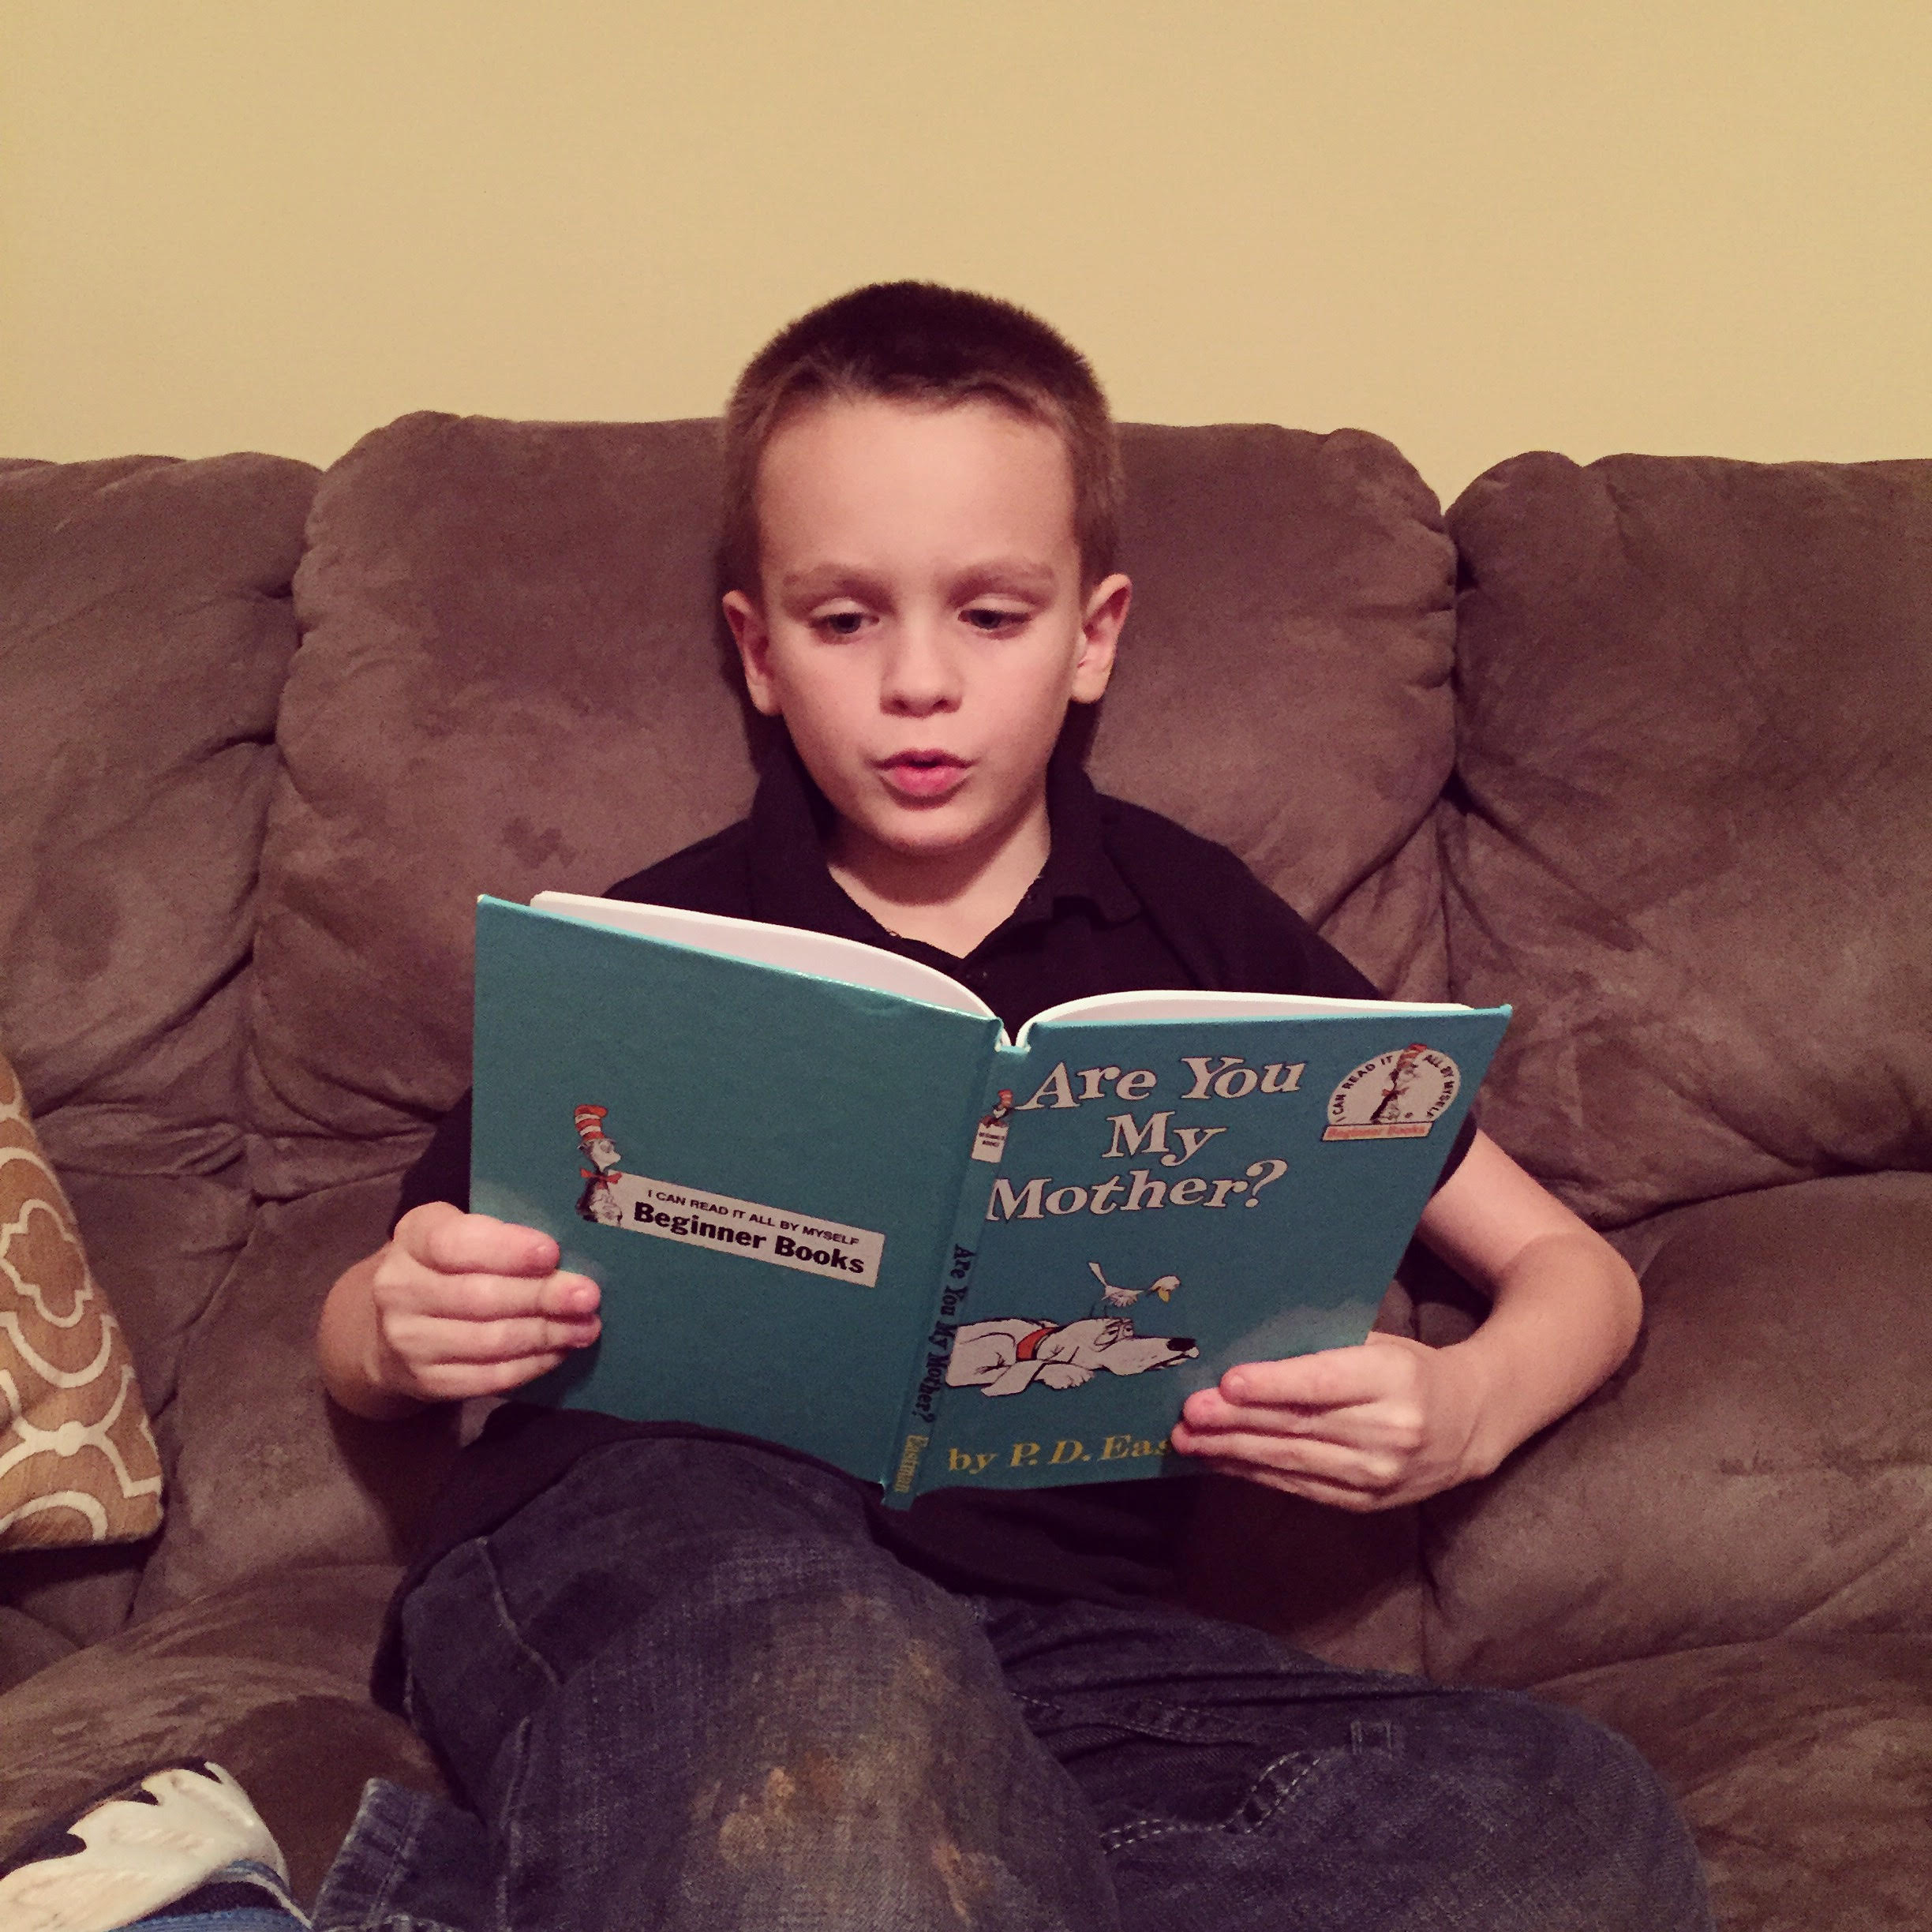
This picture makes me all kinds of happy. He’s worked SO hard this year to master reading and his hard work is paying off!! He started the school year barely reading 3-letter words (despite multiple years and reading curriculums, it just wasn’t clicking) and read the entire Are You My Mother? book to me this week with almost zero help from me!!!
I love that he wants to read to me and he’s finding so much joy in it! (He was reading so intently that he didn’t even notice I was taking a picture. But I just couldn’t help myself.)
These are the moments we mamas treasure in our hearts. (I also love that he’s sporting dirt on his jeans, because, of course. ;))

I got this beauty out earlier this week… after months of keeping her in the closet. I’ve missed her so much and can’t believe I let her just sit there untouched for that long. And now I want to take up lessons again!!
The girls decided that they want to learn a song on their guitar and ukulele to play together with me. They’ve never acted interested in playing with me before, so suffice it to say that my week is MADE!
(For those who don’t know, I used to be a violin teacher and much of my teen years was spent practicing, teaching, and performing violin.)

One of my favorite things to get in the mail is notes from readers. This note came sharing how I inspired reader, Anna, to start her own business selling pure luxurious handmade soaps. She also generously sent me a bunch of handmade soaps from her brand-new Etsy shop. My kids were SO excited about their little mini soaps she sent and I’ve been loving using the soaps every day!
You can follow her Facebook Page here or check out her Etsy shop here.
What I’m Watching
This week, I loved watching this first video in a 3-part video series from Style and Styleability on designing a wardrobe you love.
My husband and I also watched another episode of Poldark. We have four more episodes left in the season and we are trying to make them last as long as possible! 🙂
I also watched some football with Silas, the girls and I watched a Disney movie one night that turned out to be a total dud, and we watched Left Behind for our family movie night.
(The kids had never seen Left Behind before, so it definitely opened up the door for lots of questions, thoughts, and discussions on different viewpoints Christians have on the End Times. We like to present viewpoints we don’t necessarily agree with to our kids and let them ask questions, think for themselves, discuss it with us, and come to their own conclusions.)

What I’m Changing
After a long time of having a pattern in what posted on Instagram (quote, b&w photo, color photo), I decided to buck my system and go back to just posting whatever strikes my fancy again.
I made this decision for a few reasons:
1) I was feeling a little constrained by the system I had created.
2) I wasn’t posting as often as a result — because I didn’t always have a good picture for whatever photo was supposed to come next, so I’d just wait to post until I found the right picture.
3) I wasn’t loving how it was looking in my feed — it just felt a little too dreary and cluttered for where I am right now and felt it was a poor representation of the joy and renewed clarity in my heart and life.
So, since I get to be the boss of my own Instagram, I’m going back to eclectic posting. 😉 And it feels good! (If you’re not following me on Instagram, you can follow me here.)
In Case You Missed It
YouTube Videos I Posted This Week:
- 2 Books I Read Last Week + 4 Books I Plan to Read This Week
- My New Daily Routine for 2017
- My #1 Tip for Finding Frugal Friends
Posts I Wrote This Week:
- 2 Proven Systems to Track How Much You’re Spending on Groceries
- How Much Should You Spend on Groceries?
- 5 Days to a Better Grocery Budget
- All The Details on How I Made a Full-Time Income Blogging in November
- Our Week at an Extended Stay America (my completely honest review)
What are you loving, reading, watching, listening to, or changing this week? I’d love to hear!

10 Ways to Make Extra Cash if You’re Good at Photography
Guest post from Ashli from The Million Dollar Mama
I have a lot of friends who are talented photographers and I know that for many of my photographer friends, there are periods of feast and periods of famine. This got me to thinking – how can photographers make extra money?
After doing some brainstorming, I’ve come up with 10 ways to make extra cash if you’re good at photography, beyond your standard session fee.
1. Sell Stock Photos
Selling stock photos could be a great way to make some passive income from your photography. Once you’ve taken some great photos, you can upload them to a site like Shutterstock or iStockPhoto and make money every time someone downloads your photograph.
2. Teach Photography
There are many people interested in learning more about photography from a talented photographer. You could teach classes at your local community center, or even create your own online course and upload it to Udemy.
3. Social Media Photography
For social media sites like Instagram, having great images is absolutely essential. You could work with businesses taking photos specifically for their Instagram feed, or you could specialize in flat-lays, a trend that’s super popular on Instagram right now.
4. Take Pictures at Local Events
Local events such as county fairs, spartan races, 5k’s, etc could be a great way to make some extra money. Get in contact with the organizers and see if they’d be interested in hiring you to take photos for the event, which people can download and purchase. You could also sell pictures to local newspapers.
5. Make Greeting Cards
Another way to make extra money from your photography is to start making your own greeting cards, featuring your unique, beautiful pictures. You can upload and sell these on a site like Etsy.
6. Start a Photography Blog
If you’re also talented at writing, you could start your own photography blog featuring product reviews, recommendations, tutorials, photography tips – the possibilities are endless!
7. Take Real Estate Photos
Great photographs are an essential part of successfully marketing a house, but if you’ve looked on Zillow recently, you might have noticed that a lot of realtors are sorely lacking in this area. Do some research on local realtors in your area, and offer to take professional photos of their listings.
8. Make a Calendar Featuring Local Businesses
Each month you can feature one of your photographs, and a local business can offer a special deal or coupon. You could charge businesses for advertising space, or you could offer free advertising in return for local businesses selling your calendar in their store.
9. Sell Products Featuring Your Photography
Graphic t-shirts, mugs, pillows, baby onesies, baseball caps – there are endless possibilities when it comes to products you could sell featuring your photography, and sites like CafePress make it super easy to set something like this up.
10. Enter Photography Competitions
An often-overlooked way to make some extra money is by entering photography competitions. A local Tennessee magazine that I receive in the mail every month regularly holds photography competitions that offer cash prizes! I’m sure most states have something similar, not to mention the many online photography competitions.
Do you have any other ways you make extra money from your photography?
Ashli Sweat is a freelance writer, blogger, wife to an active duty soldier, and mama to a sweet little boy named Sean. She loves finding ways to save money, make money, and live life to the fullest. She currently lives in Tennessee, but home is wherever the Army sends her (next up is North Carolina!)
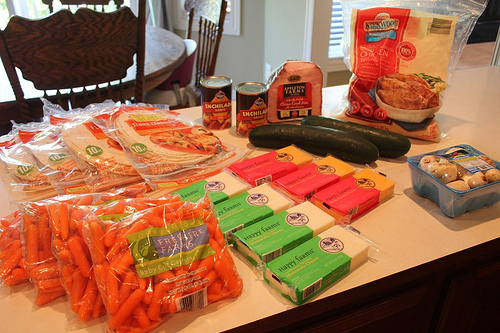
Brigette’s $39 Grocery Shopping Trip and Weekly Menu Plan for 6
Brigette’s $39 Grocery Shopping Trip and Weekly Menu Plan for 6
I didn’t spend as much on groceries this week – but that’s only because we were out of town last week and so we made a quick grocery run this past weekend when we got back (one of those unorganized, unplanned kinds of grocery trips… you know, where you are in a hurry and just start throwing stuff in the cart because there’s no food in your house and you are hungry??! :)). Since we still have LOTS of food in the house, from THAT trip, we didn’t need too much this week. As far as meat goes, I will be relying on our freezer stash of venison (my husband got three deer hunting season!) and Zaycon chicken. I think we are done with traveling for a few months, so I’m back to (slightly) more organized shopping trips and meal planning. Hope that everyone had a great holiday season!
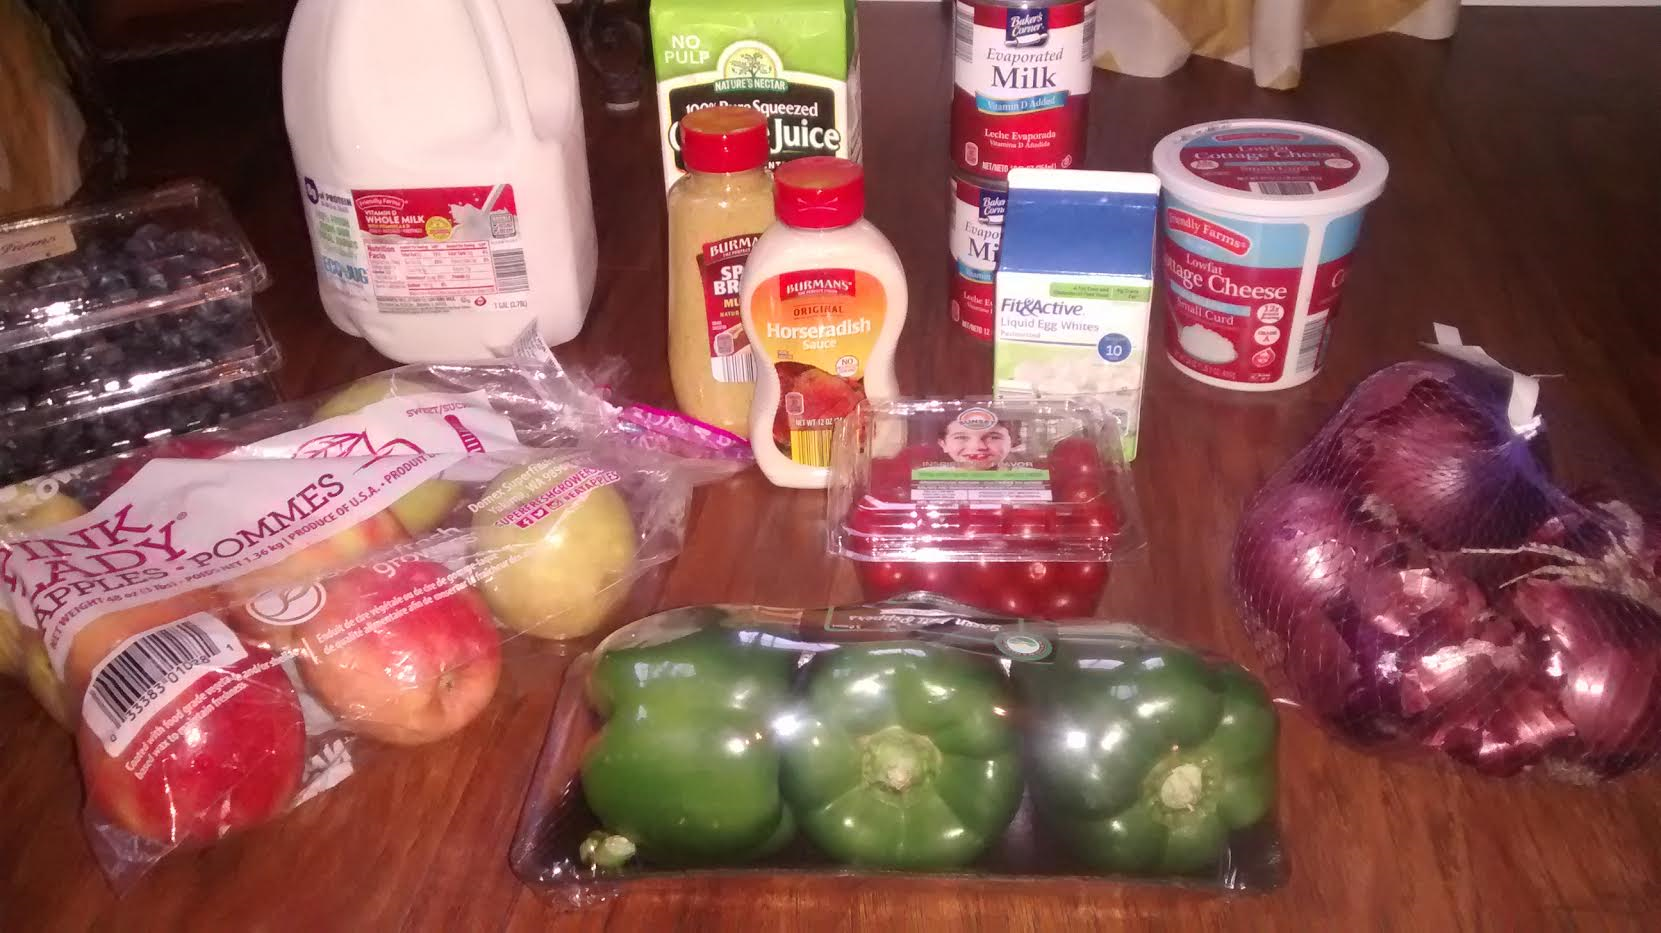
Aldi
1 3-lb bag Pink Lady Apples – $2.99
1 pkg Green Peppers – $1.19
1 64-oz carton Orange Juice – $1.69
2 cans Evaporated Milk – $1.38
1 gallon Whole Milk – $2.59
1 24-oz tub Cottage Cheese – $2.29
1 Spicy Mustard – $0.99
1 Horseradish – $1.29
3 containers Blueberries – $2.98 (Great price! And they are GOOD!!)
1 16-oz carton Egg Whites – $1.99
1 pint Grape Tomatoes – $1.29
1 bag Red Onions – $0.98
Total: $20.65

Harris Teeter Trip #1
(Double Dollar Coupons – I wasn’t able to go until the last day of the sale, so they were out of almost all the best deals. But I did manage to score everything pictured without paying a penny! :))
2 bags Steamfresh Frozen Peas – $2.00, used $1.00/2 Birds Eye Varieties – 1-8-17 SS (exp. 02/27/17) (doubled) – FREE after coupon
3 Snickers Bars – $2.97, used 3 $0.50/1 printable (doubled) – FREE after coupon
1 32-oz tub Stonyfield Organic Yogurt (B1G1) – $1.99, used $1.00/1 Stonyfield Organic (3) Single Serve Products or (1) 30 – 32 oz or Larger Cup or (1) Multipack, 4 pk or larger – 12-4-16 SS (exp. 02/01/17) (doubled) – FREE after coupon
6 pkgs Yakisoba Noodles – $3.00, used 2 $1/3 Maruchan Yakisoba Products, exp. 1/31/17 (SS 11/06/16 R) (doubled) – FREE after coupons
Total after coupons: $0.00
Harris Teeter Trip #2
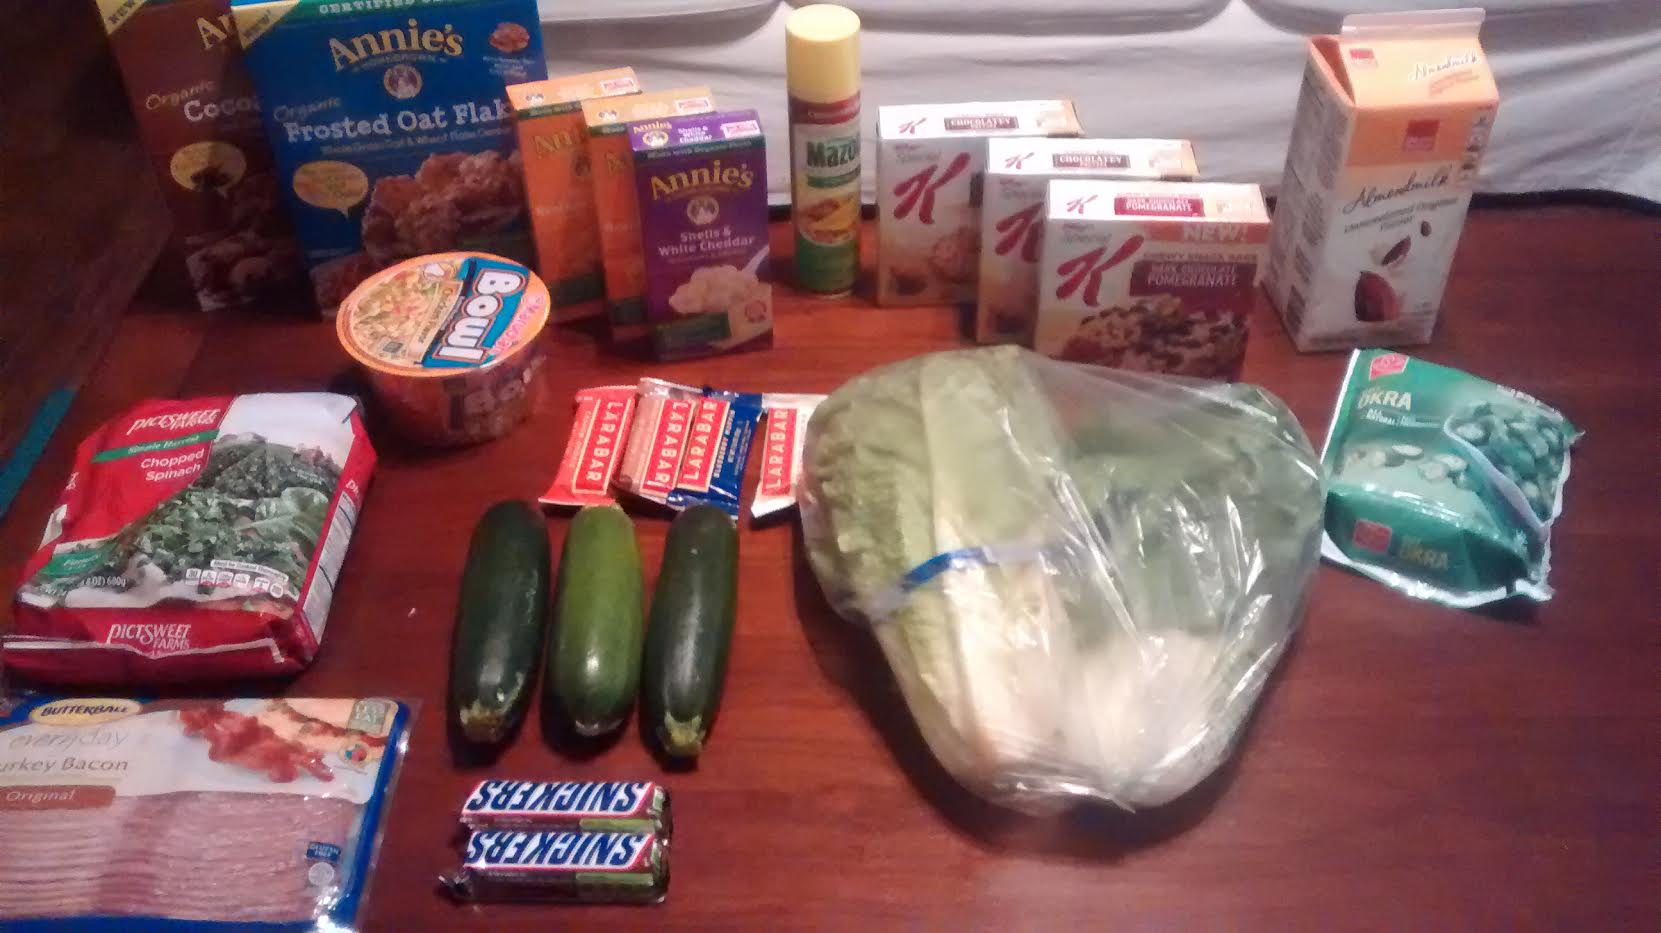
2 boxes Annie’s Cereal – $5.00, used 2 $0.75/1 printable (doubled) – $2.00/2 after coupons
3 boxes Annie’s Mac and Cheese – $3.57, used 3 $0.50/1 printable (doubled), plus $0.50/2 evic – $0.07/3 boxes after coupons
4 Larabars – $4.00, used 2 $0.50/2 printable (doubled), plus $0.50/2 evic – $1.00/4 after coupons
3 boxes Special K Bars – $6.00, used 3 $0.75/1 printable (doubled) – $1.50/3 boxes after coupons
1 Mazola Cooking Spray – $2.59, used $0.55/1 Mazola Oil Spray Product – 11-6-16 SS (exp 12/30/16) (doubled) – $1.49 after coupon
1 Maruchan Bowl – $0.40, used $0.25/1 printable (doubled) – FREE after coupon
2 Snickers Bars – $1.98, used 2 $0.50/1 printable (doubled) – FREE after coupons
1 bag Frozen Okra – $1.29
1 64-oz carton Almond Milk – $2.77
1 pkg Butterball Turkey Bacon – $2.97, used $0.55/1 printable (doubled) – $1.87
1 Family-Size Bag Picsweet Frozen Spinach – $1.74
2 bunches Romaine Lettuce – $1.50
3 Zucchini Squash – $3.36 (Yikes! Too bad Aldi was out this week!)
Total after coupons: $18.50
Grocery Total for the Week: $39.15
Weekly Menu Plan
Breakfasts
Cereal x 3
Oatmeal with Blueberries x 2
Hard Boiled Eggs (veggie omelets for me), Yogurt, Toast x 2
Lunches
Baked Potato Bar x 2
Macaroni and Cheese, Apples, Carrots x 2
Leftovers x 3
Dinners
Spaghetti Carbonara, Homemade French Bread, Roasted Zucchini
Venison Roast in the Crockpot, Baked Potatoes, Carrots
Baked Chicken Breasts with Parmesan Crust, Tossed Salad, To Die For Blueberry Muffins
Homemade Pepperoni Pizza and Breadsticks, Tossed Salad
Mom’s Night Out (I’m going out with some friends, and my husband is in charge of dinner for himself and the children. 🙂)
Chicken Noodle Soup with Homemade Egg Noodles, Butterhorns
Leftovers
OVER-SPENDING EVERY SINGLE MONTH?Grab these FREE Budgeting Sheets!
Click here to download!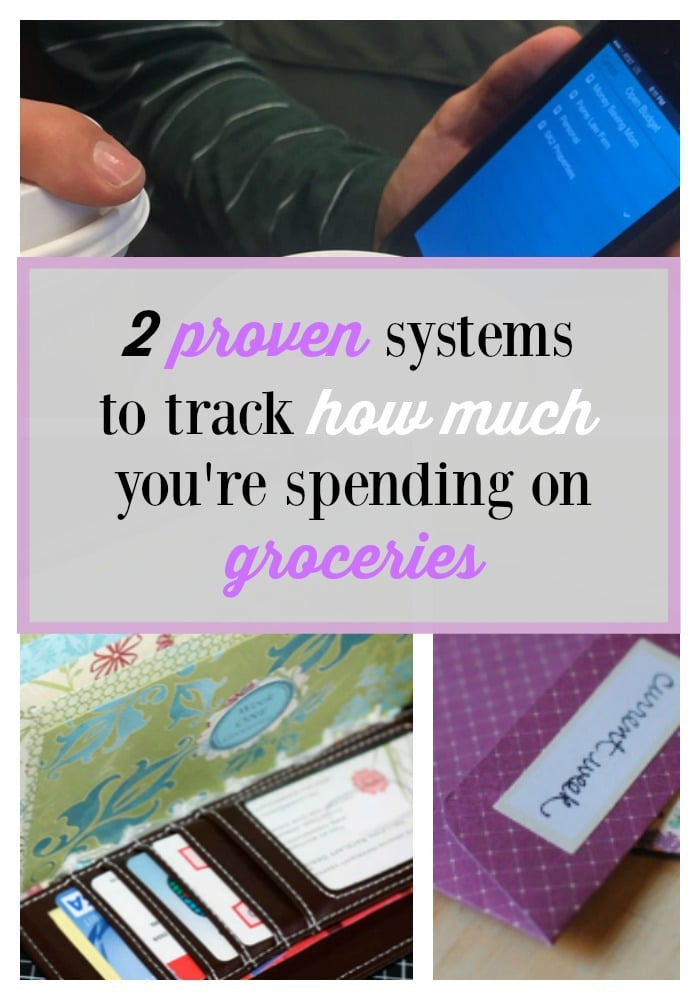
2 Proven Systems to Track How Much You’re Spending on Groceries
2 Proven Systems to Track How Much You’re Spending on Groceries
This is Day 3 of the 5 Days to a Better Grocery Budget series. If you missed the previous posts, read Day 1 here and Day 2 here.
Once you’ve decided on a grocery budget amount that works for your family, you need to set up some sort of accountability for sticking with that budget. This is key for the success of your grocery budget.
You can’t just mentally kind of, sort of have an idea of a grocery budget for it to work.
Really think through what would work best for you, your spouse, and your family when it comes to tracking your grocery budget. There are two different systems I would recommend…
(Download a free Envelope System Template here.)
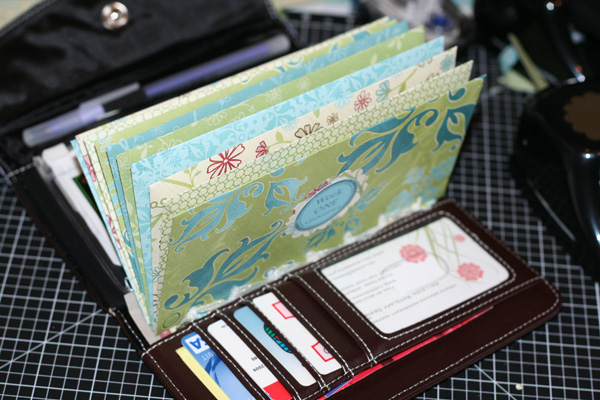
1. Cash Envelope System
A cash envelope system is just that — you take out your allotted Grocery Budget amount in cash every month (or weekly or bi-weekly, depending upon when you get paid) and just take that cash to the store.
The benefits of using cash are that you can’t go over budget. When the money’s gone, the money’s gone! It forces you to stick with your budget and to really analyze each purchase as you’re putting it into the cart.
The drawbacks are that you have to mess with going to the bank or ATM to get cash — which can be a hassle for some people. In addition, some people find that they spend more or spend the cash on non-grocery purchases because they have it in their wallet and it’s “burning a hole in their pocket”.
Need some more encouragement to try a Cash Envelope System? Read these posts:
- 6 Reasons People Argue Against a Cash Envelope System
- The Envelope System Experiment
- Dave Ramsey’s Envelope System
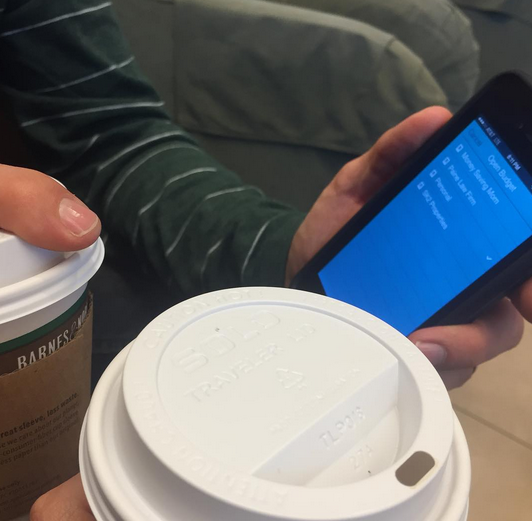
2. Virtual Envelope System
If messing with cash seems tedious to you, a great alternative is to use a Virtual Cash Envelope system through a program like YouNeedaBudget or EveryDollar.
These apps allow you to set up your “cash envelopes” or budget categories and then deduct your purchases throughout the month. This way, you can always have a running total of how much you’ve spent and how much you have left in each budget category you’ve set up.
The benefits of using this system are that you can keep better tabs on what you’re spending your money on and when you’re spending it and how you’re doing on your budget overall at a glance. It’s also nice because you don’t have to mess with sharing cash envelopes if you’re like our family and both spouses pitch in with grocery shopping and other shopping at different times throughout the month.
The drawbacks are that you are swiping a card — which means that you can more easily go over budget than you can when you use cash. Plus, it’s more sophisticated than cash (i.e. you have to mess with inputting the data after each shopping trip and tracking how much you have left in each budget category.
Need some more encouragement to try a Virtual Cash Envelope System? Check out these posts:
- Why We Love YouNeedaBudget
- How YNAB Helped Us Pay Off $50,000 In Debt
- 4 Personal Finance Products & Why They Might Work For You
A Note About Overspending
With both of these systems, you still can overspend. Because YOU are ultimately the one who is in charge of what you spend and what you don’t spend. A budget doesn’t work unless you do! 😉
Overspending could be the result of a self-discipline issue. Or, it could be even deeper than that: you could be overspending because you are trying to fill a void in your life of some sort.
When you are tempted to spend money that you either don’t have, isn’t budgeted, or is an impulse buy, start training yourself to stop and ask: Why?
Why am I wanting to spend this money? What need am I trying to fulfill? Why do I want this thing or experience? What do I think it’s going to do for me?
The more you can step back and ask, “Why?”, the more you’ll be able to get to the root of the issues and deal with those versus just trying to slap a bandage on surface problems — which will never resolve the issues longterm.
Do you use a system to track your grocery purchases? Tell us in the comments!
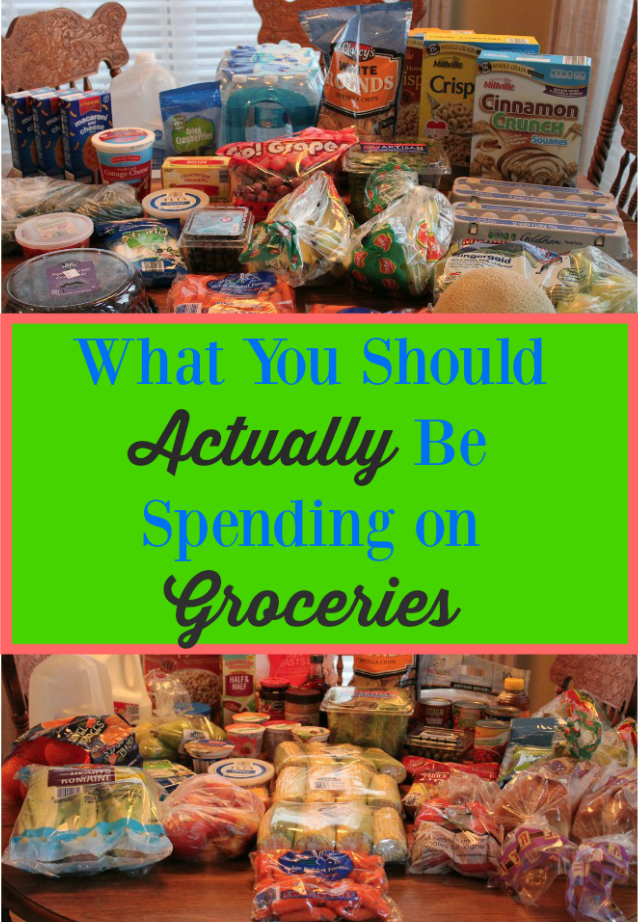
How Much Should You Spend on Groceries?
This is Day 2 of the 5 Days to a Better Grocery Budget series. If you missed Day 1, read it here.
One of the questions I get asked all the time is, “How much should I spend on groceries?”
I wish that there was a simple one-size-fits-all answer to this question. But like I said yesterday, what works for one family won’t work for another family.
We all have so many different variables that play into what a good grocery budget amount is for us. I really encourage you not to just pick some grocery budget number out of thin air because it “sounds good” or you “think it’s doable” or you “know someone who has a budget that low”.
That’s a surefire way to set yourself up for grocery budget failure or at least a whole lot of stress trying to stick with a grocery budget that wasn’t designed with your family’s needs in mind.
What To Consider When Determining Your Grocery Budget:
- Your own situation: Do you have young kids or a crazy work schedule which means you need to buy more convenience foods/products?
- Your family’s dietary needs: Are you gluten-free, dairy-free, or eating according to a nutritional plan that might cost more money?
- Your family’s priorities: Do you like to host lots of people into your home or bake/cook for others?
- Your family’s preferences: Do you like certain foods that are more expensive or like to have more meat and less beans and rice?
- What you’ll include in your grocery budget: Will you include hygiene products/pet products/diapers, etc. in the grocery budget?
There are no right or wrong answers to the above questions. Well, okay, I take that back. There ARE right answers and wrong answers! The right answers are what is best for you and your own family. The wrong answers are trying to do what you think works well for another family.
How to Determine a Reasonable Grocery Budget
After taking all of these things into consideration, also look at your recent grocery receipts to get an idea of how much you have typically spent on groceries over the past few months. I encourage you to come up with a weekly amount that you think is very doable to start with.
If you have the wiggle room in your budget, choose a number that feels somewhat high. Why? Because I want you to set yourself up for success from the get-go.
And remember this: Success in the beginning is just setting up a budget and following it. As you get better at it and more comfortable with it, then you can work on lowering it. But for now, just focus on picking a number that you feel is a reasonable number that will not make you feel stressed or frustrated to try to stick with.
If you need a ballpark idea to go off of, I’d say anywhere between $25 to $40 per person is usually a good figure to start with. (But don’t stress if that feels too low for you right now! It’s better to start somewhere and choose a higher number and stick with it, than to just give up because you can’t get it as low as you’d like to get it.)
Our Grocery Budget Evolution
For the first 8 years of our marriage, our grocery budget was in the $10-$15 per person range. That’s really low, I know, but we were barely eeking by some of those years and I knew that our grocery budget was one area where I could really save a lot of money since I had the time, the know-how, and I found it a fun “hobby” to see how far I could stretch every grocery budget dollar.
I was a hardcore couponer and drugstore game shopper + I planned super simple menus that were based almost entirely around what I could get on a really great deal at the store. This worked well for us and saved us thousands of dollars over those eight years.
However, as our kids came along and got older and our season of life changed, we’ve slowly raised the budget to allow more breathing room. I still LOVE finding a great grocery bargain and am always on the lookout for them when I’m shopping, but I’ve given myself grace to not feel like I need to have the grocery budget super, super low or spend a few additional hours of my week going to multiple stores in order to cut my grocery bill by $50 to $75.
A reasonable amount for our family at this season of life is allotting about $25 per person per week. This allows us to eat higher quality foods, purchase a few convenience foods, have more meat, and keep our menus simple and nutritious.
I could still keep our grocery budget really, really low and I could still enjoy doing it. However, it would take me an additional 2-3 hours per week to realistically make that happen. Right now, because we have the wiggle room in the budget, I’ve chosen to spend those hours on the business where I can make significantly more per hour than I could ever save by using coupons.
For me, that’s what wise financial management is. It’s about weight the return on your investment of time versus your priorities and deciding what are the best use of your limited resources in that season of life.
Your turn: What is your grocery budget, where do you live, and how many people are you feeding? Has it changed over the years? I’d love to hear!
Related: 6 Ways We’re Keeping Our Grocery Budget Low — Without Using Coupons!
5 Days to a Better Grocery Budget (new series!)
Note: I’d been planning this series for a few months, so I had to laugh when I had scheduled the first post for today and then saw that my friend, Laurie, from Passionate Penny Pincher just started her own series called The Ultimate Guide to a Better Grocery Budget. She does such a great job of sharing things and is so inspiring, so if you want some different ideas on how to cut your grocery budget, be sure to check out her series, too!
Are you wishing that you could find a way to get a better handle on your grocery budget? Welcome to a brand-new series I’m running here over the next week called 5 Days to a Better Grocery Budget. It’s been awhile since we’ve talked about grocery budgets and I thought it was high time for a refresher!
As we begin this series on setting up a better grocery budget, I want to start by giving you three important reminders:
1. There is no right way to set up a grocery budget.
I think one of the big reasons people don’t create a budget in the first place is because they are worried they will “do it wrong”.
Here’s what you need to hear loud and clear: there is no right or wrong way to set up a grocery budget. All that matters is that you set one up that works for you and then stick with it.
Yes, I know, I’m sharing such amazingly, incredible stuff here today. {Insert sarcasm.}
But seriously, if you set up a grocery budget and stick with it, you have yourself a successful grocery budget. You are a success!
So stop stressing over the how of setting up a grocery budget. Stop feeling frustrated that you don’t think you’re going to do it right. Just get up and do it and follow through with it. I know you can!
2. There is no magic number that is the “perfect grocery budget amount”.
I promise. I know that you can read other blogs — or even this blog! — and feel like you need to have a grocery budget that is lower than XX amount or you are failing at the whole grocery budgeting thing.
There is no way to fail at your grocery budget except for not having a grocery budget at all. ANY grocery budget that you set up and stick with is a successful grocery budget. And ANY amount you choose that works with your income and takes care of your family’s needs and doesn’t make you miserable is a great amount.
3. There is no grocery budget competition.
Spending less or spending more doesn’t make you less or more of a success or failure. It just makes you uniquely you.
Pick a number that works for YOUR family. For YOUR own needs. For YOUR own season of life. And don’t apologize for it or feel that you need to explain it.
Trust me, I get how easy it is to do both of those things — especially if you have a frugal blog or lots of frugal friends! But this past year, I’m really stepping into the freedom that comes from being okay with doing what’s best for our own family — even if other people don’t agree, don’t approve, or don’t get it.
So breathe a big sigh of relief. You can do this!
Tomorrow, we’ll talk about how to actually start setting up a successful grocery budget!
All the details on how I made a full-time income blogging in November
All the details on how I made a full-time income blogging in November
Thinking of Starting a Blog? Over the years, I’ve received many requests from folks for help on how to start a blog and how to make money blogging. That’s why I put together this comprehensive guide on How to Make Money Blogging with updated information and links.
It includes step-by-step help on how to set up your blog, get started, and make money from blogging. Go here to learn how to make money blogging and get started today!
In 2005, I discovered this thing called “blogging” and decided to try it out. I was a brand-new mom at the time, had recently quit working as a nanny, and was hopeful I could make enough on the side through online ventures to be able to replace my income and be able to stay home.
My husband was in law school and we were living on a beans and rice budget, trying to stay out of debt. We never, ever dreamed that my little blog idea would grow into what it has become.
In all honesty, when I started MoneySavingMom.com, I remember telling people that I hoped to make a side income from it. I never could have imagined that by the end of 2008, I’d be making full-time income from blogging!
And in all my wildest and craziest dreaming, I never would have envisioned that this blog would allow my husband to come home full-time, would provide the means for us to support ministries we love dearly (in the US, in the Dominican Republic, and in South Africa), and would enable us to provide incomes for our small (but amazing!) team.
How I Make a Full-Time Income from Blogging
Over the years, I’ve heard the question again and again and again: How do you actually MAKE money blogging??
People seem intrigued by the idea that our family actually makes a really good income from this blog and other related online ventures.
In these monthly posts, I want to give you a comprehensive and detailed look at our different income streams and expense streams to give you a better idea of what’s working, what’s not working, and how I actually make money blogging. I always find these posts fascinating and inspiring when I read them from other bloggers.
It helps me to learn the real nitty-gritty details of what is and isn’t working, how bloggers are diversifying their income, and what they are experimenting with.
Some bloggers share these types of posts and include specific numbers of exactly how much they make every month. I’ve opted not to do that because I feel like sometimes people can get hung up on numbers and miss the bigger picture.
Instead, I want share detailed percentages of our income and expenses — not only will this give you a very accurate picture of our earnings, but it will be something that is relatable, no matter the size of your blog or the income you make.
My hope is that these detailed reports not only help give you a better picture of how I make money blogging, but I hope they inspire you with new ideas on how you can increase your income or improve as a blogger or online entrepreneur.
Ready for the numbers? Here’s our income and expenses report for the month of November 2016:
November Income
Note: Some of the links below are affiliate links. All of the products listed below are products and services we’ve used before. If you have any questions about any of the income or expenses, you can leave a comment and we’ll do our best to reply.
All Revenue Streams

- Affiliate advertising (See a detailed breakdown of all affiliates we earned income from below.) — 44%
- Digital products (Sales of the Blog Coaching Program, Make Over Your Mornings, Make Over Your Evenings, and Make Over Your Year) — 33%
- Banner ads (We mostly work with AdThrive for this. Erin lists more ad companies here.) — 12%
- Product/Books sales — 7%
- Sponsored Posts — 4 %
Affiliate Revenue Streams Detailed Breakdown
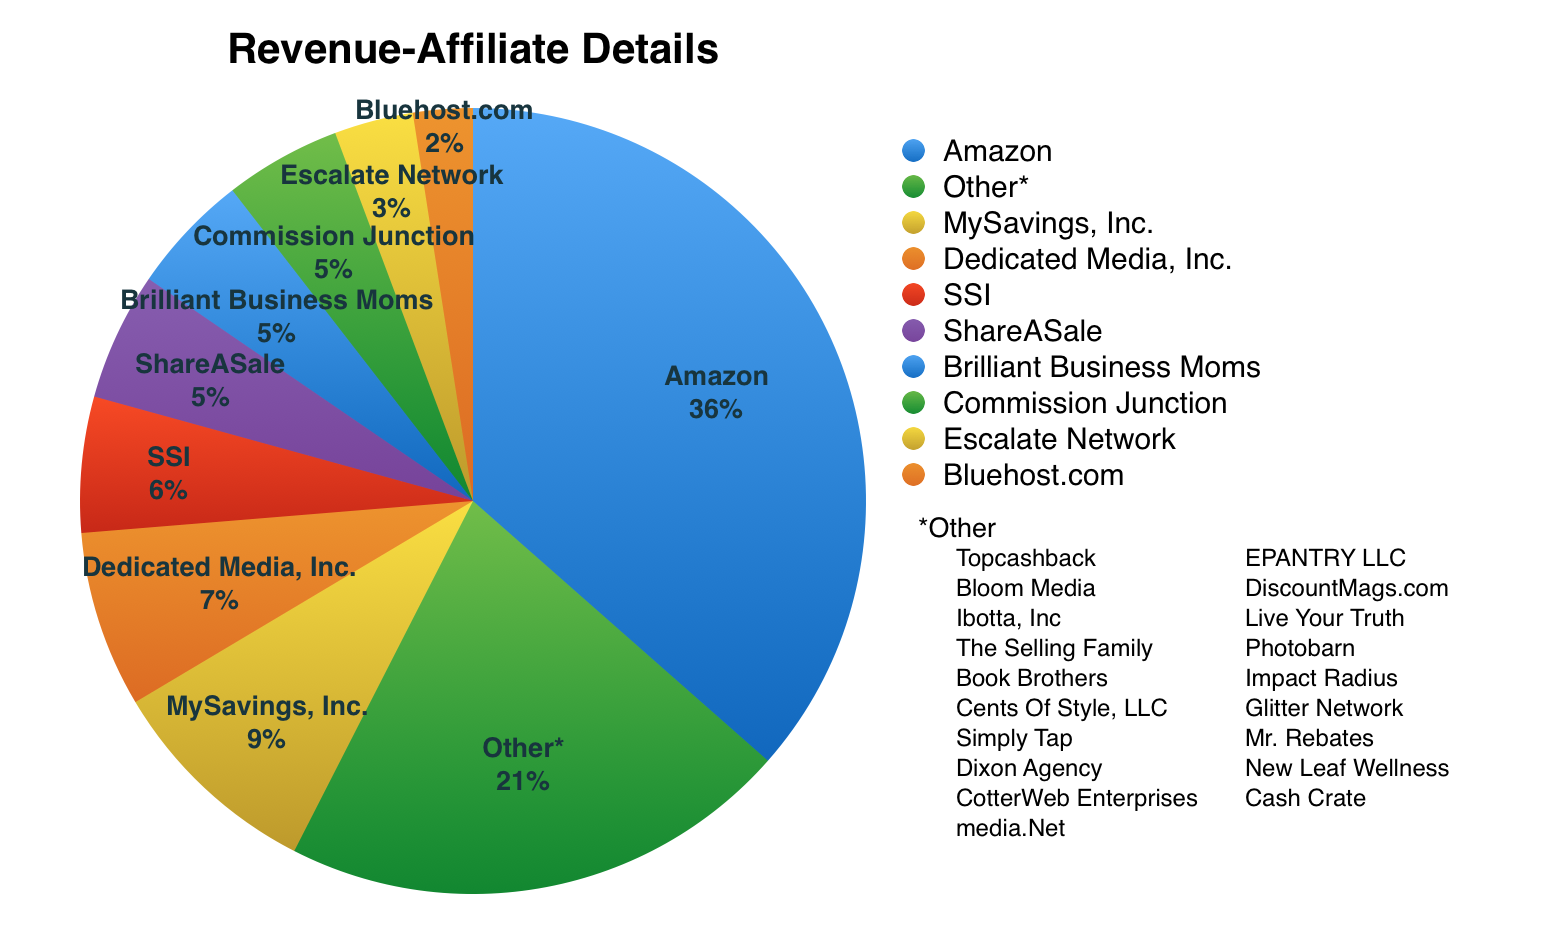
Want to know more how affiliate programs work? Be sure to check out my post on How to Make Money Blogging.
- Amazon — 36%
- Other (DiscountMags.com, 23 Publishing, SecureN1 Transactions, CotterWeb Enterprises, The Selling Family, Topcashback, LinkShare, Ultimate Bundles, Mr. Rebates, Photobarn, Live Your Truth, iBotta, Cents of Style, and more) — 21%
- My Savings, Inc. — 9%
- Dedicated Media, Inc. — 7%
- SSI — 6%
- ShareASale — 5%
- Brilliant Business Moms (this was from a Facebook course I promoted through a webinar I did with Beth Anne) — 5%
- Commission Junction — 5%
- Escalate Network — 3%
- Bluehost — 2%
November Expenses
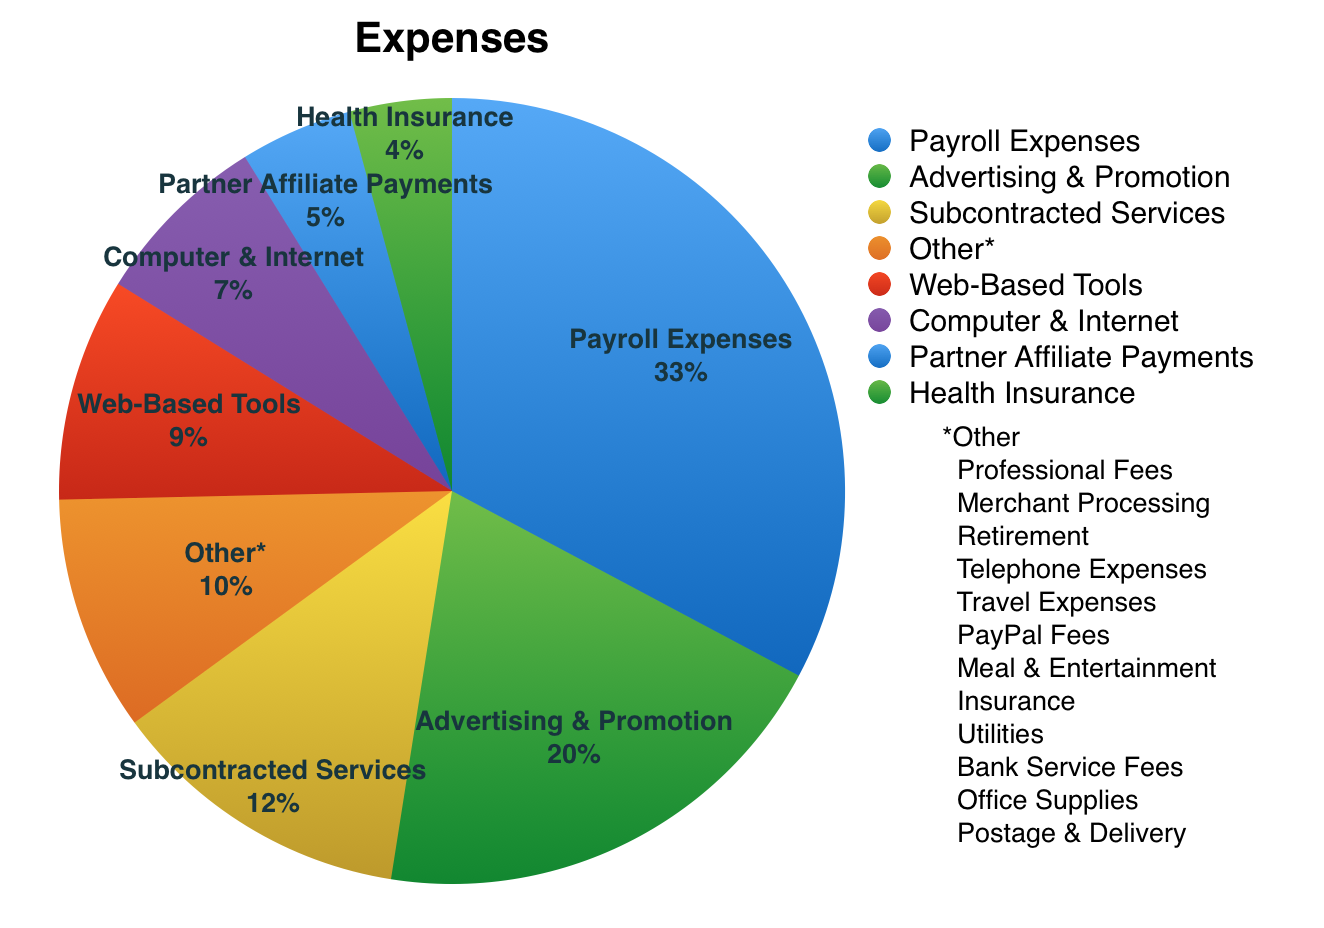
- Payroll expenses — 33%
- Advertising and Promotion — 20%
- Subcontracted services — 12%
- Other (Office space rent, PayPal fees, shipping/postage fees, merchant account fees, bank service charges, utilities, travel expenses, wifi, etc.) — 10%
- Web-based tools (InfusionSoft, Feedblitz, GoDaddy, Dropbox, Harvest, etc.) — 9%
- Computer, hosting, Internet expenses — 7%
- Partner & Affiliate Payments (Sign up for our affiliate program for our products here.) — 5%
- Health insurance — 4%
Percentage of Income Versus Expenses
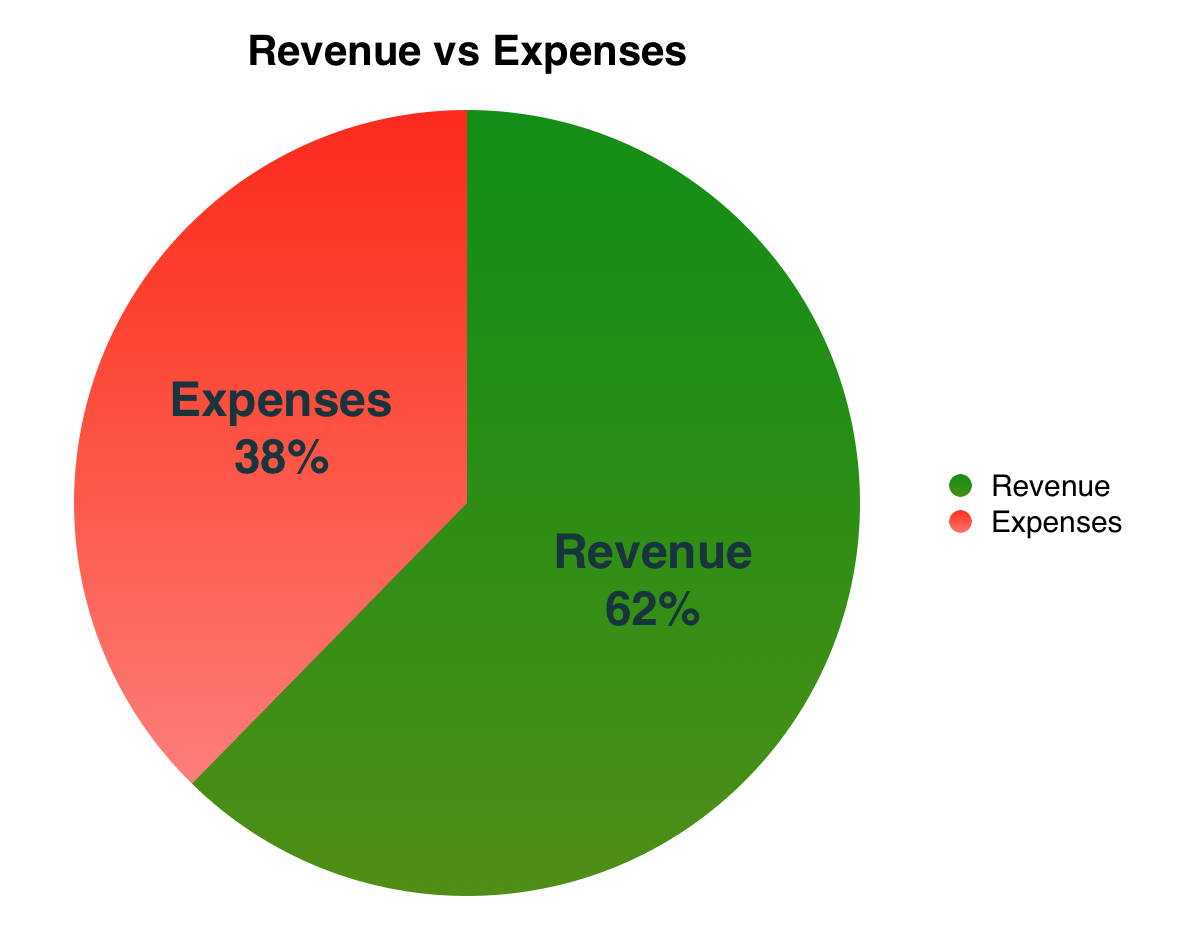
Once again, I was very excited to have a good revenue to expenses ratio. We’ve been working hard to diversify our income and think outside the box and it’s really been paying off!
Recent Experiments
Blog Coaching Program
In November, I launched the 4-Week Blog Coaching Program as an experiment to see if there was enough interest in me doing group blog coaching to possibly put together some products and launch a dedicated blog on this topic.
I’ve blogged for so long that sometimes it feels like I’m a Grandma Blogger instead of a Hipster Blogger and that I’m so old-fashioned about how I do things that I’m not up-and-coming enough to really teach new bloggers. 😉
But I have a passion to help other bloggers and I love to share what I’ve learned and the mistakes that I’ve made. So I just jumped out and put the 4-Week Blog Coaching opportunity out there.
My big hope was to hit 100 sign-ups in 3 days. The cost of the program was $97 and I knew that was a lot of money to ask people to pay — especially kind of on the spur-of-the-moment. But I also knew that if I was going to prove that there was a market for me to teach other bloggers about blogging, I needed to be able to find 100 people willing to pay $97 in 3 days.
Well, I was shocked and thrilled that over 300 people signed up!!! And I ended up have the best time ever doing the blog coaching and can’t wait until I can do something like it again!
ConvertKit Versus InfusionSoft — What a Wild Ride!
So, I told you all that we were switching from InfusionSoft to ConvertKit. We set everything up and starting making the switch. We decided to test it out and learn the program by running all of the Blog Coaching Program through ConvertKit — including all of the sales and the emails related to the program.
Well, we ended up running into all sorts of glitches and issues. It wasn’t with ConvertKit, but with other programs we needed to use in order to run a launch and coaching program.
A lot of people didn’t get their emails or even get on the email list. We had to manually go in and fix all sorts of things. We had issues with payment processing. And we saw some huge holes in the overall system that would cause headaches for us in big ways for future launches.
My team spent a lot of time on the phone with ConvertKit and the other programs we were using to connect everything to run a launch. Ultimately, because of all of the issues and problems and the fact that there didn’t seem to be any fixes for some of them with our set-up and how we wanted to run things for future programs, we decided to go back to the drawing board again.
As of right now, we’re moving forward with trying to clean up everything currently in InfusionSoft and learn InfusionSoft to see if possibly we can make it work for what we’re wanting to do. It’s been hours and hours and hours of effort from my team, but they are making some headway and I’m hopeful that we’ll have a good email/course download system in place in the next few months.
This Month’s Featured Question
This month’s featured question is from Catherine:
Hi, Crystal! I’m a newbie blogger. I’ve started a chart for tracking things like email signups, Facebook page likes, Instagram followers, etc., to see how they’re growing each month. When it comes to Google Analytics, what should I pay the most attention to? Pageviews or users or something else?
This is a fantastic question, Catherine! First, let’s talk about what Google Analytics is and how bloggers use it.
Google Analytics is a Google service that helps website owners track the traffic they get to their website. Using Google Analytics, you can find out how many people have visited your website, what they’ve looked out, how long they’ve stayed, and where they came from.
This is very important information because it helps you get to know your audience better, and knowing your audience is key to running a successful blog.
Here is a quick breakdown of a few of the most important metrics to look at in Google Analytics:
- Pageviews — This metric shows the total number of pages that were viewed on your site. (More pageviews = higher traffic.)
- Sessions — This shows the number of times visitors are actively engaged on your site. As Google Analytics puts it, “A session is a group of interactions (pageviews, purchases, etc.) that take place on your website within a given time frame.”
- Users — This is the total number of visitors that have had at least one session on your site.
- Bounce Rate — Your bounce rate is the percentage of visitors that stopped by, but only looked at one page before leaving your website — meaning they bounced in and out again without exploring your website further. If your bounce rate is high, it might mean that your content isn’t grabbing their attention OR that you’re marketing to the wrong target audience. TIP: Statistics show that visitors to your website will decide if they want to explore your website further in the first 6 seconds of their first visit. (Note: We actually have a high bounce rate because most of our posts are encouraging people to click off our site and go to another site to sign up for a freebie, download an ebook, or get a great deal. So for us, because that is the nature of MoneySavingMom.com, I don’t worry as much about the bounce rate.)
- Average Session Duration — This shows the average length of time each user spends on your website. This is valuable in learning whether or not your visitors are engaged. (Longer sessions = more engagement.)
- Pages per Session — This metric shows how many pages your users are looking at during their time on your website. (More pages = more engagement.)
We keep records of how our pageviews, sessions, and users are compared to last year and the year before. We also pay attention to where visitors are coming from so that we can make sure that what we’re doing is performing.
For instance, right now we’re working on increasing out Pinterest traffic. So we’re paying close attention to which posts are performing the best on Pinterest and then we make sure to promote those the most often on our boards, as well as promoting posts that are similar and keeping what is working in mind when planning and writing new posts!
Highly Recommended Blogging Resources
- How to Blog for Profit Without Selling Your Soul by Ruth Soukup
- Building a Framework: The Ultimate Blogging Handbook by Abby Lawson
- Brilliant Pin Promotion Course by Beth Anne Schwamberger
- FB Brilliance: The Ads Course for Business Builders

Want to Start Your Own Blog?
I’m here to help! Check out my comprehensive guide on How to Make Money Blogging with updated information and links. It includes step-by-step help on how to set up your blog, best practices for blogging, and all the details on how to make money from blogging.
Also, if you haven’t done so already, be sure to sign up for my FREE 5-day course on How I Make a Full-Time Income From Home. This video course will give you an inside peek into my blogging and business journey, will share lots of inspiration and hard lessons I’ve learned in the process, and will encourage you with ideas on how you can make a part-time or full-time income from home, too.
Previous Income Reports
More Posts on Blogging
-
- Help! I Want to Start a Blog, But Isn’t the Market Already Saturated?
- Help! I Want to Start a Blog, But I Can’t Figure Out What I Should Blog About!
- The 3 Most Important Things You Should Do After You Start a Blog
- Why I Think You Should Break the “Blogging Rules”
- 5 Questions to Ask When You Feel Like Quitting Your Blog

Our Week Staying at an Extended Stay America (my completely honest review!)
Our Week Staying at an Extended Stay America (my completely honest review!)
(Note: This post contains affiliate links. Read our disclosure policy here.)
Over Christmas break, our family traveled to Wichita, KS to visit both of our families. While we were there for six days, we stayed at an Extended Stay America. They had contacted us about possibly trying out one of their hotels and because we were going to be staying in Wichita anyway, we said we’d love to try staying there instead of our usual hotel.
It was our first time to stay at an Extended Stay America and we weren’t sure what the experience would be like! I wanted to share a really honest review of our thoughts on this hotel chain for those of you who might be interested in trying out this hotel chain for an upcoming vacation or some travel you have planned this year.

First off, Extended Stay America is designed for longer stays and is a really affordable option compared to most hotel chains — especially if you are planning to stay somewhere for a week or longer.
From the research I did, you’re usually going to pay around $69 to $79 per night for a regular room. However, they offer weekly, biweekly and monthly discounted rates.
Plus, they have discounts for seniors and military and government personnel. They also have a free Extended Stay Rewards Program where you can earn instant rewards + get $2500 annual savings on other brands.


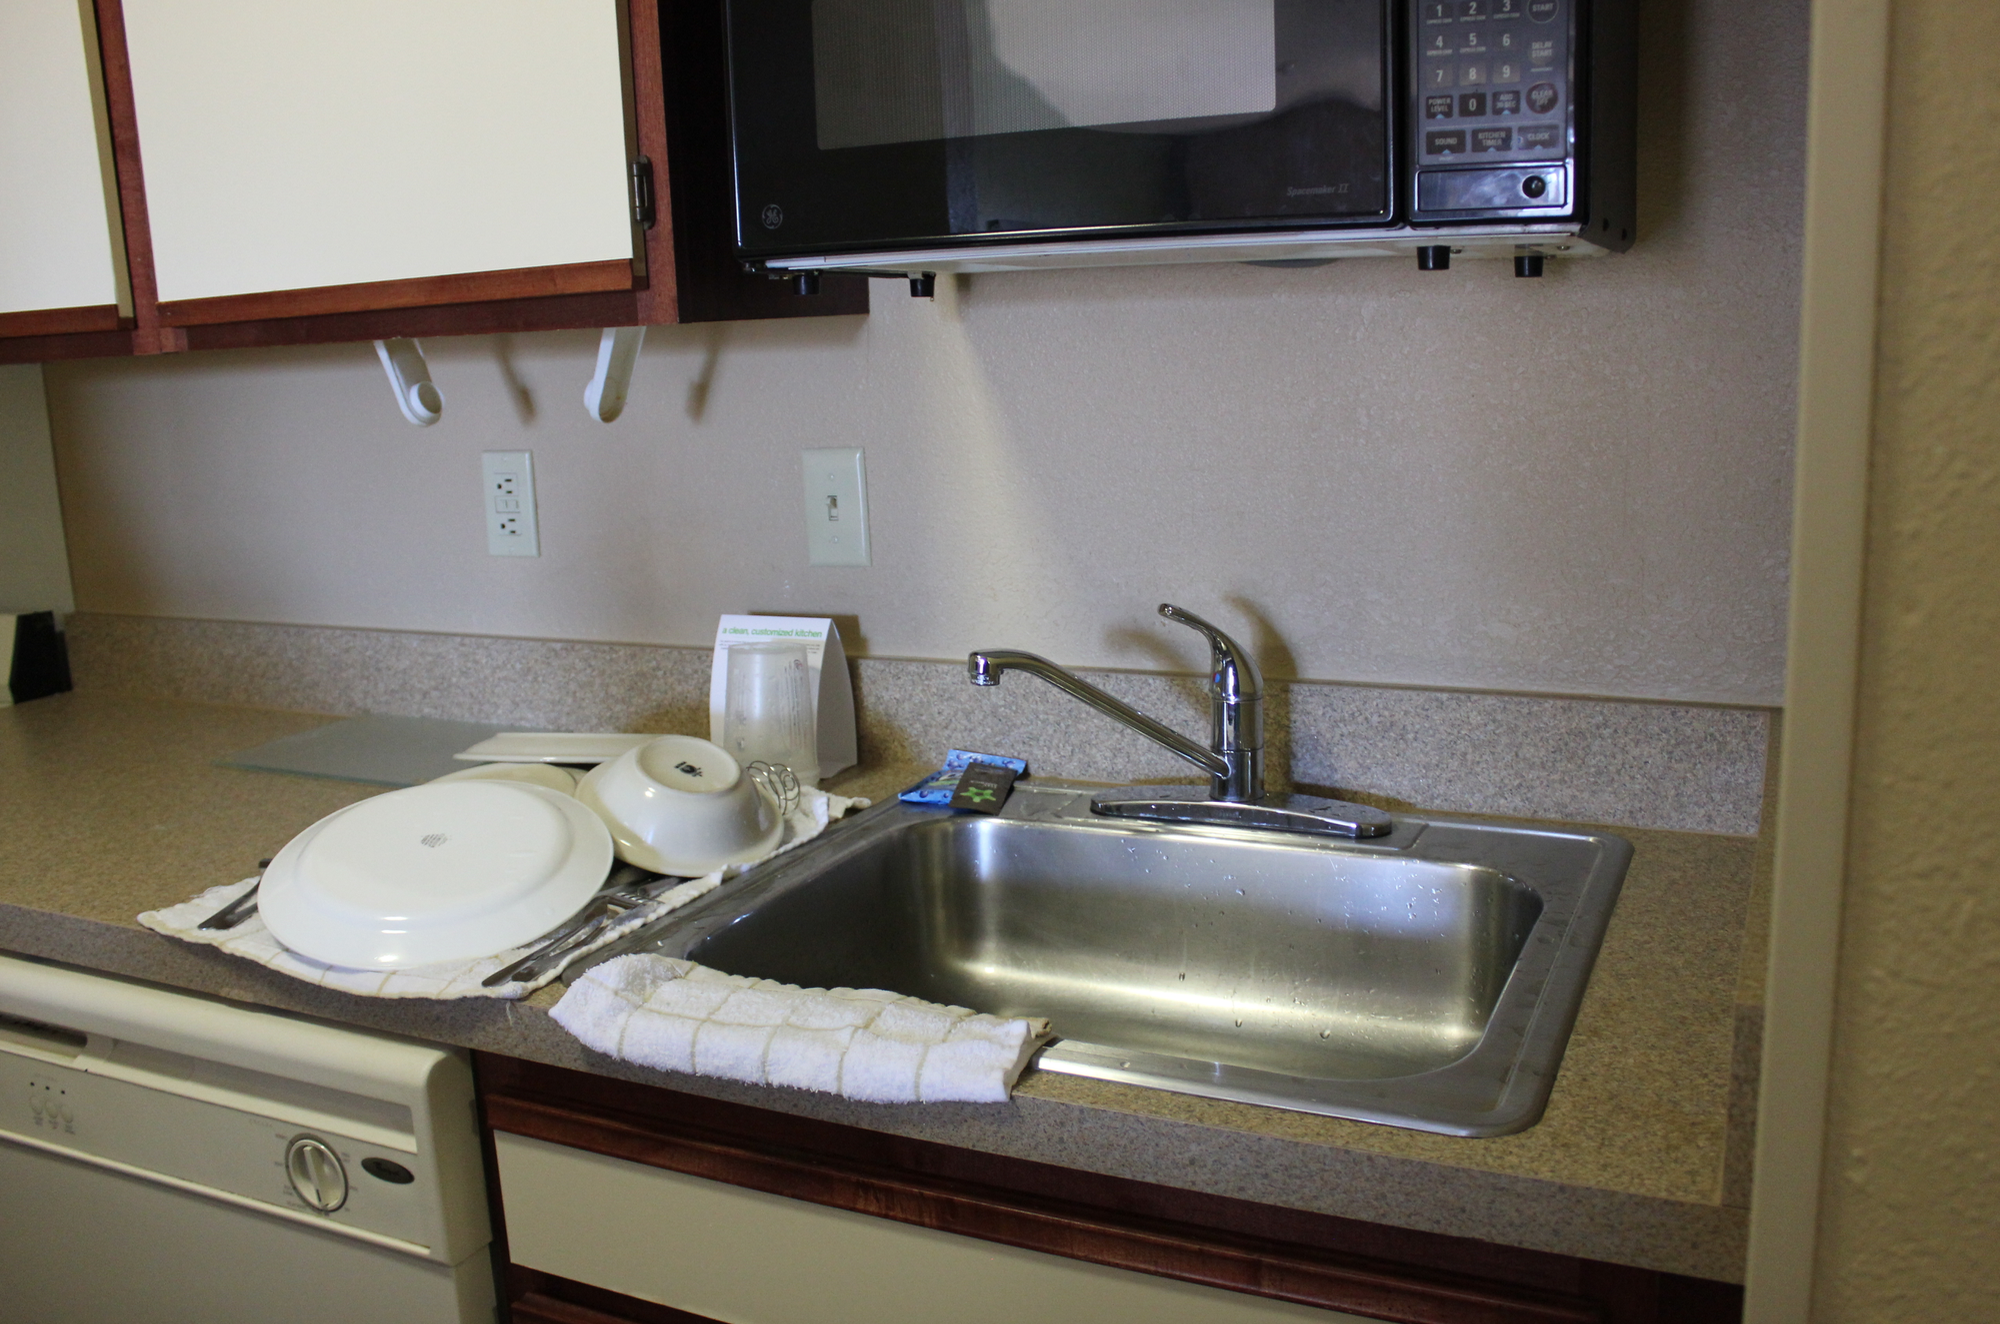
The rooms are spacious and every room has a full kitchen! We loved having the ability to bring all of our own food and cook all of our meals in our room! It definitely not only allowed us to eat healthier, but it also saved us quite a bit of money.
No matter where you stay or what room you book, every single room at all locations has a fully equipped kitchen with a full-size refrigerator, stovetop, and microwave. You can request a large assortment of different types of kitchen items — we got pots, pans, dishes, utensils, and a few other items. There were a number of other appliances we could request, too.
Some locations even have ovens and/or dishwashers! Because we got a larger room, ours had both.
They also offer a FREE grab-and-go breakfast every morning. This free breakfast included: coffee, hot tea, hot chocolate, instant oatmeal, pre-packaged muffins, and an assortment of granola bars.


They also offer free in-room wi-fi and cable. I will say that the free wi-fi speed was a little on the slow side and we ended up paying $3 per day to upgrade to the much faster premium wi-fi. I thought $3 per day was incredibly reasonable and the premium wi-fi was much faster and worked on up to six devices!


The rooms aren’t fancy, but they are very adequate and we found the facilities to be clean. They also offer a small workout room that had three different pieces of fitness equipment in it.
They also have laundry facilities on-site. It cost about $5 in quarters for a load of laundry to go through the washer & dryer (including the cost of detergent). This seemed high to us, however, we haven’t used a laundry mat in ages, so I have no idea what the going prices usually are for doing laundry at laundry facilities!
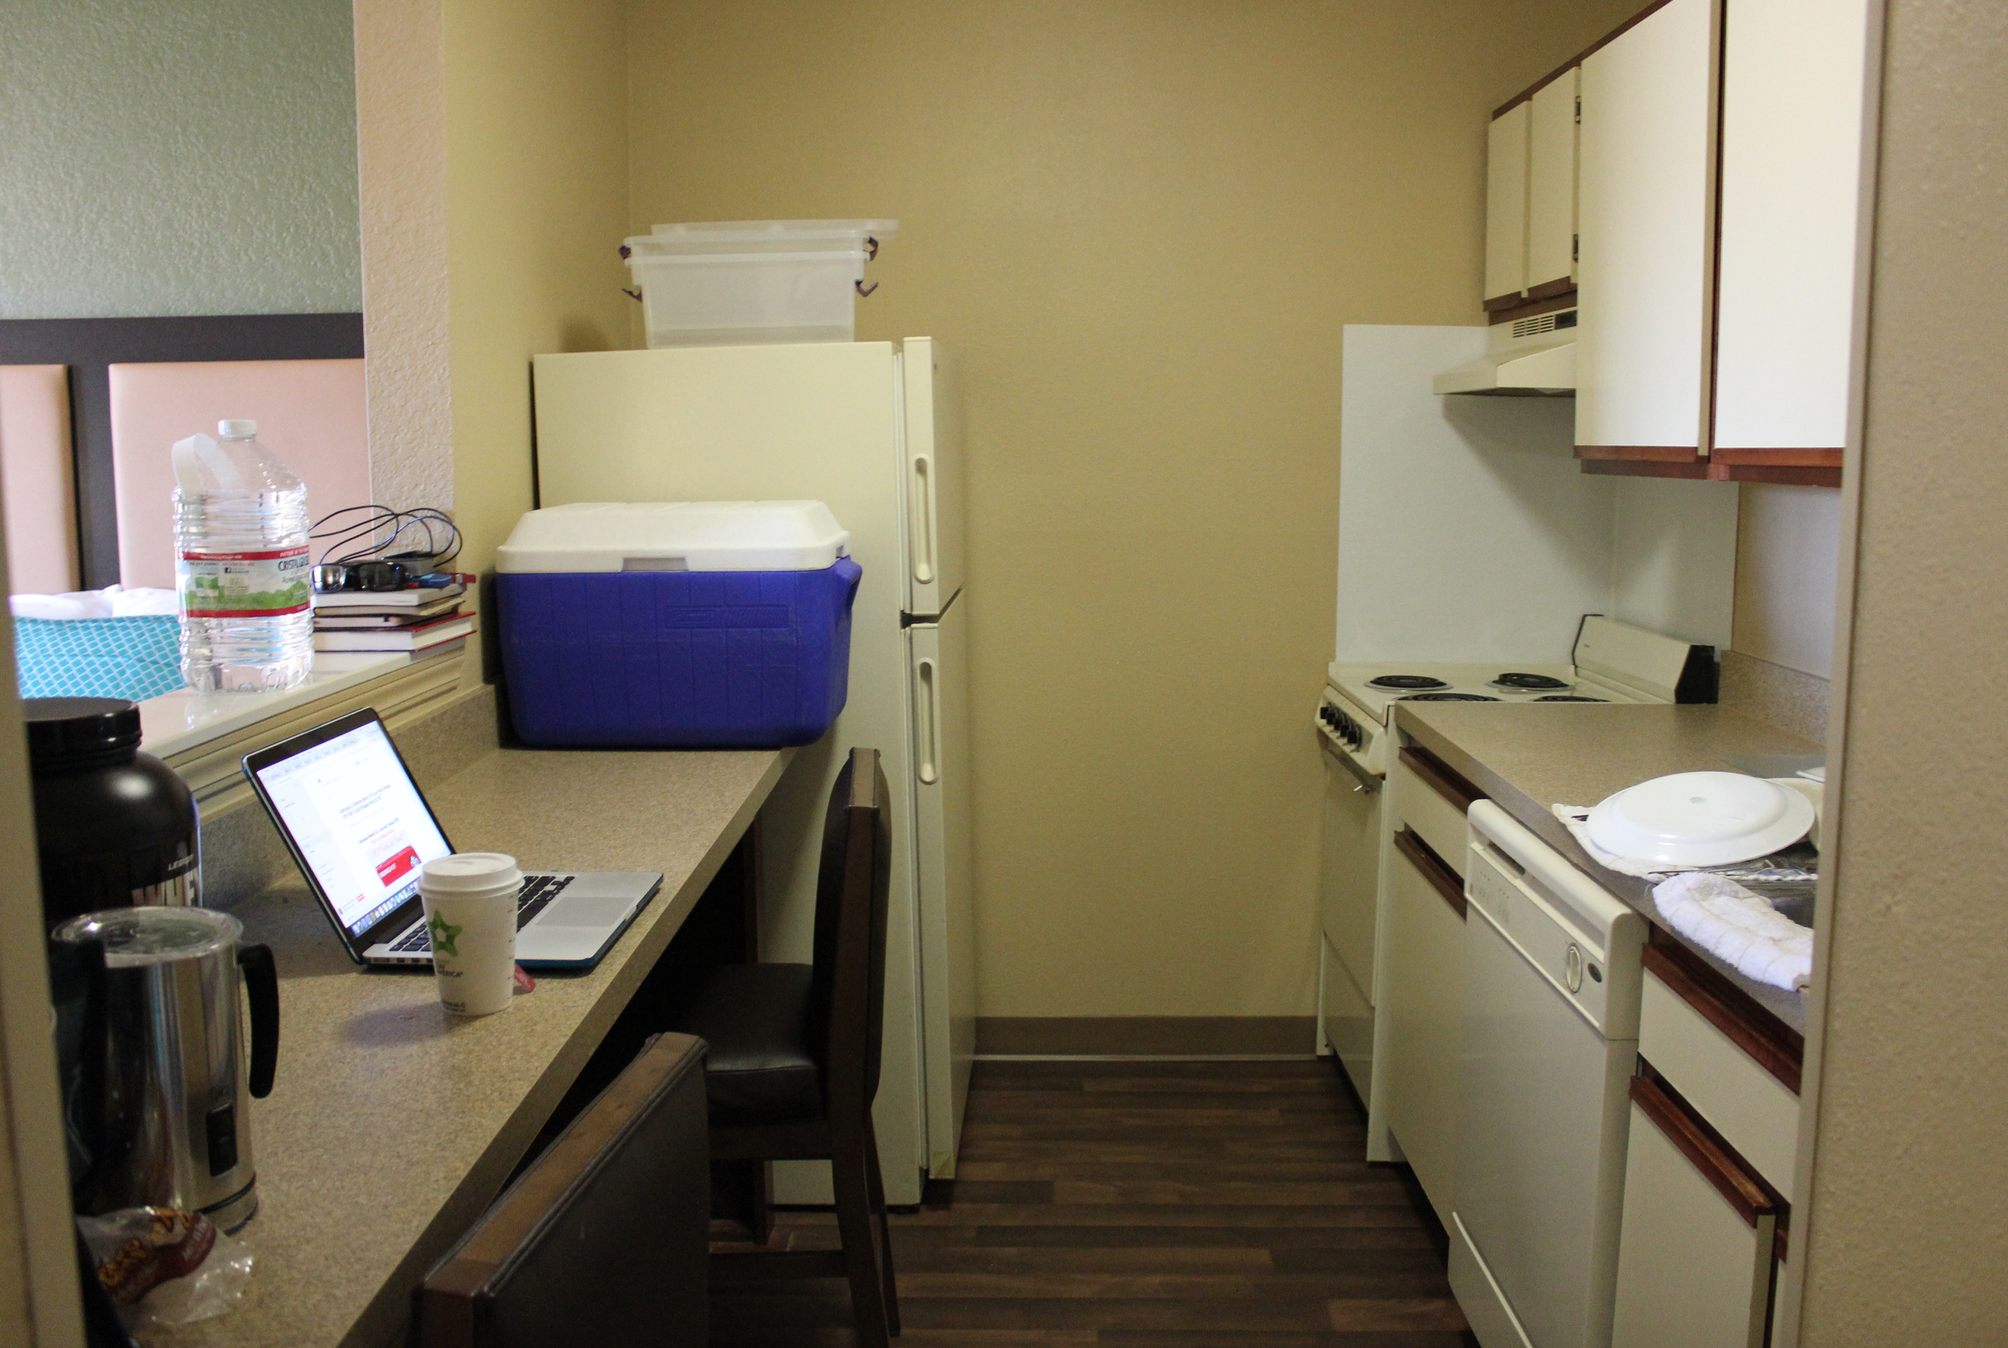
I’d say one of the biggest differences between staying at a regular hotel and at an Extended Stay America is that they don’t offer daily housekeeping services — unless you want to pay an additional fee. They do offer weekly housekeeping services for stays over 8 days.
Since we were only there for 6 days, we didn’t get housekeeping services. However, we just told the kids that we were all going to be the housekeepers and they had fun trying to make the hotel beds as well as the hotel housekeepers usually do! 🙂
We did find that we needed fresh towels about 4 days in and we went to front desk and asked for them and they said we could have fresh towels or sheets any time we wanted them!

Speaking of the front desk, we found the staff at Extended Stay America to be extremely kind and accommodating. They definitely seemed like their job was to serve their customers well and they went out of their way to do that.
Overall, we were very pleased with our stay at Extended Stay America and felt it was very worth the price you would pay. We would definitely stay there again and would recommend it as a great option for budget-conscious families — especially if you are going to be staying in one location for a week or longer.

Thank you to Extended Stay America for offering us the opportunity to stay in their hotel for free in exchange for this review.