1. Homemade refried beans are healthier — Canned, store-bought beans are usually full of hydrogenated oils and preservatives.
2. Homemade refried beans are cheaper — I can buy a 25-lb. bag of organic pinto beans from Azure Standard for around $40. That means I’m only paying about $1.60 per pound of dry beans… which makes as much as 4 cans of beans from the store.
3. Homemade refried beans taste much better — To be perfectly honest, I despised refried beans for the longest time. It wasn’t until I learned how to make them myself that I discovered I actually love them! Homemade refried beans have a much better texture and are full of flavor.
For reasons like that, you have to give these beans a try, at least once!
What are Refried Pinto Beans?
Refried beans are traditionally Pinto Beans that are soaked and cooked in water (to soften) then mashed and mixed with a variety of spices and seasonings.
They are rich in protein and fiber and pair well with many Hispanic foods.
Why are they called refried beans?
“Refried” doesn’t mean the beans have been “fried twice”. In fact, refried beans aren’t ever “fried”!
The word “refried” comes from the Spanish name, “frijoles refritos” — or beans that are “well fried”.
Refried beans are traditionally made with pinto beans, but black beans or even kidney beans can be substituted.
Refried Bean Recipe Substitutions and Additions
Homemade refried beans are a very forgiving recipe — so feel free to use whatever you have in your pantry, or whatever your family’s taste buds prefer!
Substitute black beans for pinto beans.
Try shallots or scallions instead of onions.
Mix up the spices and seasonings to spice things up, if that’s your style.
Add more milk to make them creamier or broth to thin them out.
Top the finished beans with a variety of cheese for extra flavor and protein!
How to Make Refried Beans from Scratch
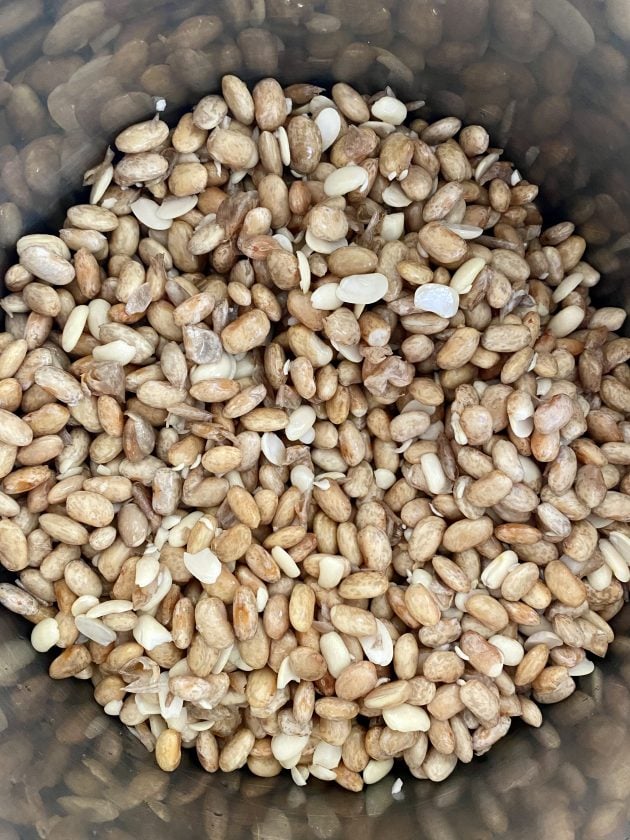
1. To prepare the beans, place dry beans in a large bowl, cover with an ample amount of water, and allow to soak overnight. (Keep in mind that 1 cup of dry beans equals approximately 3 cups of cooked beans).
2. The next day, drain and rinse the beans. Cover them generously with fresh water and simmer for several hours or until tender. A slow cooker works wonderfully for this as well!
3. In a large pot or saucepan, saute the onions in fat until they are soft and translucent. Add the minced garlic and cook for 1-2 minutes more.
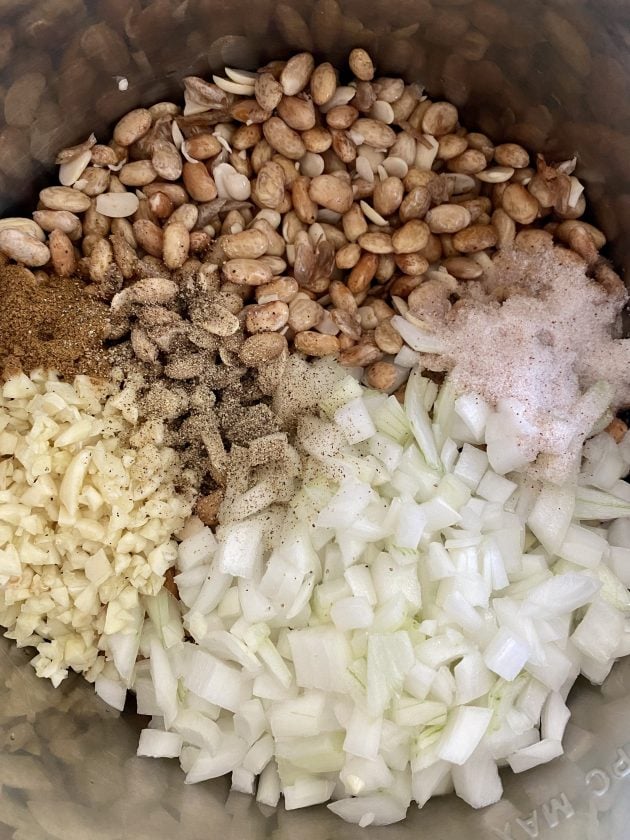
4. Add the cooked beans. If your beans are without liquid, you may need to add extra water or milk at this point. (I prefer to leave a little of the bean broth in with the beans when I freeze them.)
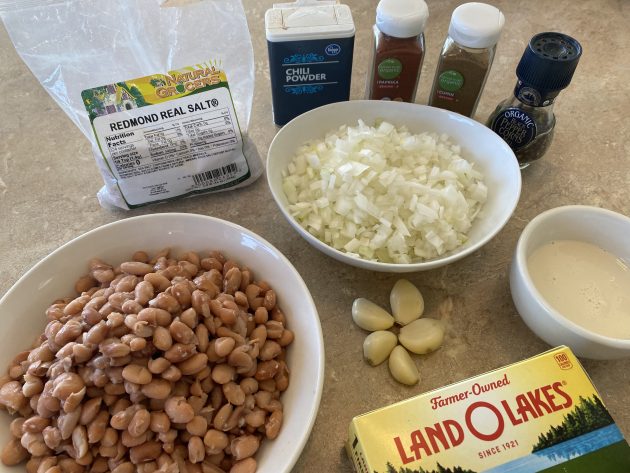
5. Stir in cumin, paprika, salt, chili powder, and black pepper.
6. Bring to a slow simmer and allow it all to cook on low heat for 10-20 minutes, stirring occasionally.
If the mixture is dry, you may need to thin it with a splash of milk or water at this point. However, if you started out with extra liquid in your cooked beans, you may not need to add anything.
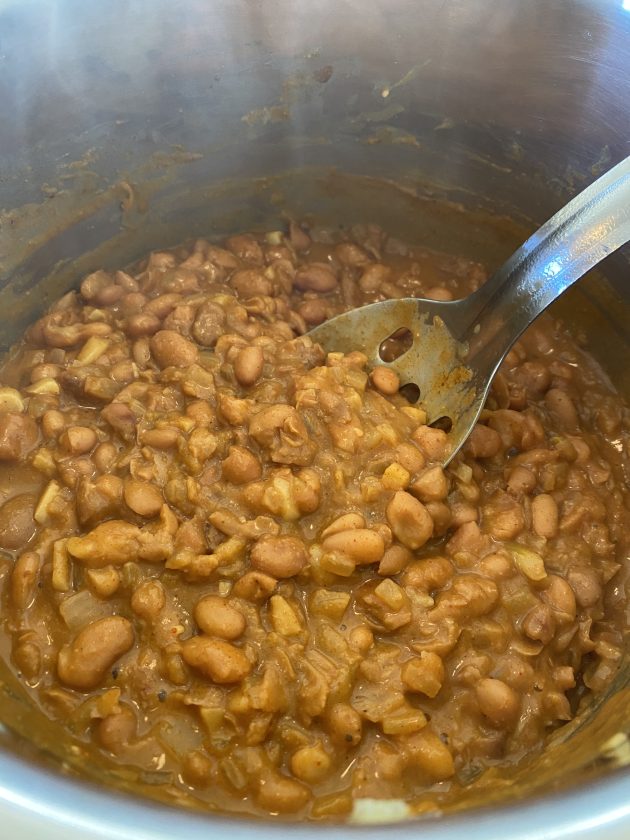
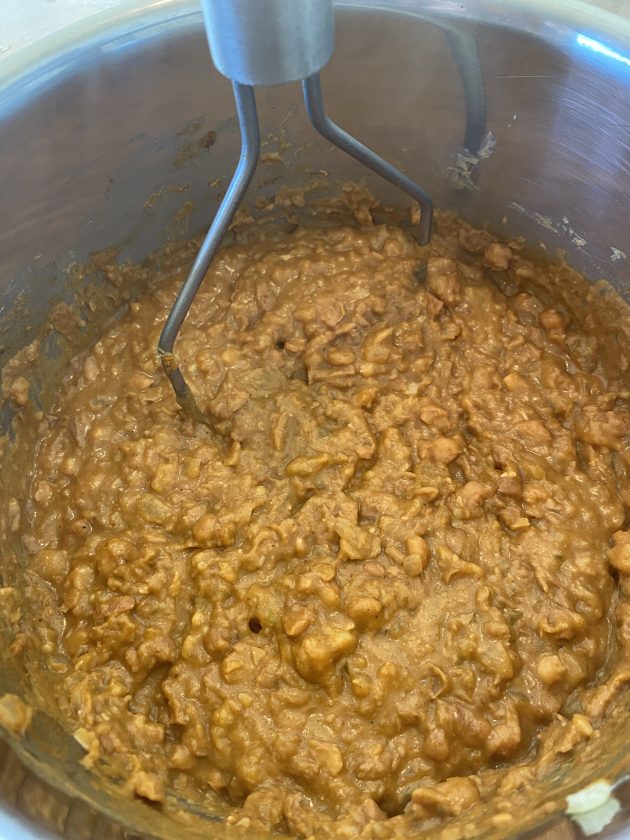
7. Once the beans have cooked down and the flavors have had time to incorporate, mash them with a potato masher, fork, or my personal favorite: an immersion blender. I prefer slightly chunky beans, versus a super-smooth “puree” consistency.
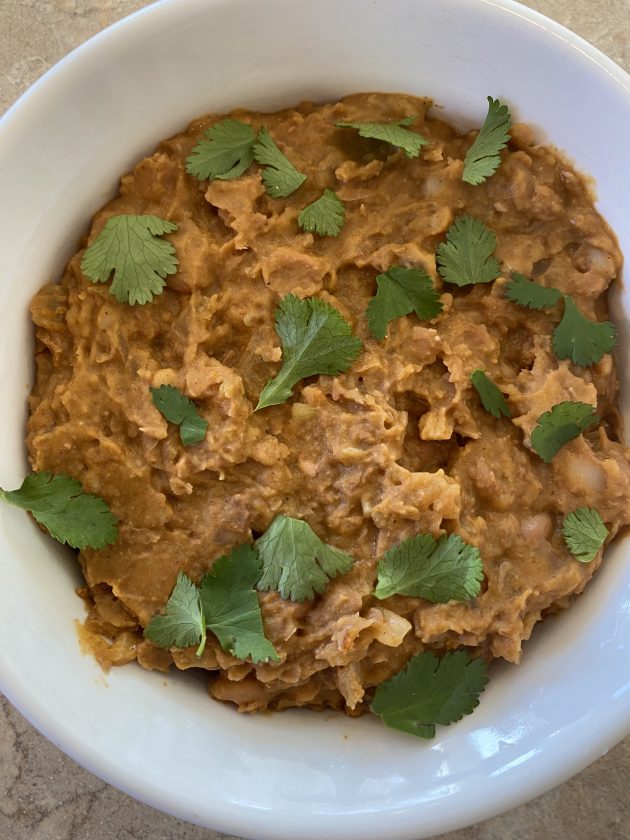
8. Serve with tacos, burritos, or alongside chips as a dip.
How to serve this recipe for Refried Beans
Refried beans make for an easy lunch or after-school snack — simply wrap them up with some cheese in a tortilla and serve them as a bean and cheese burrito.
We love using homemade refried beans in this easy layered nacho dip with chips.
Southwest roll-ups are another tasty treat and a wonderful way to use homemade refried beans.
One of our favorite ways to eat refried beans is to make simple bean and cheese quesadillas with homemade tortillas, cheddar cheese, and sour cream. YUM!
Storing Refried Pinto Beans
The beauty of using dried beans is that they are self-stable for years!
Once cooked, however, you can keep your pinto beans refrigerated for up to a week, or freeze them for longer storage (see notes below).
Similarly, you’ll want to refrigerate your prepared refried beans in any food storage container or glass jar for up to a week or freeze them for later.
Freezing Refried Beans
Cooked pinto beans freeze surprisingly well. I like to freeze them in 2-cup containers and use 4 cups whenever I’m ready to make refried beans.
You can also freeze fully-prepared refried beans and simply defrost them whenever you want a fast and easy side dish.
Making refried beans from scratch transforms a rather boring side dish to a flavor-packed feature that just might end up being the main event on your menu. It’s worth giving them a try!
Homemade Refried Beans FAQs
Are refried beans always made with lard?
Nope — that’s a popular traditional recipe though. You can use any type of “fat” you have in the house. I prefer butter, coconut oil, beef tallow, or lard. Olive oil isn’t stable at such high temps so I usually avoid that fat for this recipe.
What spices should I add to refried beans?
This depends on what you want the finished product to taste like! I always like lots of onions and garlic. Also, salt and pepper are a must for homemade beans. Cumin, paprika, and chili powder are my go-to spices, but you can also add cayenne pepper if you want a little extra heat!
Why do people put milk in refried beans?
Milk is thought to make the beans creamier… but if you have any dairy intolerances, you can easily substitute water, bone broth, or even some of the liquid from cooking the beans.
Are homemade refried beans better than canned?
I suppose this is an opinion… but I’d say a resounding YES! Homemade refried beans have so much more flavor and a much better texture too!
Can I make refried beans in a slow cooker?
Yes, you can add all the ingredients to your slow cooker and cook on high for 8 hours, checking after 5 hours to make sure there’s enough liquid. We’ve used this slow cooker recipe many times and LOVE it!
½tsp.chili powder more or less, depending on how spicy you want your beans
½tsp.black pepper
milkoptional if you want to thin the beans
Instructions
To Soak The Dried Beans
In a large bowl, cover dried beans with cold water and let soak overnight.
The next day, drain and rinse beans.
Place soaked beans in a large stockpot, cover with water, and simmer for several hours, or until tender (you may also do this in a slow cooker for 6 hours on high)
To Prepare Refried Beans
In a large saucepan, saute onions in butter until they are soft.
Add minced garlic and saute for 2 minutes longer.
Add the beans and a little bean broth or milk.
Stir in cumin, paprika, salt, chili powder, and pepper.
Cover pot and simmer on low heat for 20 minutes, stirring occationally.
Mash the beans with a potato masher or immersion blender until smooth.
Add a bit of milk or broth if you want a thinner consistancy.
Serve as a side dish to your favorite Mexican food, or freezer for later!
Jill writes from the homestead she shares with her husband, 3 children, and an ever-changing assortment of animals. When she’s not in the kitchen preparing traditional foods, you’ll find her outside riding horses, growing vegetables, milking her cow, and killing rattlesnakes. She blogs at The Prairie Homestead, where she enjoys encouraging readers to return to their roots, no matter where they may live.
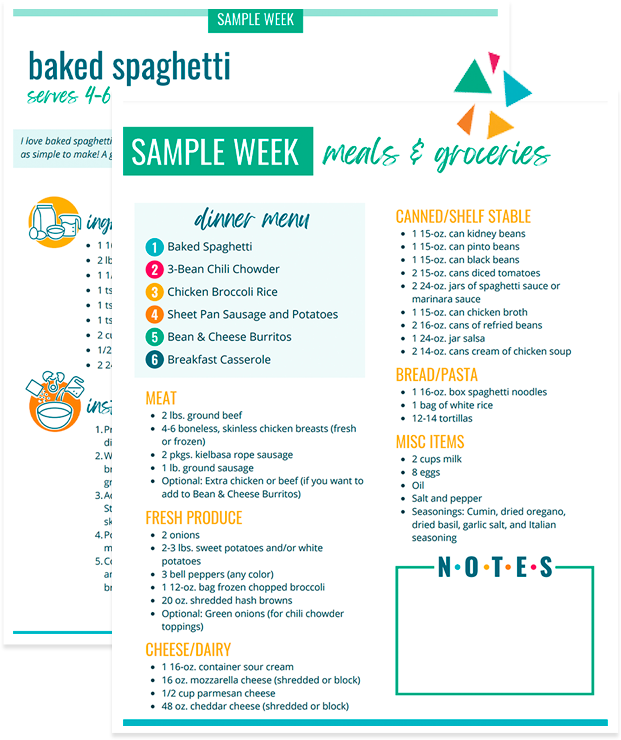
FREE One Week Menu Plan!
Done-For-You Dinner Recipes With Simple Ingredients and a Grocery Shopping List!
Published: by Crystal Paine on | This post may contain affiliate links. Read my disclosure policy here.
In our early years of marriage funds were very limited. My husband was in graduate school and we lived on his small stipend. During this time, my menu planning consisted of deciding which one casserole to cook for the week — of course, each dish was nutritious and microwaveable!
This “casserole of the week” cooking would continue through the birth of four or five children in some form or another. But, as my husband’s salary increased, I became lazy and allowed our grocery budget to increase — except disproportionately. We were living debt-free in our own house and driving debt-free cars. I could loosen up, or so I thought.
I became curious as to where our money was being spent, so I began writing down my expenses. I was astonished to find that I was spending $800 on food! Granted, we had eight children at home, but I thought $800 was ridiculous! So, I set out to reduce it.
To begin with, I made a list of the homemade meals we enjoyed. I then drew out a calender and filled in meals for the whole month. I placed it and others like it into a plastic sleeve and displayed it on my refrigerator. So, at a glance, I would know what was for dinner. Now that I have entered the computer age, they are printed.
Next, came a monthly shopping list. Checking my pantry first, I made a shopping list according to the recipes on my monthly menu. This was a bit overwhelming at first, but the results were well worth the effort. By simply planning meals for a month and shopping accordingly, I was able to lower our food bill to $400. That was a 50% savings! And that was even before I was using coupons.
I further tweaked my menus by figuring out the cost per serving of each individual recipe. Yes, this took some more time and effort, but it was also worth it. I found that by expanding my recipe collection to include additional, more economical meals (red beans and rice was added) I further cut expenses to $300.
We are now blessed with a productive garden and my menu planning now revolves around eating out of our three freezers.
Now, for a family with 7 children (3 years to 18 years) still at home (the oldest three have moved out but others, including four grandchildren, keep coming), I am spending less than $300 per month. The keys are planning, using what we have on hand (garden fresh and freezers) and shopping with coupons in conjunction with sales.
To read more about raising 10 children, chickens, and cows on a budget, be sure to visit Dina-Marie’s blog, Dimes 2 Vines.
Published: by Crystal Paine on | This post may contain affiliate links. Read my disclosure policy here.
We’re so thankful for our March sponsors:
Before you go out to eat or head to the store, be sure to check out the Restaurant Coupons and Retail Coupons over on Surviving The Stores. If there’s a printable coupon available, chances are that they have it listed on their Restaurant and Retail Coupon Databases! When you see a logo for a restaurant or store that you want to go then just click on the logo to see all of the current printable coupons available.
San Diego Deals and Steals celebrates being frugal even in a city with one of the highest costs of living in America! On San Diego Deals and Steals, you’ll be inspired to live richly on less through coupons, travel tips, recipes, frugal DIY projects, random adoption and family stories, exclusive discounts, giveaways, and lots of fun free events. Also, check out San Diego Deals and Steals on Facebook and follow us at @SD_DealsnSteals on Twitter!
PAMO, meaning Picture And Money Organizer, is a free checkbook app that takes away the hassle of a paper checkbook. Started by a college student who wanted to make sure she didn’t go into overdraft, PAMO allows you to keep up with transactions and take pictures of receipts, checks, and products purchased.
Published: by Crystal Paine on | This post may contain affiliate links. Read my disclosure policy here.
Over the next month, our focus here is going to be on saving money on your grocery bill. I’ll be sharing a number of fantastic guest posts and ideas from readers, plus I’m going to share a simple tip each weekday for how you can cut your grocery bill. Here’s tip #1:
Supermarket Savings Tip #1: Always Shop With a Grocery List
Before heading to the grocery store, make a grocery list. It doesn’t have to be on some fancy spreadsheet nor does it need to be extremely detailed. But never shop without a list.
A grocery list encourages you to spend less.
Without a list, you’ll usually end up buying whatever looks good. In the process, you’ll likely end up with a number of over-priced, non-essential impulse purchases that aren’t in the budget.
A grocery list saves you time.
Instead of going up and down all the aisles trying to figure out what to buy, when you have a grocery list, you can just look at the list, stop at the necessary spots to pick up what you need to buy, and efficiently make your way in and out of the store.
A grocery list eliminates extra trips to the store.
When you make a list and follow the list, you don’t have to make a second trip at the store later in the week to pick up the three things you forgot to buy during your first shopping trip.
What are some other ways shopping with a grocery list has benefited you? I’d love to hear!
Free Printable Grocery Lists
Want to write out your grocery lists on something other than the back of an old envelope? Here are two free printable grocery lists we’ve put together for you:
Grocery Shopping List :: Contains space for the items to purchase, the cost of the item, whether there is a coupon for it, and how much the coupon is for. Also includes a space for notes where you can record extra information about your shopping trip.
Two-Store Shopping List :: Two separate shopping lists on one page, each of which includes space for the items to purchase, the cost of the item, and whether there is a coupon for it. Also includes a space for notes where you can record extra information about your shopping trip.
Published: by Crystal Paine on | This post may contain affiliate links. Read my disclosure policy here.
Guest Post by Janelle from Gluten Freely Frugal
It’s a cool winter evening, and you think to yourself, “a bean soup would be so delicious and economical right now”. You hunt for some bean recipes in your slow cooker cookbook, but they all call for canned beans, or dried beans that have been soaked for a day.
No canned beans in the pantry, or the wrong kind. Bummer, move on to Plan B.
Sound familiar?
If you are committed to being frugal, beans can be your best friend. And dried beans are much more economical even than canned beans, plus they have the added benefit of being gluten-free.
Unfortunately, they are also rather inconvenient. I find that by the time I make up my mind to make something with beans, it is too late to begin the process of soaking and softening. And I still find canned beans to be too expensive.
Solution: Freeze your beans.
Did you know that could be done? I didn’t, until I read an article in Gluten Free Living Magazine about preparing beans.
I have greatly modified their recipe to due a much larger quantity, and have modified cook times. It is not terribly labor intensive, but spans a pretty long period of time while you’re doing other things, so pick a day you’ll be home for a few hours.
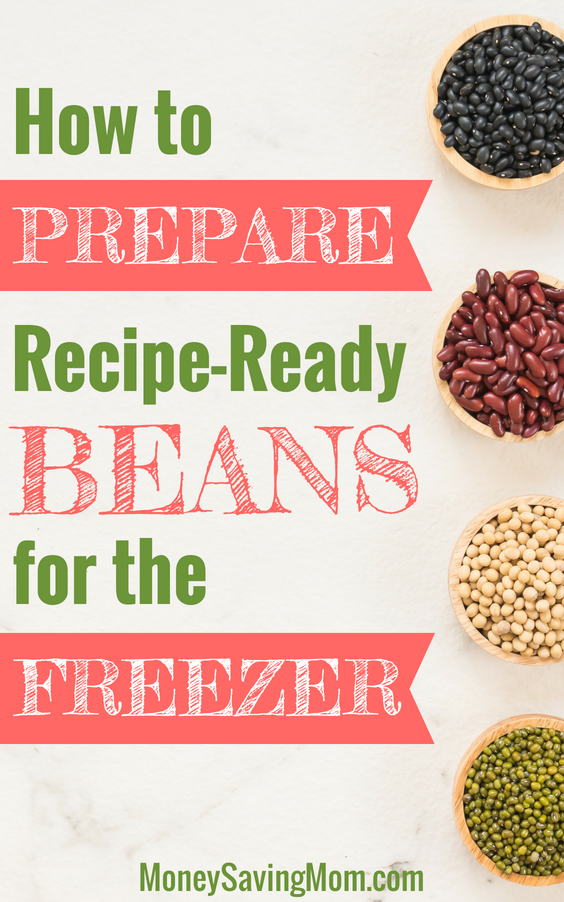
Here’s how to make Recipe-Ready Beans for your freezer:
1. Find a big pot. I use an enormous soup pot. Bring 9 quarts of water to a boil. Do not add salt; it keeps the beans from softening. Rinse six cups of beans in cold water. After the water has reached a boil, add the beans. Boil at a rolling boil for about 3 minutes.
2. Remove from the heat and let the beans soak for an hour.
3. Return to the heat and bring to a simmer. Simmer until the beans are soft. It took mine about 2 hours (they were small black beans). Many things can affect how long it takes, including the type, the size, and the age. Older beans tend to take longer to soften.
4. When they are soft enough, package in 2-cup containers (that is the approximate size of a can, so it’s recipe -ready!) You can add some salt now if you want to, and leave them in their liquid.
Now, next time you have a recipe that calls for beans, you can easily thaw out a container from your freezer, at a fraction of the cost.
I ended up paying about $0.80 for 6 cups of dried black beans at the discount store (you could do any kind, though). I got six pints of beans out of this recipe, which equals about $0.13 per “can”.
Now that’s frugal!
Janelle is wife to Brad, who is celiac, and mom to 2 sweet girls, one of whom is celiac. She blogs about the gluten free life on a budget, including coupons, deals, recipes, and other money-saving tips at Gluten Freely Frugal.
WANT TO SAVE $100 FAST?!Join the FREE 14-Day Savings Challenge!
Want some practical help with setting up your day for success? It all starts the night before! Be sure to grab a copy of my brand-new online course, Make Over Your Evenings.
This 14-day online course includes videos, a workbook, and step-by-step projects andis designed to help you maximize your evenings in order to experience more success in your life, more order in your home, and more joy in your soul.
It’s time to stop sleep-walking through life and wake up to the amazing excitement and fulfillment that comes when you follow my simple plan to Make Over Your Evenings.
Last summer my in-laws offered to pay for hotel stays if we went on a family vacation to Texas — leaving us to be responsible for gas, food, and activities. My husband and I really wanted to go because it had been five years since our last vacation, but we wanted to make sure we could pay cash.
The Plan:
We sat down and estimated how much it would cost in gas to get there.
We researched activities that we thought our family would like and their cost.
We wanted to have $1000 for our vacation and we had about nine weeks to save for it, so we had to save $225 per paycheck.
I set up a separate checking account with its own debit card and started transferring money into the account on payday.
We also made a “vacation envelope” that I would put a few dollars in, here and there, if we had a little extra in a budgeted category.
The Results:
We had a great time on vacation and we were really able to enjoy it and make some wonderful memories, knowing that we would not be paying for this vacation once we returned home!
Carolynn is a stay-at-home mom of four, ages ranging from 6 years to 18 months. She used to teach, but now blogs about parenting, pregnancy, coupons, finances, teaching, and crafting at My Little Bit of Life.
Just having a routine written down on paper is not enough. You actually have to stick with it!
Now, like I said yesterday, you don’t have to follow your routine perfectly for it to make a big impact. But you do need to use it as a guideline on a daily basis. Even just following 75-80% of it almost every day can mean a world of difference in your home and life.
Here are four suggestions to help you stick with your routine:
1. Add One New Thing Every 3 Weeks
If the concept of a routine is completely new for you, don’t try to overhaul your life all at once. Slow and steady changes in the right direction will result in much more lasting and long term changes. As I’ve often said, moving in the right direction–even at a microscopic rate–is still moving forward.
I recommend adding one new habit every three weeks. Start with a morning routine and stick with that for three weeks. Then add in an evening routine and stick with it for three weeks. Finally, add in an afternoon routine and stick with that for another three weeks.
Once you’ve got your routines down, try filling it in by following your entire written routine. If that’s too much to add all at once, go back to just adding in one or two new things to your routine every three weeks.
2. Create a Checklist
I’ve found it really helpful to print a new routine for each day of the week to follow and check off as I complete each task. This might just be the Type A in me, but there’s something about checking off things from a list that helps to keep me on track.
If you don’t want to mess with having a new page for each day, you could print and laminate your routine and use a dry erase marker to check it off. And then just wipe it clean at the end of the day.
Or, if you’re more of a techy person, you could use some type of online program on your computer or smartphone. I use the To Do App for my daily to-do list (this is separate from my standard routine) and think it could easily be set up to have a standard routine to check off each day if something a bit more high-tech appeals to you.
However, don’t try to make it more complicated than it needs to be. A simple list printed on scrap paper with a pen to check it off can work just fine. What matters most is not how high-tech or elaborate your system is, but that it inspires you to follow through with your routine!
3. Get An Accountability Partner
If you feel like you’re not disciplined enough to stick with a routine on your own, find an accountability partner to help keep you on track. Maybe it’s a friend who checks in with you via email every afternoon. Or a neighbor who pops by every afternoon. Or your spouse who checks in with how your day went at dinner. Maybe you form a group of online friends on Facebook to keep each other accountable. Or perhaps you do something entirely different.
Think about what would most motivate you to stay accountable and then get that accountability system in place. No excuses; just do it!
4. Reward Yourself For Sticking With It
Create milestones to celebrate along the way. This inspires you to keep at it when you don’t feel like sticking with it. Plus, life is just a lot more enjoyable when you make time to celebrate your successes!
What ideas do you have for motivating yourself to stick with your routine?
Need Some More Help Getting Your Home & Life in Order?
Then you’ll want to check out The Ultimate Homemaking Bundle — an AMAZING collection of homemaking helps & resources — many that I’ve already read and benefited so much from and many more that I cannot WAIT to read myself!
One of the books in the series is called Paperless Home Organization. This ebook is designed to walk you step-by-step through using your gadgets to organize your life, putting technology to work for you so you can be organized and get rid of your paper clutter.
These 4 ebooks alone retail for over $35! And you can get all four of them + many, many more ebooks, printables, ecourses, and free bonuses for just $29.97 total! That’s a steal!
Published: by Crystal Paine on | This post may contain affiliate links. Read my disclosure policy here.
In early January, I shared about my Goals for 2012 and promised an update at the end of each month. So here’s February’s update:
Personal
Read through the Bible in a year. {I’ve been keeping up with this faithfully}
Read through the 24 books on my 2012 booklist. {I’ve almost finished my February books plus read quite a few other books!}
Listen to 12 audiobooks. {Finished February’s audiobook.}
Run in at least one 5K race. {Almost finished with week 6 of the Couch to 5K program.}
Complete the Couch to 10K program.
Tackle 12 Do-It-Yourself Projects. {I’m making homemade Naan this week–hopefully!}
Focus on one habit per month. {I made early bedtimes a big priority in February and got so much more sleep this month. Still working on consistently getting up at the same time each day.}
Learn to use my new DSLR camera (huge surprise Christmas present from Jesse!!) & improve my photography skills.
Take at least one photo a day and put together a page every week for my Project Life album. {I almost have all of February done.}
Memorize Colossians using the plan and free download here. {I’m almost caught up with this.}
Marriage
Go on the Love Like You Mean It Cruise. {Done–read my recap here.}
Go on two Marriage Retreats (overnight trips sans children for planning, talking, goal accountability).
Have monthly date nights. {We had one date in February plus the cruise.}
Read four books together. {We’ve read a few more pages of one book together so I guess that counts for something!}
Read at least 3 books on marriage. {Almost finished with Rekindling the Romance–loving it!}
Children/Homeschooling
Continue regular dates/outings with each of the children individually. {I didn’t do so great at this with the cruise and us being sick this month. I’ll try again in March!}
Continue Grace and Truth memory book. {The children memorized four more verses plus two verses to a hymn this month.}
Ice-skating lessons for all three children. {The children just finished their first round of classes and we decided to go on to the next round because they all enjoyed them so much!}
Swimming lessons for all three children.
Finish second grade, begin third grade with Kathrynne. {Plugging away at this!}
Finish kindergarten, begin first grade with Kaitlynn. {Plugging away at this}
Start preschool with Silas.
Go on at least one field trip every month. {We didn’t get to go on a field trip because of the cruise and sickness.}
Go on at least one family vacation.
Finish at least 15 read-aloud books. {We’ve almost finished five read-alouds so far this year.}
Ministry/Friendships/Extended Family
Write at least two handwritten notes every month to encourage someone. {I wrote & mailed three handwritten notes this month.}
Continue being involved in our local church, homeschool group, young couple’s group, and blogging accountability group. {Ongoing}
Continue with weekly get-togethers with both sides of our extended family. {Ongoing}
Business/Blogging
Continue to take Sundays off from blogging/business work. {Ongoing}
Continue keeping strict Office Hours for the business/blogging time each day. {Working on this–making a tiny bit of progress!}
Switch to a paperless planning system. {This is going well for me, though I’ve decided I’m probably never going to be 100% paperless for all things.}
Follow my weekly blogging plan. {I didn’t do this perfectly in February, but I adhered to it somewhat.}
Plan blog posts out at least a month in advance. {Not quite there, but I’m at least being much more intentional with my blogging this year than I’ve ever been before!}
Write and schedule blog posts at least a week in advance. {Making some headway with this, though I’m far from where I want to be!}
Financial
Continue to tithe 10% of our income. {Ongoing} Give generously to needs in our community and around the world, as God prompts us. {Ongoing}
Pay cash for a new-to-us vehicle to replace our family’s van. {We were able to finish funding our vehicle fund this month. Now we’re starting to look at vehicles and hoping to find something in the next few months. We’ll see!}
Finish saving for and purchase a rental property with cash. {We were able to set aside some for this in February.}
How Are You Doing on Your Goals for 2012?
If you’ve posted goals for 2012, I’d love for you to post an update on how things are going and share your link in the comments. If you don’t have a blog, feel free to just leave your update as a comment. Let’s encourage one another to live lives of intention and purpose!
OVER-SPENDING EVERY SINGLE MONTH?Grab these FREE Budgeting Sheets!
Published: by Crystal Paine on | This post may contain affiliate links. Read my disclosure policy here.
Guest post by Mary
One easy way to earn an income is donating plasma. Now, before you all say “EWW!” and stop reading, hear me out…
Yes, I realize that plasma collection centers don’t always have the best reputations. And, for some of them, this reputation is rightfully earned. However, most of them (like the one I work at, for example) certainly do not fall in to this category.
Our donor population, for example, is made up of mostly college students, soldiers, and locals who are simply looking for a way to put extra cash in their pocket while doing something that helps people.
Here are a few things you should know if you are interested in earning a little more money in this way.
It is a perfectly safe process.
Plasma donation is highly regulated by the FDA, as well as several other agencies. (Many of our medical staff employees have told us that we have more regulations than hospitals they have worked at).
When you donate, you only come in contact with sterile supplies. All lancets, sample collecting tools, and supplies for our machines are brand new and thrown away after each use, eliminating any possibility of transmission of a disease.
Now, that being said, there are some people who aren’t not suitable for donating due to health reasons. This is why every donor goes through a screening and physical process consisting of medical history, examination, and testing of a sample of blood.
And, for this reason, it is crucial that you are fully honest with the employees so they can be sure you are a suitable candidate. Also, each center is overseen by a licensed physician and there is always a nurse on site.
You are saving lives.
I mean this quite literally. Plasma is filled with proteins and clotting factors. These can be used to help people with primary immune deficiencies, certain protein deficiencies, clotting disorders, burn victims, babies born with hemolytic disease of the newborn, shock victims, and the list goes on and on.
For most of these conditions, there is absolutely no synthetic substitute for plasma, which is why it is in such demand — these people would either die or have a significantly reduced quality of life without these donations.
The money you earn is worth it.
You go through a screening process and then sit in a bed while you read, watch a movie, or surf the Internet for about an hour and get paid for it. The amount you earn per donation varies by location, company, and the weight of the donor, but our center pays anywhere from $20-$50 per donation, and you can do this twice a week! That is quite a chunk of change in your pocket!
Yes, I know this incoming earning ideas isn’t for everyone; but I really encourage you think beyond rumors you have heard about the process and check it out for yourself, for your own good and for the sake of the people you could be helping.
If you are interested, find a plasma center in your area and check it out.
Because plasma centers are run by separate companies, there is no one good way to find a center in your area. But, if you just run a google search “plasma center in (your town)” you should be able to find one easily if there is one around you.
Published: by Crystal Paine on | This post may contain affiliate links. Read my disclosure policy here.
Today’s question is from Danielle:
I have recently started a cupcakery and bakery from my home. I am trying to grow my business, but am out of ideas for advertising without having to spend a lot of money. I have started a Facebook page, and that has helped, but would like other suggestions. Please help! -Danielle
Do you have a question you’d like to ask Money Saving Mom® readers? Read the submission guidelines and submit it here.
Published: by Crystal Paine on | This post may contain affiliate links. Read my disclosure policy here.
Before I get into this post, I wanted to remind you that I share this to help those of you who are struggling with organization in your life. If however, life is going smoothly for you or you just don’t need something else added to your life right now, just skip over this post, okay? The last thing I want to do is heap guilt or more things to do onto your plate!
Once you have your time budget created, take those blocks of time and put them in a set order for the day. Do not stress over doing this perfectly, just think of how to order the time blocks so things would flow fairly smoothly in your home.
For instance, here’s what my current routine looks like:
My Current Routine
Up, Bible, coffee
Run
Shower, dress
Clean up bathroom/bedroom, start laundry
Blog
Children up, baths, hair fixed
Breakfast, Bible Time, clean up kitchen
Chores, switch laundry, dinner out from freezer
Homeschooling
Reading together
Lunch, read alouds
Afternoon Routine
Homeschooling
Blogging
Free hour
Dinner, Bible Time
Evening Routine
Time with Jesse, read
3. Make Sure to Include Margin Time
If you’ll notice, I have an hour of free time built into my routine. This gives some “padding” in the routine to allow for the inevitable interruptions and things that come up throughout the day. Plus, it also provides a time block for extra projects.
4. Keep It Simple
Don’t make the mistake of trying to pack your day so full that you end up overwhelmed and burnt out. It’s better to do fewer things and actually finish them, than to attempt a massively-long list and end up frustrated. Stick with the basics and don’t forget to focus on the big rocks first.
5. Don’t Worry About Following it Perfectly
We never follow our routine exactly. I view it as a guideline, not a strict slave master. It’s there to keep us moving in the right direction, but it can be shifted and rearranged somewhat depending upon how the day is going.
Now, if you start shifting things too much, you’ll defeat the purpose of having a routine, but do give yourself some grace and don’t feel like you need to follow it to a tee or you’ve failed. Good enough is always better than doing nothing at all.
6. Keep Tweaking It
A good routine is like a good budget: you keep tweaking it as your needs and life changes. If something isn’t working, change it!


")
")


Do you have a fun and frugal DIY idea to share? I’d love to hear about it! Read the submission guidelines and submit it here.