Related Posts: Menu-Planning on a Budget

Shared Feb 14, 2011
comment

Saving Families Money Since 2007

Related Posts: Menu-Planning on a Budget

Guest post by Johnlyn
Many people assume I use coupons to keep our grocery budget low. They tell me that they can’t have a low grocery budget because they just don’t have the time or energy to clip coupons.
At the beginning of 2010, my grocery budget was $260.00 per month for our family of four. My husband is a marathon runner with a high metabolism and my kids were 13 and 11 at the time and they both continue to eat more than I do.
When you live in a small town, you do not receive the same coupon inserts in the newspaper as you do when you receive a large city newspaper.
Here are the coupons I received in last weekend’s newspaper insert: Zicam, Lysteda, Pillsbury Sweet Rolls, Betty Crocker Warm Delights, Red Baron Pizza, Chuck E Cheese, Weight Watchers Yogurt, Foot Pain Wraps and Wrist Supports and Direct T.V. I won’t use any of those!
I’ve decided to increase our food budget to $400.00 per month. The $140.00 increase is for several reasons:
Johnlyn has been a full time homemaker for the past nine years. She is the owner of Hummingbird Homemaking: Working the Home to Save Time and Money.
I went out shopping last Saturday evening to four different stores — all by myself!– and got some great deals. It was so weird to be kid-less, as I usually always take at least one child with me.
I was amazed at how cathartic and refreshing it was to go grocery shopping by myself to multiple stores — something I’ve not done in months, as far as I can remember. I came back feeling like I’d just spent two hours at the spa! 🙂
Here was my “loot” from the health food store, Aldi, Target and Dillon’s:

Altogether, I spent right around $45 for all the groceries shown.
I think my favorite deal of all was the Enjoy Life Chocolate Chips for $0.99 per bag. I have to admit that it took quite a bit of self-control to not buy all 20 bags they had on the clearance shelf. But I convinced myself that I really did not need 20 bags of chocolate chips — especially since we usually only use an average of one bag of chocolate chips per month.
I also was excited to get free Finish Powerball Tabs and Rimmel Eye Shadow at Target by combining Target coupons and manufacturer’s coupons. Now that we don’t live near a CVS anymore, I’m rarely able to score free makeup or dishwashing detergent, so I was especially thrilled about these two deals.
And avocados were only $0.25 each at Aldi — a price we rarely, rarely see around here. So that was another exciting bargain. I’m considering trying putting a few in our smoothies in the mornings just to keep things interesting. Anyone have a great smoothie recipe which uses avocados?
This week, we also bought four loaves of bread at the dollar store (I’ve recently discovered that our Dollar Tree sells soon-to-be-expiring Nature’s Own bread for only $1 per loaf so I’ve been buying a few loaves every few weeks and sticking them in the freezer to use as needed.) and milk, more cheese and some fruit and veggies at Dillon’s.
So all totaled, we spent around $65 on groceries the past seven days.
Would you like to know what the best deals and coupon match-ups are for your local stores? Be sure to check out the Store Deals section of our site where we post the best deals and coupon match-ups each week for over 100 different stores across the country. You can sign up to receive the top deals in your email inbox each week as soon as they are posted!

 Did you snag any great deals or bargains this week or save money in other ways? If so, be sure to post about them on your blog and leave your link below. Please remember that this weekly round-up is to share deals you personally got and/or money you were able to save this week. In order to keep this weekly round-up focused on helping and inspiring others in their efforts to save money, links which have little-to-no content other than promoting affiliate links, etc. will be deleted. Also, to make it easy for everyone to navigate quickly through the links, your link must link directly to your Super Savings Saturday post.

Homemade Dishwashing Detergent gets mixed reviews, but I decided to try it anyway.
I’ve been using the Tropical Traditions Powdered Dish Detergent for the past four weeks because they sent it to me. It’s very similar to the homemade version and so far, I’ve been liking it quite a bit. I’ve noticed that some of our plastic dishware is sometimes cloudy, but it’s not been a huge issue.

Homemade Dishwashing Detergent Recipe
- 1 cup baking soda or washing soda
- 1 cup borax
- 1/2 cup salt
- 1/2 cup citric acid
Mix together. Use 1 Tablespoon per load. Add some vinegar to the rinse aid compartment of your dishwasher to help prevent clouding.

I bought all the ingredients but the borax from Amazon with Swagbucks. The borax cost me $4.55.
If I was paying out of pocket for all the ingredients, I am not convinced that this recipe would really be less expensive than buying dishwashing detergent with coupons — especially since I can occasionally get it for free at Target and elsewhere. (If you typically pay full price for dishwashing detergent, though, making your own is less expensive per this cost breakdown.)
However, it was fun to try my hand at making something I’ve never made before.
And in case you missed it, here’s the list of the 12 Do-It-Yourself Projects I Plan to Try in 2011:
January: Make From-Scratch Chai Tea
February: Make Homemade Dishwashing Detergent
March: Make Homemade Hamburger Buns
April: Make Homemade Laundry Soap (I did attempt this one time before, but it was with a pre-made mix someone gave me. So I’m going to try again — this time completely from scratch!)
May: Make Appliqued Flower Tee
June: Make Homemade Hummus
July: Make Freezer Jam
August: Make Homemade Soap
September: Sew a Rag Quilt
October: Make Homemade Apple Butter
November: Make Artisan Bread in Five Minutes a Day
December: Make Homemade Marshmallows
Have you attempted any new do-it-yourself projects recently? I’d love to hear how they went!


Looking for a last-minute sweet treat to make for Valentine’s Day? These Valentine’s S’More Bites look scrumptious and simple to pull off.

A testimony from Liz at e squared.
When my husband and I got married in 2005, he had never been in any kind of debt. He was working his way through college and paying his school bills without the use of student loans.
While he had some savings and some mutual funds, I had a small car loan, $11,000 in student loans and no savings. I sometimes joked that he brought all the assets into our marriage, while all I brought were liabilities!
We only had one car, and although I would have loved to buy a second one, we made the decision to make do with one car until we could afford to pay cash for a second car. This meant paying off the loans I currently had — which were driving my previously debt-free husband crazy! — before we could even start saving for another car. Back then, it seemed like quite an impossible goal.
 In July 2010, we finally had enough saved to buy a used car, and after searching for a few months we were able to purchase a 2006 Ford Fusion for $8000.
We are both incredibly thankful for God’s grace and provision. I’ve learned much about patience, contentment and stewardship in the past five years. Although reluctant to this whole idea at first, I’m glad for the wisdom my husband had financially and so thankful to not have a car payment!
Married for five years, Eric and Liz live in Madison, WI. Eric works in retail management while Liz works from home as a medical transcriptionist and does her best to keep their blog, e squared, updated.
Have you saved up and paid cash for something — large or small? Submit your story for possible publication here.
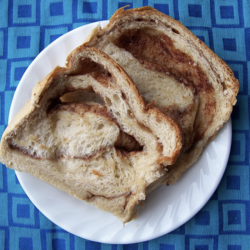
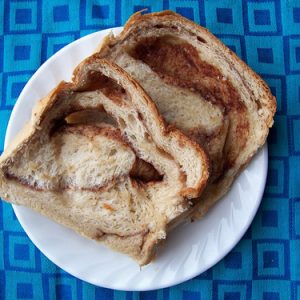
You can enjoy delicious, homemade cinnamon swirl bread with almost no hands-on effort, thanks to this impossibly easy bread machine recipe!

This variation on my favorite bread recipe is absolutely scrumptious. In fact, our whole family can eat almost an entire loaf in one meal!
My favorite thing about this recipe? It can easily be done in 15 minutes or less of actual prep time. And the end result looks like you slaved for at least an hour in the kitchen!

For the Dough:
For the Filling:
1. Put ingredients in a bread machine and turn on the dough cycle.

2. Take out dough and roll into a rectangle.

3. Sprinkle with cinnamon.

4. Add raisins (if you’d like).

5. Drizzle with honey.

5. Roll up, tuck ends under, place in a greased bread pan.
6. Cover with a towel or plastic wrap and let rise for 20-40 minutes (or until double in size).
7. Bake at 350ºF for 30 minutes, or until golden brown.
8. Let cool, then slice and eat!
This bread is so delicious, warm from the oven with some butter (and maybe a little more honey!)
It’s also really yummy toasted, or used for your favorite french toast casserole.
Once the bread is completely cool, place it in a zip-top bag or food storage container and store at room temperature for up to 4 days.
If you plan to store it longer than a few days, you’ll want to slice it and store it in the freezer. You can remove one or more slices and toast them whenever you have a craving for a little something sweet.

It might be because you kneaded the dough a little too long. It might also be because it wasn’t rolled tight enough so it separated in the pan. Make sure you roll up the dough nice and tight and properly seal the outside edge so it doesn’t come apart while baking.
If your bread is too dense for your preference, try using bread flour in place of all-purpose or whole grain flour.
Gummy bread is almost always a result of bread that didn’t rise long enough. Make sure you watch your bread machine during the rise cycle to make sure the dough is getting enough time to rise.
Make sure to share and save it on your favorite platform below!
If you want a Cinnamon Sugar Swirl bread, you can try Laura’s recipe. I didn’t seem to have great success in using butter as it seemed to be too heavy and caused the loaf to separate and have holes in the center. But hopefully you’ll have better success than me! 🙂
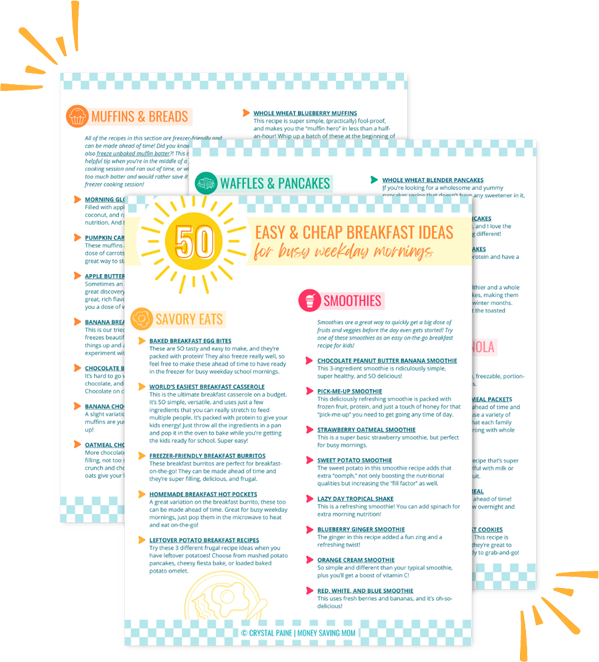
Mornings just got so much easier with this FREE list of 50+ Easy & Cheap Breakfast Ideas for Busy Weekday Mornings!

Well, as usual, the freezer cooking ended up taking longer and making more of a mess than I’d hoped. And I skipped making the brownies in favor of cleaning up the kitchen. But I’m happy to have some meals and goodies in the freezer again.
Here’s what I ended up making:
::Bag of chicken breasts baked and chopped
::Green Rice Casserole
::Freeze oranges (for smoothies)
I never managed to get a picture of the Green Rice Casserole. However, I froze it uncooked, so I promise I’ll post the recipe and pictures sometime in the next few weeks.
And the jury is still out on how the frozen oranges worked since I didn’t get a chance to make smoothies for breakfast this morning. I’ll let you know what the verdict is as soon as I have a chance to make smoothies.
Thanks for joining in my Impromptu Freezer Cooking Day yesterday. You all are such great cheerleaders and encouragers!

Once I finished making the Chocolate Chip Pancakes, I made the Brown Bag Burritos. Since I already had chicken cooked, I went ahead and substituted chicken for the ground beef. Because you know how I just can’t bear to stick with a recipe exactly! 🙂

I realized that I didn’t have enough tortillas for all the filling, so I just filled the tortillas I had and put the rest of the filling in bags to freeze. While not quite as nice as having the burritos completely made, it’s really simple to just thaw the filling and make up a quick pan of burritos. Plus, it takes up less space in the freezer.

And then the freezing oranges experiment commenced.

I just cut, peeled, pulled them into pieces and stuck them in a freezer bag. I’m anxious to try them in some smoothies and see how they turn out. I have visions of variations on Orange Cream Smoothies.

Then it was time to roll out the bread dough for Cinnamon Swirl Bread. I’m happy to report that it actually turned out this week and we ate almost the entire loaf for dinner.
I spent the rest of the evening making granola, finishing our homeschool lessons for the day, playing with the children in the snow, cleaning up messes and more messes (!), getting dinner on the table, helping Jesse shovel the mountain of snow on the driveway (talk about a workout!) and then we all settled in and read four chapters of On The Banks of Plum Creek before bedtime.
All in all, it was a good day — even if my kitchen isn’t very clean right now and I’m pretty tired!
Coming up tomorrow: Granola photos and Cinnamon Swirl Bread recipe

First up, I mixed up the Chocolate Chip Pancake batter.

I used some milk from the freezer in the batter. I also grab up marked down milk when I find it on a great deal and then freeze it to use in pancake batter.

While cooking the pancakes, I laid the chicken out on a cookie sheet and popped it in the oven to bake. I used to boil chicken breasts, but a reader left me a tip last year about baking them in the oven instead and I’ve found this to be much easier and the chicken ends up a lot more tender and juicy.

I then dumped all the bread dough ingredients in the bread machine and set it on the dough cycle. I just seriously love how simple it is to make dough using my bread machine!

I let the children have Chocolate Chip Pancakes for lunch. I guess they are getting their share of chocolate chips today! 🙂
The only problem is that they love Chocolate Chip Pancakes so much, that after they’d had their fill for lunch, we only had four pancakes left. I guess I need to make a bigger batch next time if I want to have any left for the freezer.
Next up: Brown Bag Burritos and my experiment with freezing oranges
We’ve been busy as beavers this morning! I’m finally sitting down for a coffeebreak while the children watch Jelly Telly.

Breakfast was Oatmeal with Turbinado and Mini Chocolate Chips. I think I won some big brownie points with the children for letting them have chocolate for breakfast.
I found some Enjoy Life Chocolate Chips marked down to $0.99 per bag at the health food store on Saturday night, so I’ve been a bit more lenient with dolling out chocolate chips around here. Just don’t ask me how many handfuls I’ve consumed in the last few days, okay? 😉

Then it was time to clean the kitchen. I have no idea how it manages to collect the messes it does in such a short period of time. It was completely clean yesterday afternoon! The only good thing is that I’ve found if I try to have it all cleaned up at least once a day, it never becomes overwhelmingly unmanageable.

Much better! The children all settled in to do some crafts at the kitchen table while I started in on my Freezer Cooking List.
Next up: Chocolate Chip Pancakes, Bread Dough and Chicken
We got eight inches of snow yesterday afternoon and evening, so we’re staying put today. And just for fun (and because I’m hoping to warm up the house a little more by using the stove and oven!), we’re having an Impromptu Freezer Cooking Day!
I’ll be live-blogging my progress a few times today so you can peek in on the goings-on in our bustling household.
Here’s my plan:

List of Things I Hope to Make
::Bag of chicken breasts baked and chopped
::Green Rice Casserole
::Freeze oranges (for smoothies)
::Granola
::Ultimate Double Chocolate Chip Brownies
I’ll post an update in a few hours to let you know how things are going.
Are you cooking/baking anything today?
 Recipe from Lacey
If you are like me, the thought of children receiving large amounts of sweets this upcoming Valentine’s Day is a little overwhelming. The children in my home have sensitivities to sugar; in other words, I find them bouncing off each other and furniture when they eat too much sugar.
So, as not to add to the sugar hysteria this weekend, I made individual play dough gifts for my daughter to share at a Church Valentine’s Day party.
3 cups of flour
1 1/2 cups of salt
3 cups of water
2 Tablespoons vegetable oil
1 Tablespoons cream of tarter
Red food coloring
Cook the ingredients over medium heat until dough pulls from the sides of pan and no longer looks shiny.
Allow to cool before storing in an airtight container or wrapping in individual bags (you can find cute bags at your local craft store or Dollar Store). If you use bags, be sure to tie bags very securely with ribbon or string so that the play dough does not dry out.
I doubled this recipe and it made enough for 20 individual gifts. All the ingredients, with the exception of cream of tarter, can be purchased inexpensively at Aldi.
Be sure to add a tag explaining that your gift is play dough as you wouldn’t want children to think it was candy! Homemade play dough is safe to eat, but doesn’t taste very yummy! It’s also fun to include a cookie cutter with the play dough gift bag.

Lacey is a military wife and homeschooling mother to two darling little girls. She loves creating, learning, and growing in her faith.

I wanted more info on opening a flexible spending account for medical expenses. I dont know much about them except that I should have one. How does it work? I would love to get one up and running for 2011! How much do you budget per person? -Mary
I have received numerous emails regarding setting up a IRS-approved savings account for medical expenses after my post a couple of weeks ago on HSAs. Right now, my understanding is there are several options: the Flexible Savings Account (FSA), the Medical Savings Account (MSA) and the Health Savings Account (HSA) (See IRS Pub 969)
I do not know much about the FSA, as I have personally never had one. My understanding is that you set aside a certain amount each month for qualified health expenses and that, if you do not use all the money you have set aside by the end of the year, you lose whatever you have left because it does not roll over and accumulate into the next calendar year.
Because I didn’t want the hassle of trying to guess what expenses we would have over a year’s period of time and I didn’t like the idea of losing money we do not use, I didn’t even look into the possibility of opening an FSA. Instead, we elected to open up an HSA, which would allow us to keep the money we put in over the course of a year (up to $6150, married filing jointly for 2010) that would then be tax deductible on our 2010 return.
The MSA is similar to the HSA, but created for the self-employed or employees of small businesses. To open the HSA, I called a local broker who sold a variety of health insurance products from a number of different companies so I could get a good match for us that qualified under the IRS’s guidelines for a High Deductible Health Plan.
Once we got the health insurance side squared away, I contacted a local bank that had a Health Savings Account product, into which I put our annual contributions. The money in this account, if unused for medical expenses, rolls over annually and continues to build and grow interest.
I take what we would probably pay for regular PPO coverage, subtract what we currently pay for our HDHP coverage and put the rough balance in our HSA. At this stage, the annual contribution allowance covers the high deductible we have on our health plan, so we would technically not be out of pocket anything if we had a major medical condition that wiped out our deductible because our plan covers 100% above our family deductible. (Some HSAs are 80/20 instead of 100, but I wanted to stay away from something that would leave us exposed to liability in the event we maxed the deductible.)
As of now, I have been very pleased with it and it is amazing how much more aware we have become with our medical needs when we are on the hook for most expenses.
Jesse Paine is a licensed attorney who owns his own law firm. He’s married to Crystal and is the numbers nerd of the MoneySavingMom.com team! If you have a question you’d like him to answer in a future column, you can submit it here.
The content of this column intended for informational use only and is not to be construed as providing legal, investing, accounting, or other professional advice. Your situation is factually specific and you should accordingly seek qualified professional counsel concerning your specific legal, investing or accounting needs.