


These 3-ingredient pumpkin chocolate chip muffins are delicious AND really easy to make. They freeze well and would be perfect for a quick lunch (at home or on the go).
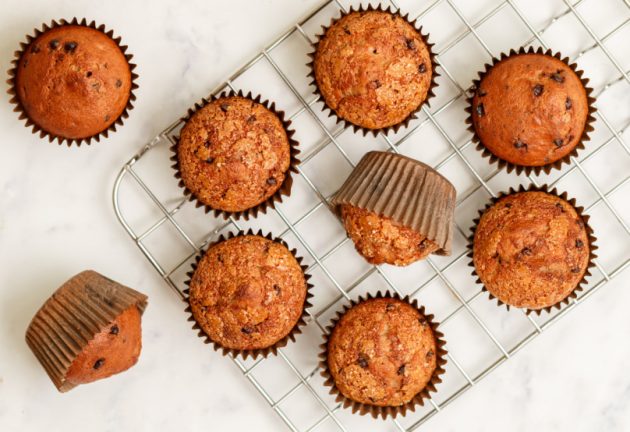
We’re big fans of Pumpkin Chocolate Chip Muffins here. So, of course, when I saw this recipe recently, I just had to try it — especially since I already had all of the ingredients on hand.
I thought it would be fun to change things up for our Lunchbox Freezer Cooking series and make these muffins, instead of our usual pumpkin chocolate chip muffin recipe.
These were very easy to make and were surprisingly yummy — especially for the ingredients.
They aren’t as good as our favorite recipe. However, they are much quicker to make. And, I’m guessing, they are much lower in fat and calories, too.
Ingredients for 3 Ingredient Pumpkin Muffins
- 1 box chocolate cake mix
- 1 can pumpkin
- 1 cup chocolate chips

How to Make Pumpkin Chocolate Chip Muffins
1. Preheat oven to 350ºF.
2. In a large bowl, mix canned pumpkin and chocolate cake thoroughly (can use an electric mixer, if you prefer).
3. Sprinkle chocolate chips over batter and stir in.

4. Fill greased or paper-lined muffin tins almost full.

5. Bake in preheated oven for 20 to 25 minutes, or until done.
How to Freeze Pumpkin Chocolate Chip Muffins
Cool completely and place into an airtight ziptop freezer bag.
Store for up to 4 weeks in the freezer.
How to Defrost Frozen Muffins
Thaw for 30 minutes to 2 hours.
Or, warm for a minute in the microwave.

Freezer Friendly Pumpkin Chocolate Chip Muffins
Ingredients
- 1 box chocolate cake mix
- 1 can pumpkin
- 1 cup chocolate chips
Instructions
- Preheat oven to 350ºF.
- In a large bowl, mix canned pumpkin and chocolate cake thoroughly (can use an electric mixer, if you prefer).
- Sprinkle chocolate chips over batter and stir in.
- Fill greased or paper-lined muffin tins almost full.
- Bake in preheated oven for 20 to 25 minutes, or until done.
Notes
Nutrition
Love this recipe?
Make sure to share and save it on your favorite platform below!
If you haven’t tried our family’s favorite Pumpkin Chocolate Chip Muffin Recipe, you’ve got to give it a whirl. I can almost guarantee you’ll like. Unless you’re one of those strange people who don’t like chocolate or pumpkin! 🙂

Are you joining us for Lunchbox Freezer Cooking? If you’ve blogged about a lunchbox recipes you’ve made for your freezer, leave a link to your post and recipe below. I can’t wait to see your yummy recipes and ideas!
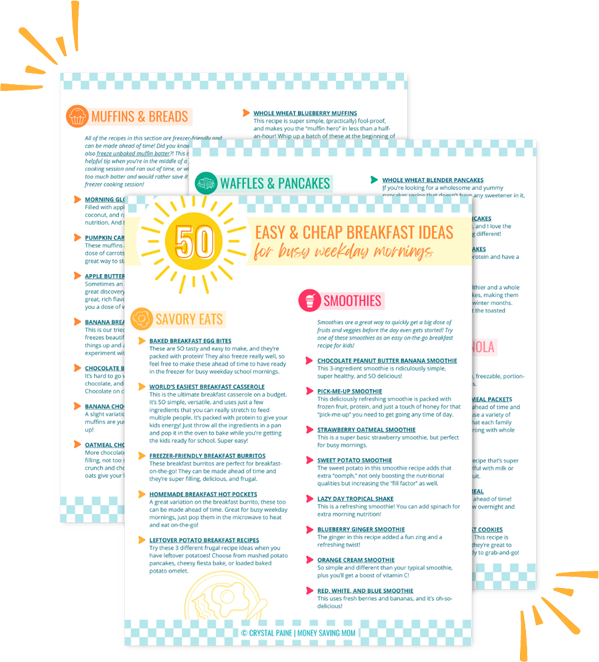
FREE 50+ Easy and Cheap Breakfast Ideas!!
Mornings just got so much easier with this FREE list of 50+ Easy & Cheap Breakfast Ideas for Busy Weekday Mornings!

Sometimes we take the little things for granted — until we think we’ve lost them!
Sometimes we take the little things for granted — until we think we’ve lost them!
Sometimes, we take the little things for granted… like a cell phone.
Today, in the midst of getting all of the kids into swimming lessons in the rain, my cell phone fell out of the backpack. I didn’t realize it had fallen out, but after getting everyone situated with their goggles and swimming teachers, I sat down and instinctively went to pull out my phone.
It wasn’t in my purse. It wasn’t in the backpack.
I double-checked. I triple-checked.
No phone.
I went back out to the car to see if maybe I had accidentally left it out there, though I was positive I had stuck it in the backpack. I searched in all the cracks and crevices of the car.
Still no phone.
I knew Jesse was going to meet us at swimming lessons in about 15 minutes, so I went back in and retraced all of my steps, thought about every possible scenario of what could have happened to my phone, and went through every article and item in both my purse and backpack.
Jesse got there and I met him with the grim news that my phone was missing. He looked through my purse and backpack just to be absolutely sure, he retraced all of my steps, he looked in the car, and he went to check at the swim club’s lost and found.
Nothing.
Gratefully, Jesse’s more tech-y than I and he has GPS tracking set up on his phone for mine. He checked that and we could see that the phone was right there at the swim club. I wasn’t sure whether that should make me relieved or feel like a crazy woman that I couldn’t find my phone when it was supposedly right there in the building and there were basically no other options as to where it could have been.
We turned on the Find My iPhone alarms and started hunting all over the building and outside and in the car for the obnoxious noise that it makes. Again, this resulted in nothing.
I began praying that God would please help us to find the phone and I tried to remember Lisa’s words of encouragement in her book Unglued as to how to respond in situations and not panic or become stressed.
I reminded myself that it is just a phone, after all. I’ve lived without one before and, if it was truly lost or stolen, I could survive without it again.
But I still was rather unsettled about the whole thing — and wondering where I’d left my brain that a bright pink phone could just up and grow legs and walk off like that.
As a last resort, I suggested that Jesse call the phone. I’m not even sure why. I guess I thought maybe by some weird set of circumstances, the Find My iPhone alarm wasn’t working or something and that the phone ringer would work and we’d figure out the phone had been right under our noses all this time.
Well, Jesse called my phone — and someone picked up! They immediately asked, “Are you the owner of the phone?”
I couldn’t be more relieved!
I guess they had found the phone in the grass near the entrance to the swim club and had retrieved it so it wouldn’t get rained on. And then they hung onto it assuming that the rightful owner would eventually call.
They were no longer at the swim club, but we picked a nearby rendezvous point and, within minutes, had the phone back in our possession! Not only was I so thankful that my phone wasn’t hopelessly lost, but my heart was very warmed that, of all the people who could have came upon it, it was someone with the integrity to want to return it to me.
And the next time I go out, I think I’m going to make sure that my phone is securely mounted in some zippered pocket in my purse — as I’m still not sure how it managed to fall out of the backpack! 🙂
We Paid Cash: Honda CR-V EX

Guest post from Tiffany of Don’t Waste the Crumbs
I grew up thinking that every family had to have two cars. Even if the family lived in a big city, with ample public transportation, and both spouses worked from home – two cars were still necessary.
And even when we slashed our budget by 50%, we still kept two cars.
It wasn’t until my husband and I moved into our townhouse that we realized that having a second car wasn’t really a “need” for us. Between finding parking spaces, maintaining an older vehicle and switching two car seats back and forth, we often found it easier to just use the family sedan.
Not wanting to intrude on my responsibilities on managing the house and raising our kids (which often times require a vehicle), my husband had the idea of carpooling with a co-worker (who is also a good friend) for rides to and from work. When surf season had passed and regular exercise was becoming not-so-regular, my husband suggested riding his bike for the 8-mile commute.
After a few weeks with a new primary mode of transportation (his bicycle) and a back-up in place (his co-worker), it became apparent that we officially had no need for a second car. We listed the car for sale and sold it for asking price.
Since we’d just finished paying off all our debt over the last two years, we certainly did not want to back-track financially and take on debt if the need for a second car ever arose in the future. So we decided to start setting aside money into a car fund in case we decided to buy a second car in the future.
We took the money we’d earned from selling the second car and used it to set up our second car fund. The second major deposit into the car fund was the profit from a garage sale: $500!
Next came cash birthday gifts sent from various family members. Christmas came and we decided to put what we budgeted for gifts towards each other directly into the car fund instead. Our car fund was building – very slowly – but we were enjoying the thrill of watching the balance steadily go up.
One night my husband and I started “dreaming” about the next car. We weren’t in a rush to purchase, and certainly not in a need, but we enjoyed talking about someday walking into a dealership and paying for a car with cash. And then it hit us – we had gotten pretty good at saving and this goal was not unattainable. At that moment, we devised a plan to save aggressively so that we would be able to buy our “someday” new-to-us-car in one year.
Here are the basics of our plan:
- We researched the year, make and model of the car we were eyeing and came up with a ballpark number of how much it would cost us to buy it in cash – including tax, title and license.
- We estimated how much a monthly payment would be for that car – in addition to gas, insurance and maintenance – and put that amount into the car fund each month.
- I was offered to take on additional classes at my part-time teaching job. I took advantage of this offer and all the extra income was put into the car fund.
- We applied our “Christmas gift plan” to every holiday – Mother’s Day, Valentine’s Day, Father’s Day, birthdays, anniversary – all of this gift money went into the car fund.
- Realizing that our stockpile was plentiful, I stopped using coupons and started shopping from our closets instead. I even started to blog weekly about our grocery budget for additional (and public) accountability.
- We had another garage sale and it was even more profitable than the first one. After treating ourselves to Chipotle (a reward for meeting a smaller goal), we deposited the profits into the car fund.
As the one-year mark approached, our schedules started to shift and the need for a second vehicle had become inevitable. We checked the balance of our car fund and were surprised to see that we had indeed reached our goal!
My husband found a four-year old model of the car we wanted with just under 17,000 miles – it was practically a brand-new car. We went to the dealership, inspected the car and made a cash offer and they accepted.
Today’s we’re proud owners of a 2008 Honda CR-V EX. It was paid for by methods that aren’t new or earth-shattering, but they are proof that hard work and dedication do pay off… and that paying cash for a car really is as sweet as we dreamed it to be.
Tiffany is an in-house day care teacher, private chef, housekeeper, teacher, laundry service, chauffeur and dedicated CEO of her house. She aims to be a good steward of all He has given, so she tries to do more {and do it better} with less. She’s making baby-sized strides and would be honored if you joined her for the ride via her blog, Don’t Waste the Crumbs!
Do It Yourself: Homemade Sprinkle Cake Topper

kojo-design.com shows you how to make a homemade sprinkled cake topper.
Do you have a fun and frugal DIY idea to share? I’d love to hear about it! Read the submission guidelines and submit it here.
Pinterest Experiment: Pink Sugar Hand Scrub

I find a lot of great ideas on Pinterest… but pinning something doesn’t do anything unless I actually, you know, try the idea. So I thought it’d be fun to challenge myself to do at least one Pinterest experiment every week — and blog my results.
I can’t promise that I’ll always have a Pinterest Experiment post up each week, because you know how I sometimes get distracted or on blog tangents. But I’m at least going to try. By the way, you can follow my personal Pinterest account here, if you’re interested.
Silas and I whipped up some Sugar Hand Scrub tonight. I had gotten a bottle of Dawn Hand Renewal for $0.50 at Dillon’s recently and was excited to use it to make this recipe.

I only had raw sugar on hand so my end result wasn’t as pretty as it would have been with white sugar, but this stuff works and smells so good.

Someone mentioned putting a few drops of peppermint oil in the scrub and I think that would make this even more amazing!

If you wanted to make it for gifts, I’d recommend putting more sugar in it so that it’s not as watery. This should help it keep a good consistency and last longer.
Have you tried any ideas or recipes you’ve found on Pinterest recently? If so, I’d love to hear how they worked out for you. Feel free to leave your blog link in the comments if you blogged about your experiment!

Our “New Normal”: Finding Ways to Save Time and Money as a Special Needs Parent
Our “New Normal”: Finding Ways to Save Time and Money as a Special Needs Parent

Testimony from Megan
In April 2011, we were blessed with our second child — a little boy named Whit. He was precious and perfectly formed. But there was an unexpected complication… Whit was born with brain damage.
We soon found out his reality: he does not walk, talk, eat, roll over, reach, laugh, or purposefully do anything. He came home with an array of equipment, a curious big sister, and nervous parents!
It didn’t take us long to realize we had to figure out our “new normal.” We were thankful we had two precious children, my husband had a job, and I had a home to run, but the special needs world can be difficult to navigate and we found the two commodities we often lacked were time and money!
Through trial and error, we have learned a few tips for saving some of each:
1. Take One Day At A Time
The nature of our life is unpredictable. Whit gets sick often and quickly! No two days are ever alike.
My desire for some semblance of normalcy, however, is still there. After trying many different schedules, it finally dawned on me! We live day-to-day, so that’s how we should plan!
Every morning, my daughter and I sit together to make “our list.” She enjoys the freedom to add some of her favorite things, too! Things get accomplished, daily life is streamlined, and everyone seems more content.
2. Simplify
Things are boring around here — aside from the kids! Meals are simple. We have downsized to one car. Outings consist of the library or a walk outside. Whit’s tragic situation has given us some perspective: not only is simplicity okay, we love it!
3. Give Yourself Some Grace
I can’t remember the last time I scrubbed baseboards… I have no idea when it was! And I am completely okay with that!
I have learned to let go of some things in order to hold my family closer. Sure, we hit the basics (no one wants to live in a dirty house!), but have I vacuumed under the couch cushions lately? Not a chance! And sometimes, that’s okay!
4. When In Doubt, Bring Food
We go to appointments… All. The. Time. It is worth it to spend the money on groceries our family enjoys versus paying much more for a single meal in a drive-thru. We have saved so much just by having a picnic in the car!
5. Bring Those Siblings
Our daughter often accompanies us to appointments for Whit. We save money on a sitter, but I firmly believe this is opening her eyes to a world often unseen by other children. Yes, it saves money, but the lesson in compassion is worth more.
6. Why Spend If You Can Borrow?
Our town is relatively small, but there is a wealth of organizations that have loaned us equipment. It’s often second-hand, but always serves it’s purpose. Before you spend all that money, just ask someone! The worst they can do is say no.
Megan is a lover of Jesus, Bret, and her precious babies! She’s living her dream as a stay-at-home wife and mother. Since having Whit, her desire is to encourage families as they journey through the world of special needs.
Jingit: Get paid to watch ads online

Jingit is a simple way to earn a little money online for watching ads or for taking surveys.
Just sign up for a free account, complete a 30-second registration process, and you can then click on ads available to watch. You’re not going to get rich watching ads from Jingit, but it’s a nice way to earn a little extra side money!
Looking for more income-earning ideas and opportunities? Check out this page.
Thanks, Moms By Heart!
(Note: Some of the links in this post are my referral links. Read our disclosure policy here.)

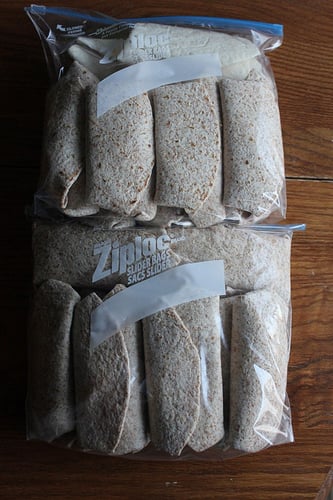
Freezer-Friendly Bean & Cheese Burritos
Looking for an easy make-ahead lunch or dinner idea that’s frugal and will fill you up? How about a quick meal for busy weekdays? This freezer-friendly recipe for bean & cheese burritos checks all the boxes, and your family will love it too!

After the amazing success I had with Crockpot Refried Beans, I decided to try making Freezer-Friendly Bean & Cheese Burritos (adapted from Pennies & Pancakes). They were SO easy to make, and very inexpensive too!
These burritos aren’t anything spectacular and, if you’re a foodie, you just might be appalled that I’m posting such a crazily basic recipe.
But I’m all about keeping it simple — especially when it comes to quick lunches on the go!
Ingredients for Bean and Cheese Burritos
- 24 medium flour tortillas (you can make your own)
- 1/2 recipe Crockpot Refried Beans (or 4 16-ounce cans of refried beans)
- 1 jar salsa of your choice
- 1 package taco seasoning mix (or homemade taco seasoning)
- 8-12 ounces of cheddar cheese, grated
How to Make Bean and Cheese Burritos
1. In a large bowl, mix beans, salsa, and seasoning together.

2. Spread 2-3 Tablespoons of the mixture into center of a tortilla.

3. Sprinkle with cheese and roll up (folding the sides in to keep all the filling inside).

4. Place assembled burritos in a freezer bag OR cook burritos to eat immediately.

5. Serve with salsa and sour cream if desired.
How to Re-Heat Frozen Burritos
Microwave Baking Instructions:
- Pull 1-3 burritos out of the freezer and put on a microwave-safe plate
- Warm in the microwave on 50% heat for 2-3 minutes, or until cheese is melted.
- If you want a crispy tortilla, place warmed burritos in a hot frying pan for 30-60 seconds on each side.
Oven Baking Instructions:
- Pull out desired number of burritos and thaw for 1-3 hours.
- Bake at 350º for 20 to 30 minutes, or until heated through.
- You can top with additional cheese before baking.
Other Burrito Recipes You Might Like:


Freezer-Friendly Bean & Cheese Burritos
Ingredients
- 24 medium flour tortillas you can make your own
- 1/2 recipe Crockpot Refried Beans or 4 16-ounce cans of refried beans
- 1 jar salsa of your choice
- 1 package taco seasoning mix or homemade taco seasoning
- 8-12 ounces of cheddar cheese grated
Instructions
- In a large bowl, mix beans, salsa, and seasoning together.
- Spread 2-3 Tablespoons of the mixture into center of a tortilla.
- Sprinkle with cheese and roll up (folding the sides in to keep all the filling inside).
- Place assembled burritos in a freezer bag OR cook burritos to eat immediately.
- Serve with salsa and sour cream if desired.
Microwave Baking Instructions:
- Pull 1-3 burritos out of the freezer and put on a microwave-safe plate
- Warm in the microwave on 50% heat for 2-3 minutes, or until cheese is melted.
- If you want a crispy tortilla, place warmed burritos in a hot frying pan for 30-60 seconds on each side.
Oven Baking Instructions:
- Pull out desired number of burritos and thaw for 1-3 hours.
- Bake at 350º for 20 to 30 minutes, or until heated through.
- You can top with additional cheese before baking.
Notes
Love this recipe?
Make sure to share and save it on your favorite platform below!
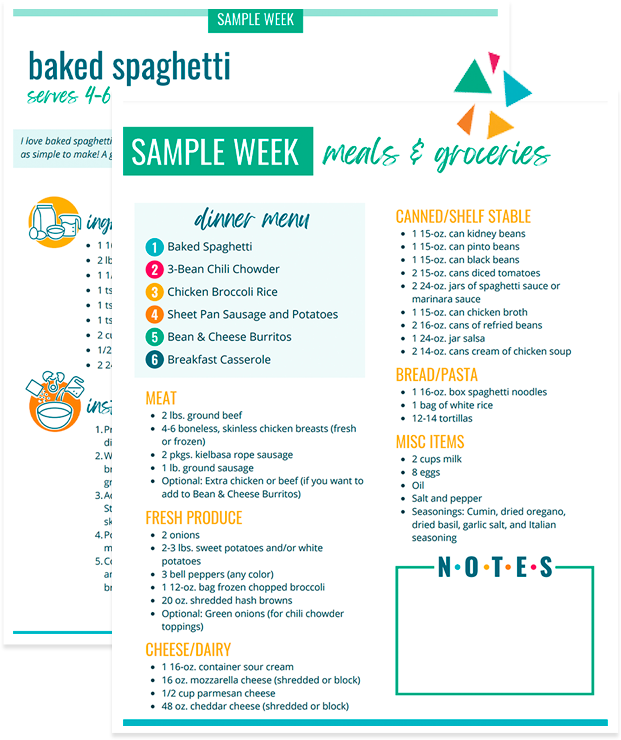
FREE One Week Menu Plan!
Done-For-You Dinner Recipes With Simple Ingredients and a Grocery Shopping List!
When You Want to Give Up

 Is your life feeling hopeless and overwhelming right now? My guest post on Hope for Women today might encourage you:
I flung myself into a heap on the floor in our little basement apartment.
“What am I supposed to do, God?” I cried aloud. “I’m so thankful for this baby, but I’m so sick with this pregnancy. And being so sick means I can’t work. How are we going to survive?”
I felt helpless and at the end of my rope. My morning-noon-and-night sickness had hung on for weeks, keeping me from working at the part-time jobs I had before I got pregnant.
While my husband was in law school, those part-time jobs were keeping us afloat. Combining both of our incomes, we were already barely making it. With the absence of my income, our finances suffered a huge blow – and so did my faith.
Read the full post over on Hope for Women.
Allergy-Free Buffalo Chicken Pasta Salad


Guest post from Michelle of The Willing Cook
As I’ve said before, coming up with something original and satisfying for lunch while still remaining food allergy-safe is not always an easy task.
The most common lunch menu in our home is leftovers. It is nice, though, to have other lunch options for those times when leftovers is not an option or you’re tired of the same ol’ thing.
I have come up with a recipe today that I hope will fit that bill for you. My intention in making this dish was for a quick and tasty lunch, but we ended up having it for dinner as well. So, whether you make up a batch to eat for lunch for a few days or have it as a lunch leftover from dinner, it is sure to satisfy.
An added bonus for many of you out there is that while this recipe is safe for food allergy sufferers, it’s also great for everyone else as well. So, give it a try and enjoy!

Buffalo Chicken Pasta Salad
Ingredients
- 2 cups cooked chicken, diced (I pulled out previously cooked chicken from the freezer and thawed.)
- 8 ounces pasta of choice, gluten-free or whole wheat
- 1/4 cup bell pepper, finely diced
- 1/4 cup sun-dried tomatoes, finely diced (regular tomatoes are fine too)
- 1/4 cup red onion, finely diced
- 1 celery rib, finely diced
- 1/4 cup cilantro, chopped
- 5 slices bacon, cooked and crumbled
- 1/2 cup cayenne pepper sauce, like Frank’s Red Hot Sauce
- 1/3 cup extra-virgin olive oil
- 1/2 teaspoon kosher salt
- 1/2 teaspoon black pepper
- shredded cheddar cheese (optional)
Directions:
- Cook your pasta according to package directions to al dente. Once cooked, rinse with cold water and pour into a large bowl.
- While pasta is cooking, prepare the rest of your ingredients. Dice your cooked chicken and put in bowl with pasta. Use any kind of chicken that works for you, whether grilled, leftover roasted whole chicken, baked, etc.
- Dice your bell pepper, tomatoes, onion, celery, cilantro. Cook the bacon. Pour all these ingredients into the large bowl with the chicken and pasta.
- Season the pasta salad with kosher salt and pepper.
- In a separate bowl, whisk together the hot sauce and olive oil. Pour sauce over the pasta salad. Toss gently to combine all the ingredients with the sauce. (If cheese is allowed, add desired amount to top of pasta salad.)
- Refrigerate pasta salad until ready to eat. Serve with fresh fruit. Enjoy!
Would you like more allergy-friendly brown bag lunch ideas? You can find more ideas at The Willing Cook by clicking on Lunch Ideas for School/Work.
Michelle is blessed to stay home with her three children (ages 10, 7, and 4), while her husband works to provide. When she’s not experimenting with allergy-friendly meals, she’s blogging about it at The Willing Cook. Through the Willing Cook, her hope is that you gain peace of mind in your kitchen (and your pocket book) and are able to serve those you love who suffer with food allergies.
OVER-SPENDING EVERY SINGLE MONTH?Grab these FREE Budgeting Sheets!
Click here to download!
18 Brilliant Re-Uses For Things You Already Have

Have a minute? You’ve got to go check out this post on BuzzFeed with 18 Brilliant Re-Uses For Things You Already Have. I’m sure you’ve seen some of these before, but many of them were new ideas to me.
Thanks, Emily!
Our wonderful September Sponsors

Don’t let the name fool you: Camping Survival Women is for all women who are interested in being proactive, while at home or out-and-about. Whether it’s knowing how to build a fire, deck out a camper, save money by canning your own food, or prepare your home and family for that next big storm, Camping Survival Women is your place. Join our active Facebook page to learn from women just like you, and shop our store for some great deals. Don’t forget to code “women” for 5% off your purchase!

Kroger Krazy is a blog where Katie shares weekly Kroger ad matchups, unadvertised Kroger finds (including a running list of everything you can get for FREE at Kroger) and general money-saving deals in a very detail oriented manner. If you are looking for one concise location for all your Kroger needs, then look no further. Kroger Krazy is here to do the heavy lifting, so to speak, and guide you through the process.

How often should you clean door handles and light switches? What’s the easiest way to clean fan blades? When is the best time to clean your oven? What’s the fastest way to wash windows? Spring Cleaning 365 will give you all the answers by prompting you to do one task, each day, all year. Each cleaning prompt will be season specific and should take 15 minutes or less — and we’ll focus on the less! It’s the easiest way to have a home that looks Spring Cleaned all year long. Sign up now to be notified when we begin!

The Modest Mom is a family owned online clothing store for women, girls, and moms to be. They specialize in custom made maternity and women’s skirts. They also offer modest cami’s, layering shells and nursing covers. If you are struggling to find feminine, cute, and comfortable clothing, or you just need something that is custom fitted to you, look no further than The Modest Mom.

Are you considering homeschooling but wonder if the costs are too high? Maybe you have been homeschooling for a while and want to find some areas where you can shave off some curriculum expense. Wherever you are in your homeschooling journey, check out the list of homeschool freebies at How To Homeschool For FREE!

Great Homeschool Conventions is hosting two huge homeschooling events in 2013! March 14–16, 2013 will be the SouthEast Homeschool Convention in Greenville, SC, at the TD Convention Center and April 4–6, 2013 will be the MidWest Homeschool Convention in Cincinnati, OH, at the Duke Energy Center There will be lineup of incredible speakers (including Crystal Paine from MoneySavingMom.com!), hundreds of workshops, and a wealth of exhibitors! Back for 2013: Christian Comedian Tim Hawkins will be performing live! Find out more information at our website.
Do It Yourself: Melted Crayon Art

SimplyRebekah.com shows you how to make homemade melted crayon art.
My Lunchbox Freezer Cooking Plan

School is back in session and many of you are packing lunches to send with your children. Or, you might be packing a lunch for your spouse or yourself to take to work.
Packing your own lunch is a great way to save money, but trying to put together lunches at the last minute can be time-consuming. And that’s where freezer cooking comes in!
For the next two weeks, we’ll be doing a Lunchbox Freezer Cooking series here on MoneySavingMom.com. I’ll be making a different freezer-friendly Lunchbox item each day — and I’ll be blogging about it, with pictures, and encouraging you to join in and make what I make or another recipe that would work for brown-bagging it.
I’m not 100% sure of all of the recipes I’m making, but here’s what I think I’m going to make (most of these are new to me, so I can’t vouch for them!):
Individual Mac & Cheese
Peanut Butter & Jelly Sushi Rolls
Pizza Lunchables
Broccoli Chicken & Rice Cups
Corn Dog Muffins
Homemade Pizza Rolls
Bean & Cheese Burritos (here’s another option for Burritos, if you want something with a little more variety in it)
Mighty Tasty Mini Lasagnas
Chocolate Chips Granola Bites
Pumpkin Chocolate Chip Muffins
Other Freezer-Friendly Lunchbox Ideas:
Barbecued Meatballs
Peanut Butter & Jelly Sandwiches
Brown Bag Burritos
Homemade Pizza Pockets
Ham & Cheese Pockets
Southwest Rollups
Will you be joining us for some or all of the cooking/ What are you planning to make? Leave a comment with your list and links to your recipes!
10 Goals For This Week

We had a hard week last week. And, as a result, most of my goals went by the wayside. But that’s okay… goals aren’t the be all, end all of life.
And sometimes, you just have to set aside all of your ambitions and focus on just doing the basic things — like making sure everyone has food to eat, clothes to wear, and knows that they are loved and cared for.
Last week’s goals:
Family/Marriage/Mothering Goals
1. Start reading A Way Through the Sea aloud to the kids. Continue reading one chapter of The Borrowers aloud at dinner each night. {I did not read at all as much as I usually do last week and all of the reading was pretty much picture books from the library.}
2. Write a love note to Jesse. {Gulp… does texting count??!}
3. Read together with Jesse before bed at least three nights. {Um, this totally did not happen}
Personal Goals
4. Finish reading Running For My Life, Eats, Shoots, and Leaves, Now, Discover Your Strengths, Unglued, Abundant Simplicity, and Happier at Home. {I had all of this big plans to read while I was on my trip to and back to Illinois last week, but I ended up reading through my stack of magazines and some of the ebook I’d downloaded for free recently. Yes, I know, I’m so easily distracted and so good at starting new things instead of working on finishing the things I already have started.}
5. Listen to two chapters of Switch: How to Change Things When Change Is Hard. {I think I only listed to about 20 minutes total.}
6. Exercise at least five times. {I only managed to exercise four times.}
Homemaking Goals
7. Try at least two new recipes. {Progress here: a big fat zero.}
8. Finish at least 25 rows on the scarf I’m working on knitting. {I think I got a grand total of 12 rows done. Hey, at least it’s something, right?}
Business Goals
9. Write at least two articles for other blogs/sites.10. Prep for my speaking engagement in Bloomington, IL on Saturday.
This week’s goals:
Family/Marriage/Mothering Goals
1. Start reading A Way Through the Sea aloud to the kids. Continue reading one chapter of The Borrowers aloud at dinner each night.
2. Write a love note to Jesse.
3. Work on getting back on our Fall routine after falling off the bandwagon last week.
Personal Goals
4. Finish reading Running For My Life, Eats, Shoots, and Leaves, Now, Discover Your Strengths, Unglued, Abundant Simplicity, and Happier at Home.
5. Listen to two chapters of Switch: How to Change Things When Change Is Hard.
6. Exercise at least five times.
Homemaking Goals
7. Fill freezer using Lunchbox Freezer Cooking Plan. (More on that in a bit.)
8. Spot clean and wash curtains in kitchen.
Business Goals
9. Write at least two articles for other blogs/sites.
10. Blog four posts in the Lunchbox Freezer Cooking series.
How did you do on last week’s goals? What are your goals for this week? I’d love to have you share your progress on last week’s goals and your goals for this coming week in the comments. Of, if you’ve blogged about it, leave your direct link below. Let’s cheer each other on to live purposeful and productive lives!
You can download a free customizable weekly goal-planning sheet here.