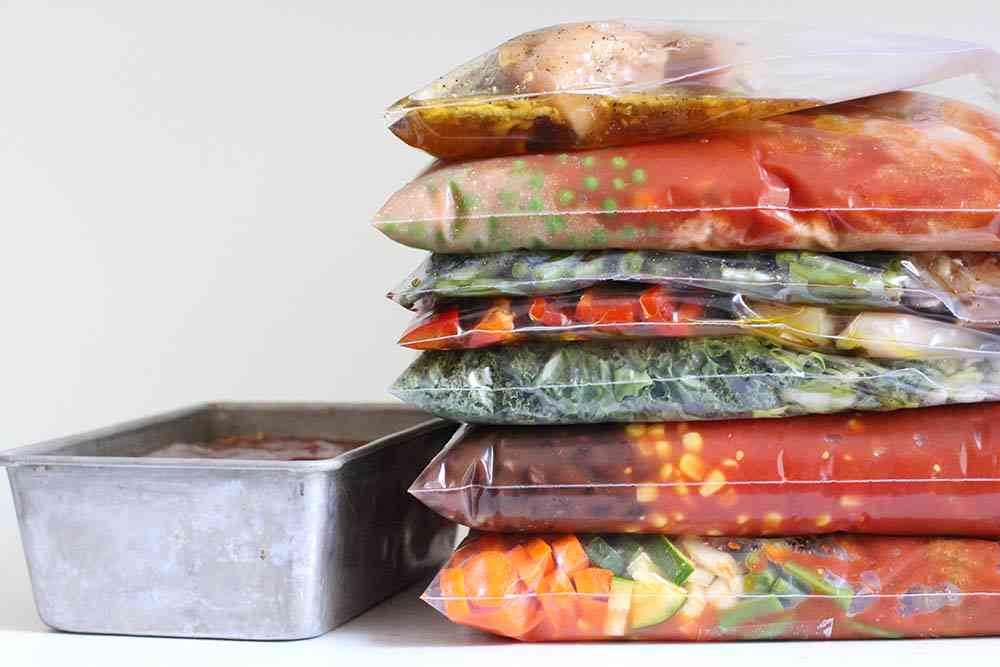
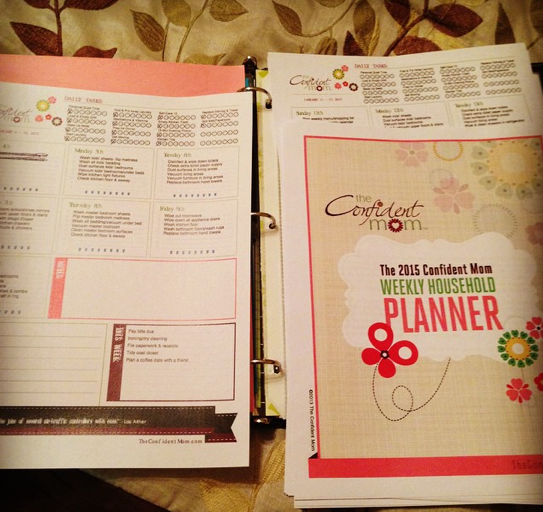
Kelli from New Leaf Wellness shows you how to make 8 No-Cook Freezer Meals in 90 Minutes.

Saving Families Money Since 2007


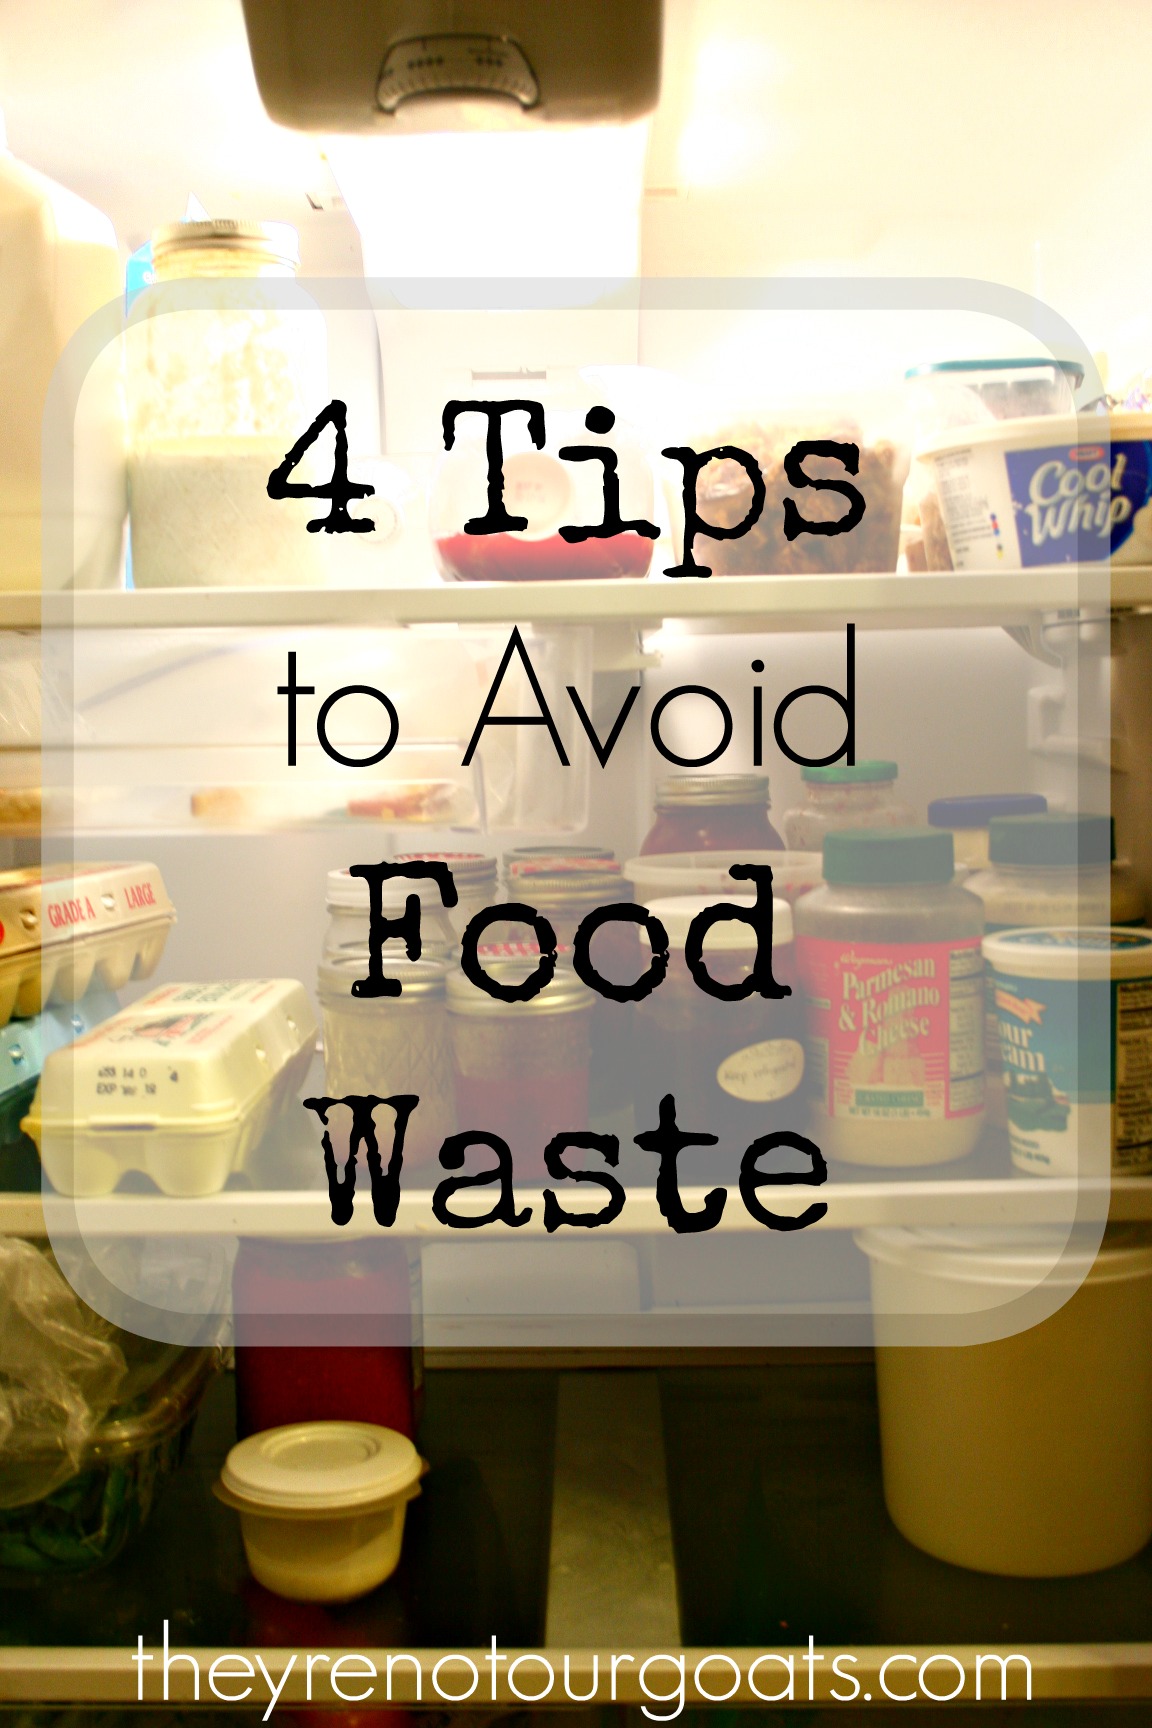
Guest post from Abigail of They’re Not Our Goats
I thought I was pretty good at avoiding food waste, until I cleaned out my fridge a couple weeks ago.
Ugh. Do I really have a science experiment growing on the back of the bottom shelf?, I thought to myself. Why yes, yes I did. I found myself disgusted with the amount of food I had let slide past my attention.
While it was a disheartening cleaning session, I finished with renewed vigor to cut back my waste — and hey, maybe save a few bucks at the same time!
Is food waste a problem in your house too? Here’s how you and I can put less food in the garbage and more in our bellies.
Knowing what you have on hand is half the battle. Consider the following:
Don’t dispose of perfectly edible food. An untouched kid’s plate should be saved rather than tossed, and the bottom of the pot can be given new life.
With a little planning and extra effort, we can save a lot of food from the garbage, keep more money in our pockets, and hopefully keep our fridges a little cleaner too!
Abigail is an aspiring homesteader, homeschooler, music-maker, and birth doula. She lives with her husband and soon-to-be-three children on her acre-and a half homestead in scenic Pennsylvania. You can visit her blog about living the homegrown life (and seeking contentment while doing it) at They’re Not Our Goats.

Looking for some freezer-friendly lunch ideas? Check out this Easy Lunches Freezer Cooking Plan from Life as Mom.


I am so grateful to my parents for the wise money management they not only modeled before us, but also taught and instilled in us! These are 3 of the most important lessons my parents taught me about life and money:
My dad’s dad raised my dad with the belief that you should never go into debt for anything except a house. From the beginning of my parents’ marriage, they followed this principle.
And then they took it one step further.
When I was around six years old, my parents decided to do something radical and work hard to pay off their house. They then saved up everything they could.
When I was ten years old, we sold that house and bought land out in the country and moved a single-wide trailer onto it for us to live in.
The trailer didn’t have an oven, didn’t have heat or air conditioning, leaked crazily every time it rained, had a bad mice problem, and was in fairly disgusting shape when we got it. But after days of elbow grease, we got it in livable shape, moved most of our possessions into a storage unit, and moved the basic necessities into that trailer.
We spent seven months in that trailer while we were building our house. I could write a book of stories from that experience. But most all of the memories are very happy memories and I wouldn’t trade the experience for the world.
At the end of seven months, our new house was finished enough that we could move into it. And it was a huge celebration to make it to that day… and for my parents to have realized their dream of building a house debt-free.
Seeing my parents’ sacrifices and creative commitment to living debt-free and how it put them in position to be able to give generously because they worked so hard to no longer have a house payment was a huge inspiration to my husband and me. I know beyond any shadow of a doubt that we would never be in the position we are in financially nor would we have paid cash for our first house were it not their example and influence. And we are eternally grateful.
My parents taught me that money is a tool. In the hands of wise stewards, it can be put to good use and make a huge impact. In the hands of those who are unwise, it can be wasted and blown with nothing to show for it.
With their lives and checkbooks, they modeled the importance of being wise in how you use and manage money. It wasn’t about saving money for saving money’s sake, but so that you could use that money saved to impact and help other people. To invest in things that matter, to bless people, to donate to causes you believe in, and to give generously.
My parents wanted their children to leave home with three things: a deep love for God, integrity, and a strong work ethic. They were so motivated to teach us the value of hard work that they set a goal to move out to the country by the time we were in our early teens.
With much prayer and effort, their goal was realized. And boy did we learn how to work! I have fond and not-so-fond memories of lots of back-breaking work: gardening for hours on end, dragging hoses all over the acreage to water the new trees we had planted, and spending much of the day on Friday taking care of the seven acres of the land that were planted in grass.
Truth be told, I wasn’t always so thrilled at all the work they expected us to do. Sweating in the heat and developing sore muscles on a regular basis weren’t necessarily what I’d consider fun. But looking back, I’m so thankful for the character I developed through all those hours of laboring in the hot Kansas sun.
The lessons in diligence and perseverance have been invaluable to me as a wife, mom, and business owner today. Truly, I believe one of the greatest gifts my parents gave me was instilling in me a strong work ethic from an early age.
I’m so grateful for how my parents taught me these three lessons and have they’ve impacted my life in profound ways.

For years, I’d dreamed of being a mom. And I didn’t just want to have a few kids; I hoped to have 12 (yes, for real!)
I came from a large family (there were 7 kids in my family) and I loved big families. Plus, I loved the idea of being a mom. So I couldn’t wait to get married and have kids.
Only, life often doesn’t pan out how you would dream. Soon into our marriage, we found out the devastating news that we’d probably never be able to have kids.
So many long-held dreams and hopes died on that day. So many visions of nurseries and strollers and rocking chairs and little feet.
And I cried many, many tears.
We didn’t tell this to many people because it hurt so badly and voicing it just made it more painful. So when someone would say something about us having children — and people made many unknowing comments of that sort in our first year of marriage — it stung deeply.
I well remember that first Mother’s Day as a newly married woman. I was sitting in church and hearing all of the moms being honored and praised. And my heart wanted to burst from how badly it hurt to know that there was a very good chance I would never be able to have kids.
I won’t ever forget what it felt like. And my heart will always hold a special place for women who struggle with the pain of infertility.
Mother’s Day isn’t always flowers and chocolate and handmade cards. For many women, it’s a hard reminder of something that isn’t, something that once was, or something that might never be.
Maybe you’ve lost a child.
Maybe you’re estranged from your mom.
Maybe your child has a life-threatening disease.
Maybe you’ve lost your mother.
Maybe you’re single and longing for marriage and motherhood.
Maybe that adoption you thought was going to go through didn’t.
Maybe you never really had a mother figure in your life.
Maybe you’re desperately longing for a child and struggling with infertility.
Maybe you are estranged from your grown child...
I don’t know your exact circumstances or the burdens you are carrying today. But if Mother’s Day is hard for you, I want you to know this: You are not alone.
I can’t be there physically to hug you and pray with you like I wish I could, but I want you to know that I care about you and others in this community here do, too.
And I would be honored to pray for you — especially this Mother’s Day weekend. If you are struggling and would like extra prayer and encouragement, would you leave a comment on this post or send me an email?
I will individually pray for each of as a small way of letting you know that, while it might feel like the rest of the world is off celebrating, there are people who care about you.
You are loved. You are not alone. You are not forgotten.

Guest post from Suzi
I’ve noticed some of the “smaller living” posts on MoneySavingMom.com lately and wanted to share our story.
We are a homeschooling family of five (plus an 85 lb. German Shepherd) living in a 990 sq. ft. downtown Chicago loft. We relocated four years ago from a 2800 sq. ft. ranch home. Not only did we downsize our living space, but we’ve completely changed the way we now think about our home and what we actually need.

We knew that downsizing would take effort and careful consideration, but having lived it now for four years, we now know that we are a changed family.
Things we used to consider necessary or “worth holding onto,” we now think of in a completely different way. We’ve managed to shift our thinking and boil it down to a few key principles.
Our main philosophy is: “Have nothing in your house that you do not know to be useful, or believe to be beautiful” – William Morris.
Our family’s key principles to living small:
Purge on a regular basis — especially if you are in a purging mood. I get rid of a lot of “stuff” and I can’t say there is one thing I miss or have needed after the purging it. Shocker alert – I even got rid of my crock pot last year because I realized the few things I did use it for, I could make on the stove top!
Be super selective about what you keep and pare down to the absolute minimum. I promise that if at first this seems difficult, you will be so glad you did in the long run. Living with less means less to organize in the future, less to keep clean, less to FIND A PLACE FOR and with all the LESS in your life, you’ll have so much more time for other, MORE important things!
You’re not going to hurt anyone’s feeling if you get rid of something. The card someone sent you last year was thoughtful and meaningful and how nice of that person to think of you. However, in short, it’s paper. Which in turn becomes piles and boxes of paper.
Keep things that are most meaningful, don’t keep everything anyone has ever given to you. We have a “keep box” that is in actuality a drawer. Things that we find meaningful, kids art, notes, and special cards, go into this drawer. At the end of each year we sit down and go through what is inside. We again, revisit each item and purge yet again. The most important items, we place in a large ziptop bag, label it with the year and place it with previous year collections in a bankers box). This helps us not only stay organized but to save what is truly meaningful to our family.
If you buy a new items, commit to getting rid of an old one. We have a pretty bare bone approach to the items we do have. Take the kitchen as an example. We have one spatula, two serving spoons, one set of measuring cups, one set of pots and pans, etc.
I truly ask myself, when do I use this? If it’s a cake pan I use once a year, I likely don’t need it. If, for some reason something breaks, then I can go buy a new one and have a reason to get rid of the item I’m replacing. It’s amazing what spacious kitchen cabinets can do for mood and organization.
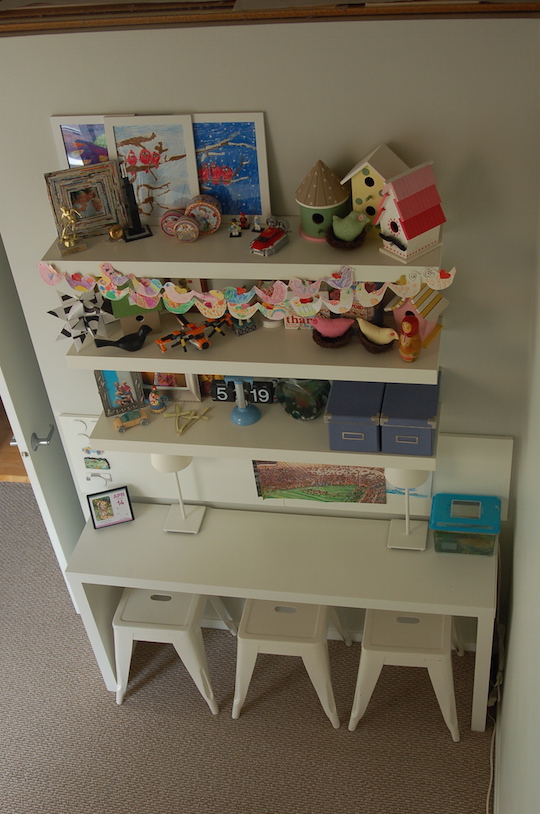
Consider not having so many knick-knacks in your home. For us, these are not something we consider useful in our home. Because we don’t have a lot of space to put things, like shelves or nooks, we’ve decided to not have many knick-knacks. They need a place, they need to be dusted regularly, and they don’t always go well with three little ones running around!

This seems like an easy solution, but it really is a tough one. It’s tough to get in the habit of keeping something organized that you spent so much time organizing in the first place!
When we organize something, we think about it long term and ask ourselves, is this really an easy and effective way to store something. Will it be easy to put “away” and is it accessible and sustainable? Over the years, we’ve tweaked and made adjustments to areas that were not sustainable and after constant effort, we’ve (for the most part) got it down. The best advice here is stick with it. There is a proper place for everything. Which brings me to my next point…
You don’t need to buy all kinds of fancy organizing “equipment” in order to get organized. If you don’t already have a place or location for something, you might not need it in the first place. Use the space you currently have and work with it. No need to add more stuff to hold all your stuff!
Always take the time to put things away, BEFORE doing anything else. Now, I know as a parent, this one is easy to overlook, but I promise it’s completely doable (even with crying kids at the door, or tantrums in the car making it so you can’t even get in the door)! Been there, done that too.
When it’s 6:00, you’re just walking in the door from hours of kids’ activities or work, you have three little ones that are hungry, cranky and need dinner and baths, it’s super easy to throw down your jackets, shoes, bags, etc. and make a beeline for the kitchen to get the train moving just so you can have some peace and quiet, STAT! However, if you just take the extra 1-2 minutes to hang up the coats, ask the kids to put their shoes away and unpack bags, it prevents a few things from happening.

It takes constant effort from everyone in the family to assess and reassess their belongings on a regular basis. It takes teamwork and a shared philosophy that together WE can make this work and, therefore, we can enjoy the small, shared space that much more!
We consistently go through things, talk about them, discuss them and make decisions on them. Our children know that 990 sq. ft. can only hold so much, and over the years they’ve become quite the critical thinkers. They ask themselves the questions that my husband and I ask ourselves when it comes to our things. They make difficult decisions and are not only gaining reasoning skills, but learning that “stuff” is exactly that…it’s stuff. And what is truly important in life is not stuff.
This is an invaluable lesson that I did not foresee when we downsized, but one that I am truly thankful for.
Play the room switcheroo game. We’ve given our kids the Master Bedroom! It’s true…we gave the kids the room with two closets and the most space. We took the room with ZERO closets and about 12 inches on each side of our queen size bed. It’s crazy, but it works. We figure the kids need the most space and all we do is essentially sleep in our room. So, our girls have the larger room and it works out just perfectly.
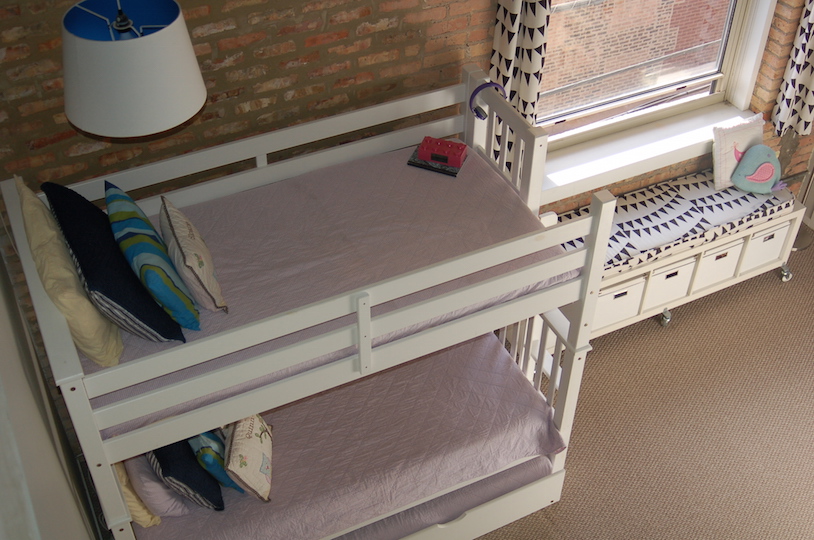
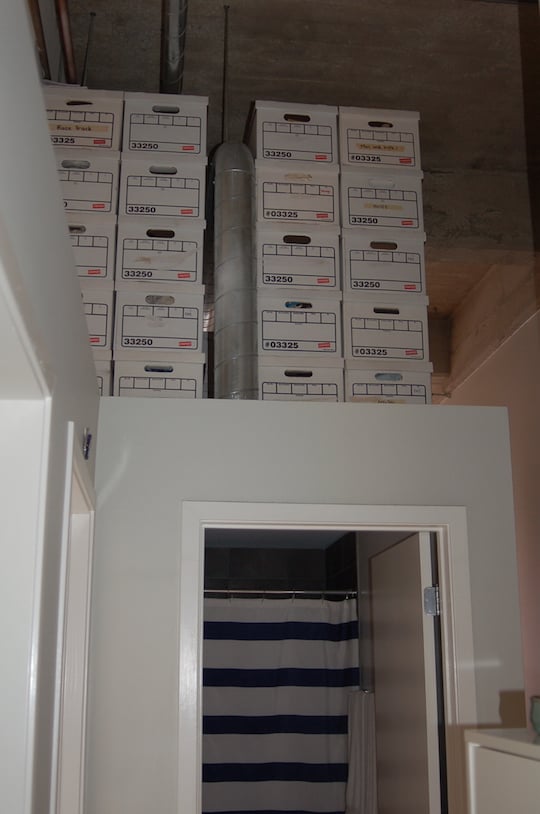
Use vertical space. Granted, we live in a loft with 15 ft ceilings, but we utilize the upward space as much as possible. Because we are in a loft, all of our walls are “soft” walls. They only go up about 8 ft. The rest is wide open. However, the only room that is enclosed is our bathroom.
We’ve gotten creative by adding “floor boards” to the top of the bathroom and stacking our bankers boxes that house things like seasonal items, our wedding dishes or those ever important “keep items” that we purge each year.
We’ve also added boards above the girls closets and used the space above to store off season kids’ clothing and items. It works like a charm and looks pretty decent too.
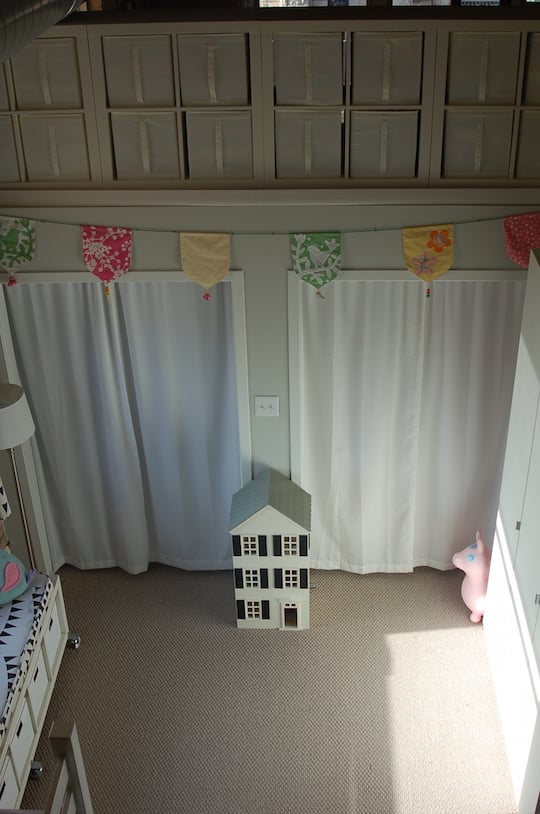
Take off the doors and who said you had to put clothes in closets? We found that in our small space, the bi-fold doors weren’t doing us any favors, we decided to remove all of the bi-fold closet doors (there are only 3 closets, two of which are in the girls room) and add curtains instead. It opens up the space quite a bit and allows easier access for the kids. In the kids closets we’ve designated 1 for toys and the other for books.
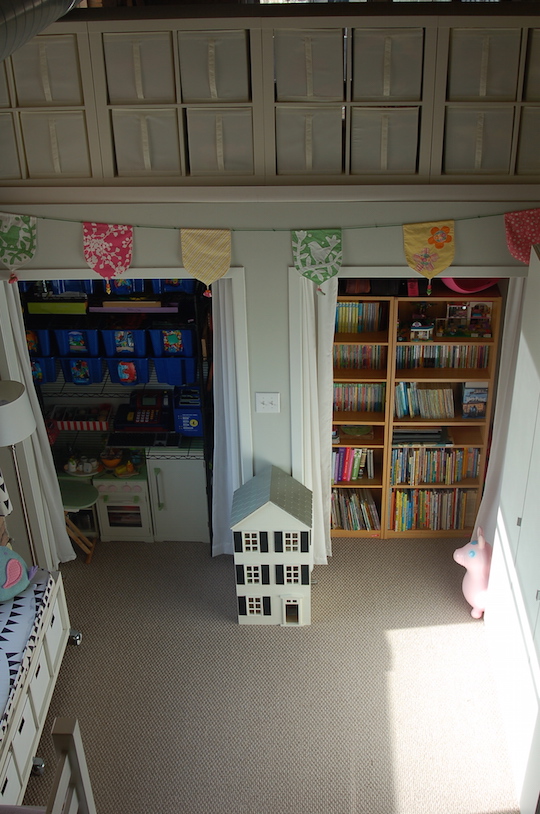
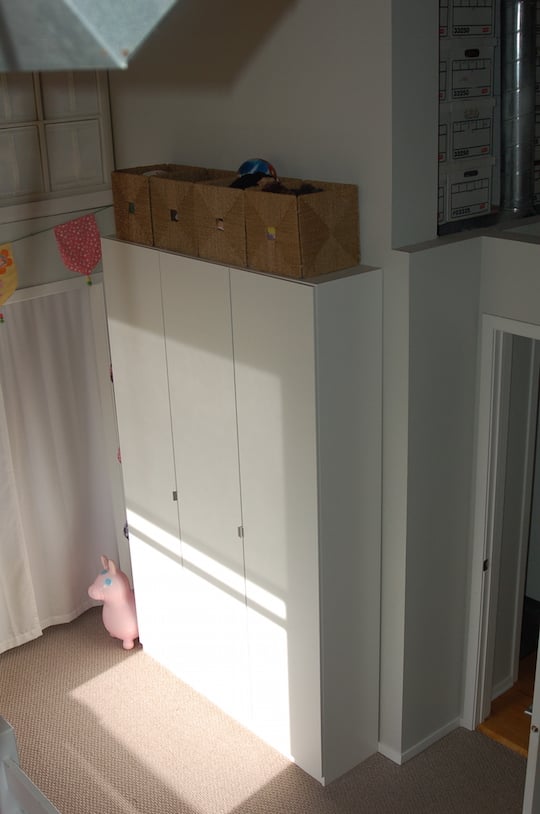
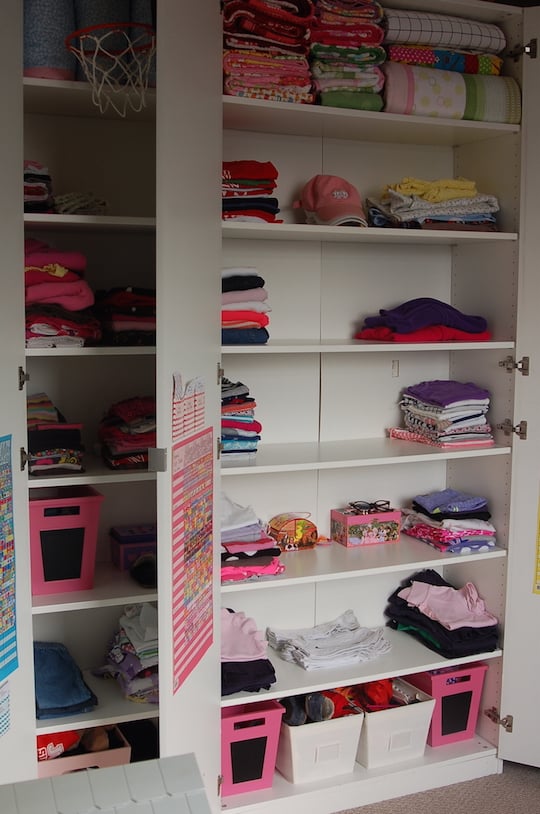
So, where do we put their clothes? We opted to use a slender IKEA wardrobe in their room. It takes up less space, blends in, and allows us a place for everything for all 3 kids!
Create a space for everything. One of our highly coveted closet spaces houses ALL of our toys. Everything has a place and is organized with photos so there’s no confusion on where things “live.” The small closet holds our play kitchen, all of our board games and countless buckets of toys, all labeled with photos and sorted by type. It seems a little crazy but it works for us and my kids like that clean up is a breeze.
When we organize, we make sure all things have a home. But some things have unexpected homes. For example, my make up and hair things that you’d find in a bathroom are in boxes below our TV cabinet (because our bathroom is way too small!) I have a small folding mirror that lives there too and I get ready there each morning.


Another “secret” spot is where I homeschool. ALL of my teaching supplies are housed in the cabinets next to our dining room table. They are all hidden so we don’t “live” in the classroom. (We’ve also painted the cabinet doors with magnetic/chalk paint so I can teach here everyday and then close it up at night and have our house back)! Win-win. Seems strange, but again, find what works with what you already have and embrace it!
In closing, I should say that small living is likely not for everyone. And sure, there are days when I think about our old basement that housed so much of our past “stuff!” However, after living small, teaching small, and embracing small, I have absolutely fallen in love with small!
I find joy in the fact that I can plug my vacuum in to an outlet in the center of our loft and vacuum the entire house. I find peace in knowing that I only have one bathroom to clean, and I find excitement in the fact that staying organized and living tiny allows our family so much more time to do the things we want to do…that are fun!
Suzi is a former elementary school teacher turned SAHHM (stay at home homeschooling mom) to three fantastic girls ages 8, 6 and 4. She is extremely lucky to have a wonderful husband that supports her and is just as crazy about organization as she is. In her spare time she enjoys spending time with her kids, running, enjoying the city of Chicago and taking way too many pictures.

1 head Cabbage – $1.29
2 24-oz jars Spaghetti Sauce – $1.98
1 3-lb bag Sweet Potatoes – $1.79
1 48-oz bag Frozen Boneless Chicken Breasts – $6.69
1 head Cauliflower – $1.99
2 16-oz bags Baby Carrots – $1.98
1 20-oz pkg Zucchini – $1.99
1 bag Sweet Mini Peppers – $2.29
1 6-ct pkg Kiwi – $1.69, plus receive $0.25 back from Checkout 51 – $1.44 after rebate
1 3-head bag Garlic – $0.79
1 16.9oz jar Extra Virgin Olive Oil – $3.29
1 large Bag Kale – $1.99
1 8-oz bag Flat Leaf Spinach – $1.79
1 box Rice Squares – $2.29
1 3-ct pkg Romaine Hearts – $1.99
2 6-oz cartons Blueberries – $2.58
Total: $34.77
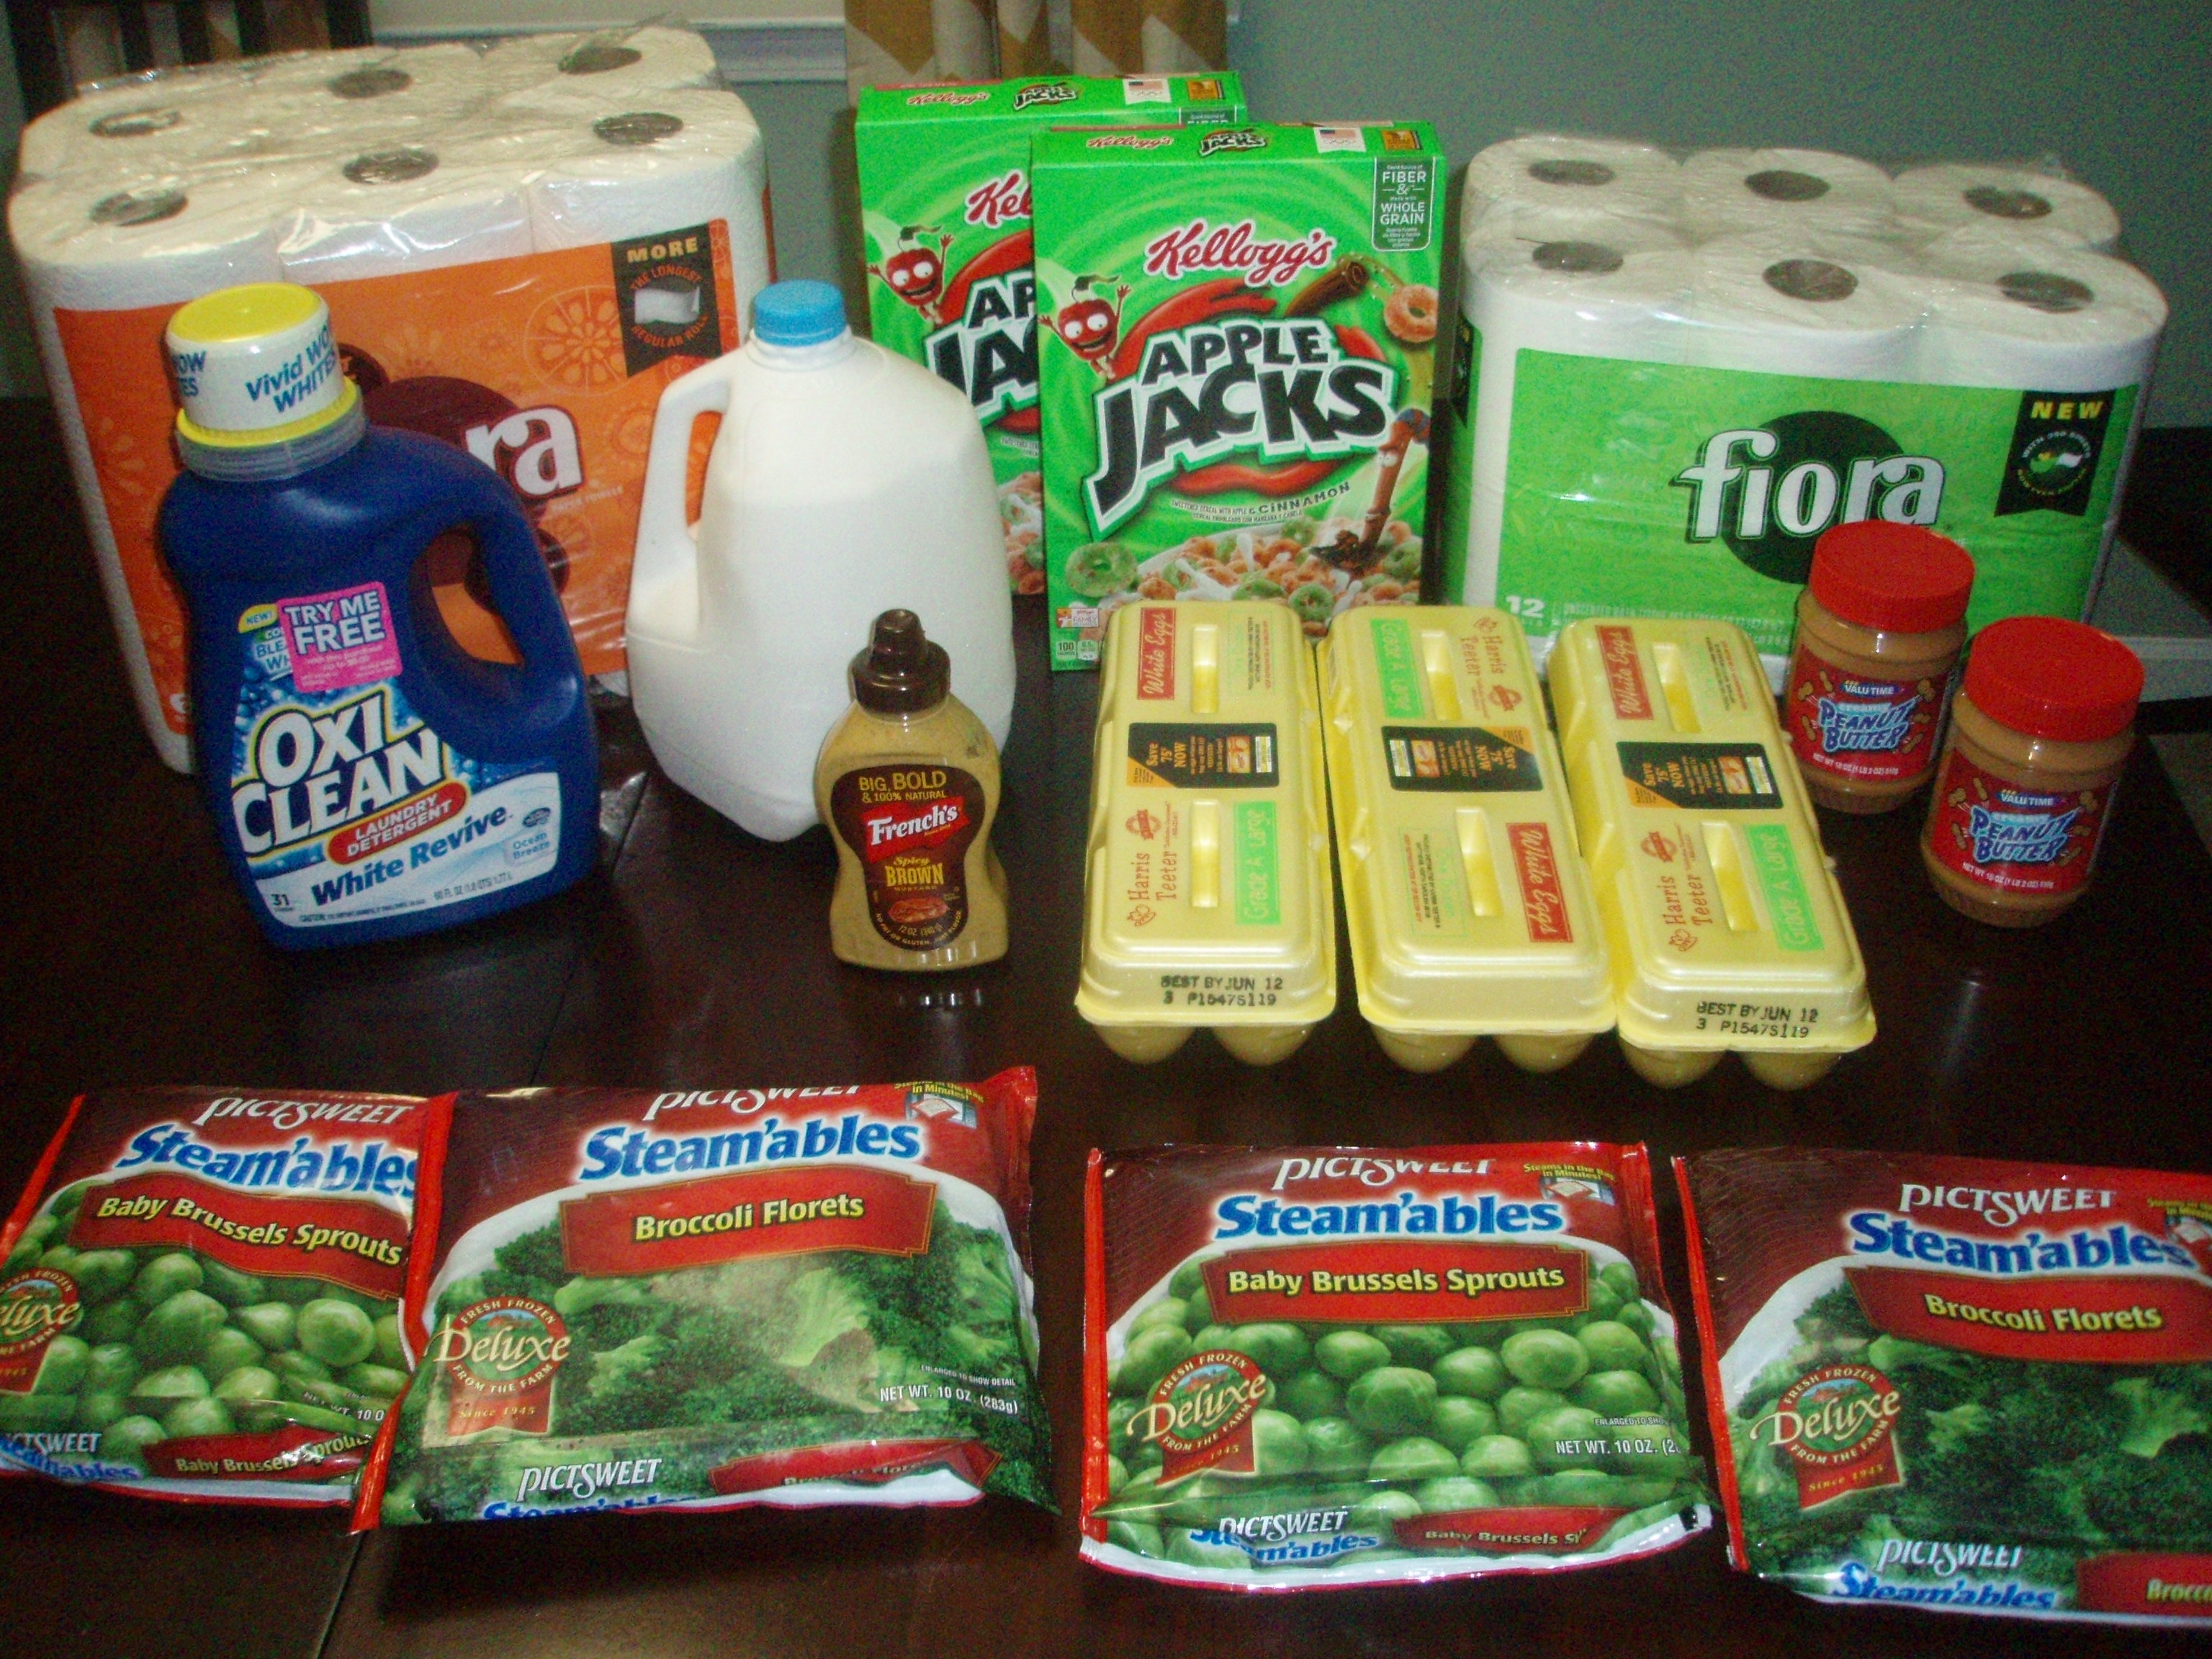
2 boxes Apple Jacks – $3.94, used 2 $0.50/1 printables (doubled) – $1.94/2 after coupons
1 gallon Milk – $2.99, plus receive $.30 back from Ibotta – $2.69 after rebate
1 French’s Spicy Mustard – $1.67, used $0.75/1 French’s Sweet or Spicy Mustard, exp. 7/31/15 (SS 04/12/15) (doubled) – $0.17 after coupon
2 jars Peanut Butter, reduced to $0.83 each – $1.66
1 jug OxiClean Laundry Detergent (which had a “Try Me Free” rebate sticker on it) – $5.99, used $2.00 coupon (which I am not finding in the database for some reason) – $3.99, plus receive $5.99 back after Mail-In-Rebate – $2.00 MM after coupon and rebate
1 12-ct double roll pkg Fiora Toilet Paper – $3.99, used $0.55/1 Fiora Bath Tissue or Paper Towels, exp. 6/30/15 (RP 05/03/15) (doubled) – $2.89 after coupon
1 6-ct Fiora Paper Towels – $3.99, used $0.55/1 Fiora Bath Tissue or Paper Towels, exp. 6/30/15 (RP 05/03/15) (doubled) – $2.89 after coupon (unlike Crystal, we DO use paper towels at my house…I just can’t convince my husband we can live without them ;))
4 pkgs Frozen Vegetables – $4.00
3 dozen Eggs – $3.75, plus receive $0.30 back from Ibotta – $3.45/3 after rebate
Total after Coupons, Rebates and Tax: 18.59
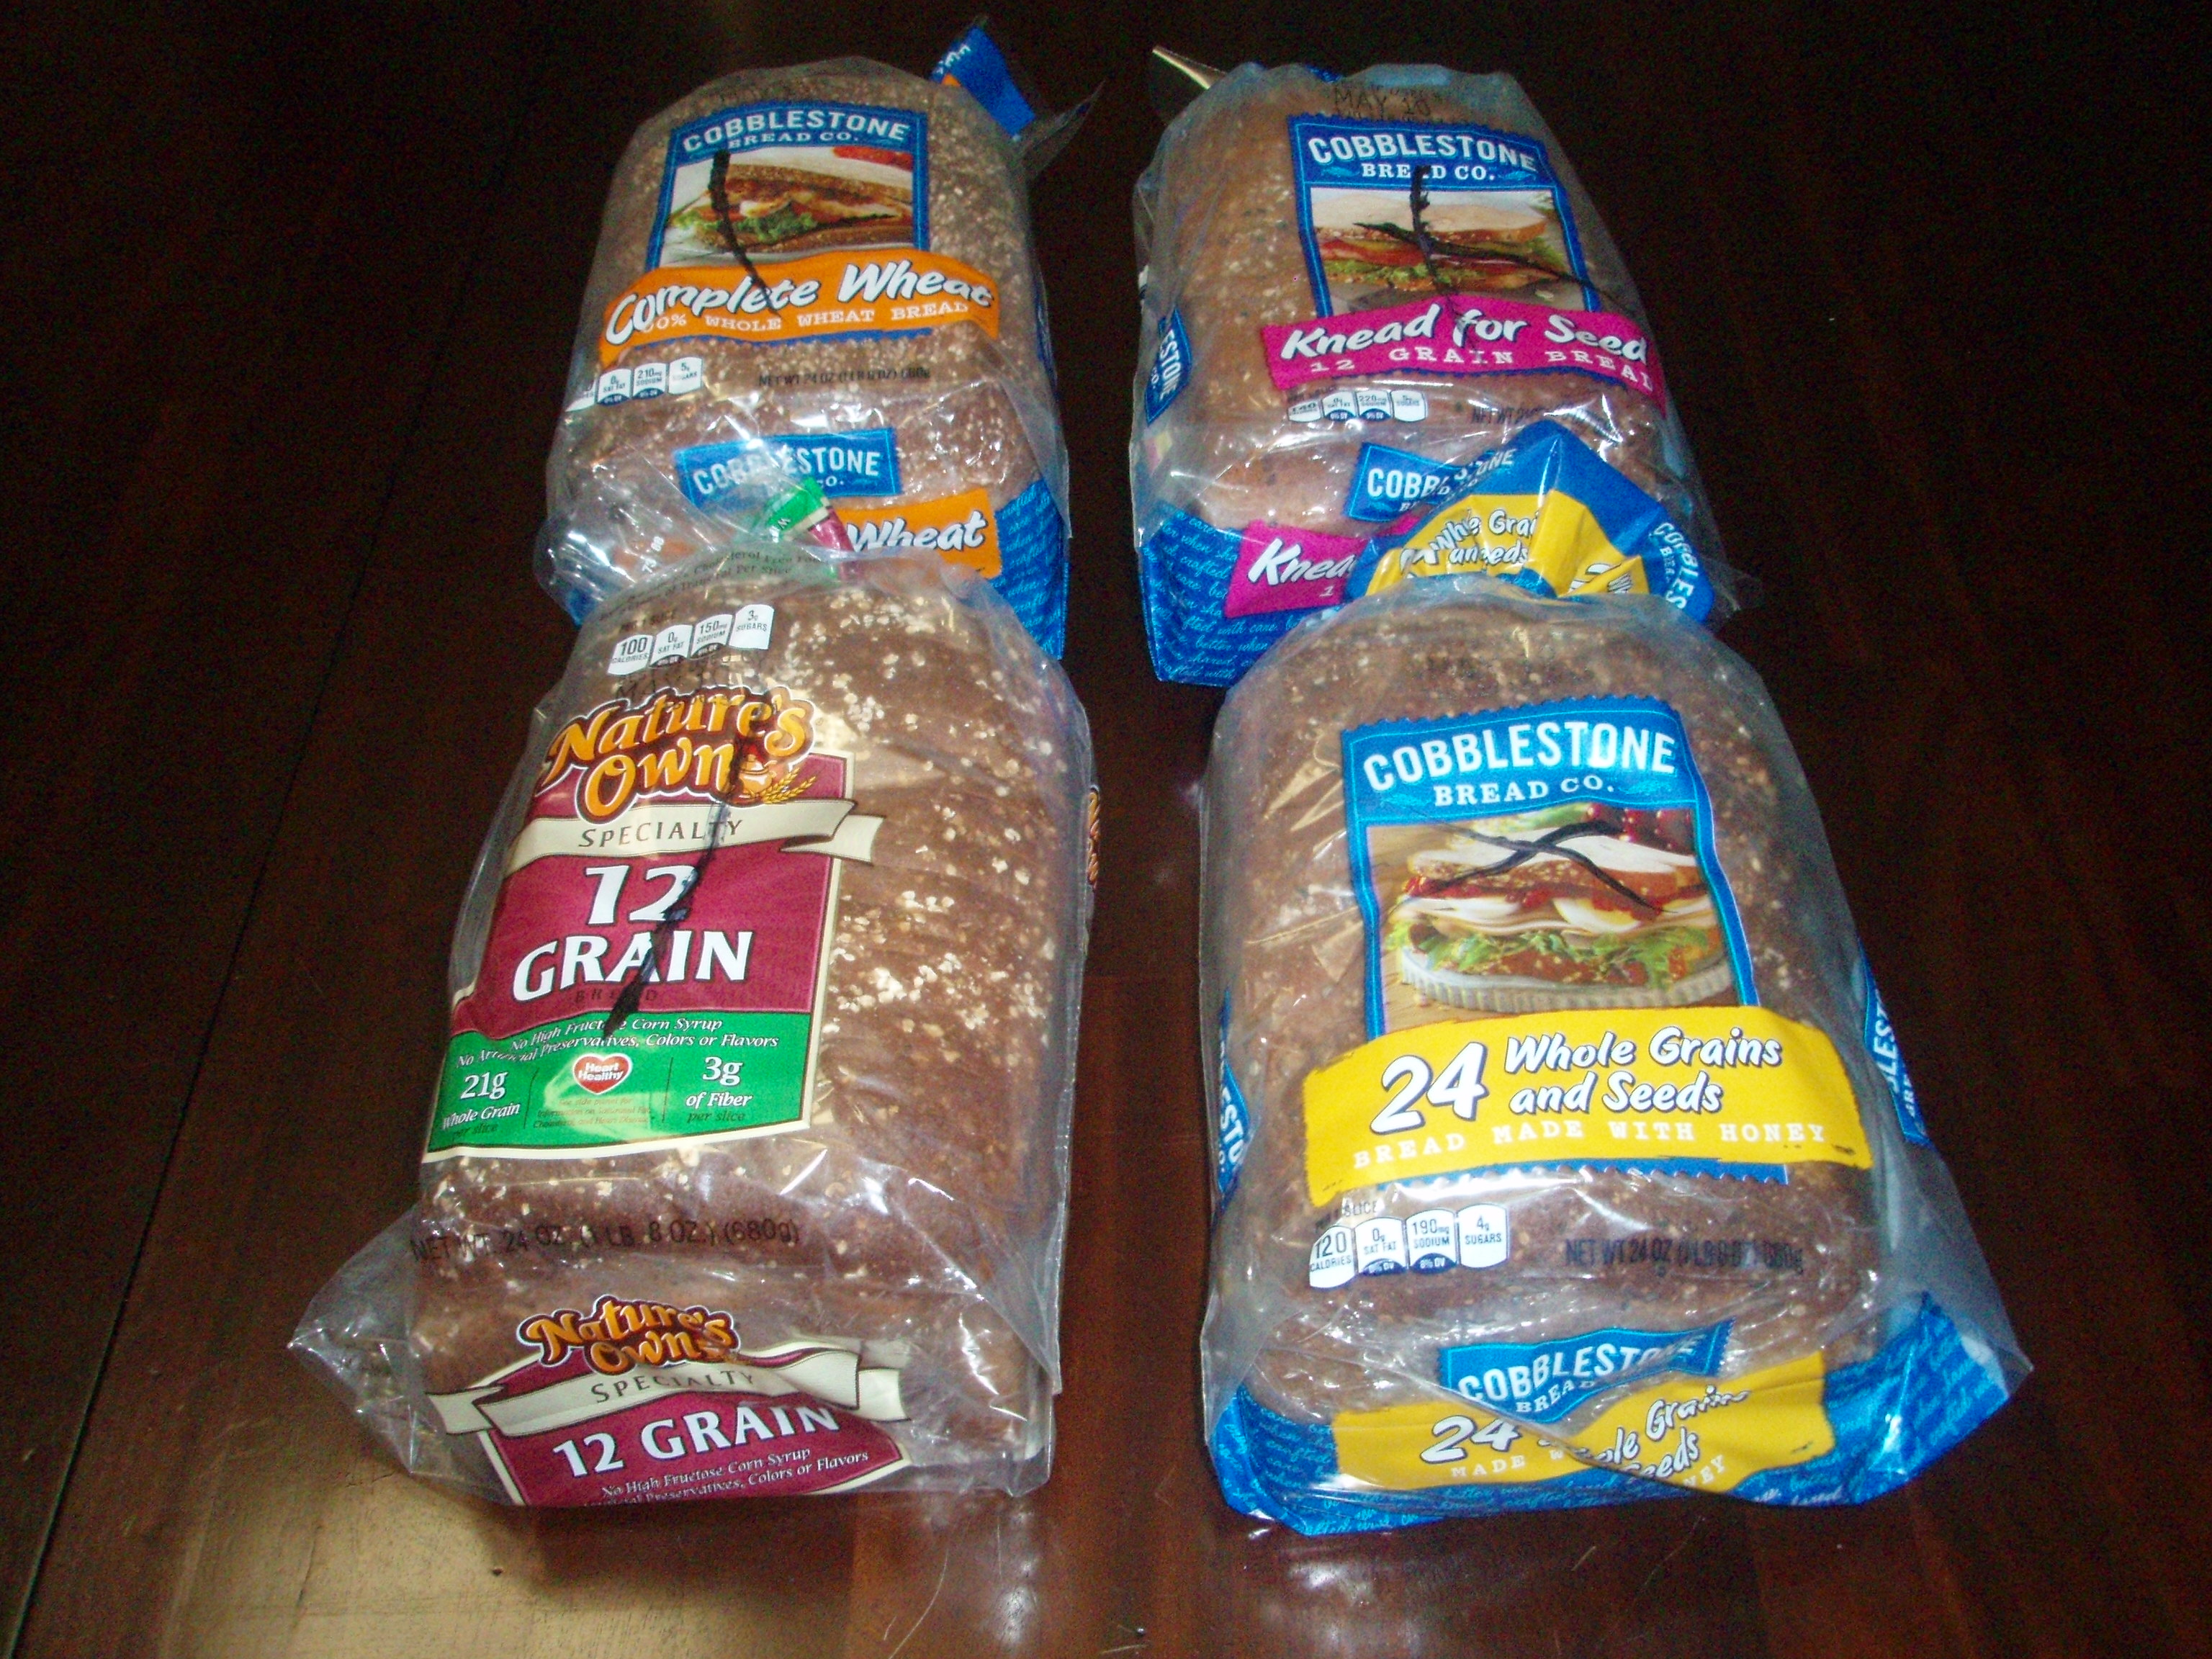
4 loaves Bread, reduced – $2.00
Total: $2.00
Weekly Total: $55.16
Weekly Menu Plan
Breakfasts
Oatmeal and Strawberries (from the freezer) x 3
Cereal x 2
Veggie Omelettes x 2
Lunches
Baked Sweet Potatoes with Cinnamon, Fruit (we still have leftover fruit from last week to use up), Peanut Butter Toast x 2
Build-Your-Own-Salad x 2 (mixed greens, hard boiled eggs, sliced cheese, sunflower seeds, raw veggies)
Macaroni and Cheese, Raw Peppers and Carrots, Oranges
Leftovers x 2
Dinners
Three Cheese Baked Spaghetti, Tossed Salad with Olive Oil Vinaigrette, Steamed Broccoli, Easiest Focaccia
Hamburgers on the grill, Grilled Vegetables (peppers, cauliflower, zucchini), Blueberries
Best Chicken Pot Pie, Grapefruit, Brussel Sprouts (brussel sprouts are not a family favorite – but I hope to change that eventually! ;))
Taco Salad (using ground turkey from the freezer, mixed with rice and beans), Fruit Salad
Potato Hash Stir fry (Using my needing-to-used-up potatoes, ham from the freezer, eggs, and shredded cheese), Steamed Broccoli, Blueberry Oatmeal Muffins (modifying this recipe)
Leftovers x 2
Snacks
Smoothies, Chewy No-Bake Granola Bars, Frozen Grapes, Fresh Veggies

I was honored to be asked to share what I really want for Mother’s Day for a Time.com piece. Want to know what I said? Here’s my blurb:
“My ideal Mother’s Day gift would be my family all pitching in together to clean up the house, do the dishes, fold and put away the laundry, and make me something yummy to eat while I took a bubble bath or read a good book.” — Crystal Paine, moneysavingmom.com
Read the rest of the answers from other moms here.
I’m pretty spoiled in that at least a few times per year, my family gives me this exact gift of a complete night off while they make me food + clean up the entire house. It’s pretty much the best gift ever, in my opinion.
What would be YOUR ideal zero-budget gift for Mother’s Day? Tell us in the comments.

Elizabeth emailed in the following tip:
A lot of the entertainment in our household revolves around food. On his nights off, my husband and I enjoy eating at nice restaurants, either alone or with friends. During the week I love to relax with my friends over wine and cheese. My Saturday mornings are spent catching up with my parents over breakfast at our favorite restaurant.
As we’ve looked to trim our budget, finding ways to continue to enjoy our food pursuits inexpensively has been forefront in our plan. While I love seeing my parents for breakfast, if the kids are along, my bill at our favorite restaurant will creep up quite fast.
One way I’ve been able to reduce my budget is to bring our Saturday morning breakfast to our house.
Breakfast is the one meal that is easy to make and relatively inexpensive to serve. There are a lot of different options and you can linger over your coffee/tea without the waitstaff getting antsy. It’s also the one meal that you can serve with very little prep work if need be. There have been times when I haven’t started my menu planning until about 30 minutes before my parents arrived!
When deciding what to serve, I choose one or two options from each of the categories listed below. Most of the time my choices are based on what I have in my refrigerator or pantry.
Starters
Protein
Carbs
Going out for breakfast (if my children are there) usually costs well over $30 with tip, that’s not including my parents bill. However, I’ve found that, on average, I’m able to cook breakfast for all of us for less than $10 — depending upon the menu I choose.
By bringing breakfast to our house I’ve been able to save all of us quite a bit of money!
In addition to being a wife and mother of two adult children, Liz works outside the home and blogs at Wonder Woman I’m Not — a home management blog for the busy woman striving to find balance in their lives.

Guest post by Melissa Kaiserman
In the spring of 2013, my husband was in his seventh year of a position that had gone from dream job to highly toxic work environment. The stress was getting worse by the week and affecting both him and our family. Despite his best attempts to just focus on doing his job well and not let it get to him, it reached a point where he really believed he was supposed to quit.
While my husband is (thankfully!) not a big spender, he is definitely the Free Spirit while I am the Nerd. I’m the one who knows the budget inside and out, divvies up the cash into spending categories, and pays the bills. So I was trying my best to be supportive and not panic as I analyzed how the finances for our family would be impacted since I was a SAHM with just a little side business that I was doing mostly for fun.
At this point in our marriage, we had been completely out of debt (except for our mortgage) for about five years, which was a major factor that allowed us to even entertain such a drastic change. So for the next few months, we saved the profit from my handmade business as well as our tax return and anything extra from paychecks. After we had accumulated about 3-4 months worth of living expenses, Dave resigned from his job.
He immediately started looking for another position in his field. While he was going through the process of applying and interviewing, he mentioned that I may as well teach him some ways he could help with my business since he was home and had time. So I did, though neither of us had any idea how vital this would turn out to be!
A few weeks after my husband left his job, I received an Etsy convo from a credit union many states away that resulted in an $1800 order! There is no way I could have fulfilled that request without my husband home.
From that point forward, we clearly saw God blessing my business and my shop continuing to grow. But while Dave had made it to the final interview round for three different jobs for which he was highly qualified, he wasn’t offered any of them.
After some initial discouragement, it hit us: Maybe God is closing doors because He wants us to do this together! We had assumed my husband would continue in his field and I would continue to be a SAHM who operated a side business that simply provided extra for Christmas gifts and vacations. Having a family business and working from home seemed like too big and lofty a dream.
For the past 2 1/2 years, we have supported our family of six with a handmade business which, despite the warnings of the pundits, has sold products exclusively on the Etsy platform. My husband gets to work in his field from time to time and keep his skills sharp, and while that only accounts for a small percentage of our yearly income, the opportunities always come at just the right time.
People often express amazement at our story and wonder how we are able to make it work. While there’s no magic formula–and while as Christians we believe the main reason for our success is that we’re doing what God has called us to do–I believe there are three very practical areas that contribute:
 1. We are out of debt.
My husband quitting his job was a step of faith, and we couldn’t have taken it with confidence if we had been under the burden of debt. If you have a dream of one day quitting your day job to work from home doing something you love, I strongly encourage you to get “gazelle intense” about eliminating debt!
We have also stayed completely out of debt with our business. In the very beginning, I used cash to pay for a limited amount of supplies until I created some profit and could purchase more, increasing inventory as I went. We’ve never used and don’t even own a business credit card–only debit.
While I am the one who manages pretty much every aspect of the business, my husband does not view any job I need him to do as beneath him. He doesn’t perform any of the sewing, but he completes so many of the intermediary and finishing tasks that I find tedious, freeing me to focus on the areas where I thrive.
The same teamwork principle applies to our home. In addition to being an excellent handyman, Dave washes all of the laundry (and passes it along to our four who fold!), does virtually all of the transporting of children as well as many errands, and is quick to jump on anything he sees that needs to be done around the house.
If we didn’t tell our money where to go, our money could easily tell us this won’t work and that my husband needs to return to a traditional job. The truth is, we love our life and want to do this for as long as possible. So for us, it is worth it to make sacrifices and forgo doing and having some things in order for that to happen. It wouldn’t be possible without choosing to be content and having a spending plan.
When I made my first cash envelope system wallet for myself over four years ago, I discovered that ditching the paper envelopes and having a pretty and durable way to organize our cash made living on a budget seem a lot more enjoyable.
Melissa Kaiserman is a wife, mom, and handmade business owner who designs cash envelope system wallets & accessories that put the beauty in budgeting. She also blogs at A Time for Everything and uses her experience and passion to support and mentor fellow makers at Makery Space.

Guest post from Kari of She Thrifts
We’d all like to be able to give back to our community, but doing so while on a tight budget can feel challenging. I’ve discovered an easy way to contribute that costs me nothing, and I receive some nice benefits, too… donating blood!
Okay, maybe not the part where the needle goes into your arm (it’s a pinch, but not painful – really!), but the part where you know you have just helped save up to three lives… yeah, that feels good!
I schedule my appointments for a time when my husband is able to be home with the kiddos and head to the donation location alone!
I don’t know about other busy mamas, but that’s a rarity for me.
Instead of finding the possible wait time annoying, I really enjoy it! I bring a book, or a magazine, or catch up on my favorite blog-reading on my phone.
Every donor gets to stop at the canteen for a snack and brief rest after their donation!
I was lucky when I first started donating blood that I had an employer who allowed me to donate on work time. Now that I am a mostly-stay-at-home-mama, I do it on my own time, but feel it’s totally worth the time invested.
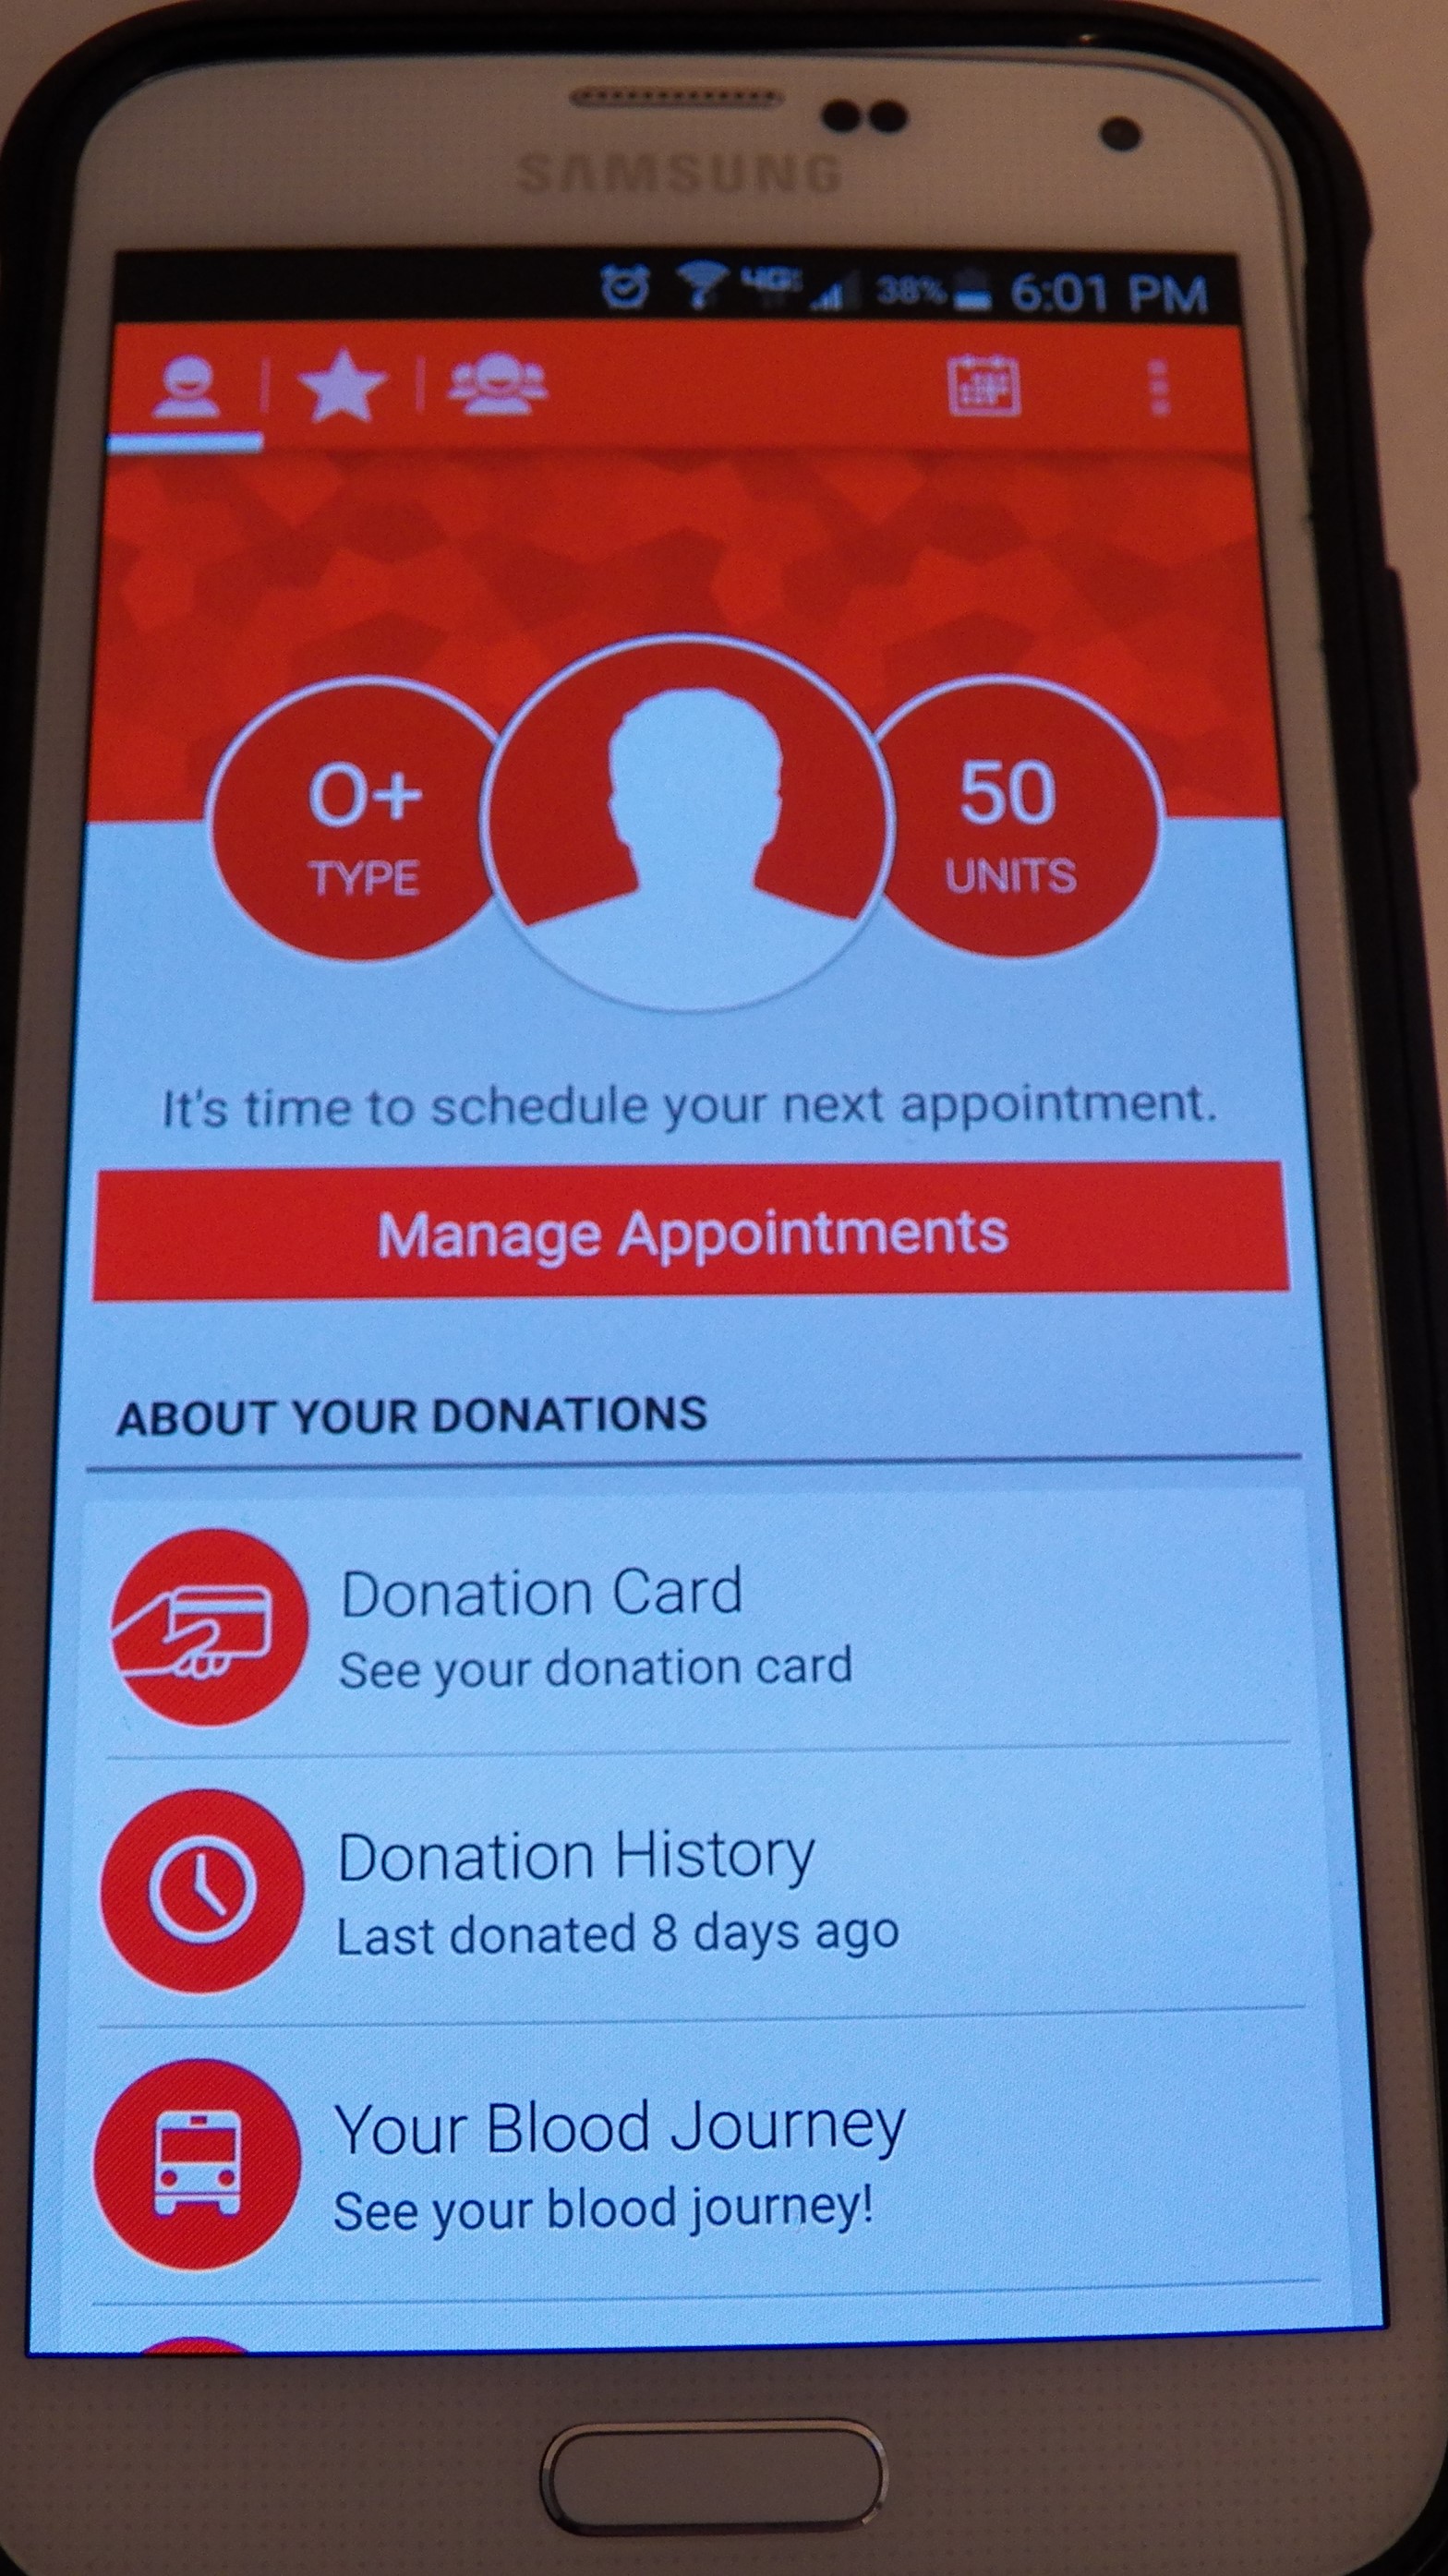
Donors can give blood every 56 days, and it’s an annual goal of mine to donate at least 5 times every year. I downloaded the American Red Cross app on my phone recently and discovered I had just reached my 50th donation!
There are certain requirements you have to meet be eligible to donate (i.e. general good health, weight minimum, not pregnant, etc.) and there are certain situations where your donations will be deferred for a period of time (i.e. after a piercing, tattoo, or travel to certain areas of the world).
A complete list of eligibility requirements can be found here.
First time donors can find out what to expect here.
And you can find blood donation centers in your area here.
Kari is a librarian turned stay-at-home-mama to two boys, ages seven and four. She was inspired by a guest post on MSM several years ago to begin selling items on eBay, which has turned into a successful hobby job which in large part helped pay off her student loans *in full* in February, 2015. She blogs about her eBay adventures at She Thrifts.

The advent of technology has opened up so many new ways to save! I was doing an interview for a magazine recently and the writer started asking me about some of these. As I began sharing ideas, I realized that I’d never done a post specifically focused on my favorite ways to save using technology.
I figured it was high time that I put that post together! So I had fun coming up with my top 10 ways to save money using modern technology:
Have a product your family loves and uses often? Take a few moments to shoot an email to the manufacturer through their contact form, tell them how much you enjoy their products, and ask if they can send you any coupons they have available.
Be polite, be concise, and be sure to include your mailing address. It only takes a minute or two, it costs you nothing, and the worst thing that can happen is that the company doesn’t respond or writes back to say that they don’t offer coupons.
But more often than not, companies will send high-value coupons or even coupons for free products — all because you took the time to ask!
Kelsi says this:
Last week I emailed the manufacturer’s of Luna bars asking for coupons and telling them about my Luna-A-Day habit while rocking my newborn with my foot and pumping breastmilk at the kitchen counter. Today, I received six coupons for a FREE Luna Bar or Luna Protein Bar and a 100% organic cotton baby blanket! -Kelsi
One simple way to save at least $5 to $10 each week without spending a lot of time and effort is to follow a local deal blogger. This is someone who lives in your area who covers the deals at your local store, as well as who alerts you to special sales, clearances, and even free events and other tips on bargains in your city.
When I talk about finding a local coupon blogger, the first question people always ask is, “Yes, but how do I find one in my local area?” I suggest starting by searching for your local city/town + “coupon matchups” or “deal blogger”.
If that doesn’t pull anything up, try searching for the towns around you. If you live in a very small town, you might not find anything, but if you live in a decent-sized town, there’s a good chance you’ll find someone — maybe even multiple bloggers!
If you still can’t find anything, then search your store’s name and “coupon match-ups” or “deal blogger”. You should definitely find something with that search. You can also check out our Store Deals section to find a blogger who is covering the deals at the stores you shop at regularly.
Once you find some bloggers who you think might be a good possibility, go ahead and sign up for their email newsletter or subscribe to their blog. Follow them for a few weeks and you’ll get a good idea if they are a good fit or not for the types of deals you are looking for.
Many stores are now offering e-coupons — coupons that are tied to your store loyalty card and that come off at checkout when you purchase a particular.
Kroger and Meijer are two grocery store chains that offer a number of e-coupons and also regularly offer e-coupons for completely free items. Check your local grocery store’s site to see if they offer e-coupons, as well.
While these e-coupons usually cannot be combined with paper coupons, they are sometimes high in value and you don’t have to mess with any printing or clipping to use them!
The Target Cartwheel App is fast becoming one of the most popular e-coupon options. Best of all, you can combine the Cartwheel coupons with paper coupons and Target Text offers (text OFFERS to 827-438 to get text coupons each week) to save even more!

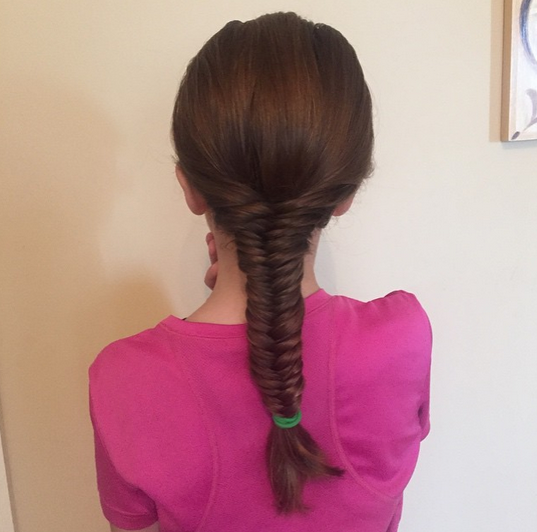
I watched a tutorial on how to do a Dutch Braid and loved it so much that I wore it for Easter!
We have learned so many great tricks and ways to fix things and save money from YouTube tutorials. In all honesty, I feel like YouTube has become the new Google — at least for visual people like me.
You can learn how to cut your family’s hair, learn sewing skills, learn basic music skills, find out how to fix things, learn how to make Artisan Bread, watch product reviews to help you make wise purchases, watch free workout videos, listen to/watch music videos, listen to sermons and inspirational messages, and so much more.
My new favorite YouTube videos to watch are for hair tutorials. Just be careful, because some of the hair tutorials haven’t been as successful for me. Ahem, like the time I tried the foil and hair straightener curling trick.
Also, be sure to download the new Family-Friendly YouTube app if you’re going to let your kids use YouTube to watch tutorials.
Kaitlynn found a tutorial on YouTube for making homemade lip gloss with crayons and coconut oil and just had to try it. She made it almost entirely by herself — and it turned out really well!
We try to never purchase anything without first looking for a coupon code to use. I’ve tried a lot of different coupon code websites and I’ve also tried Googling for coupon codes, but in my opinion, RetailMeNot.com is one of the best sites out there to consistently find legit coupon codes.
I love their rating system and the ability to see how many people have been able to use the coupon code and how recently it has successfully worked. All you have to do is go to their homepage, search for the store you’re planning to shop from, and ta-da! you have a long list of coupon codes that have been rated by their large community of users.
More often than not, I’m able to find at least one coupon code from the long list that works for me. And, for possibly one to two minutes of effort, that coupon code will usually save me at least 10% off my order—sometimes even as much as 25%!

If your store accepts printable coupons, this can be a great source of coupons which cost little more than your printer ink and paper. And oftentimes, the coupons available to print online are much higher than what you’ll find in the newspaper inserts.
I usually highlight the best printable coupons on my blog as they become available, but I also highly recommend using a coupon database. This is a database of all printable and other coupons currently available.
You can search for any brand name or item name. For instance, you can search for bread and it will pull up all bread coupons available. Or, you can search for a specific brand name, such as “Nature’s Own bread” and will only pull up the coupons available for Nature’s Own bread (if there are any available).
Tip: Read more here about how to use a Coupon Database to save time and money.
If you’ve read my blog at all, you know I’m a big fan of Swagbucks. And you probably signed up a long time ago and have been earning gift cards ever since.
For the handful of you who have yet to sign up for Swagbucks or for the many others who have signed up but feel like you’re not earning much from it, I encourage you to read this post and read through my 15 Ways to Earn More Swagbucks series and pick a few different options of ways to earn. Experiment with different ones until you determine the ones that works best for you.
Set an earnings goal each day and try to login and hit that, if possible. If you can even just put in 5 to 15 minutes each day, it can really start to add up!

Cash-back sites like Rakuten (formerly Ebates) and Mr. Rebates work with online stores to offer you a percentage—usually somewhere between 3–6% of your total purchase—back as a rebate. While 3–6% might not seem like much, it can really add up over time.
My theory: If you’re already going to be making the online purchase, you might as well get a little money back too, right? After all, it’s essentially “free” money!
When you are ready to make an online purchase, check both of these sites to see which one is currently giving the highest percentage of cash back and then shop through that one. To ensure your cash back is credited to your account, search for the store on the cash-back site you’re using and then click through the store link. This should guarantee that you are credited for your purchases.
If you shop at Walmart regularly, you’ll want to check out their Savings Catcher Program. Here’s how it works:
- Enter or scan your Walmart receipt. You can either enter your receipt number on the Walmart Savings Catcher website, or scan the receipt’s barcode with the Walmart App. Your purchase must have been made within the last 7 days.
- Walmart compares prices for you. Walmart will match the price of any local competitor’s printed ad for an identical product.
- You get refunded the difference. If the Savings Catcher finds a lower advertised price, you get the difference.
In addition, I recommend downloading the iBotta app and the Checkout 51 app. Scan your grocery receipts every time you shop and then request cashback for any items you bought that qualify. They often have offers for milk, bread, eggs, fruit, and so on. Even if you only earn $0.50 each week for taking a minute to scan your receipt, that adds up over time!
I used to think signing up for freebies was a waste of time. I knew this one girl who was all into freebies and she spent what seemed like enormous amounts of time finding and signing up for freebies online. She’d post pictures on her blog of what she got in the mail and it pretty much looked like junk to me.
It seemed like signing up for freebies meant spending lots of time searching online and filling out forms all just to get tiny little samples of stuff I didn’t need and wouldn’t use in the first place. Needless to say, I was unimpressed.
However, this friend kept raving about her free samples and I finally decided, “Okay, what’s it going to hurt me just to try it for a few months?”
So I did… and now I’m hooked. And I’ve quickly realized that signing up for freebies doesn’t have to be a waste of time. In fact, it is fun — and it can save you a nice little amount on your grocery bill.
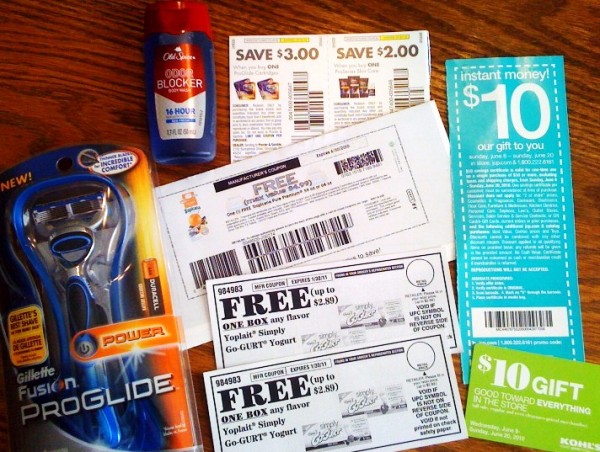
After all, when you get a coupon for free Tropicana Orange Juice, a free Gillette razor and coupons for 2 free packages of yogurt in just one day’s mail, it’s hard to conclude that it’s a waste of time to sign up for freebies!
Not only can you get full-sized products and free product coupons, but the sample sized products can help decrease how often you have to buy shampoo, deodorant, laundry detergent and body wash, and they also often have high-value coupons in them which can net you a full-sized product for a great deal!
Do NOT sign up for freebies with your main email account. I promise you’ll be inundated with advertisement emails. Instead, set up a separate account through Gmail or some other free service and only give out that email address when signing up.
I do my best to keep you updated on the best freebies which are available — from samples to free coupons to full-sized products. Often, the really hot freebies only last for a few hours, so if you’re able to, I’d recommend checking in at least one to three times per day in order not to miss out. You can also follow me on Facebook or Twitter to be notified when something new has been posted.
Note: It usually takes around 4-6 weeks for freebies to start arriving. It’s easy to be discouraged if you sign up for freebies faithfully for a few weeks and see nothing in return. Don’t be disheartened. Just keep plugging away at signing up for those you’re interested and by week four or six, you should start to see a real return on your effort.
I love, love, love all the free resources available on the internet, including free printables, free ebooks, free audiobooks, free podcasts, and much more.
I have read and listened to so many inspirational messages, downloaded so many helpful printable pages and organizational helps, and read so many books that I downloaded for free.
Looking for free audiobooks? BooksShouldBeFree.com has over 3,000 free audiobooks and ebooks — many that are classics!
If you’re looking for educational freebies, Free Homeschool Deals is the queen of all free homeschool resources, in my opinion. It’s a site that curates the best freebies and deals every day — including printables, resources, free ebooks, and more! You can see more of my favorite free educational sites here.
What are YOUR favorite techie ways to save?
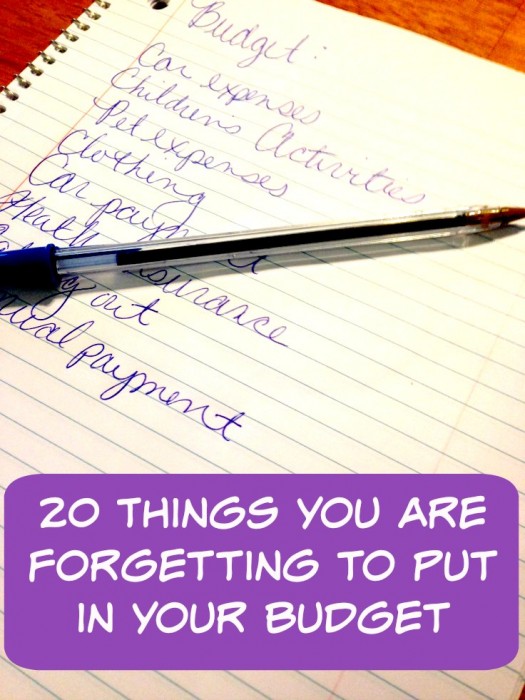
Are you trying to stick with a budget but finding that there are unexpected expenses creeping up every month? Check out this list for 20 Things You May Be Forgetting to Put in Your Budget.


Guest post from Katy of Finding Home.
To say our family loves pizza might be an understatement. If you ask my husband what he wants to eat, the answer will always be steak, tacos, or pizza.
Our favorite homemade pizza crust is this freezer-friendly one that Crystal shared, because we can get everything ready ahead of time.
The original recipe is set up to make two crusts, which you can freeze as a ball of dough. That works fine, except sometimes we decide we want to eat a pizza around dinner time (or for a late night snack), and we don’t have four hours for the crust to thaw on the counter. So I started experimenting.
First, I wanted to see if we could roll the crusts out ahead of time, and freeze them flat in the freezer.
If you’re putting the pizza in the oven right out of the freezer (after topping it with all of your yummy favorites), bake at 425°F for 18 minutes. This allows the pizza dough to come to the right temperature without heating up too quickly. Otherwise you’ll end up with a burnt bottom and a doughy middle!
If you’re looking for a thinner crust, you can split Crystal’s recipe into three crusts. The method is the same, but the baking times change slightly. To bake right away right after you mix the dough, bake at 450°F for 10-12 minutes. To bake right away from frozen, bake at 425°F for 15 minutes.
These baking times and temperatures are based on my oven, which cooks a little bit hotter than the temperature it says. You might need to adjust a bit according to your oven, but once you figure it out, you’re all set for easy frozen pizzas!

I like to freeze a few of these crusts, a batch of homemade pizza sauce (which makes enough for 3 pizzas), and a few containers of toppings. With all that done ahead of time, all I have to do is pull out a crust, defrost the sauce and toppings in the microwave, and top with shredded cheese. The whole process takes about 5 minutes — perfect for a busy weeknight dinner!
Katy is a pastor’s wife in Oregon. You can find her blogging about mostly gluten free food, homeschooling, and parenting at Finding Home.

So yesterday wasn’t as productive as I was hoping.
It started out well, though…
Since I’ve been sick this weekend, I’ve had trouble sleeping, so I woke up around 4 a.m. and just got up and stayed up.
I started the Diffuser going with OnGuard. Took my vitamins. Made some coffee. And sat down to read my Bible and catch up on emails and blogging work.
I got a lot of work done in those few hours before the rest of the family woke up. When the kids got up, I made sausage, berries, and fried eggs for breakfast and then we sat down to eat and do our morning school.
Once we were finished, I cleaned up the kitchen while the kids got ready, did their morning chores, and then got started in on their independent school.
I had planned to take a shower and get some more housework done, but around this time, I started to really feel icky again. So Jesse took over and I went back to bed (he’s been out of town more than he’s been home recently, so I was very grateful that I could actually go back to bed today!)
He washed the girls hair and then they came in to have me fix it. Should I confess that I didn’t even get out of bed to fix their hair? I just propped up the pillows and they sat on the edge of the bed while I fixed it.
And then he fed the kids and took them out to ice skating lessons, swimming lessons, and baseball practice while I tried to get some work done while resting. I had trouble focusing, but I ended up getting most of my list done.
After my list was mostly finished, I got up and made myself some Throat Coat tea, switched the laundry from the washer to the dryer, and then I folded some laundry, and worked on my talks/slides for the Arlington Homeschool Conference.
Jesse and the kids arrived home and we ate dinner, cleaned up the house, and then I headed to bed for an early bedtime.
I was so grateful to wake up feeling somewhat better today — and I finally had the energy to tackle Silas and Kathrynne’s clothes.
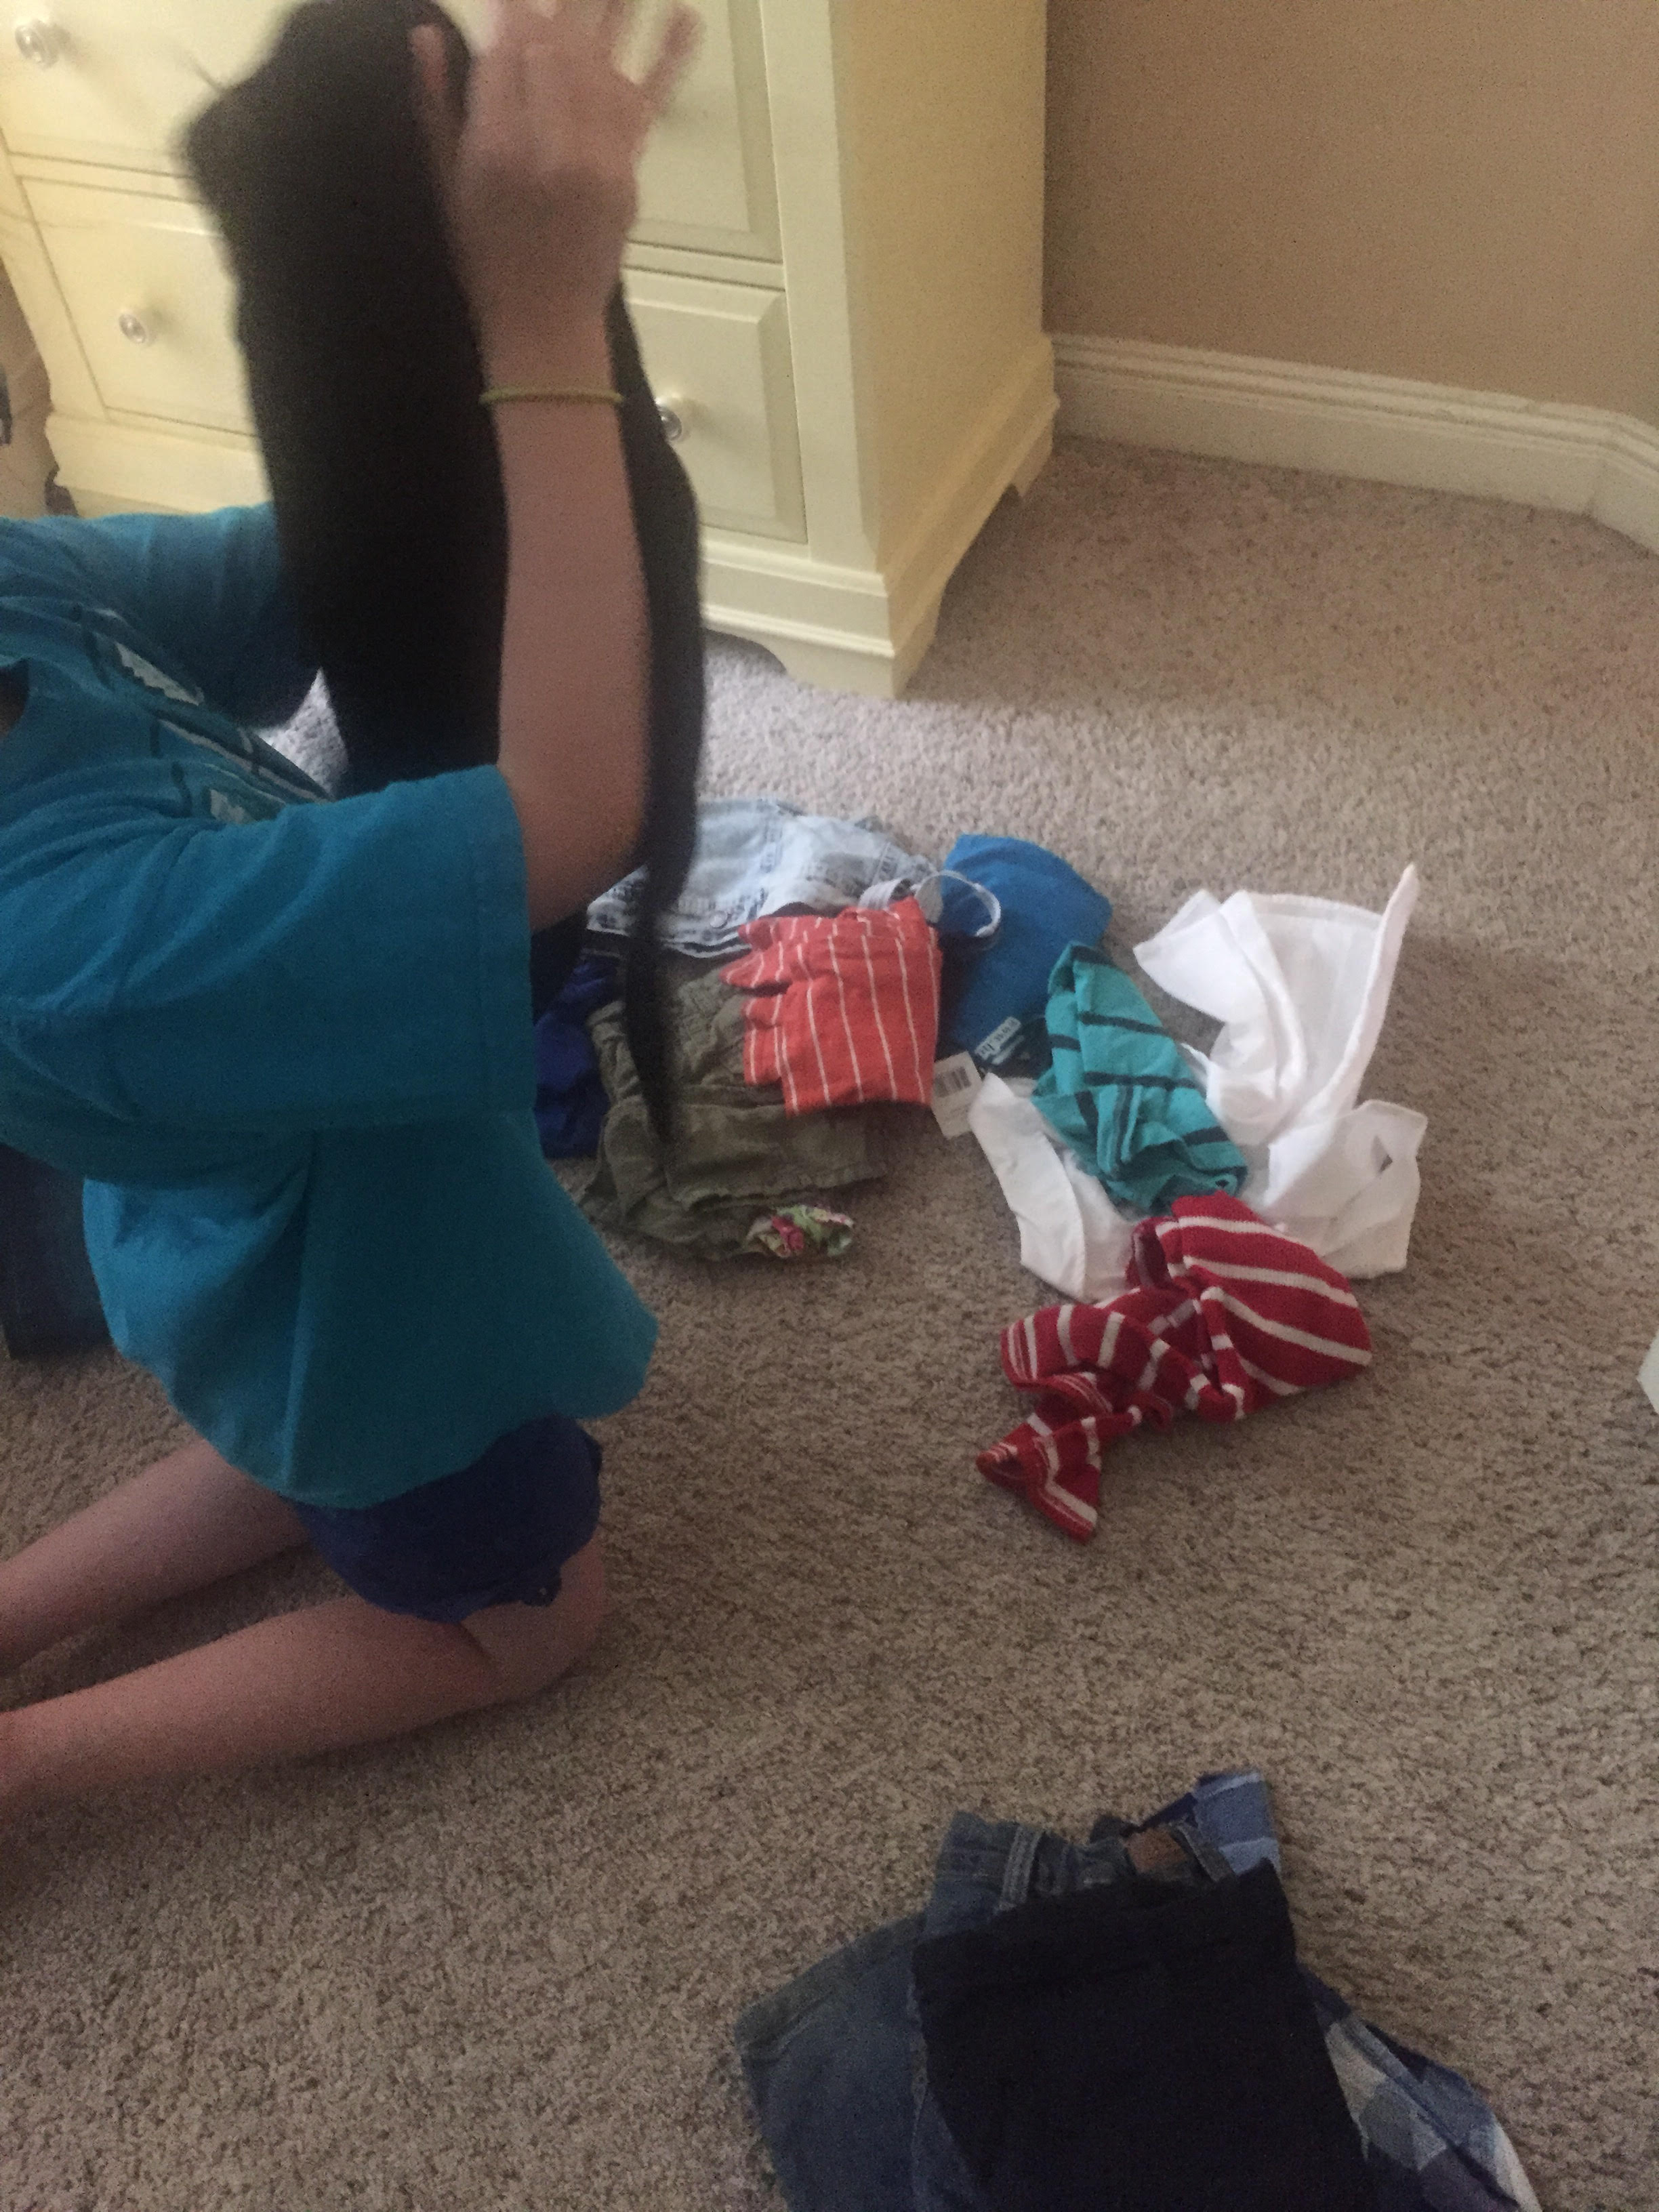
Kathrynne helped me go through her clothes and I was shocked how many clothes she actually has since she re-wears the same things over and over again.
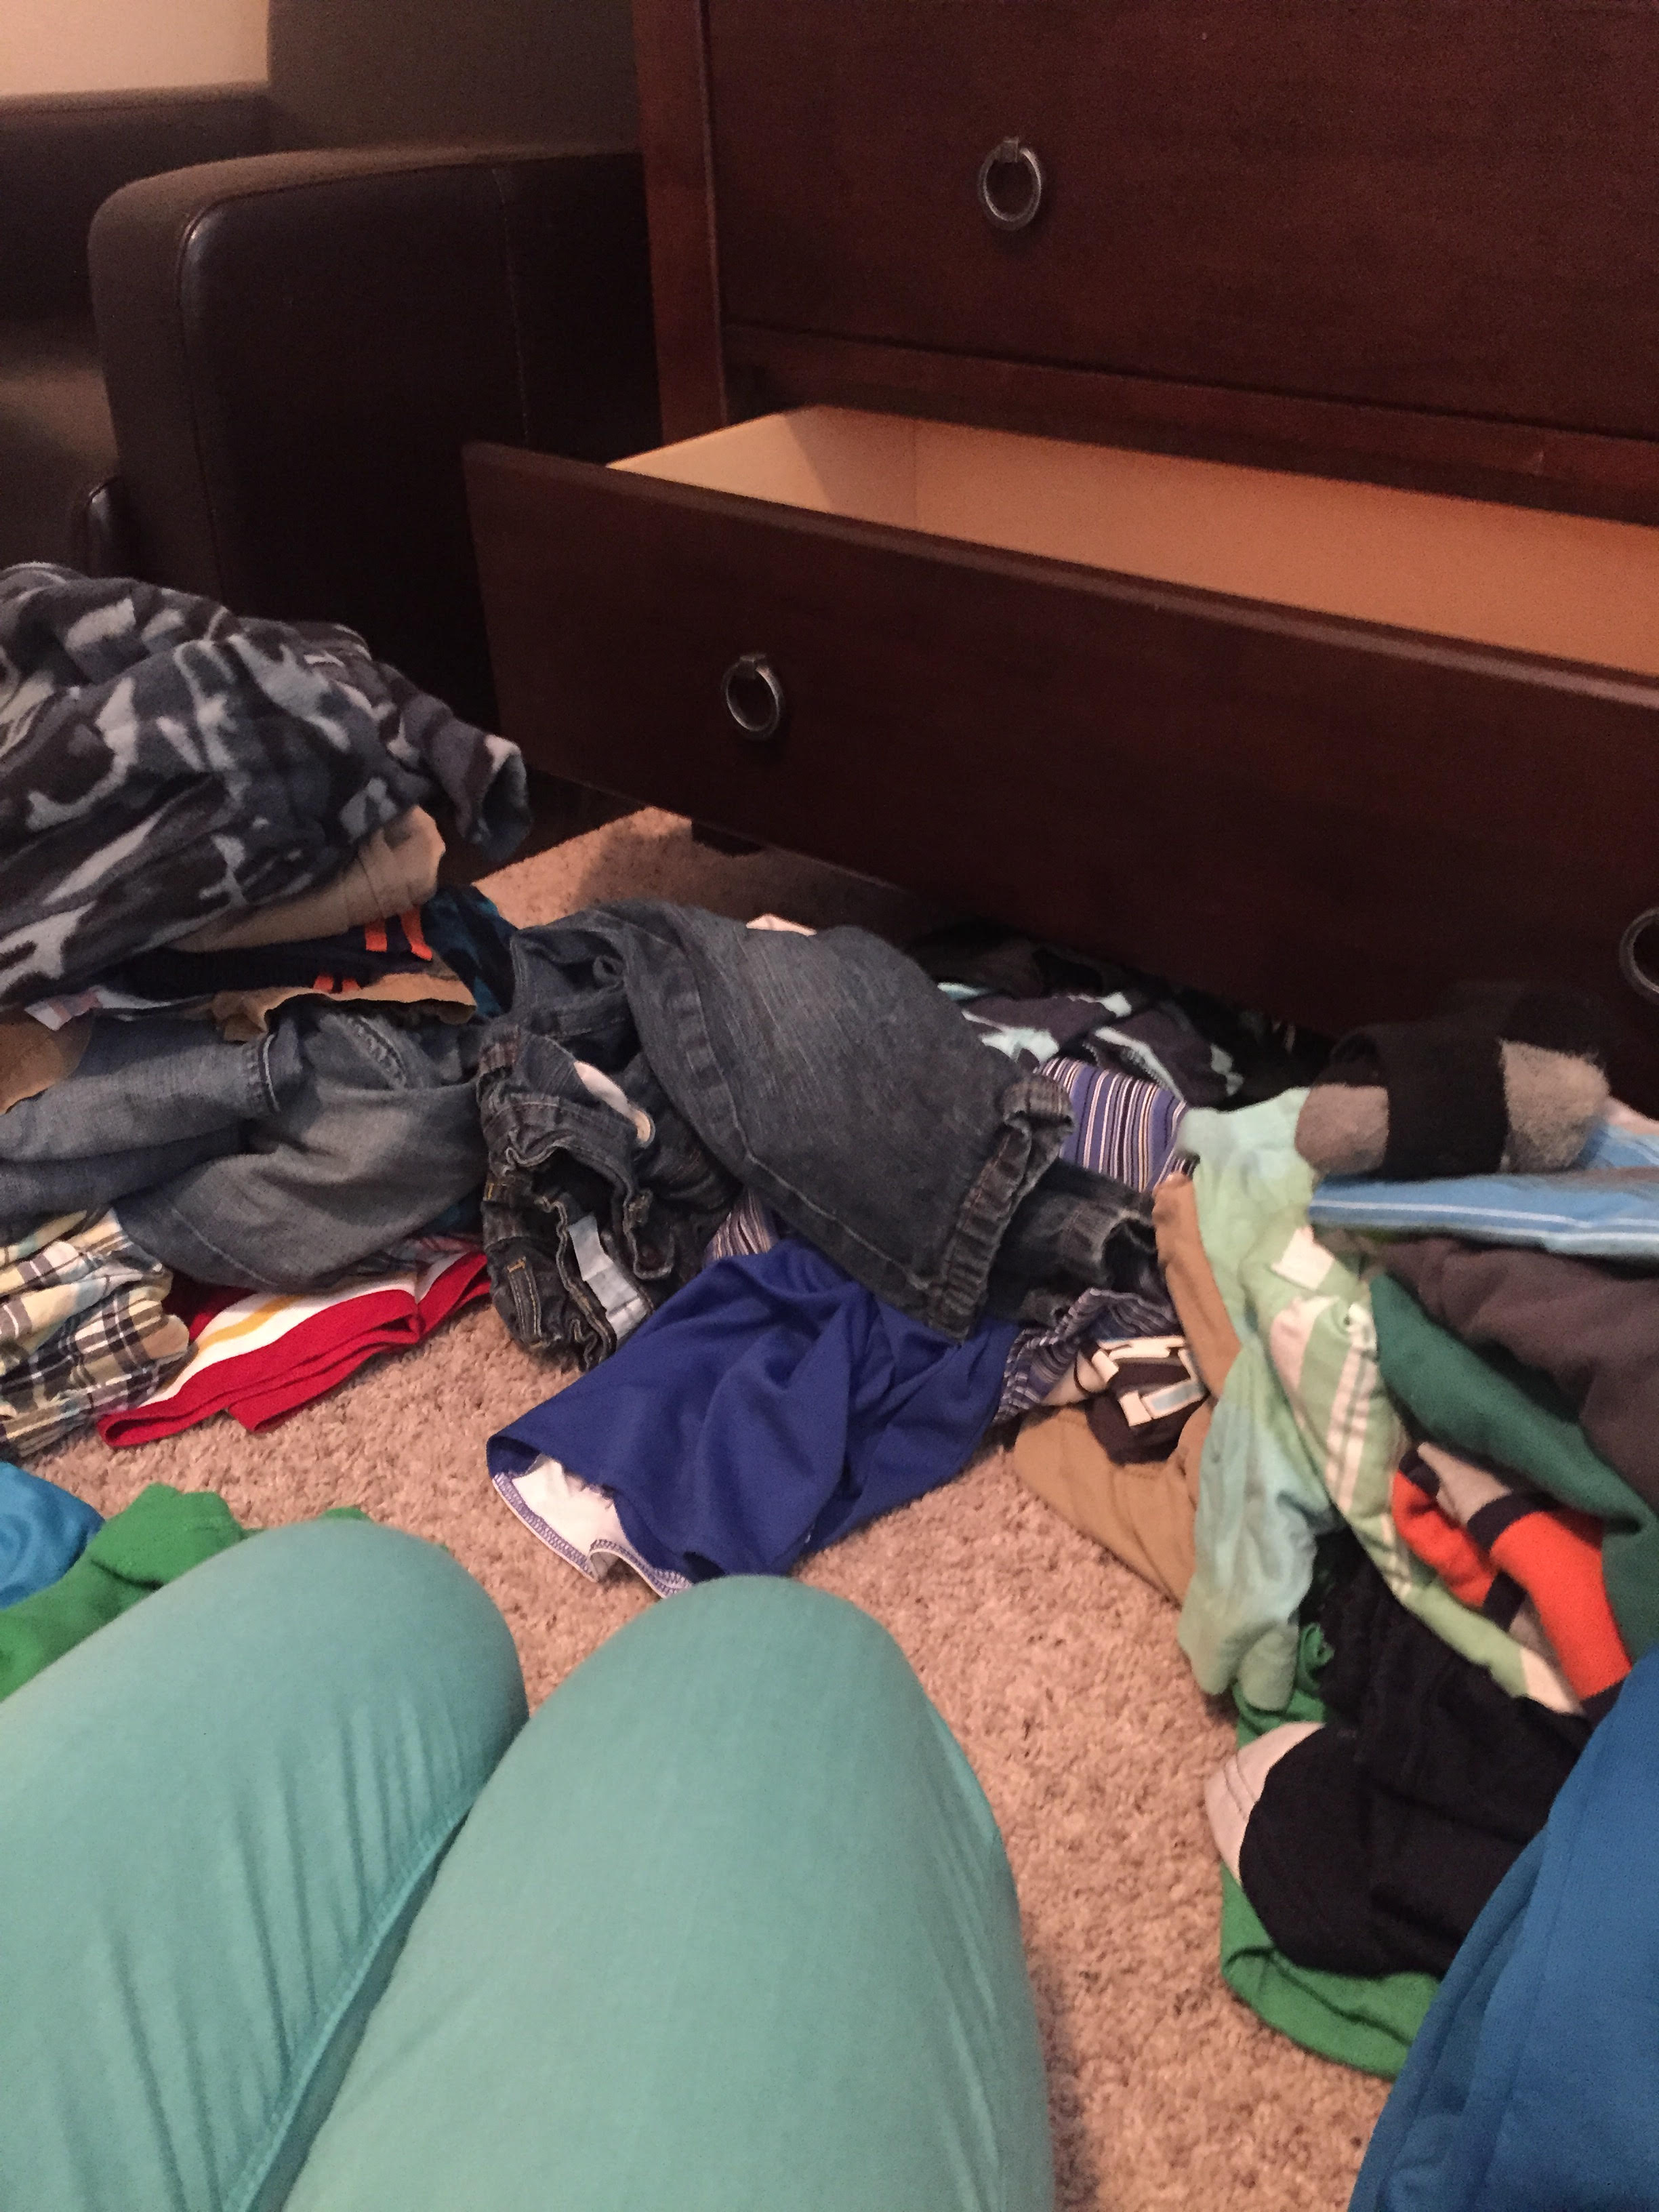
And I went through Silas’ clothes — with a little input from him, too.
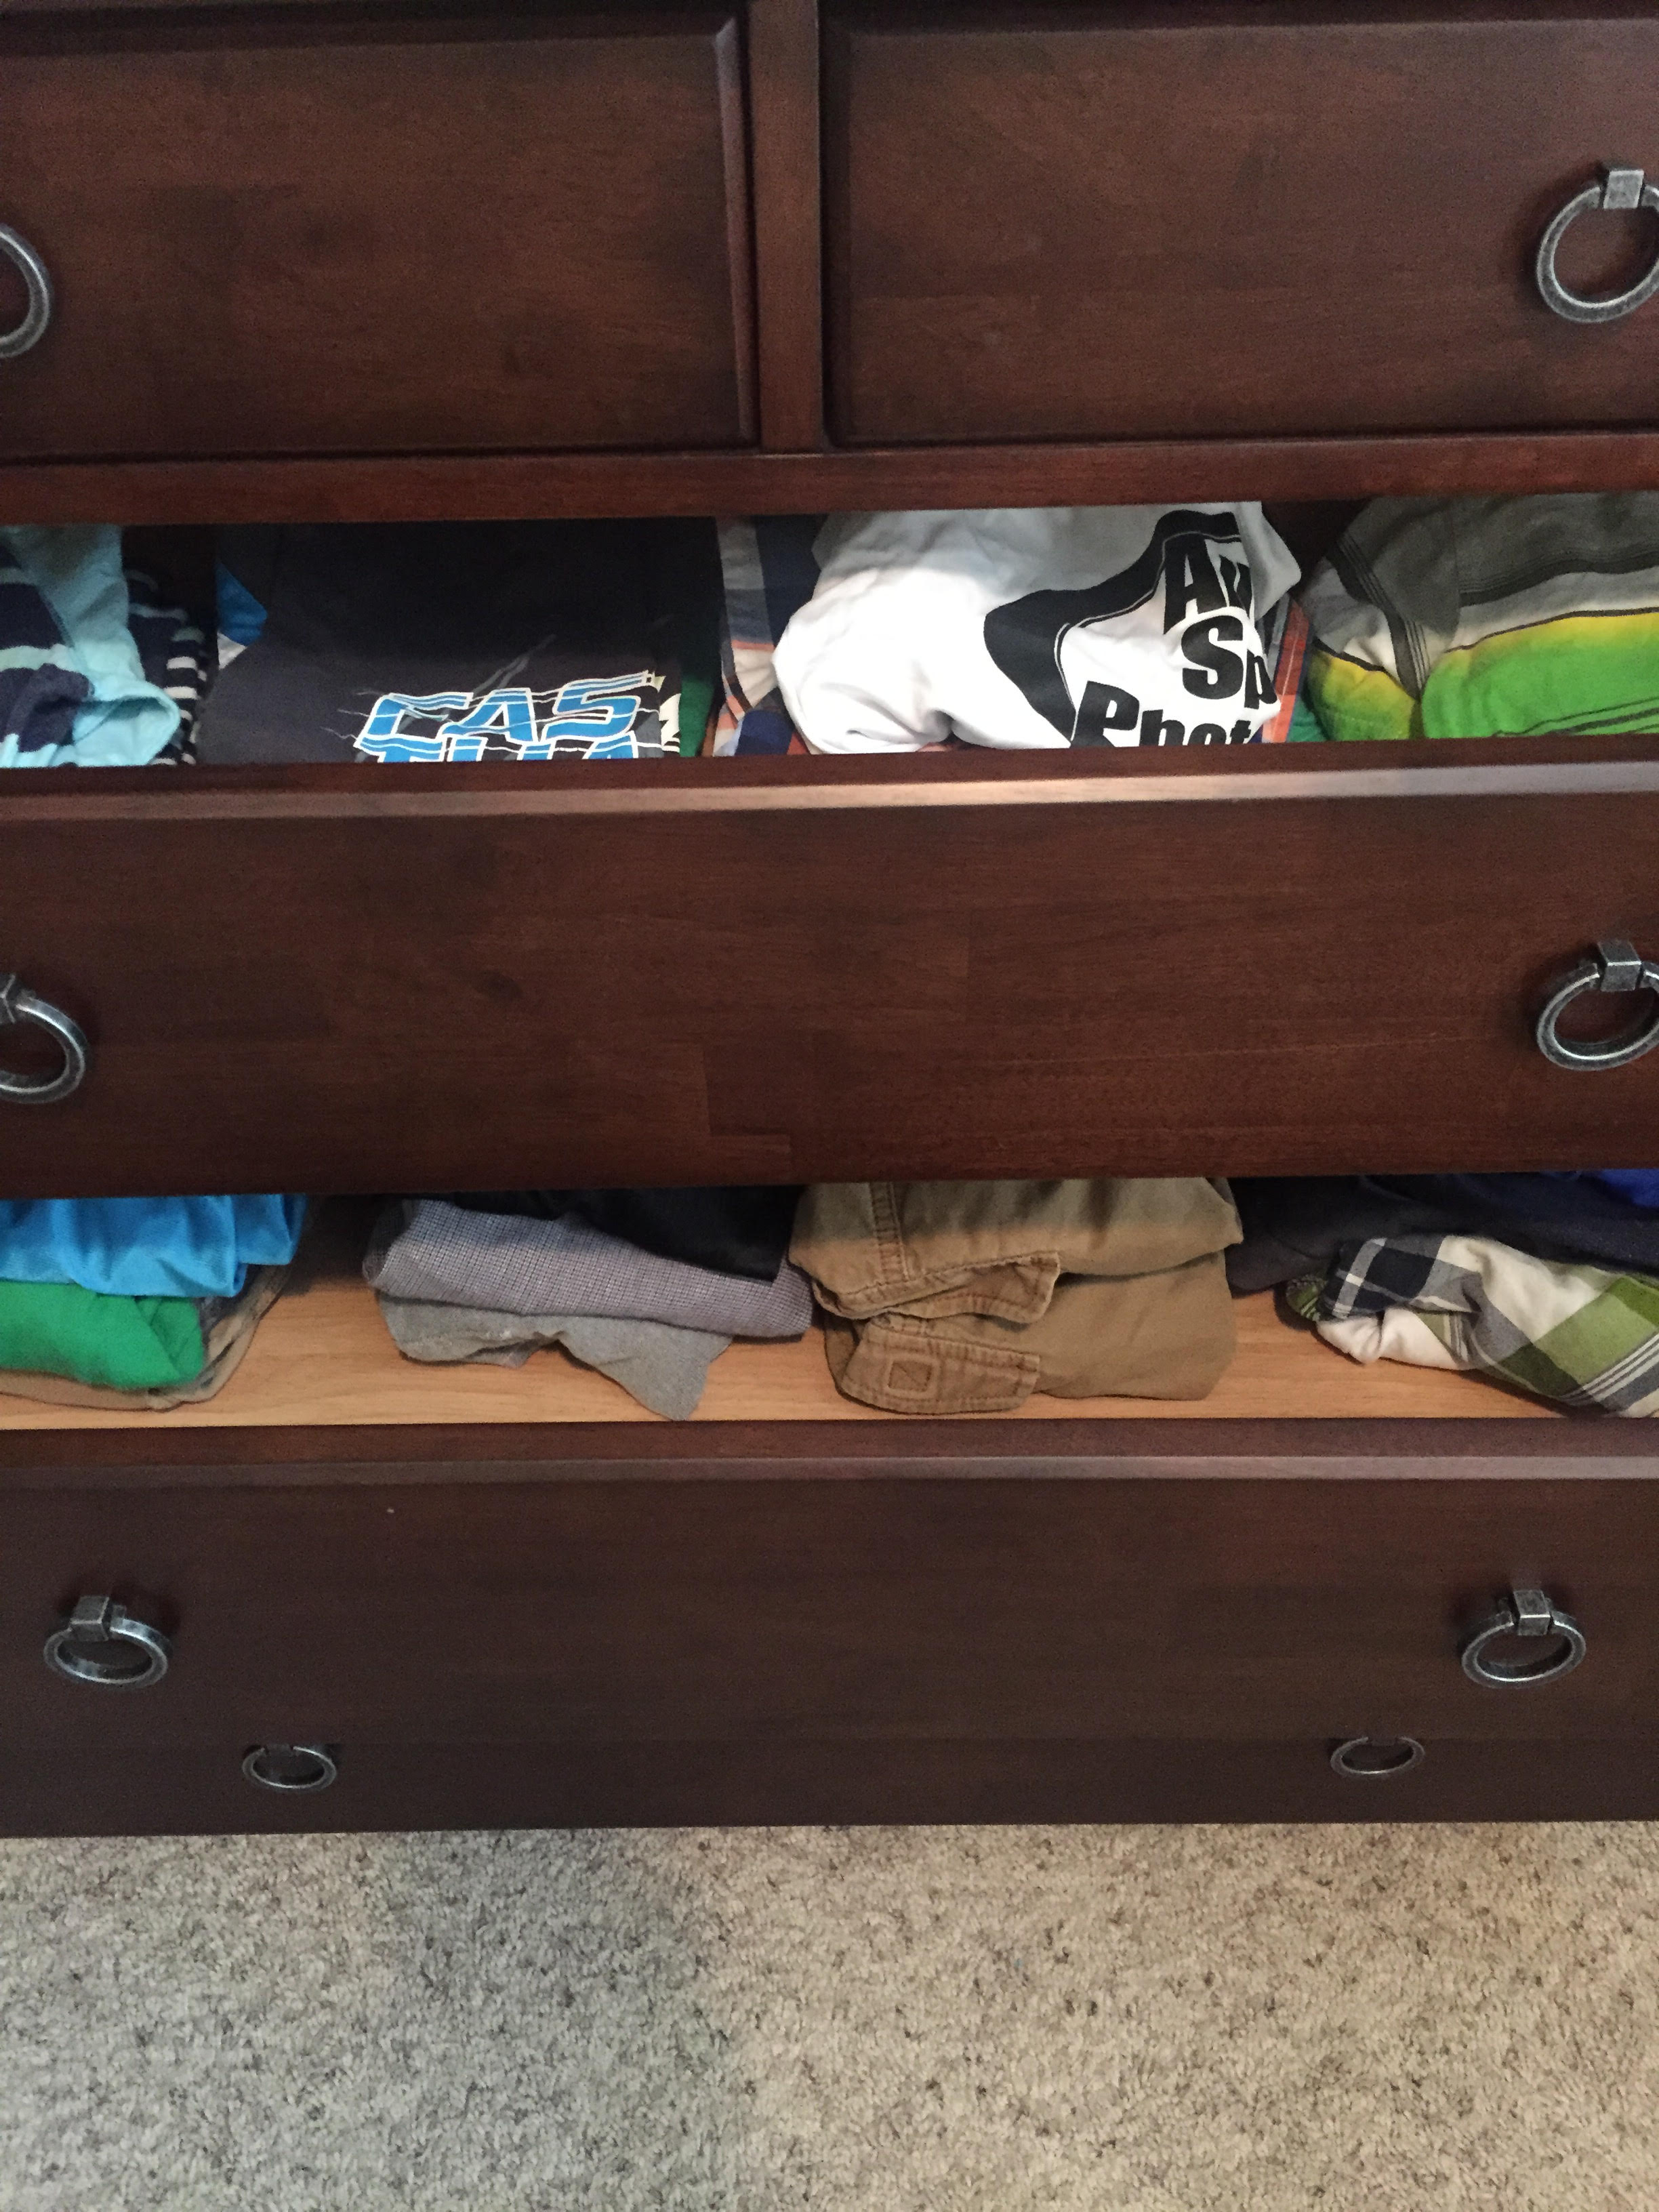
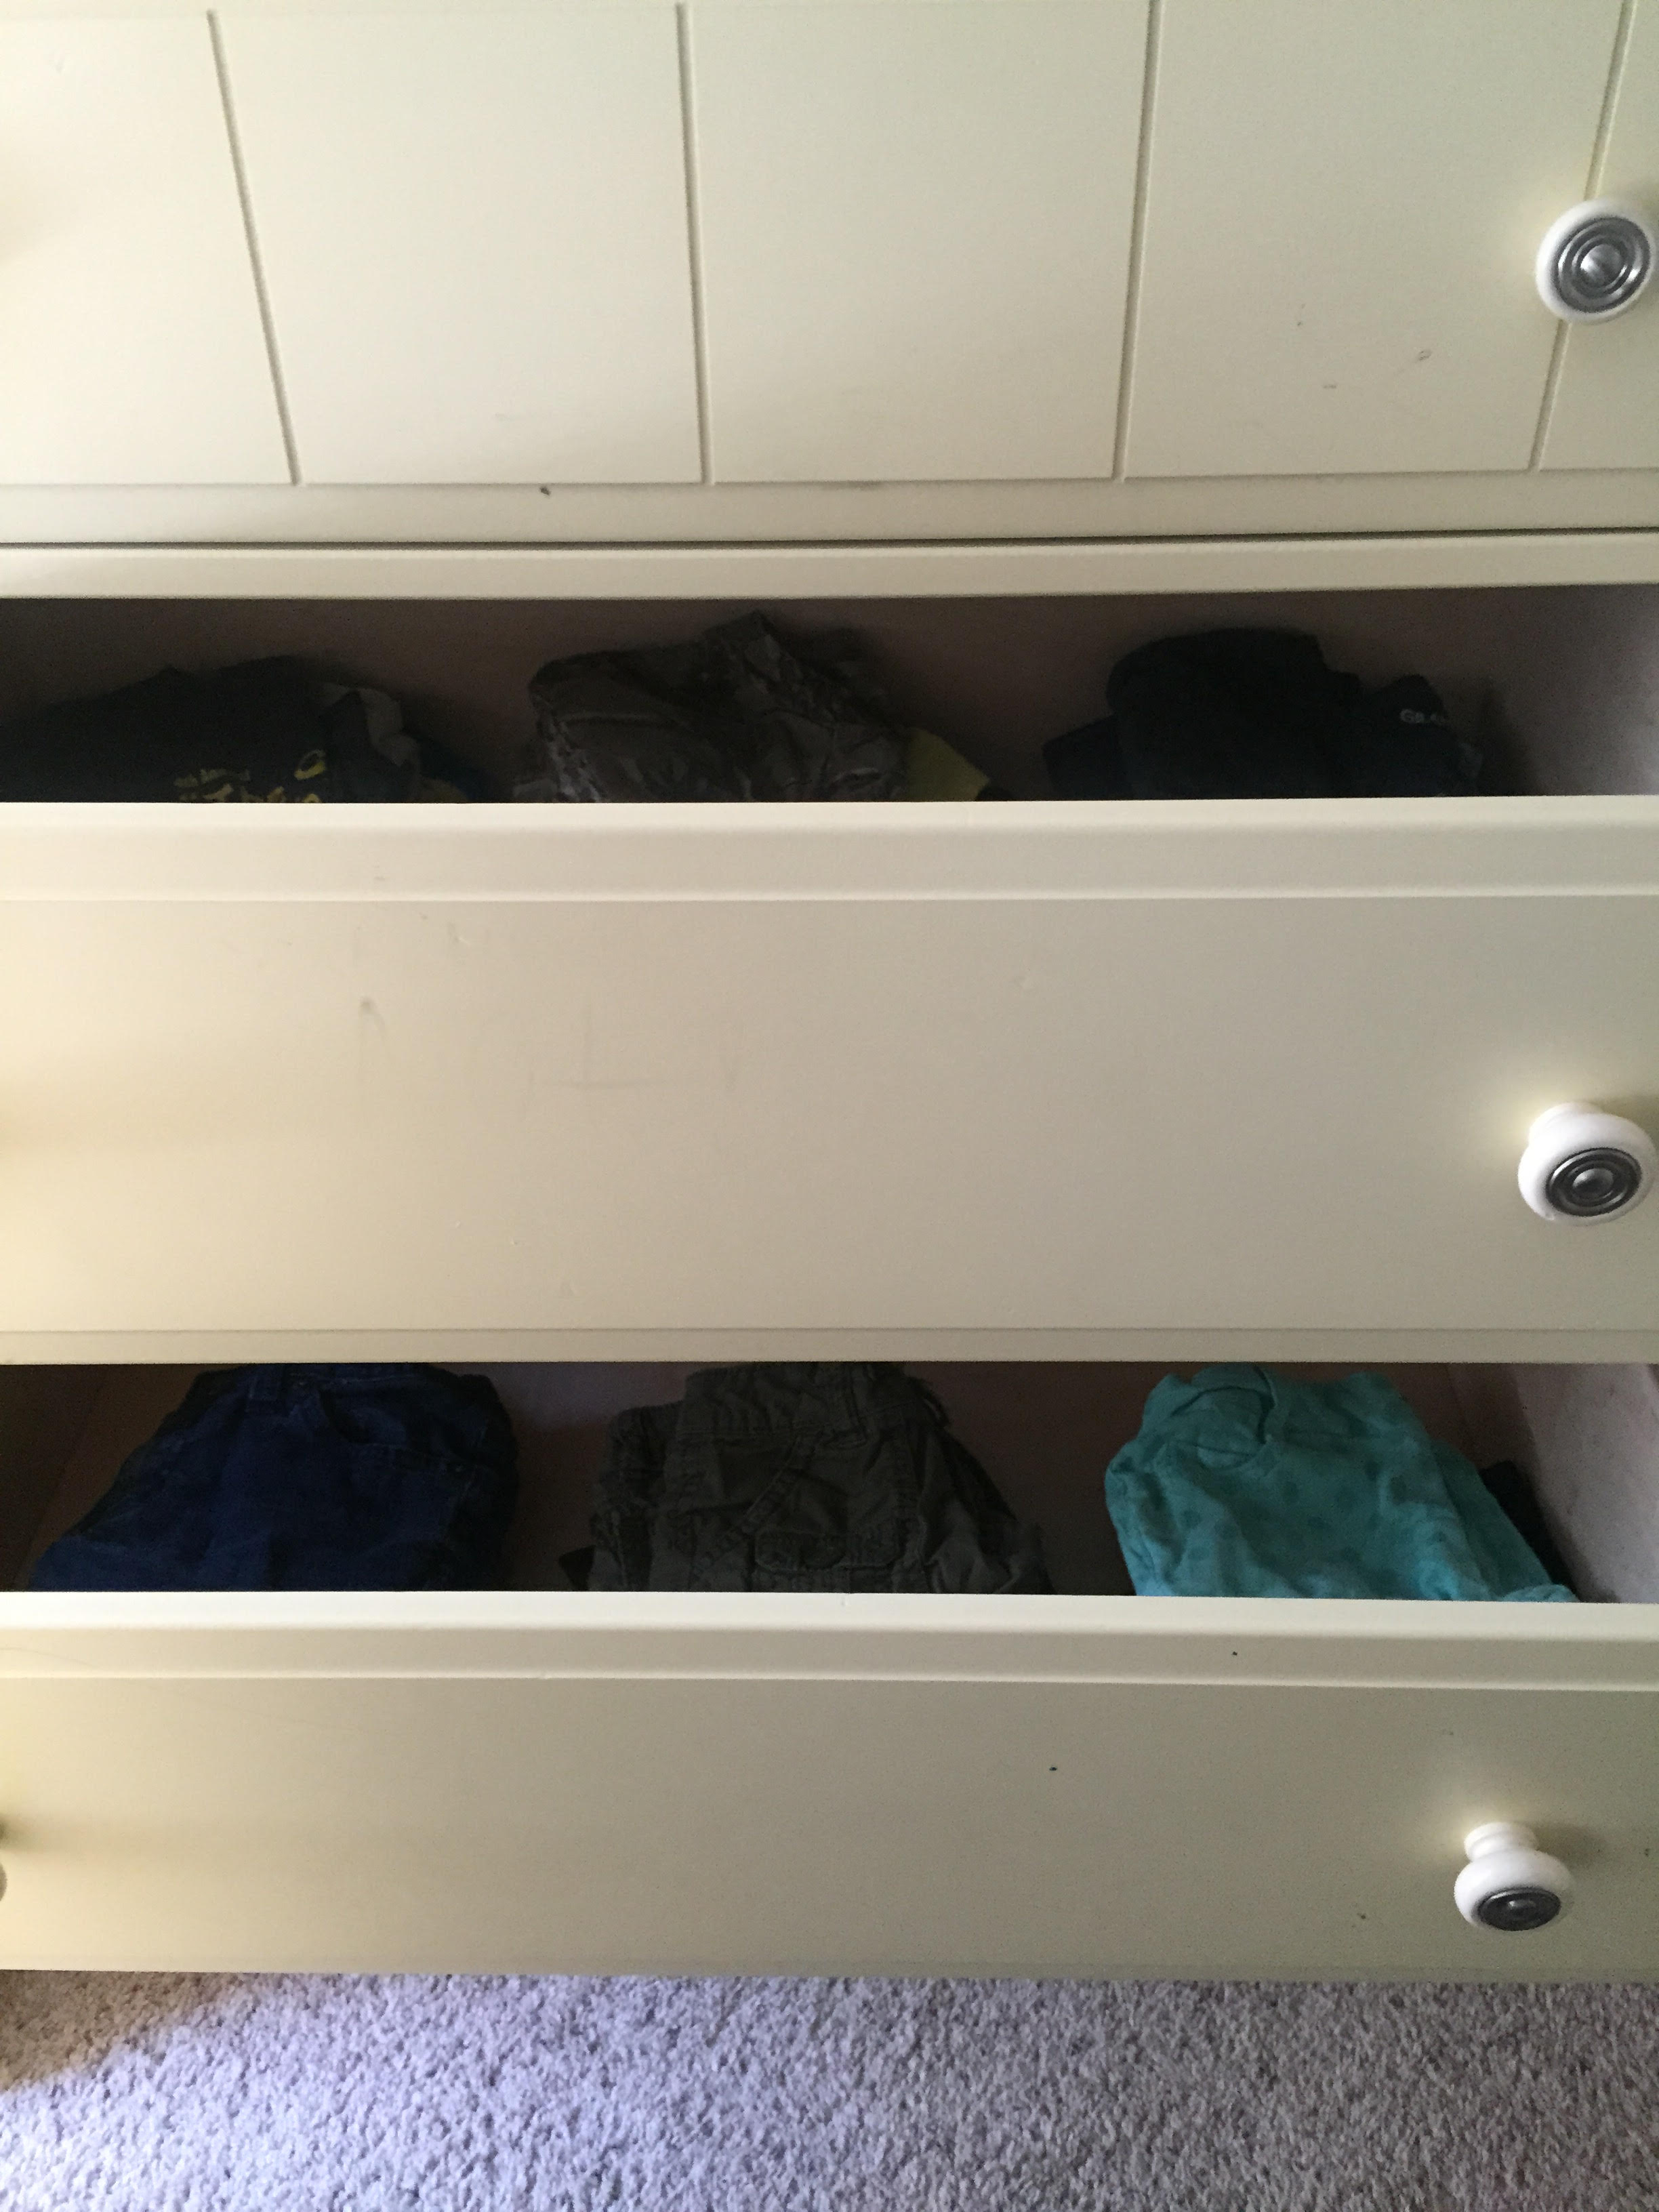
I organized both of their drawers in a similar way as Kaitlynn’s and gave them strict instructions that they are to keep them this way and make sure to fold and put away laundry in this order to simplify things.
It feels so good to have pared down some of their clothes — especially since I haven’t done this since we moved here a year ago!
How was YOUR day yesterday? Did you get any cleaning or organizing done? Is everyone well at your house? I hope so!