


This easy, frugal recipe is a great grilled chicken burrito meal for busy weeknights since can just pull it from the freezer. Your family will love it and you’ll love not spending all day in the kitchen!

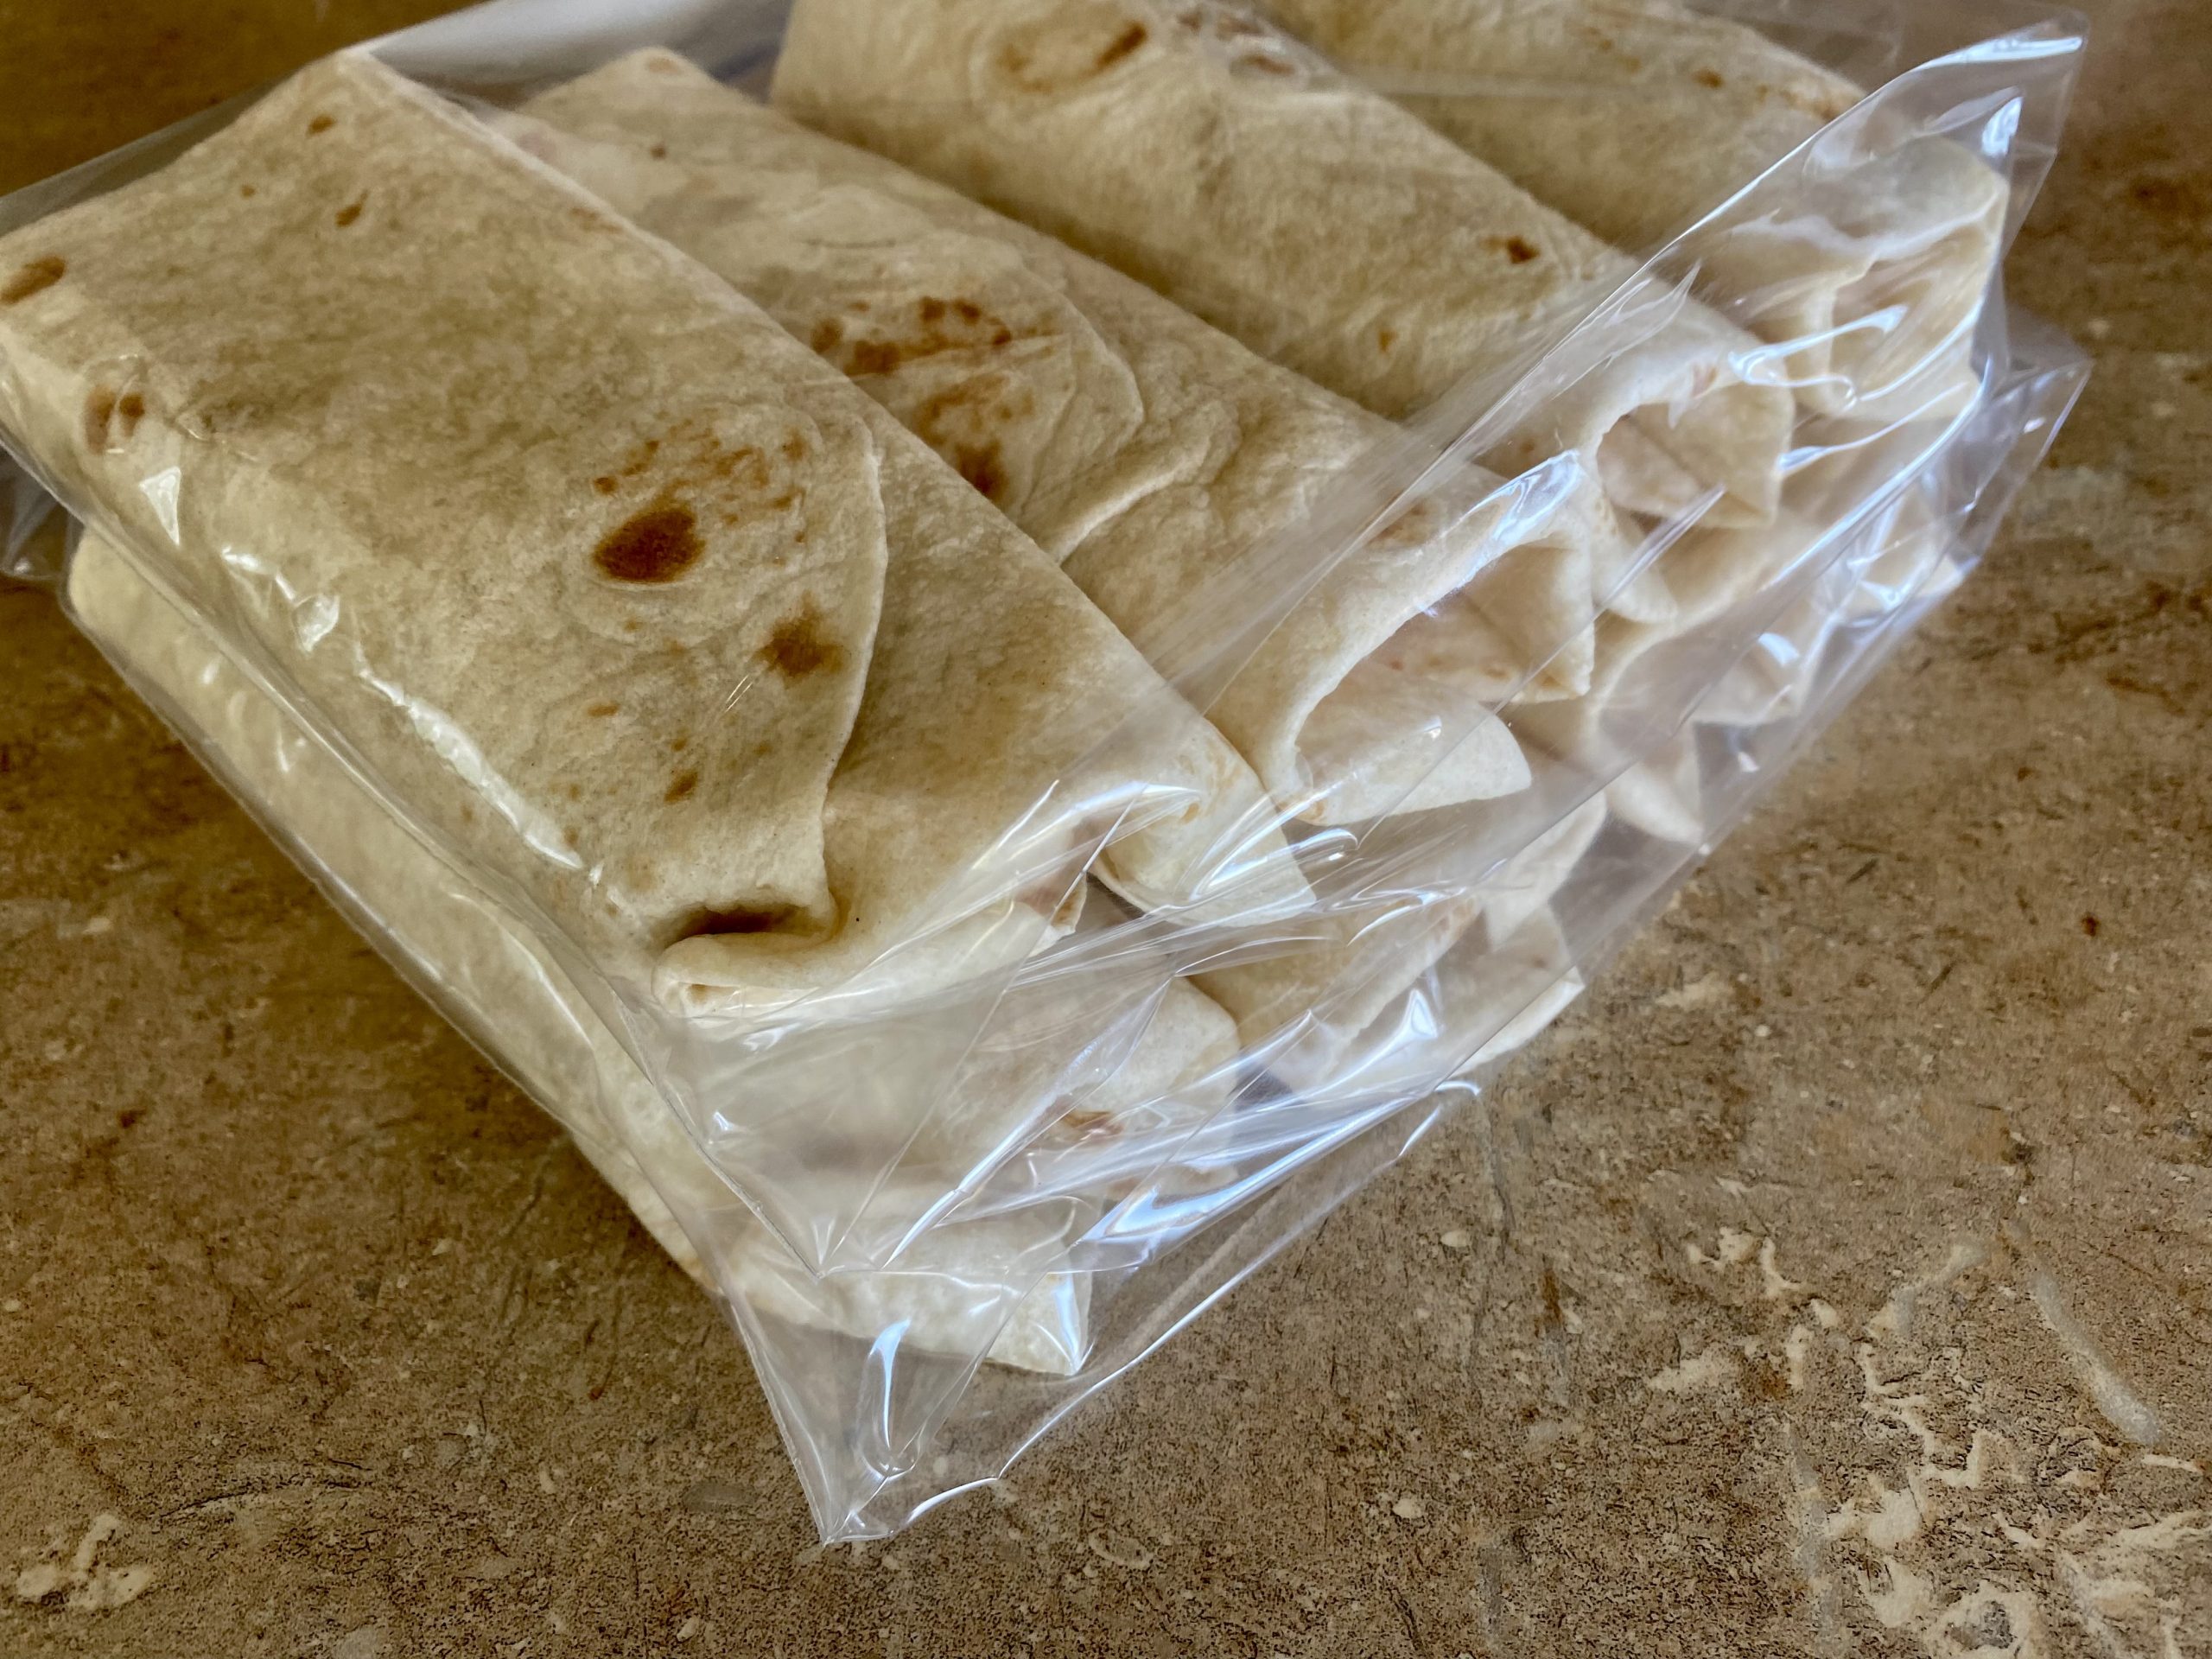
This Simple Chicken Burrito Recipe makes a great freezer meal!
We love freezer meals around here — mainly because they are a great way to save both time and money. And these Southwest Chicken Burrito Roll-Ups are one of our favorite freezer meals!
This recipe originally came from my husband’s family — and it’s become one of our family’s longstanding favorites, too. It’s so simple to make, it freezes well, it uses inexpensive ingredients, and it’s filling, too.
Why you’ll love this Easy Chicken Burrito Recipe
This recipe is so simple, uses inexpensive ingredients, and freezes really well!
You can easily mix up the ingredients based on what you have in the house (or what’s on sale at the store)… and it’s almost guaranteed to be a crowd-pleaser!

What you’ll need for these Southwest Chicken Burrito Roll-Ups
- 2 cans refried beans (you can make your own refried beans with this easy homemade recipe or this crockpot recipe!)
- 1/2 cup salsa
- 2-4 cups cooked chicken, chopped
- 2 cups shredded Cheddar cheese
- 16 tortillas (you can make your own Homemade Tortillas with this recipe)

How to make a Grilled Chicken Burrito
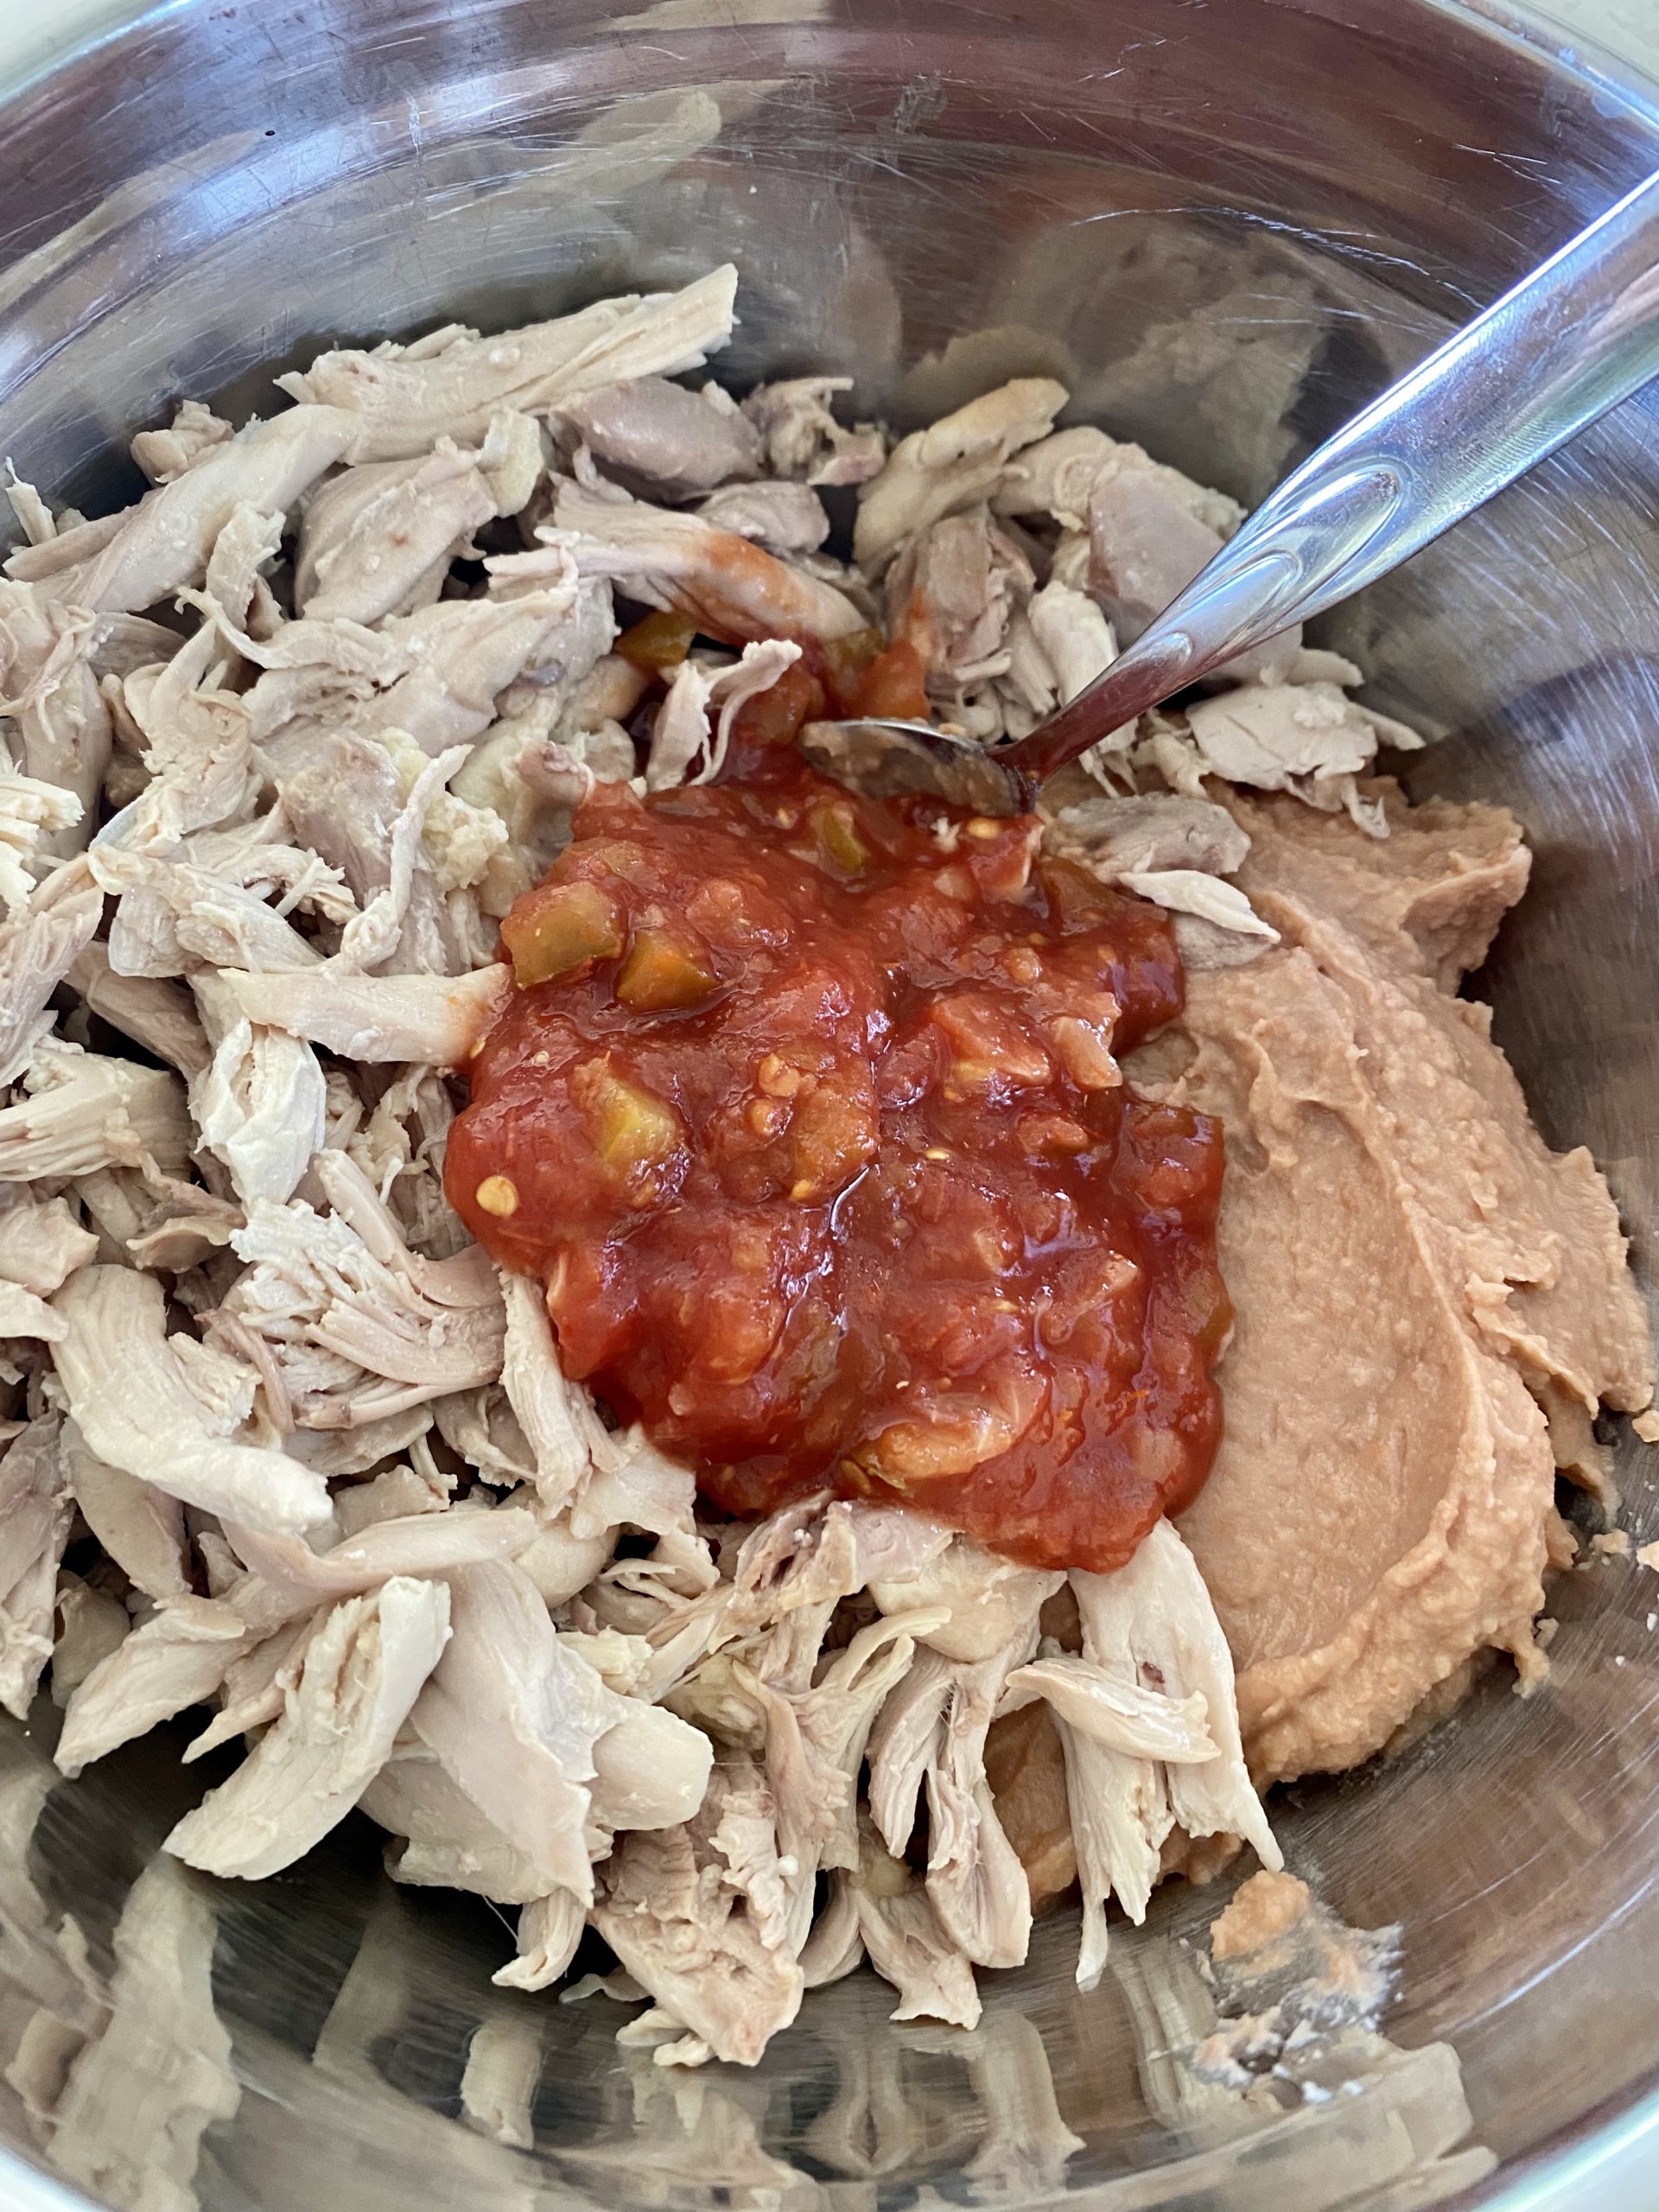
1. In a large bowl, mix together beans, salsa, and chicken.
2. Spread 1/16 of the mixture onto each tortilla.

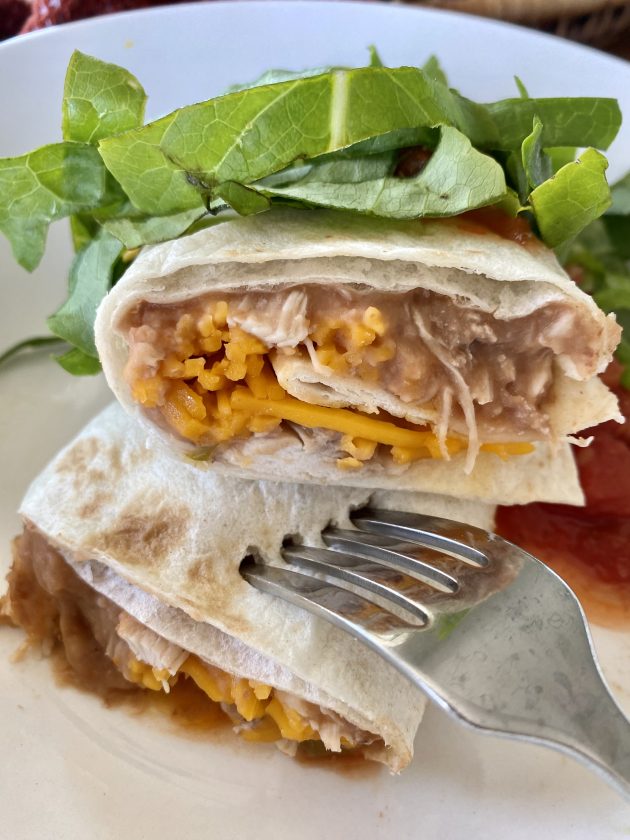
3. Sprinkle with cheese.

4. Roll up and turn ends under.

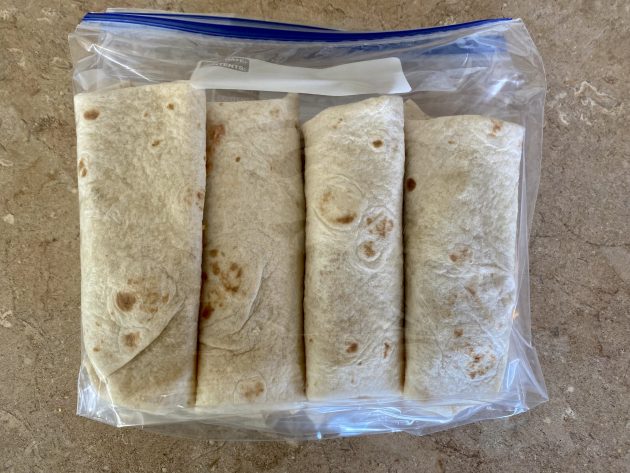
5. Stick in a freezer bag or in a 9×13 baking pan and freeze.
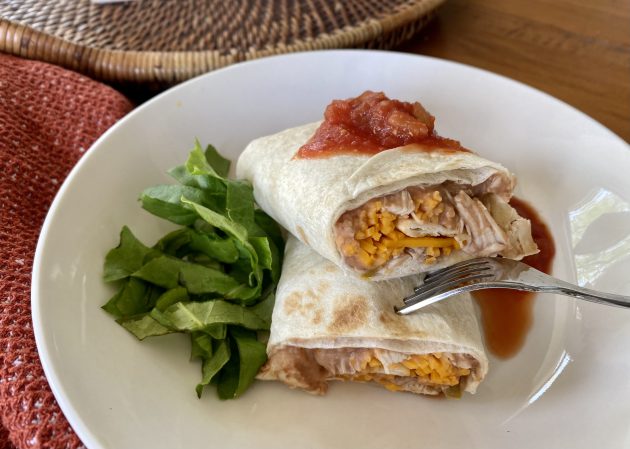
6. When ready to bake, thaw and bake in a pre-heated 350º oven for 20-30 minutes until heated through. Sprinkle with more shredded Cheddar cheese, if desired. Serve with salsa.
Tips for making the Best Chicken Burrito Recipe
These burritos are so easy — they are almost impossible to mess up! It’s honestly a great meal for the kids to help out with.
Just make sure you’re using quality ingredients and you shouldn’t have any issues.

Simple Chicken Burrito Recipe Variations
If you like your burritos extra meaty, you can add more chicken. If you like them super gooey, you can add more cheese.
Feel free to add some spices if you want to increase the heat a bit too!
What to serve with this Simple Chicken Burrito Recipe
These burritos go well with chips, salsa, and guacamole.
They also pair well with a nice lettuce salad or even a platter of raw veggies and dip.
Burrito Recipe Chicken Storage
How to freeze a Grilled Chicken Burrito
Place several burritos in a gallon-size freezer bag or a 9×13 covered baking pan and freeze.
You can also freeze individual burritos in aluminum foil or plastic wrap for lunches or on-the-go meals.
How to thaw a Grilled Chicken Burrito
When you’re ready to bake, remove the desired number of burritos from the freezer and let them thaw at room temperature for a couple of hours. Place them in a baking dish and bake in a pre-heated 350º oven for 20-30 minutes until heated through.
Individual frozen burritos can be microwaved in 30-second intervals until heated through.

Southwest Chicken Burrito Roll-Ups
Ingredients
- 32 ounces refried beans (you can make your own refried beans with this easy homemade recipe or this crockpot recipe!)
- 1/2 cup salsa
- 4 cups chicken cooked and chopped
- 2 cups Cheddar cheese shredded
- 16 tortillas (you can make your own Homemade Tortillas with this recipe)
Instructions
- In a large bowl, mix together beans, salsa, and chicken.
- Spread 1/16 of the mixture onto each tortilla.
- Sprinkle with cheese.
- Roll up and turn ends under.
- Stick in a freezer bag or in a 9×13 baking pan and freeze.
- When ready to bake, thaw and bake in a pre-heated 350º oven for 20-30 minutes until heated through. Sprinkle with more shredded Cheddar cheese, if desired. Serve with salsa.
Nutrition
Love this recipe?
Make sure to share and save it on your favorite platform below!
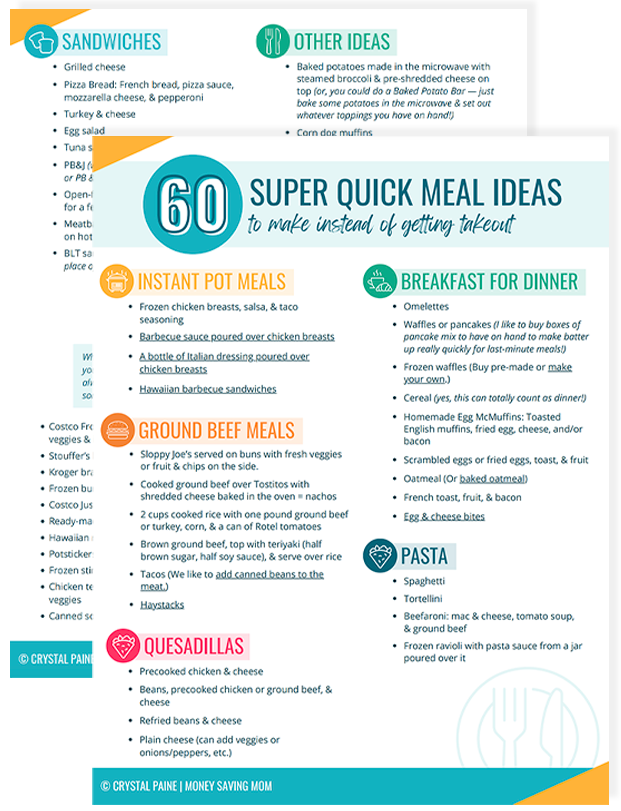
FREE DOWNLOAD: 60 Meals To Help You Avoid Takeout!
Meal time just got so much easier!

Freezer Cooking Day: My Little Helpers


Freezer Cooking Day: Making Do in a Small Kitchen

While I worked on grating the cheese, the others got busy chopping peppers, boiling noodles, browning ground beef, and Gretchen started putting together the Beef, Bean, and Tomato Burritos. (I’d love to share that recipe with you, but she made it up on the stop–as the girls in my family are prone to do!–so I haven’t a clue what was in them aside from cheese, tomatoes, taco seasoning, beef, beans, and tomatoes rolled up in tortillas).
Our kitchen is on the small side. It works for our little family of five, but it gets cramped really quickly if you add in more people. However, compared to the crackerbox kitchen we had in our little basement apartment, it seems rather spacious!
I wasn’t sure how four of us were going to cook in the kitchen without bumping into each other all over the place–especially since we’re short on counter space. My sister had a brilliant idea: set up a cardtable! So we added a large amount of work space just with this simple addition to the kitchen.
Someday, I’d love to have a a large kitchen with massive amounts of cupboard and countertop space. But in the mean time, a card table works great when you’re in a pinch for extra countertop space!
Freezer Cooking Day: Um, I Think It’s Time to Replace the Cheese Grater
Freezer Cooking Day: Um, I Think It’s Time to Replace the Cheese Grater

Our Freezer Cooking Day began at 9:15 a.m. yesterday morning. I had planned a Master List of everything that needed to be done and the order it needed to be done. I also tried to equally divide the work up among those of us who were working in the kitchen. We didn’t completely follow the plan, but it was really helpful to have everything thought-through ahead of time.
Remembering how we’d run out of bowls and pots and pans last time, I asked everyone to bring pots and pans and bowls. I also had everyone pitch in on bringing ingredients and that seemed to work well.
The only thing I forgot to ask someone to bring? A real cheese grater.
I have this little half-sized dinky one that I picked up at the store a number of months ago when my much-nicer one got rusted. Let’s just say that it was rather impractical to grate that pile of cheese blocks with my mini cheese grater.
Somehow, I managed to grate them all–but it took me probably five times what it would have taken with a real grater. But I’m all about making do. Next time, though, I’m definitely investing in a better cheese grater!
How to Use Up 12 Cans of Biscuit Dough in a Day (and Catch Your Oven on Fire, too!)
How to Use Up 12 Cans of Biscuit Dough in a Day (and Catch Your Oven on Fire, too!)

When I asked for ideas for using up canned biscuit dough a few days ago, I never quite expected to get over 450 responses! I almost wished I’d picked up more than 12 cans as now I have biscuit dough recipes running out my ears.
But alas, I only had 12 cans, so I decided on making Melt In Your Mouth Coffee Cake and Monkey Muffins since I had all the ingredients on hand to make both of those. We had a dinner to attend last night so I figured those would be perfect to bring to it.

The Monkey Muffins were so easy to make–especially with my handy-dandy kitchen scissors!

The Melt In Your Mouth Coffee Cake was a snap to make as well. But word to the wise: be sure to put a pan underneath your pie plates. I made two of these and they leaked brown sugar goop all over the bottom of the oven.
Do you know what brown sugar goop does when it leaks onto the oven floor? That’s right, it catches on fire.
I wasn’t paying much attention and all of a sudden happened to notice an orange glow emanating from the oven window. The brown sugar goop was ablaze!
After sequestering the children far away from the oven, I pulled the almost-baked coffee cakes out, turned off the oven, shut the oven door, and waited to make sure the fire went out. All the while, my 5-year-old daughter was hollering “There’s an e-mer-gen-ceeee!!” all throughout the house. It was a prime opportunity to reiterate what you are supposed to do when there’s a fire.

The coffee cake turned out wonderfully, despite the fire. My husband called it delicious–and I was even pretty impressed that canned biscuits could turn into something so scrumptious.
Now I just have to figure out how to get my oven to stop stinking and smoking!
How to Have a Freezer Cooking Day if You Don’t Have a Deep Freezer
How to Have a Freezer Cooking Day if You Don’t Have a Deep Freezer
Guest Post by Jessica from LifeasMOM
“I’d love to do freezer cooking, but I don’t have a freezer.”
Sound familiar? Well, today we’re going to dispel the myth. You can practice bulk cooking even if you have small storage space. Really and truly. Want to see how?
For the record, that is a 10 cubic foot freezer into which I placed 20+ meals and still had extra space. The meals were varied, from casseroles to sauces to chili to marinated meats. Let me explain in more detail how you can make this work for you.
The first time I attempted once-a-month cooking, I was pregnant with our first child. We lived in a 250-sq ft studio apartment and were learning a lot about making the most of small storage space. How we fit three of us in that one room is a testimony to God’s grace and creative thinking. My freezer cooking experience was no different. Our refrigerator was the smallest they made that still had an independent freezer. It was one (small) step up from a dorm fridge. Yet, I was regularly able to store 30-40 meals in the freezer. Granted, I was only feeding two adults, but if we do the math, even that small freezer would hold 15 – 20 meals for a family of 4.
How is this possible?
- Start with a mostly empty freezer. You are probably not going to be able to store several weeks’ worth of meals in your refrigerator/freezer if it already has multiple boxes of ice cream, loaves of bread, and packages of hamburger. Consider “eating from your pantry” so that you can reduce what is already there. If you have a stockpile of frozen meats and poultry, those are going to be the building blocks of your freezer meals. Research meals that you can make ahead using those proteins. You don’t need much extra space for these meals. You’re simply going to take the frozen hamburger out, thaw it, cook it up, give it a makeover and put it back where it was.
- Use freezer bags. Ziptop freezer bags, designed for cold temperatures and durability are able to hold many different kinds of frozen foods. These are especially useful for meats in marinades, taco fillings, pizza dough, and even thicker stews and chilis. As you cool, label and freeze the food in these bags, seal them tightly and lay them flat in your freezer. Once they are frozen, you will be able to stand them on end and line them up like books on a shelf, making the best use of your storage space. Make sure that you remove as much excess air as possible to avoid freezer burn.
- Use like-shaped plastic containers. For more liquid meals, like pasta sauce, use containers that are all the same shape and size. These will stack the best and make the best use of your space. Square boxes are more efficient than round, but use what you have and look for other complements on sale in future months.
- Stack like with like. This is probably obvious, but bears repeating. If you have three 9×13 pans, stack those one on top of each other. Not only will those meals be easy to find, but you’ll make the most of your space.
- Consider freezing meals in components. You might not have room for 15-20 casseroles to fit in your freezer, but you don’t have to freeze it all together. You can freeze some meal components separately. For instance, when Crystal made my Slab Apple Pies, she froze each layer in a separate ziptop bag. This enabled her to have much more flexibility with her storage space; she could move the separate bags around and fit them where there was space, rather than have to find a way for a 9×13 pan to fit.
You don’t have to have a free-standing freezer to make Freezer Cooking work for you. Sure, it helps. But, you can make the most of what you have and still enjoy homemade convenience foods.
– Jessica Fisher, also known as FishMama, regularly feeds her freezer so that she can feed the hungry masses who call her “Mom.” She posts daily about life’s joys and challenges at LifeasMOM and shares delicious ways to act your wage at Good Cheap Eats.
Freezer Cooking Day: My Plan (and come link up yours, too!)

I finally finished planning our Freezer Cooking Day for tomorrow. Here’s what’s on our list:
::Barbecued Meatballs
::Beef, Bean and Tomato Burritos
::Chicken Spaghetti (from The Pioneer Woman Cooks: Recipes from an Accidental Country Girl)
::Pizza Dough
::All Purpose Master Pancake and Waffle Baking Mix (from Quick Fix Healthy Mix: 225 healthy and affordable mix recipes)
Other possibilities, if we have extra time and energy: Chicken Pockets, Pumpkin Chocolate Chip Muffins, or Chocolate Chip Cookie Dough.

We’ll be doubling, tripling, or quadrupling pretty much all the recipes in order to make enough for 2-3 dinners’ worth for our family, my sister and her husband, and my sister-in-law and brother.
I’ll be posting any recipe adaptions we did, pictures, and more during the play-by-play Freezer Cooking Day posts I’ll be sharing on Friday.
If you’re new to Freezer Cooking, be sure to check out my post on How to Plan a Freezer Cooking Day and FishMama’s post on Making Freezer Cooking Work for You.
 Are you participating in April Freezer Cooking Days? If so, post about your cooking plan on your blog and then come back here and leave your direct link below so we can all be inspired! Please note: links which do not link directly to your freezer cooking post or which do not contain your freezer cooking plan will be deleted.
“I don’t really care what other people think.”
As many of you know, my husband and I lived on beans and rice while he was in law school in order to stay out of debt. It wasn’t easy–especially when many others around us were living extravagantly when they had no money to do so.
But one of the biggest lessons we learned was to be content with what we have and stop worrying about what others think. From the old cars to the thrift store clothes to the coupon-clipping to the eating at home, we just got used to being weird and it didn’t bother us if we were the only ones pinching pennies.
One of the things we did to save money was to only have one car for a few years. While it’s nice to have two vehicles, we certainly learned that it is a luxury, not a necessity. And we got along just fine as a one-car family.
When Jesse got a job with a long commute, we saved up and bought a second vehicle–an old blue minivan. This vehicle has been Jesse’s mode of transportation for the last few years and he’s driven Old Blue Van all over the state to his various court appearances and attorney functions. He’s gotten quite a few funny looks and interesting remarks from other attornies since it’s definitely not the typical car a lawyer would drive.
After a number of years of scrimping, saving, investing, and working hard, we’re now in a position where we could afford to pay cash for a newer, nicer car. So I’ve been thinking recently about how badly I felt that Jesse was still driving such a clunker and guessing he probably got tired of the comments about his less-than-ideal vehicle, even though he never has once complained about it.
So I told Jesse the other day that I’d like for us to save up to pay cash for a better car for him. He looked at me and said sincerely, “I don’t need a new car and I don’t care what other people think.”
I love that guy! And I completely agree with him: There’s such a freedom in not having to spend time stressing about impressing other people.
We’ll probably buy a newer vehicle at some point in the not-too-distant future (likely when Old Blue Van breathes its last breath!), but in the mean time, we’re content and thankful. After all, we have two vehicles–a luxury that many people can’t even fathom!
Help! It’s Canned Biscuit Overload!

So I have this rule that I won’t buy refrigerated biscuit dough unless it’s $0.05 or less per can. Well, with the catalina, sale, and coupons this week, they almost paid me to take these biscuits home, so I bought them.
But what was I thinking? We don’t normally eat many canned biscuits (no offense to those of you who do, but we really prefer homemade!) and now I have 12 entire cans of biscuits sitting in my fridge.
Help! What are your most creative ideas for using up canned biscuits? I’m planning to make some of them into Brown Sugar Biscuit Twists, but beyond that, I’m stumped.
Freezer Cooking Days: March 31-April 2, 2010
It’s the end of the month and my freezer is getting empty. Which is a good thing because March 31-April 2, 2010, FishMama and I will be hosting another big Freezer Cooking Extravaganza.
What Is Freezer Cooking Day?
Basically, Freezer Cooking Day is a monthly day FishMama and I set aside to fill up my freezer with main dishes, breads, desserts, and side dishes to save ourselves time and money the rest of the month. I find that we eat better, I spend a lot less time in the kitchen, and we avoid many needless trips through the drive-thru when my freezer is full.
FishMama and I blog a play-by-play of our Freezer Cooking Days to inspire you to consider doing the same and share some great recipes, as well. You can see dozens of posts from past Freezer Cooking Days here. Check out step-by-step instructions for planning a Freezer Cooking Day here.
How Do I Join in Freezer Cooking Day?
We’d love to have you join in this Freezer Cooking Day in some way, shape, or form. You can make muffins or cookies to put in your freezer, make ahead some of your Easter Dinner, cook up 30 meals, or anything in between. The goal is just to get in your kitchen and do some prep work to save you time and money later in the week or month.
If you’re blogging about your Freezer Cooking Day, you can link up your planned cooking list tomorrow (Wednesday, March 31, 2010). On Friday afternoon, I’ll have another link-up here for you to share all about your Freezer Cooking Day accomplishments.
My Freezer Cooking Day Plan: It’s a Family Affair This Time!
I’m sort of “cheating” this time, though, because I convinced my extended family to join in. So my three sisters, sister-in-law, and mom are all pitching in this time. Mom is on babysitting duty, and the rest of us are on Kitchen Duty. We’re going to set up some extra tables in our kitchen, everyone is bringing pots and pans, and we’re going to see if we can all squeeze into my small kitchen and make enough food to fill our freezers up.
We’re planning to make enough for all of us to take home doubled dinner portions of nine different main dishes. Tomorrow, I’ll be shopping, making lists, and sharing my planned Freezer Cooking list. Thursday, we’ll be cooking up a storm. And Friday, I’ll blog about our cooking adventures.
I’m getting excited. But for now? I gotta finish making the plan and prep list. As I said last time, without a plan, Freezer Cooking Day is a disaster.
OVER-SPENDING EVERY SINGLE MONTH?Grab these FREE Budgeting Sheets!
Click here to download!
Dillon’s Shopping Trip Today
After our success at the Double Dollar coupon event, I was inspired to stop by Dillon’s to pick up a few more deals.
I had all three children and it was naptime, but we made it through without mishap. Well, except for the potty accident. But gratefully my two-year-old waited until we got out to the van, instead of when we were in the store! {Sigh. At least we’re making progress in the potty-training department. I have hope!}
Here’s our loot (Don’t ask me why the photo is all fuzzy! It was the only picture I took so it’ll have to do!):

1 box of Annie’s Mac and Cheese — on sale for $0.50.
6 tubes of Grands! Biscuits — on sale for $0.98 each. Used 2 $0.80/3 coupons (there are also $0.30/2 coupons here), plus I got a $4 catalina back for purchasing 6 making them about $0.03 each after coupons and catalina. (See more details on the catalina here.)
5 boxes of Ronzoni Smart Taste Pasta – on sale for $0.75. Used $0.75/1 coupons here to get them free!
1 pouch of Betty Crocker potatoes — on sale for $1. Used $0.80/1 coupon (there are $1/1 coupons available here, too!), plus I got a $0.50 catalina back for purchasing 1 making this free plus overage after coupon and catalina! (See more details on the catalina here.)
2 Scotch Brite sponges — on sale for $0.50 each. Used $1/2 coupon to get these free after coupon.
1 bag Brown Sugar — on sale for $1.
5 tubs of cottage cheese — reduced to $0.89 each (using this in Ziti that we’re making for Freezer Cooking Day on Thursday).
2 bags of Chex Mix — on sale for $1.50. Used $0.50/1 coupons here (doubled) to get these for $0.50 per bag.
1 half-gallon of lemonade — reduced to $0.79.
1 bag Tyson Chicken — used free coupon I got in the mail.
1 bag Banquet Chicken — used free coupon I got in the mail.
My total before coupons and sales was $56.81. After coupons and catalinas I earned from my last shopping trip, I paid $7.53 out of pocket plus I got back $4.50 in catalinas to use on my next shopping trip!
So if you combine both of my shopping trips today, I spent $26.35 out of pocket and saved $173.47! I’m pretty happy with that percentage of savings. 🙂
Double Dollar Coupon Shopping Trip

One of our local stores is running a Double Dollar coupon promotion so my mom and two sisters and I had fun getting quite the haul of deals. It’s hard to see just how much food we ended up with and these pictures don’t really do it justice.

Let’s just say I think we’re well-stocked on applesauce, pineapple, and Kashi cereal for awhile!
All of our orders combined, the four of us together spent around $79 out-of-pocket for all the groceries shown above. Considering that before coupons, it would have cost us around $400 for all those groceries, I think we got some great bargains!
And here’s specifically what I bought:

Before coupons, my total was $116.66. After coupons, I paid $18.82!!
Four Ways to Save Money on Laundry Detergent

How do you get good deals on laundry detergent? I have found the occasional good deal, but this seems like the one product I struggle
to really save on. Any advice would be greatly appreciated! Thank you! -A reader
1) Don’t Be Brand Dependent
One of the easiest ways to save money on laundry detergent is to stop being brand dependent and start buying whatever brand you can get on a great sale with a coupon.
My target price for laundry detergent is $2 for a 48-load bottle or larger. By watching for sales on the store-brand at Dillon’s or by pairing a coupon with a great sale on a name-brand, I rarely pay more than that for a bottle of laundry detergent. Aldi and Costco also have good everyday prices on their store brands if you don’t want to mess with watching sales and clipping coupons.
If you can afford it in your grocery budget, stock up when the price is low so that you don’t ever pay retail for laundry detergent again!
2) Use Half of the Recommended Amount
I’m not sure who decided you have to use a full capful of laundy detergent in order to run a load of laundry, but I’m not buying it. In fact, I pretty much always use half the recommended amount–and I think our clothes are plenty clean.
Maybe this is going to sound over-the-top frugal, but it was a trick my mom taught me: when the bottle has almost been used up, add some water, put the lid back on, and shake it up to get the last remains of laundry detergent cleaned out of the bottle. I can usually stretch the bottle to last for another load just by doing this.
3) Only Wash Dirty Clothes
One of the best ways to cut down on your laundry detergent bill–and your water and electric bill for that matter!–is to just stop washing clothes which aren’t truly dirty. We’re not always 100% perfect about this (especially since my 2-year-old has discovered the joy of changing her clothes multiple times throughout the day!), but we try to re-wear clothes whenever we can.
I can often make a pair of jeans last for two to three days without needing to be washed. I just spot-clean them and re-wear them. (I know some people think that is terribly unsanitary, but seriously, who made up the rule that you have to wear an entirely new outfit every single day? If you’re bathing everyday, I really don’t see what’s the big deal. It works for us and it saves us time and money.)
4) Make Your Own
Truth be told, I tried making my own laundry detergent once and it was a total fail. The goopy, baby-spit-up-like solution was not only icky, it did a horrible job of getting our clothes clean. So I gave up that idea and decided to go back to buying detergent on sale with coupons.
However, I have friends who think homemade laundry detergent is the best thing ever. And when I’ve seen the cost breakdowns, I would wholeheartedly agree that it’s very inexpensive to make your own!
How do you save money on laundry detergent? I’d love to hear your ideas! (And anyone want to “fess up and tell me that you also re-wear your clothes?!)
photo credit: Pixel Drip
Reader Testimonial: “I want to live with less and simplify”

Emails like this are such an encouragement to me:
My name is Amanda and I just recently found your website through a recommendation from a friend. I just want to thank you. I am the mother of a very active 4-year-old and hope to have another child in the next few years. My husband is a teacher and I am a social worker, both jobs that are often more than full-time and don’t pay terribly well.
We recently had a scare when the school district we both work for decided to reduce both of our positions. It would have been a cut of $26,000 in our annual income. It was a horribly scary time—we both love our jobs and didn’t want to seek other full-time employment but weren’t sure how we would keep up with our financial obligations (mortgage, student loans, daycare, food, etc.).
It was right after this happened that my friend told me about your website. I visited and was hooked. I definitely appreciate the coupons, but what I appreciated more is the atmosphere of the site. Exploring your site, I felt so much support and positive energy from the topics you cover and the posts left by other women. With your help I started to believe that I really could make it work for my family—that we could live more simply on less and be fine.I got more and more excited about my plans for growing our own vegetables, shopping at Goodwill, finding cheap/free entertainment, etc.
After about 3 weeks, our district decided not to cut my husband’s position and to restore mine to 3/4 time. Now we are not nearly as worried about our finances and probably wouldn’t have to change much.
However, now I WANT to. I WANT to live with less and simplify. Much of that desire comes from the things I’ve found on your website. Since I will have one day a week off, I still fully intend to plant that garden, search for those deals, shop at Goodwill, and hopefully even put some extra money in savings in the process!
Most of all, I’m really excited to have a little more time to focus on being Mom and taking care of my family. I just wanted you to know how you and the other women who contribute to your site brought me hope during a really difficult time, and hopefully changed my family’s lives for the better as we implement some of the money-saving, “simplifying” tips found on your site. -Amanda
A big thank you to each and everyone of you who visit here and those of you who take time to leave comments, share money-saving tips, and contribute guest posts. You might never know just what a big impact you are having on others who are struggling!
photo credit: ddsnet
Ziploc House Party

My friend, Yvonne, hosted a Ziploc House Party today. It was my first time to attend a House Party and it was so much fun! Not only were lots of great home organization tips shared, but we got some free products and coupons to take home.
I now know why so many of you love these House Parties and have raved about them to me. I’m definitely going to apply to host some of my own in the future–and let’s hope that eventually I’m chosen!
If you’d like to sign up to host a House Party, there are quite a few you can sign up for right now. Just click here to see the list. It’s free to host a party and, if you’re selected, you get lots of fun items to host the party plus freebies and coupons to send home with your guests!