
Live Renewed shows you how to make your own foaming hand soap.
Do you have a fun and frugal DIY idea to share? I’d love to hear about it! Read the submission guidelines and submit it here.

Saving Families Money Since 2007


Live Renewed shows you how to make your own foaming hand soap.
This doesn’t have much to do with saving money (unless you count the money saved on buying sippy cups!), but so many of you asked how we’ve taught Silas to drink from a regular cup yesterday that, just for fun, I did a short video last night explaining how we’ve taught our children to drink from regular cups instead of sippy cups.

Amy emailed in the following testimonial which I thought many of you would enjoy reading:
I just wanted to let you know that we just had our most successful garage sale ever after reading your Ten Tips for a Successful Garage Sale post. For starters, our philosophy was different because we realized we had already gotten our use out of each item and so were not holding onto the “but this is what we paid for it new” syndrome.
After the sale, we also realized that a clean and empty garage is definitely worth our efforts to have the sale. (The garage had been full after our move back to Texas two years ago. We began to realize if all that stuff had not been used in that long, we really do not need it.) I think this sale proved a successful teaching tool for all of us in the blessings of minimalism. We all love jumping around freely in the newly-emptied garage!
How We Did It
We started the sale on Friday, so Thursday night we listed the sale on Craigslist. My husband created a public map on Google Maps, with directions to our house from the nearest major cross-roads. In the description of the Destination (our house), he posted sale hours and a long list of items we had for sale. It was the same text that was in the Craigslist post, but including the link in the post made it very easy for folks to find us.
We also posted signs like we had in the past, but most people said they heard about us and found us because of Craigslist and the map we placed in the ad. Very effective, indeed.
The second day of our sale we updated our Craigslist and Google Maps postings and stapled smaller, brightly colored signs to the original signs that said, “50% off Sat. 7:30 a.m.” Wow! That worked!
We sold most the remaining big stuff within minutes of opening the garage door. All the little stuff was sold off in steady streams until about 10:30 a.m., at which time we had our children take turns holding up a sign at our street corner saying, “90% off — many items FREE!”
People came in droves after that! We got rid of just about everything very quickly. It was all said and done by about 12:30 p.m..
Lessons Learned
We included our children the sale and let them set up a table of their own. One of our sons was originally miffed because he sold some of his things for way less than he wanted to, but he quickly learned the art of strategic marketing! So, all was good in the end.
The children also sold donuts and bottled waters. Those were a huge hit — and a big profit-maker, earning a dollar per donut or bottled water. They made a good return for their efforts, and were very happy about it. They learned effective salesmanship and how to talk with a variety of people.
Afterward, we had a long talk about rejoicing and giving thanks for the 90% God lets us keep from our earnings and we were able to give a much larger than usual tithe on Easter Sunday morning which gave us all so much joy! -Amy

Smoothies for our breakfast and reading time… Kaitlynn’s such a ham!
We have a busy week this week, so I’m keeping dinners very simple. And I’m thankful our freezer is starting to fill up which relieves me from having to cook as much!
Breakfasts
Cantaloupe Strawberry Smoothies (This was a crazy smoothie creation I came up with on the fly this morning. Everyone drank them, but they weren’t a big hit!), Hard-boiled eggs
Cereal, Pick-Me-Up Smoothies
Waffles (from the freezer), scrambled eggs, fruit
Steel Cut Oats with raw sugar and milk
Breakfast Burritos, Fruit
French Toast Casserole (from the freezer), FruitLunches
Leftovers x 3
Apple Peanut Butter sandwiches, carrot sticks
Beans & Rice with cheese, peas, fruit
Mac & Cheese, carrot sticks
Cheese Quesadillas, fruitSnacks
Whole Wheat Chocolate Chip Oatmeal Cookies
Popcorn
Fruit/VeggiesDinners
Marinated chicken, wild rice, frozen veggies, fruit
Steak on the grill, frozen veggies
Tilapia, rice, steamed broccoli, fruit salad
Barbecued meatballs, sweet potatoes, frozen veggies, fruit
Dinner at church
Dinner out
Dinner with extended familyFreezer-Cooking-In-An-Hour Plan (I’ll share pictures/details on how this goes on Thursday!)
Breakfast Burritos
Southwest Roll-Ups
Lighter Chocolate Chip Pancakes
 (You thought my floors weren’t too bad? Well, take a peek at my countertops before I’ve cleaned the kitchen in the morning. They always need serious help after breakfast!)
What’s on your menu this week?

Guest post by Jenae at I Can Teach My Child.
As a family of four, we live on my husband’s income only. He is currently an Administrator in Long-Term Care, a job he absolutely loves. I consider his job a ministry to the elderly and he truly has a gift for encouraging this neglected population.
His income, however, is largely bonus-based and therefore is quite irregular depending on the center’s performance in meeting budget, accounts receivable, census, etc. My husband is a high-achiever and does great with this type of compensation, but it certainly makes budgeting quite tricky!
Here are just a few suggestions we have found helpful for budgeting on an irregular income:
Look back to the last few years and make note of overall compensation received as well as any noticeable trends (for example, a large part of my husband’s bonuses pay out in March). Divide your average income by 12 to see what you can expect your monthly income to be.
Once you have your average yearly income, make a budget based on that income and set your financial goals (i.e. paying off debt, mortgage, etc). If you are new to an irregular income, you’ll want to shave off as much excess spending as possible until you are comfortable with the new income situation.
In addition to 3-6 months of an emergency fund in an accessible savings account, I would recommend having at least one extra month’s worth of expenses in your checking account. This will help tremendously during those lean months without having to dip into your emergency fund.
Make sure you keep a close eye on all financial transactions to ensure you have enough money to pay your monthly bills (as well as to make sure you’re not overspending). Using cash is always the most reliable way to do this, but we also use Mint.com for our electronic transactions.
Every month, look over your budget and actual spending (with your spouse, if you are married). If you have received a large payout, decide what to do with that money (put it towards the mortgage, paying off debt, etc). If this month is especially lean, look for ways in which you can cut back. Monthly budget meetings are especially important for families with irregular income.
An irregular income can be especially challenging in regards to managing and budgeting money. But it doesn’t have to be stressful nor consuming. Keep an open line of communication with your family members and remember to always keep a cushion to carry you through.
Jenae is a Master-degree holding former first grade teacher turned stay-at-home Momma. She loves finding creative ways to save money, spending time with her family, and sharing fun activities on her website I Can Teach My Child.
I loved this testimonial that Sharon emailed in:
I’ve been saving between $100 to $120 every month just simply by going grocery shopping every two weeks instead of every week like I used to do. This is not taking into account the money I might have spent in gas either.
In order to shop every two weeks, I have to plan ahead a little more, thinking about any hosting or extra events I may have to cook for in the next two weeks. A few times, I have had to pick up some extras in between my regular shopping week, but I am amazed at how rare it is that I’ve needed to do so. I’ve discovered I can usually plan my menus around what my cupboards, fridge and freezer contain.
I’m finding that the less I see, the less I buy. The less I shop, the less I see.
By the way, not only has shopping every two weeks dropped by grocery bill significantly, but it’s also given me more time to spend on other projects. -Sharon
I’m late in getting this up today because I spent this morning at a knitting class and this afternoon hanging out with my friend, Carolynn, from My Little Bit of Life. At any rate, here’s a rundown on my grocery shopping purchases this week…
I stopped at Walmart last night to get some Ivory soap for the homemade laundry detergent I’m making (I’ll be sharing the recipe and full details on how it goes on Wednesday). Of course, I have been unable to find a $1/1 Ivory soap coupon from my usual coupon sources, so I decided to use overage to my advantage.

Here’s what I got:
1 can Similac formula — $4.17, used $5/1 coupon, free plus overage
1 Nivea Bodywash — $3, used $3/1 coupon, free after coupon
1 3-pack of Ivory soap — $0.97
My total was $0.73 after the coupons plus tax.
We won’t use the formula, but I went ahead and bought it to donate since I had the coupon and it gave me overage toward the soap purchase.
I did the rest of my shopping on Tuesday:

I spent $41.97 at Aldi — see a full list of what we bought and the prices here.

I spent a little over $7 at Dollar Tree.

And I spent $7.11 at Dillon’s — see a full list of what we bought and the coupon match-ups here.
Would you like to know what the best deals and coupon match-ups are for your local stores? Be sure to check out the Store Deals section of our site where we post the best deals and coupon match-ups each week for over 100 different stores across the country. You can sign up to receive the top deals in your email inbox each week as soon as they are posted!

 Did you snag any great deals or bargains this week or save money in other ways? If so, be sure to post about them on your blog and leave your link below. Please remember that this weekly round-up is to share deals you personally got and/or money you were able to save this week. In order to keep this weekly round-up focused on helping and inspiring others in their efforts to save money, links which have little-to-no content other than promoting affiliate links, etc. will be deleted. Also, to make it easy for everyone to navigate quickly through the links, your link must link directly to your Super Savings Saturday post.

After deciding that this wasn’t the season of life for me to be doing big marathon freezer cooking sessions, I’ve been trying to figure out what might work for me and how I can streamline cooking and dinners around here.
I love having stuff in the freezer to pull out and use. I love not having to worry about making dinner every night of the week. And I love not having to do as many dishes. But I don’t love the upheaval the mega freezer cooking sessions were creating nor the massive mess and exhaustion that always seemed to result now that I have three children underfoot.
So I’m experimenting with another alternative… something I’m calling “Freezer Cooking in an Hour”. Basically, I’m going to set aside one hour one afternoon a week during Silas’ nap time to do as much cooking ahead as I can. And I’m bringing you all along on the ride with me to see how this goes. 🙂
Here’s what I did in an hour (plus a little extra!) yesterday:
3:00 — Start mixing up Pumpkin Waffle Batter. I “cheated” and used a mix I’d gotten for Christmas. I had set out some frozen milk the night before to use.
3:10 — Waffle batter finished and started waffles on the waffle iron. Realized I still had a few cups of milk left. Decided to make some French Toast Casseroles with the clearanced bread I’d gotten at Aldi plus the extra milk.
3:30 — Three French Bread Casseroles made and stuck in the oven, the pile of waffles continued to grow and I moved onto making the Marinated Chicken.
Uh-oh, Silas is up from his nap. I set the children all around the table with my laptop to watch Mary Poppins and dive back into freezer cooking.
3:45 — Chicken is finished and in the freezer, waffle batter is all cooked up, time to start on the Whole-Wheat Chocolate Chip cookies. But wait, someone needs a drink. And a snack. Silas needs a diaper change…
4:00 — So much for finishing in an hour! The children are back to their places at the table. I mix the cookie dough and roll it into balls.
4:20 — Finally finished! Well, except for the kitchen. I tidy up, have the children go out to play and survey my accomplishments:

3 pans of French Toast Casserole
4 meals’ worth of Marinated Chicken
3 dozen Whole-Wheat Chocolate Chip Cookie Dough Balls
Double batch of waffles (Half were eaten for snack. Sigh. How much are these children going to eat when they get a little bigger?!)
Not bad for an hour and 20 minutes!
And truth be told, I think giving myself a shorter time frame encouraged me to really focus and be efficient and productive. I’m looking forward to testing this theory out during my Freezer Cooking in an Hour segments over the next few weeks. Perhaps this method of cooking ahead might be the perfect solution for this time in our lives! We’ll see…
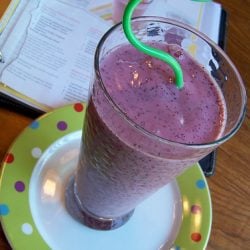
Blueberries + ginger is such a great smoothie combination — and excellent nutrient value too! This smoothie is so quick and easy to whip up, and a great way to start the day!

When I first saw this recipe in an old issue of the Sandra Lee Semi-Homemade magazine, I thought it sounded like a very strange combination. But the more I thought about it, the more the idea grew on me.
So I tried it this week — and thought it was really quite good. The ginger added a fun zing and a refreshing twist.
If you try this, I’d love to hear what you think about it!
1. Combine all ingredients in a high-powered blender and blend on high until smooth (we use a Vita-mix).
2. Pour into 3 glasses and serve immediately.

Make sure to share and save it on your favorite platform below!
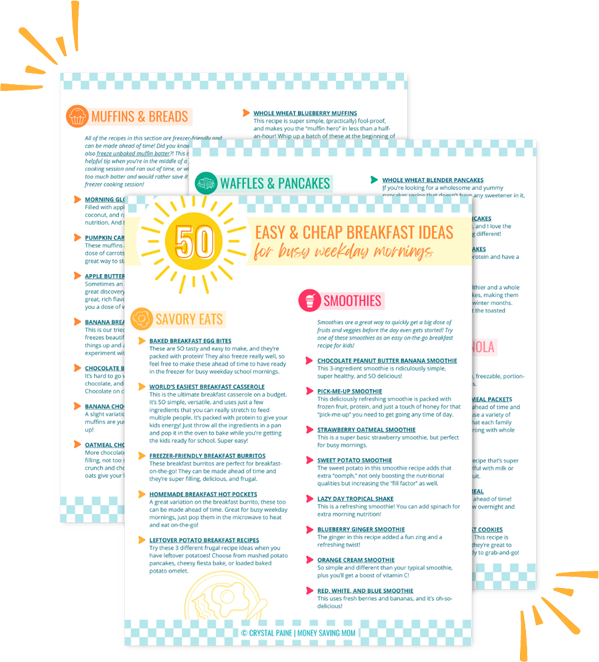
Mornings just got so much easier with this FREE list of 50+ Easy & Cheap Breakfast Ideas for Busy Weekday Mornings!
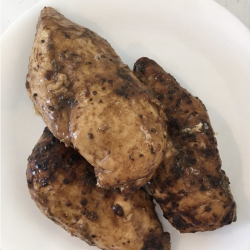
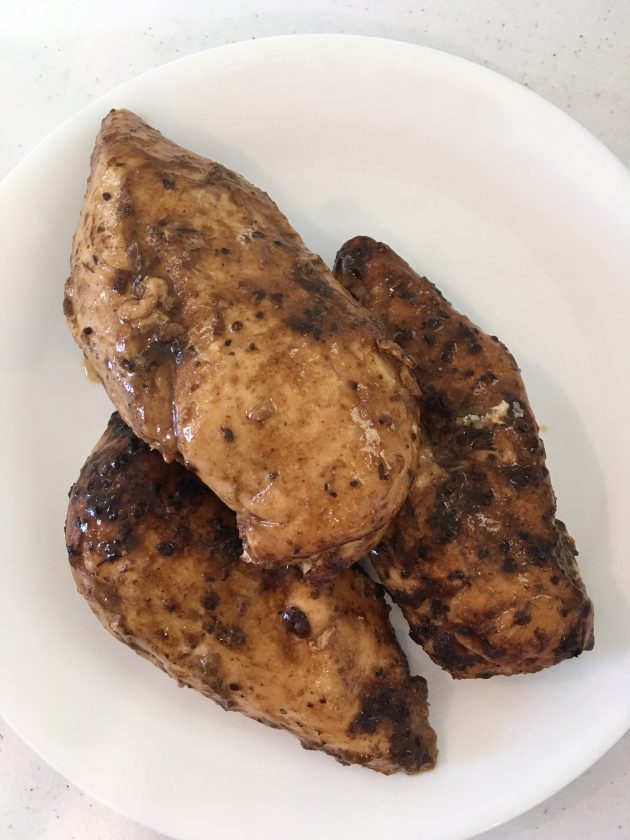
Looking for a delicious but super simple chicken recipe? This World’s Easiest Marinated Chicken Recipe is it.

I’m pretty sure you can’t beat it in simplicity — there’s only a few minutes of hands-on time to prepare this delicious chicken.
Best of all? Since salad dressing is often on sale for less than $1 per bottle, you probably have some of it in your stockpile most of the time.
NOTE: This is the freezer-friendly version of my Crockpot Italian Chicken. I was going to try and explain how to freeze that and decided it might just be easier to do a separate recipe post for it!

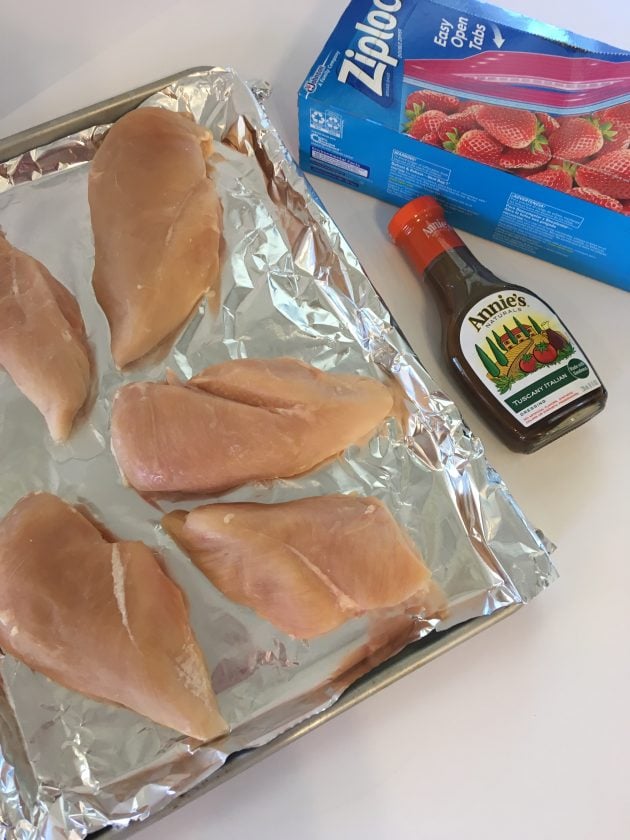
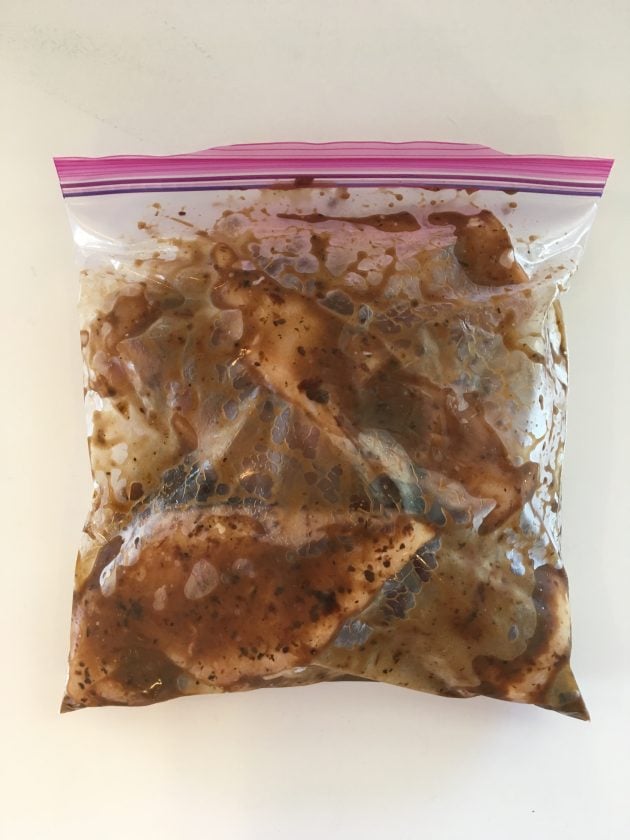
1. Put the chicken in a gallon-size zip-top freezer bag.
2. Pour the Italian dressing over the chicken.
3. Squeeze the air out of the bag, seal it, and place it in the freezer.
The Quick Method:
1. Preheat oven to 350º F.
2. Pull frozen chicken out of the freezer and run the freezer bag under hot water to thaw slightly.
3. Pour all the contents of the bag into a 9×13-inch baking dish.
4. Bake in preheated oven for 45 to 60 minutes, or until chicken is fully cooked.
Longer Marinating Method:
1. Pull frozen chicken out of the freezer, place the bag in a bowl, and let it thaw in the refrigerator for up to 24 hours.
2. When ready to bake, preheat over to 350º F.
3. Pour all the contents of the bag into a 9×13-inch baking dish.
4. Bake in preheated oven for 45 to 60 minutes, or until chicken is fully cooked.
Crock Pot Method:
1. Pull frozen chicken out of the freezer and run the freezer bag under hot water to thaw slightly.
2. Pour all the contents of the bag into the crock pot.
3. Cook on high for 4-6 hours, or until chicken is fully cooked.
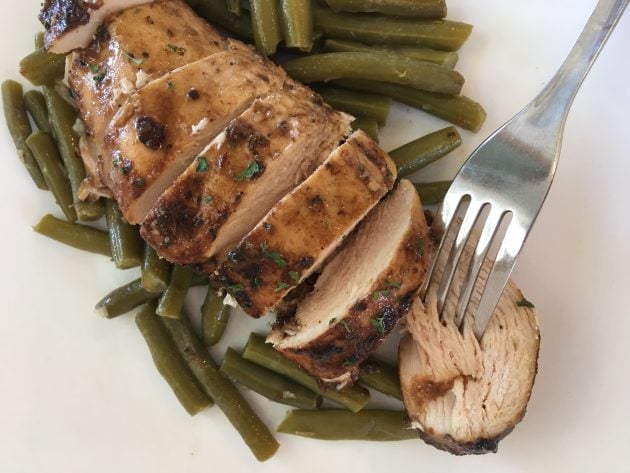
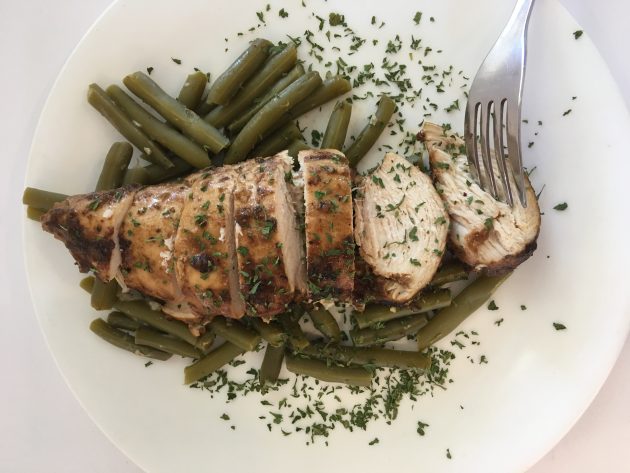
This is delicious served over rice with steamed vegetables on the side.
It’s also really yummy with mashed potatoes, baked beans, and corn on the cob… and it pairs well with butternut squash too.
Bone-in chicken requires a longer marinating time than boneless chicken — but in general, anywhere from 2 hours to 24 hours is adequate. Of course, the longer you marinate, the more flavorful the meat will be. However, marinating for longer than 48 hours could cause the marinade to break down the meat fibers, making it mushy.
It’s a great combination of seasonings and flavors that work especially well with chicken. Also, the oil in the dressing keeps the meat moist during cooking, and the vinegar helps to tenderize the meat.
No, you definitely don’t want to rinse the marinade off the chicken before baking it. However, you can toss any extra marinade in the bag as it has been in contact with raw meat.
This is more of a taste preference. Usually the marinade provides all the seasoning, but you may certainly sprinkle your chicken with a little salt, pepper, or other seasonings either before or after baking it.

Make sure to share and save it on your favorite platform below!
Done-For-You Dinner Recipes With Simple Ingredients and a Grocery Shopping List!


This is a recipe my older sister created many years ago and it’s been a family staple ever since. It’s not a low-fat recipe (I think I gained a pound just making these yesterday!), but it’s delicious.
It’s a hearty cookie and it blends two of my favorite foods together — chocolate and peanut butter. And the whole-wheat flour and oats might help balance out the sugar and fat… or at least I like to tell myself that! 🙂

This cookie dough freezes well and is perfect to have on hand for last-minute guests or a mid-afternoon snack.
Preheat oven to 375 degrees. Cream together first six ingredients. Add flour, baking soda, salt and oats. Mix well. Stir in chocolate chips. Roll into 1-1 1/2-inch balls. Place on greased cookie sheets and bake for 10 minutes or until done. Makes approximately 40 cookies.
Freezer-Friendly Instructions:

Roll dough into balls and place on a cookie sheet. Freeze for 1-2 hours.

Put frozen cookie dough balls into a plastic freezer bag and seal tightly. When ready to bake, pull out the desired amount of balls and place on a greased cookie sheet for 30-45 minutes to thaw. Bake at 375 degrees for 10 minutes or until done.
*I use 1 1/2 cups raw sugar.


If you missed part 1 of the How to Make Money Blogging series, read it here.
Your blog name should encompass your blog’s mission and should clearly articulate your blog’s purpose. Don’t hurry through the process of picking a name: it’s your brand and you want to make sure you love it and it’s something you’re going to love for years to come.
Take a week or two to consider potential names. Ask a few trusted friends to give their input. Toss around ideas and, when you land upon ones you like, check to see if the domain name (the www website address) is available on GoDaddy.com before jumping ahead and settling on any one name.
Important note: Blog names can be federally trademarked. This means that an individual or company owns the federal rights to a particular name or phrase and it cannot be used by others or you will be subject to fines and required to discontinue using the name. To be safe, search thoroughly online to make sure no one is using the name you come up with or a very similar variation of it.
As soon as you land on the blog name you love and have double-checked that no one is using it, buy the domain name immediately. It usually costs around $10 to $20 per year for this and it’s worth every penny to have your own domain name for your blog.
I always purchase domain names from GoDaddy.com just because, well, that’s what I’ve always done. However, if you are planning to set up your blog through Blogger (see point 3), it’s much, much easier if you purchase the domain name directly through Blogger rather than through a separate domain name service as it will be automatically set up for the domain name to point to your Blogger blog rather than you having to go through some complicated process to manually input the code and do it.
I also suggest, if you want to think long-term and hope to turn your blog into a successful business, that you purchase all variations on your domain name. That way, you don’t have to worry about someone else setting up a site with a domain name very similar to yours.
Not too long ago, I was asked what is the one thing you wish you had done differently when setting up your blog. I instinctively replied, “I wish I had started with WordPress.”
I started with Blogger because that was pretty much the only blogging platform in existence. I moved to TypePad when the Blogger SPAM bots marked my blog as SPAM in 2008 and I was locked out of my Blogger blog for 10 days.
Near the end of 2009, my blog outgrew TypePad and I was forced to switch to WordPress. Making the leap from TypePad to WordPress was daunting and tedious. We had to move thousands of posts and hundreds of thousands of comments. There were all sorts of glitches and it was a big learning curve.
Truth be told, though it was a major headache, it was one of the best blogging moves I’ve ever made. WordPress has allowed me to have a much more organized blog and offer many features I couldn’t with TypePad and Blogger.
So, if I were to suggest a blog platform, I’d highly recommend WordPress. It’s more expensive, but it gives you many more options than other platforms offer. Plus, you don’t have to worry about your blog getting locked or outgrowing TypePad.
Another big perk of WordPress is that it has much more sophisticated SEO capabilities (i.e. SEO stands for Search Engine Optimization and basically refers to optimizing your site so it comes up high in search engines. People will find you a lot more easily if you come up on the first page or two of Google rather than page 133!). I don’t do a lot for SEO at this point, but I’m all about doing small things to help improve where MoneySavingMom.com shows up when you search for “money-saving blogs” or “grocery budget”. WordPress makes it extremely simple to accomplish this.
Back in the “olden” days when there weren’t many blogs, if you had great content and updated regularly, you’d have a good number of readers — even if you had a basic, free Blogger blog design. Today, because there are so many more blogs, great content is paramount, but a nice designer and ease-of-use is also very important. If people find your blog design dull or your layout disorganized, they are much more apt to just go find another blog.
Now, please don’t let this discourage you. You don’t need a fancy-schmancy blog with lots of bells and whistles. Just a clean design that is easy to navigate can make a world of difference. And paying someone to set this up for you may be every bit worth the money.
If you can’t afford a designer, at least consider paying to have someone design your header and then take the time to learn some basic HTML so you can tweak your sidebar.
I can’t tell you how many times I’ve seen a new blog advertised and been all excited to check it out, only to find there were a whopping three posts on it! If you want people to stick around, you need to have depth and series and a variety of posts.
Before you “open your doors to the public”, go ahead and post 10 or 15 posts, plus plan out and write another 15 to have in queue to post after you start “advertising” your blog. Not only will this allow you to “get your feet wet” and get accustomed to blogging before you have a real live audience, it also provides some great content for people to check out when they visit your blog.
I love Google calendar for planning out post series long-term. I also have recently begun printing out a monthly calendar to pencil in specific posts for each day. This gives me accountability, inspiration and organization — well, at least it’s better than my former “blog-by-the-seat-of-my-pants” routine!
Next week, we’ll talk about five tips for producing creative content.
If you’re a blogger, I’d love to hear your top tip for setting up your blog for success. And, if you’re brave, I’d love to hear what you wish you had done from the get-go.

And finally, we stopped at Dillon’s yesterday and got some great deals! I double-checked the ad and it looks like all of these (except the marked down milk!) are running through this coming Tuesday.
1 American Beauty Pasta – $0.49 each when you buy 10 participating items
Used 1 $0.55/1 American Beauty Quick Cook Pasta coupon from the 4/10 SmartSource insert (There are also $1/2 coupons here.)
Free after coupons + overage2 Quaker Quakes Rice Snacks — $0.79 each when you buy 10 participating items
Used $0.55/1 coupon from the 5/21 Moments to Save insert (“doubled” to $1 off)
$0.29 each after coupon2 half gallons of milk — marked down to $0.99 each
6 bags of Boulder chips — $0.99 each when you buy 10 participating items
Used 3 $1/2 coupons
$0.49 each after coupons1 box Mom’s Best Naturals cereal — $0.99 when you buy 10 participating items
Used $0.75/1 coupon (“doubled” to $1 off)
Free after coupon2 Better Oats Oatmeal Packets — $1.35 each
Used 2 $1/1 coupons
$0.35 each after coupons
My total after coupons was $7.11.

We also stopped by Dollar Tree yesterday to pick up some supplies for the Busy Bag Swap we’re participating in (more details/pictures on that along with a free Busy Bag pattern/download coming next week!). While there, I also picked up a few groceries:
3 boxes of bags (some of these we are using for the Swap, the rest will be for freezer cooking!) — $1 each
2 bags of Nature’s Own hot dog buns — $1 each
1 package of cups — $1
1 canister of sea salt — $1
Have I mentioned how much I love Dollar Tree? It’s so great to not even have to worry about looking at price tags and just to know everything is $1!