Published: by Crystal Paine on | This post may contain affiliate links. Read my disclosure policy here.
Tomorrow is Christmas Eve, so today it’s time to get our homes in shape for company or so that we can enjoy our family and not have to worry about stepping over dirty laundry piles or tripping on spilled milk. If you’re feeling overwhelmed by all you have to do, I’m here to help!
I’ve got a two-hour step-by-step plan to help you get all the major cleaning done so that your home looks presentable for your guests tomorrow:
Two-Hour House-Cleaning Plan
1. Start a load of laundry (3 minutes).
2. Set the timer for 15 minutes and take a laundry basket and a trash bag and go through each room in your home. Quickly straighten, pick up, and put away everything that’s out of place. Put all trash in the trash bag and put everything that doesn’t go in that room in the laundry basket (15 minutes).
3. Put away all contents in the laundry basket and throw out the trash (5 minutes).
4. Head to the kitchen and load the dishwasher or hand wash the dishes (15 minutes).
5. Switch the laundry from the washer to the dryer and start another load in the washer (2 minutes).
6. Sweep or vacuum your kitchen floor and wipe down your countertops (10 minutes).
7. Take some toilet cleaner and go squirt it in all your toilets (2 minutes).
8. Take some window cleaner and spot clean the main glass windows/doors/mirrors (3 minutes).
9. Take a dust rag and quickly dust in the main rooms of your home (10 minutes).
10. Vacuum all the major traffic areas in your home (20 minutes).
11. Head back to the bathrooms wipe down the toilet, sinks, floor, and bathtub/shower. Change the towels (20 minutes).
12. Switch the laundry from the washer to the dryer and fold the clean laundry (15 minutes).
13. Light a candle or simmer some potpourri on the stove and enjoy your freshly-cleaned home!
Free Downloadable Checklist
Like to cross off lists? Download the free 2-Hour House-Cleaning Checklist to keep you on track and remind you of what you’re supposed to be doing next. Now you have no excuse for getting distracted. 🙂
3 Tips for House-Cleaning Success
1. Set the Timer
A timer works wonders in helping me stay focused and work quickly. Plus, it makes it seem more like a game to see if I can finish my project before the timer goes off!
2. Turn on Some Music
It’s much more fun to work when you’re accompanied by cheerful, upbeat music.
3. Stay Focused
Don’t worry about the next thing on the list or your overwhelming to-do list. Just focus on the project at hand until the timer goes off. Then, move on to the next project.
If your house is a complete disaster, it might need more than two hours. However, remember not to get too hung up on making it perfect.
Just work quickly and efficiently and do the best you can do in the time you have. Even if your house isn’t pristine after two hours of work, I’m sure it will at least look quite a bit better than it did when you started. 🙂
Published: by Crystal Paine on | This post may contain affiliate links. Read my disclosure policy here.
Delicious food is one of the best things about Christmas, in my opinion! But who wants to slave away in the kitchen all day on Christmas Eve or Christmas Day?
Here are a some ideas of things you can make ahead of time and freeze to make your Christmas meal preparations smoother and leave you more time to just savor the season:
1. Cookie Dough
Make up a double or triple batch of cookie dough and keep it in the freezer to give as gifts or to use when company drops by unexpectedly or you need a treat to take to a gathering at the last minute. Here’s one of my favorite Chocolate Chip Cookie recipes.
This year, I made biscuit dough ahead of time and stuck it in the freezer to be able to quickly make Brown Sugar Biscuit Twists for a Christmas Brunch at my family’s house the day after Christmas.
4. Scone Mixes
I put together the dry ingredients from the Glazed Cinnamon Scone recipe and froze them earlier this month. For Christmas Eve breakfast, we’re having scones, scrambled eggs, and juice. It will be a snap to put these together since I already have the dry ingredients measured out.
5. Scone Dough
If you want to really speed up prep time for scones, you can also make the dough up ahead of time and cut the scones and flash freeze them. Just pull them out, thaw, and bake to have fresh scones without almost zero effort! Our very favorite scone recipe is this Pumpkin Scone recipe.
Looking for a delicious roll recipe that can be made ahead and frozen? Check out our family’s Butterhorn recipe. It’s a little time-intensive, but oh so worth it!
8. Christmas Candy
What’s Christmas without candy? My World’s Easiest Christmas Candy recipe is a winner–and it can be made ahead and frozen (if any of it lasts that long!)
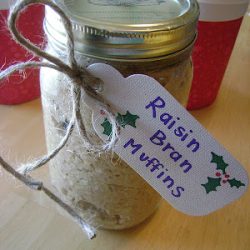
Homemade drink mixes are great to give as gifts or to have on hand to serve at Christmas get-togethers. Plus, you can keep them for months in the freezer!
What are some of your favorite Christmas foods to make ahead and freeze? Share the recipe links in the comments!
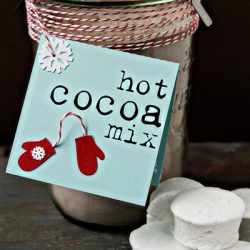
I was gifted this really cute hot chocolate kit last year from a friend. Hot chocolate is one of my favorite things to drink in the winter so I instantly fell in love with this idea and replicated it this holiday season. A Hot Chocolate Card Kit is the perfect little gift to hand out to your neighbors, co-workers, or friends.
Supplies:
scrapbook paper (1 piece in each size: 8.5″ x 5.5″, 3.75″ x 5.25″ and 3.75″ x 1.75″)
ribbon
adhesive
hole punch
stamps and/or stickers and/or embellishments
hot chocolate packet
candy cane
Step 1: Score your largest piece of paper (8.5″ x 5.5″) at the 4″ mark and the 8″ mark (you can use a scoring tool or simply measure with a ruler and fold)
Step 2: Attach your medium-sized piece of paper (3.75″ x 5.25″) onto the front of the card.
Step 3: Using stamps, stickers, or embellishments decorate your smallest piece of paper (3.75″ x 1.75″) and attach to the front of the card.
Step 4: Punch a hole at the top of the card.
Step 5: Wrap your ribbon around the bottom of your hot chocolate packet leaving a couple of inches at the top to tie a knot (you’ll need roughly 12″-14″ of ribbon).
Step 6: Thread your ribbon through each hole.
Step 7: Adhere the .5″ scored piece inside of the card closing the hot chocolate packet inside.
Step 8: Tie a knot at the top of the card.
Step 9: Adhere the candy cane to the front of the card.
Voila! A quick and easy gift in a card. Using the ribbon to pull out the hot chocolate packet like a little surprise is fun for all ages. Write a little note on the back and gift someone a warm cozy evening of hot chocolate.
Jessica is a work-at-home mom to Shane (4.5) and Adalyn (1). She loves photography, crafting, reading, baking, cooking, and is a Consultant for Close To My Heart. You can read about all of Jessica and her family’s adventures at Preserving Life’s Moments.
Have you blogged about a Handmade Christmas idea? Submit the link through this form here and we’ll consider sharing it as part of this series during the next 4 weeks!
Have any other great last-minute gift ideas? Share them in the comments!
Have you blogged about a Handmade Christmas idea? Submit the link through this form here and we’ll consider sharing it as part of this series during the next 4 weeks!
WANT TO SAVE $100 FAST?!Join the FREE 14-Day Savings Challenge!
Published: by Crystal Paine on | This post may contain affiliate links. Read my disclosure policy here.
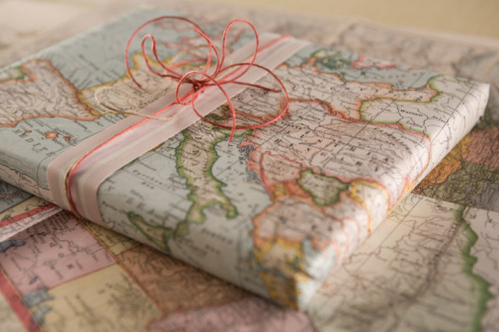
Hopefully by now, your Christmas presents are purchased. Some of you ultra-organized folks likely had them purchased and wrapped months ago. But some of the rest of us are just now getting around to thinking about wrapping gifts. 🙂
If you’re one of those people, don’t despair! Here are six simple and frugal ideas to dress up your packages without spending a lot of money:
1. If you haven’t done so already, get the rest of your gifts wrapped in the next 24 hours.
2. Once you’ve wrapped your gifts, be sure to label them clearly with the recipient’s name.
3. If you’re attending multiple Christmas gatherings, divide your wrapped gifts up into boxes or tubs by event (label these boxes/tubs with the event name) and then stick them by the door so that you can just grab the appropriate tub or box on your way out the door and you’re good to go! (Since we have young children who like to unwrap gifts, we’re keeping our wrapped gifts at the top of our coat closet. That way, it’s almost impossible to forget them since we have to put our coats on before we head out the door!)
Published: by Crystal Paine on | This post may contain affiliate links. Read my disclosure policy here.
Guest post by Kimberly from Couponing University
Growing up, I can remember Thanksgiving to be just as exciting as Christmas at my Grandma’s home. Every year, she would make all ten of the grandchildren a Christmas ornament. These became the first gift of the season, coming at Thanksgiving so we could enjoy them for the month to come.
Her ornaments were most often intricately crocheted with amazing skill and great attention to detail. My grandmother’s thoughtfulness ran deep as she crafted us ornaments each year. She knew that her gifts would serve to fill our first tree of our own one day as we began our journey into adulthood when money might run tight and leave us with an otherwise bare tree.
As my Grandmother’s ornaments graced my very first tree just three years after she passed, I couldn’t help but pull up the memories of all those years in anticipation for Thanksgiving and a new ornament. Today, all my Grandmother’s ornaments have a special tabletop tree for themselves.
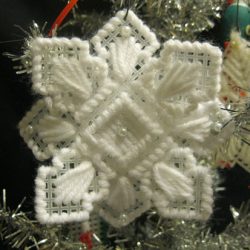
Sometimes, my Grandmother would make us something out of the ordinary, such as this snowflake ornament which was given to me in 1989. (Grandma would always label the back with the year.) We loved this ornament so much that my mother deconstructed the snowflake so that we could reproduce what seemed like a hundred of them for gifts to teachers, neighbors and friends.
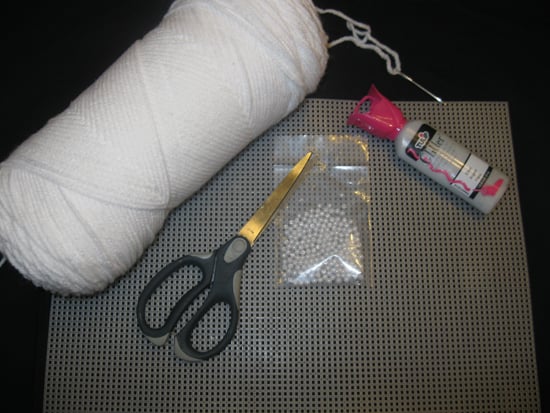
Supplies:
Plastic mesh canvas (one sheet will make six completed ornaments)
White yarn
Pearl beads
Glitter fabric paint
Yarn needle
Scissors
Instructions:
::Cut two snowflakes following the pattern. To begin, cut 19 by 19 squares, then cut the ‘petals’. Once you have cut one petal, you can use your scissors as a guide to begin the next cut, just line them up with the inner line and start over.
::Cut a hole in the middle of the one of the snowflakes. The easiest way to do this is to fold the piece in half, count in two squares, and cut up two squares on each side. Then fold the other direction, again cutting up two on each side. This will be the top piece.
::Starting in the middle of the full snowflake piece, secure the yarn by creating the first stitch and making a knot. Continue to stitch the center.
::Bring the yarn up to the closest petal and stitch the veins.
::Bring the yarn to the side and overstitch the sides, making two stitches in each outer corner, until you come to the next petal.
::Continue in this manner until the bottom is complete, making a double knot at the end.
::Begin stitching the top snowflake in the veins of the petal, creating a double knot to secure. Continue to stitch the first petal.
::Overstitch outer edges, petals, as the bottom snowflake.
::Overstitch the inner edge and secure with a double knot.
::Using the glitter fabric paint, place a dot in the middle of the bottom snowflake to attach a bead. You may find it easier to use the needle to help hold the bead in place. Place beads in the same manner onto the stitched points on the petals of the top snowflake.
::Allow to dry overnight.
::Place the snowflake with the center hole on top of the second snowflake and turn 45 degrees.
::Gently pop the petals of the top snowflake into the centers of the bottom snowflake.
::Tie a loop with yarn into the top of one petal or attach an ornament hook for hanging.
::Write the year on the back with glitter fabric paint.
::Hang to dry.
Kimberly is a stay-at-home mother of two teenage daughters and a one year old boy. In her spare time, she blogs at Couponing University where she shares all she has learned about shopping smarter as well as other tricks for the Domestic Engineer of today.
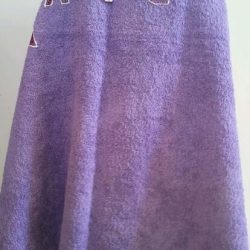
This towel is the absolute cutest personalized gift, and kids just love receiving something with their name on something that they use so regularly. While the pictures in this tutorial are of a towel that is made for a young child, I have made this gift for children of various ages (including one for a “tween” boy using camouflage material and a dark-colored towel) and they have all been well-received!
You could also do the name of a favorite sports team or school. With only four materials that are all inexpensive, this gift is not only incredibly frugal, but also very quick to make.
Supplies needed:
Towel — $2
1/4 yard fabric that coordinates with towel — $2
Heat ‘n’ Bond Ultrahold — $2.50 (found at Walmart — will make several towels)
Tulip Slick Fabric Paint — $3
Instructions:
1. Pre-wash the fabric and the towel.
2. Cut the fabric and the Heat ‘n’ Bond to a smaller size that will fit all of your letters but will be more manageable to work with.
3. Follow the directions on the Heat ‘n’ Bond package to adhere the Heat ‘n’ Bond to the fabric using an iron.
4. Take the paper off the back of the heat Heat ‘n’ Bond.
5. Cut the letters needed for the child’s name from the fabric you just adhered the Heat ‘n’ Bond to. I use my Cricut to cut the letters, but you can also simply type the name in Microsoft Word in a simple font, then before you print it, in the Print Dialog Box, choose “Mirror”. After it prints, cut the letters from the paper and use these as your letters for the towel.
6. Trace them onto the Heat ‘n Bond that is adhered to the fabric. By tracing them backwards onto the back of the fabric, they will then be the correct way when you look at the front of the fabric. Or maybe you’re just artistic enough to freehand the letters!
5. Follow the directions on the Heat ‘n’ Bond package to iron the letters onto the towel.
6. After they cool, use the Fabric paint to outline the letters and/or shapes. This keeps the edges from fraying and helps keeps the edges attached to the towel.
7. Allow the paint to dry for approximately 72 hours before wrapping the present.
8. Enjoy seeing the special kiddo in your life be thrilled to receive a gift that was made just for them!
Leah is married to her best friend and is a mom to three children who will always be reminded of their names at the end of bathtime. She enjoys blogging about anything that will help you save your dime and your time at YourDimeYourTime.com.
Macaroni & cheese with baked chopped chicken, green beans
PB&J, carrot sticks, apple slices
Egg salad sandwiches, peas, pears
Refried Beans with cheese, carrot sticks, pear slices
Tossed salad with hard-boiled eggs, feta cheese, and dried cranberries
Leftovers x 2
Snacks
Fruit/veggies
Cheese/crackers
Granola Bars
Dinners
Baked chicken, twice-baked potatoes, mixed greens salad, fruit salad Cheesy Chicken and Rice Bake, fruit salad, steamed veggies
Jesse’s Office Christmas Dinner Homemade Pizza in Less Than 30 Minutes, carrot sticks, pear slices Black Bean and Beef Taco Bake, steamed veggies, fruit
PB&J, carrots, pears (Jesse’s going to be gone this night, so I’m keeping it simple!)
Hamburgers, tater tots, steamed veggies, fruit
What’s on your menu this week? Share details and/or your link to your menu plan in the comments.
OVER-SPENDING EVERY SINGLE MONTH?Grab these FREE Budgeting Sheets!
Megan (Megsicthus@)
Shannon (skellee@)
Cindi (osunanook@)
Nichole (Brannic@)
Need (needanap2@)
Laura (lasmith6@)
Anna (annabelle002@)
Rebecca (beccamcg@)
Lindsey (joshandlindsey@)
Mary (OOMERRYMARYOO@)
Of the 3,027 entrants, the winners of the Jenuinely Pure are:
Each of you should have received an email with further instructions on claiming your prize.
_____________
Are you giving something away on your blog this week or have you found a great giveaway elsewhere on the web? If so, post your link below and let all the readers here know so they can get in on the action! Your giveaway must be family-friendly and no-strings-attached. In addition, to make it easy to navigate, your link must go directly to your giveaway post. Links going to the homepage of your blog or any other part of your blog besides the direct link to your giveaway post will be deleted.
Published: by Crystal Paine on | This post may contain affiliate links. Read my disclosure policy here.
Do you agree or disagree with the three things I share in this video? Are there other items you’d suggest waiting until after Christmas to buy? I’d love to hear.
Published: by Crystal Paine on | This post may contain affiliate links. Read my disclosure policy here.
We finished up almost 100% of our Christmas to-do list on Saturday so we can just enjoy the next two weeks. It’s been a busy December and I’m looking forward to a quieter week this week–hopefully!
I’m going to be blogging less next week so I can take time to step back and do some planning and goal-setting for 2012 with my husband. I’ll also be making a quick two-day trip to Chicago next week to record The Money Saving Mom®’s Budget as an audiobook. So, to keep it simple, I’m only making 10 goals for the next two weeks.
Here were last week’s goals {I can’t believe I almost finished all of them!}:
How did you do on last week’s goals? What are your goals for this week? I’d love to have you share your progress on last week’s goals and your goals for this coming week in the comments. Of, if you’ve blogged about it, leave your direct link below. Let’s cheer each other on to live purposeful and productive lives!
Have you blogged about a Handmade Christmas idea? Submit the link through this form here and we’ll consider sharing it as part of this series during the next 4 weeks!
Have you blogged about a Handmade Christmas idea? Submit the link through this form here and we’ll consider sharing it as part of this series during the next 4 weeks!


 10. Drink Mixes
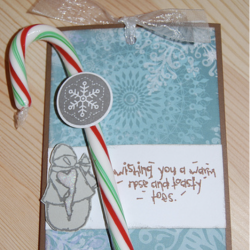


 Are you giving something away on your blog this week or have you found a great giveaway elsewhere on the web? If so, post your link below and let all the readers here know so they can get in on the action! Your giveaway must be family-friendly and no-strings-attached. In addition, to make it easy to navigate, your link must go directly to your giveaway post. Links going to the homepage of your blog or any other part of your blog besides the direct link to your giveaway post will be deleted.


