Guest Post by Leah Chamberlin from Your Dime, Your Time.
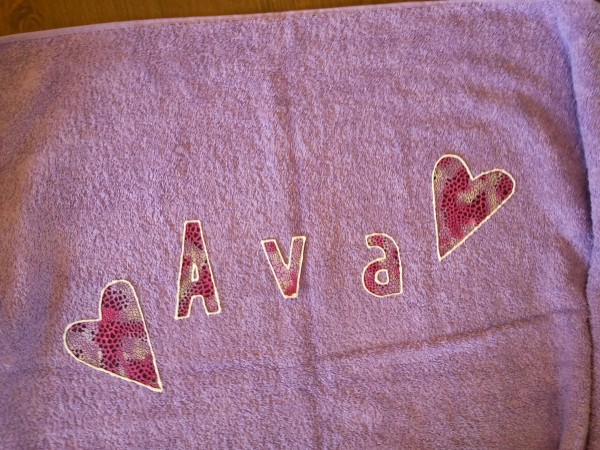
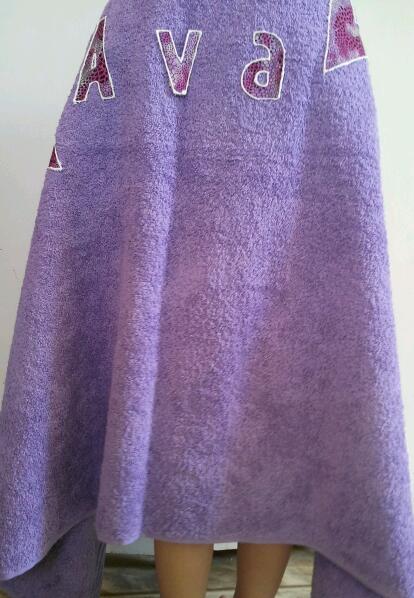
This towel is the absolute cutest personalized gift, and kids just love receiving something with their name on something that they use so regularly. While the pictures in this tutorial are of a towel that is made for a young child, I have made this gift for children of various ages (including one for a “tween” boy using camouflage material and a dark-colored towel) and they have all been well-received!
You could also do the name of a favorite sports team or school. With only four materials that are all inexpensive, this gift is not only incredibly frugal, but also very quick to make.
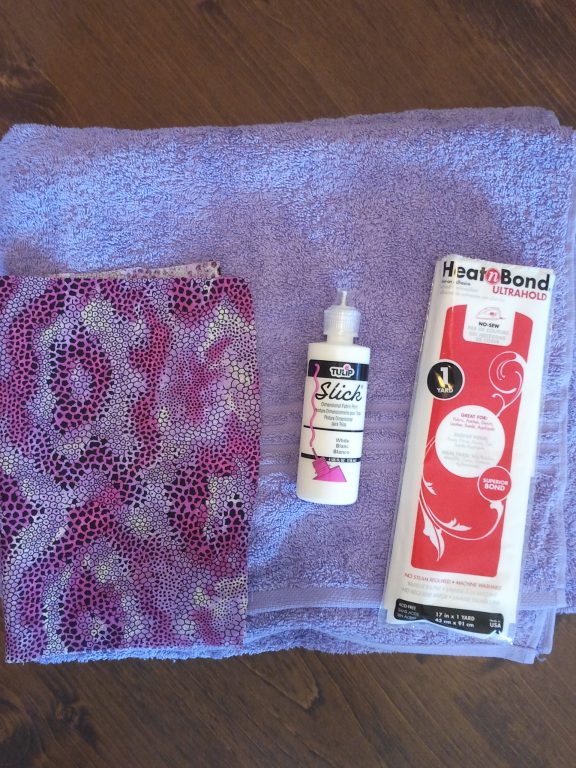
Supplies needed:
- Towel — $2
- 1/4 yard fabric that coordinates with towel — $2
- Heat ‘n’ Bond Ultrahold — $2.50 (found at Walmart — will make several towels)
- Tulip Slick Fabric Paint — $3
Instructions:
1. Pre-wash the fabric and the towel.
2. Cut the fabric and the Heat ‘n’ Bond to a smaller size that will fit all of your letters but will be more manageable to work with.
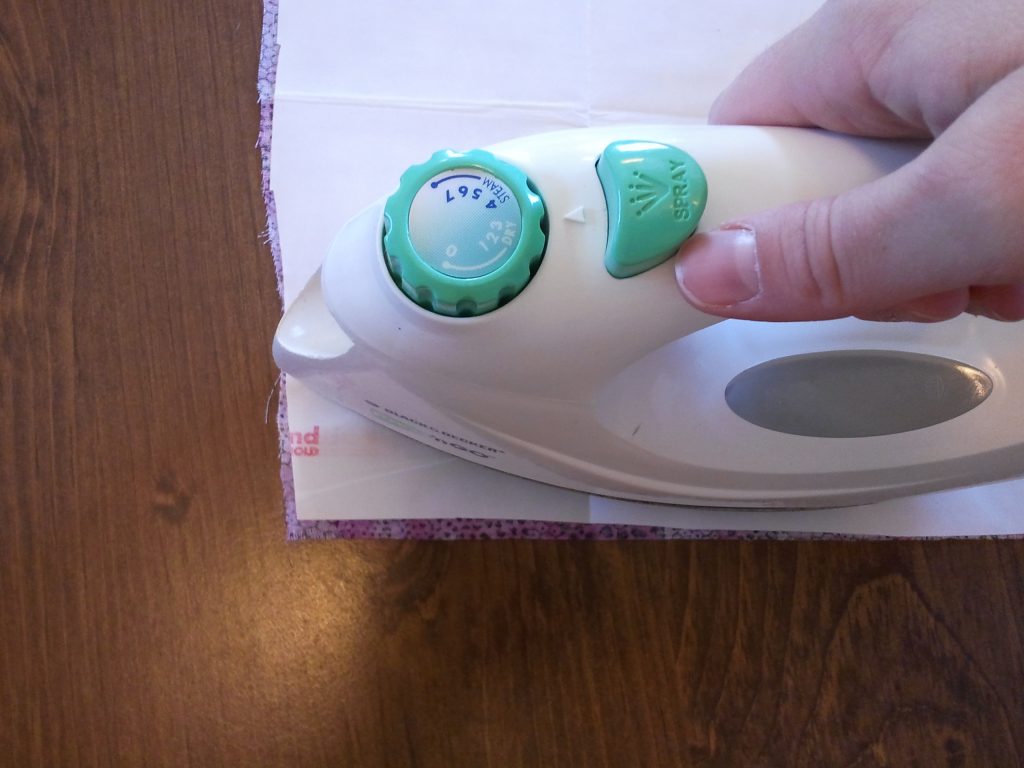
3. Follow the directions on the Heat ‘n’ Bond package to adhere the Heat ‘n’ Bond to the fabric using an iron.
4. Take the paper off the back of the heat Heat ‘n’ Bond.
5. Cut the letters needed for the child’s name from the fabric you just adhered the Heat ‘n’ Bond to. I use my Cricut to cut the letters, but you can also simply type the name in Microsoft Word in a simple font, then before you print it, in the Print Dialog Box, choose “Mirror”. After it prints, cut the letters from the paper and use these as your letters for the towel.
6. Trace them onto the Heat ‘n Bond that is adhered to the fabric. By tracing them backwards onto the back of the fabric, they will then be the correct way when you look at the front of the fabric. Or maybe you’re just artistic enough to freehand the letters!
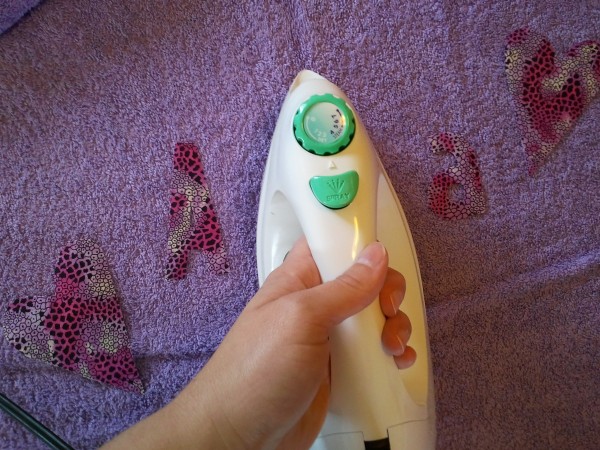
5. Follow the directions on the Heat ‘n’ Bond package to iron the letters onto the towel.
6. After they cool, use the Fabric paint to outline the letters and/or shapes. This keeps the edges from fraying and helps keeps the edges attached to the towel.
7. Allow the paint to dry for approximately 72 hours before wrapping the present.
8. Enjoy seeing the special kiddo in your life be thrilled to receive a gift that was made just for them!
Leah is married to her best friend and is a mom to three children who will always be reminded of their names at the end of bathtime. She enjoys blogging about anything that will help you save your dime and your time at YourDimeYourTime.com.

You could also do his and hers for a newly married couple. 🙂
I love this idea! Loved it so much that I had to try it. I just finished making two towels for a couple of little girls that were on my gift list. They turned out great! And, now my teenage daughters want one, too!
Thanks for the idea!
Neat idea! My daughter’s name is Ava. 🙂 I never thought about doing this at home before.
This is too cool. I’m going to make beach towels for my neice and nephew who have Spring & Summer birthdays.
Thank you so much for this! And I agree—it brings to mind some variations, too!
I really like this! So easy and so many possibilities.
The trick is the Heat n’Bond ULTRAHOLD. It makes a huge difference using that compared to other similar products. 🙂
I am just curious how well the letter wear in the wash? I did t-shirts similar to this a few years ago and the letters stareted peeling after a few washes.
I’m glad this idea can help some of you! It’s really a wonderful last-minute gift that almost any kiddo would love.
Court-I cut the actual fabric using my Cricut. One of the best tips for this is to make sure that your cutting mat is REALLY sticky. I also tape down the edges of the fabric, and make sure that it’s pulled as tight as possible without stretching, because it’s really important that your fabric holds still while it’s being cut.
I also adjust the pressure to Max, put the blade on 5, and turn the speed down to the second lowest one. Another tip is to cut your letters (or at least 1 test letter) on paper first to make sure they are the appropriate size-paper is much cheaper than fabric, so if you make a mistake using paper it’s not as big of a deal.
Hope this helps! 🙂
Thank you soooo much for getting back to me! I am cutting and pasting this comment to save to my computer so I can try it! Thank you so much, I may just be making these for the nieces and nephews!
I was so surprised to see this post as I am a rl friend of Leah’s! I have been a long time reader of both your blog & her’s. I love them both! 🙂 Love this idea, too- I may even use it this Christmas (I have a couple of gifts I need to get and wasn’t sure what to get them!). It’s so fun to see two aspects of my little world collide like this! 🙂
How do you cut the letters out with the cricut? Do you actually cut out the fabric with the cricut or make a template? Everytime I have tried to cut letters out with my cricut on fabric it has not worked out to well…. Any tips would be greatly appreciated! Thanks!
Such a neat idea! I need to file this away so I can remember it for next year! 🙂
What a neat idea!!! Will definitely keep this in mind for birthday gifts & Christmas next year. Looks much easier than embroidery! 🙂 Thanks for sharing!
Love this Crystal! I’m gonna do it!
Blessings