


What do you get when you combine the hearty goodness of whole-grain oats and the all-day energy of extra protein with a hint of honey and a few chocolate chips?
One of the easiest snacks around — no-bake energy bites!

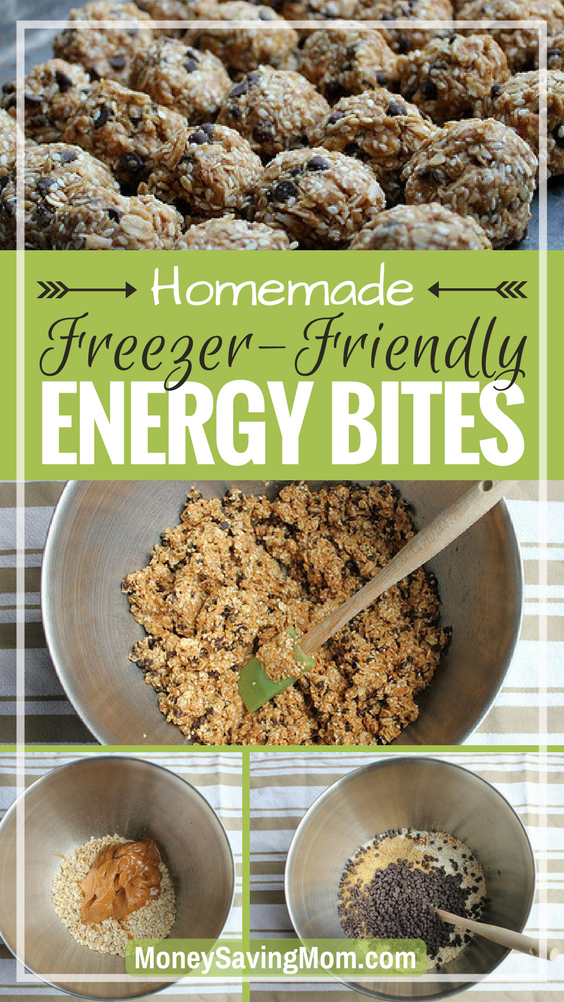
These homemade energy bites are delicious, adaptable, packed with nutrients, and freezer-friendly!
You’ll love these no-bake energy bites!
No-bake energy bites are a hit at our house… partially because they don’t require baking (so I can whip them up in about 10 minutes), but also because they pack a lot of protein and nutrients into a small package.
They are also SO delicious — it tastes like you’re eating raw cookie dough (without the risk of raw eggs!)
And they are freezer-friendly, so feel free to make several dozen at a time.
If you’re looking to mix up your snack rotation, give these no-bake energy bites a try. I hope you love them as much as we do!

Energy Balls Recipe Ingredients
- 2 cups oatmeal
- 1 cup peanut butter or other nut butter
- 2/3 cup honey
- 2 teaspoons vanilla
- 1 cup mini chocolate chips
- 2 cups coconut flakes, wheat germ, sesame seeds, or a mixture of all three (can also substitute oatmeal or protein powder, if you prefer)
- 1 cup ground flaxseed
FAQs about Ingredients
You can substitute maple syrup, but the flavor will be different and the balls might not firm up as well.
You can also substitute brown sugar, but you’ll want to melt it into the peanut butter by microwaving it for a minute or two.
Yes, any of your favorite chocolate chips should work just fine — however, mini chocolate chips are the ideal size for these energy bites. If you need to use larger chips or chunks, you may want to chop them up before adding them to the mixture.
Yes. Our bodies can not properly digest the nutrients in whole flaxseed, so it must be ground in order for us to get the benefits. Also, ground flaxseed absorbs significantly more liquid so it will help to create firmer energy bites.
It can be. If you use certified gluten-free oats and omit the wheat germ, it will be gluten-free.
How to Make Freezer Friendly Energy Bites
1. In a large bowl, combine oats, peanut butter, honey, and vanilla.

2. Add in chocolate chips and other mix-ins (or more oats).

NOTE: If you only have whole flaxseed, you can use a coffee grinder to grind it (see notes above for why it’s important to use ground flaxseed).

3. When all ingredients are mixed thoroughly, use a spoon or small cookie scoop to create 1″ balls.

4. Place balls on a cookie sheet and refrigerate until firm (30-60 minutes). Refrigerate leftovers in a covered container.
Substitutions for Energy Bites
One of our favorite things about this recipe is how versatile and flexible it is — you can mix up the ingredients to fit your family’s preferences, or just based on what you have in the house.
Here are a few ideas:
- try various types of nut butter, almond butter, or even sun butter
- use maple syrup instead of honey (or a 50/50 mixture)
- add cinnamon or another favorite baking spice
- use almond extract instead of vanilla
- add in raisins, craisins, or other chopped dried fruit
- try a variety of chopped nuts or seeds
- add in your favorite protein or energy powder
- mix up the type of chocolate you use — white chocolate, dark chocolate, butterscotch, etc.
- roll balls in coconut flakes

How To Store No Bake Energy Bites
You’ll want to keep your energy bites in the refrigerator so they stay nice and firm. They will get sticky and soft if you leave them out at room temperature.
How long do Energy Balls last in the fridge?
Energy bites can last for several days in the fridge — at least 2 weeks (if you don’t eat them all first). If you want to store them longer than that, just pop them in the freezer (see question below).
Can You Freeze Energy Balls?
YES! They freeze really well!
Simply freeze them on a cookie sheet for 1-2 hours and then transfer them to a freezer bag or container.
You can eat them frozen (they are delicious) or let them thaw for 10-15 minutes at room temperature.
FAQs for No Bake Energy Bites
Energy balls are an easy-to-make no-bake snack that is packed with protein, fiber, and healthy fats to keep you full and loaded with energy throughout the day. They are easy to take on the go and great for all ages.
This recipe makes roughly 36 1″ balls. Of course, if you make your balls bigger, you will end up with fewer. If you make them smaller, you’ll get more.
We typically recommend 3 1″ balls per serving
This depends on what ingredients you use and how large or small you make your energy balls.

Energy Balls
Ingredients
- 2 cups oatmeal
- 1 cup peanut butter (or nut butter)
- ⅔ cup honey
- 2 tsps vanilla extract
- 2 cups coconut flakes, wheat germ, sesame seeds, OR a mixture of all three (or more oats)
- 1 cup mini chocolate chips
- 1 cup ground flaxseed
Instructions
- In a large bowl, combine oats, peanut butter, honey, and vanilla.
- Add in chocolate chips and other mix-ins (or more oats).
- If you only have whole flaxseed, you can use a coffee grinder to grind it.
- When all ingredients are thoroughly, use a spoon or small cookie scoop to create 1″ balls.
- Place balls on a cookie sheet and refrigerate until firm (30-60 minutes). Refrigerate leftovers in a covered container.
- OR, freeze balls on cookie sheet for 1-2 hours and store in a covered container.
Love this recipe?
Make sure to share and save it on your favorite platform below!

Today’s Dillon’s Shopping Trip

I ran out to Dillon’s today since I didn’t get to go last week as I didn’t feel up to it. I didn’t get as great of deals as I was hoping for since I couldn’t get all the coupons to print that I wanted to (my computer/printer combo has been finicky about printing things recently!) and then some of the prices I’d seen online didn’t match up to what was on the shelves at the store.
But I was still happy for the few deals I found — and it was also just plain nice to go out shopping after being home all week long last week!
Dillon’s Shopping Trip
2 Plum Organic Baby Food Pouches — on sale for $1 each, used 2 $0.50/1 coupons (doubled) = free after coupons
4 Yoplait Kids Yogurts 4-packs — on sale for $2 each, used 2 $0.75/2 coupons (“doubled” to $1 off) = $1.50 each, plus get $4 back as part of the Buy 6, Get $6 Back promo (so $0.50 per yogurt pack after the catalina) — The $0.75/2 coupon is no longer available, but I just found a $0.35/1 coupon here that would make it even less with doubles.
2 Turkey Hill Sweet Tea half gallons (my husband’s favorite!) — $1.25 each, used $1/2 coupon = $0.75 each after coupon
2 Betty Crocker Cookie Mixes — $2.39 each, used $0.50/1 coupons (“doubled” to $1 off) = $1.39 each, plus got $2 back as part of the Buy 6, Get $6 Back promo (so $0.39 each after the catalina)
Total with tax: $11.65 + I got a $6 catalina back that is good off my next shopping trip!
Did you get any great deals today?
My 10 goals for this week

So, my sinus infection got worse instead of better after last Monday. It ended up moving to my chest — giving me a cough and causing me to struggle to talk for a few days. (I think maybe Jesse was kind of hoping it would inhibit me from talking, but I managed to still talk — even though it hurt! ;)).
I gave in and went to the doctor at the end of the week. (I’m one of those weird people who really dislikes going to the doctor and will try every natural remedy under the sun before heading into the doctor.) They put me on two different antibiotics and they seem to be working, albeit slowly.
I’m so thankful to finally be on the mend after being sick for three weeks. Thanks so much to everyone who gave me suggestions and input on how to treat a sinus infection. I was touched by your thoughtfulness and how much you care about me!
At any rate, despite how I felt, I did knock out quite a few of my goals. It helped that we had a long weekend and that Jesse stayed home from work on Friday and made me stay in bed and rest so I had more time on my hands than usual. {Yes, I love that man; he takes such good care of me!}
Last week’s goals:
Family/Mothering Goals
1. Finish reading Quest for Truth:Taken and
Spy for the Night Riders aloud to the children.{Since my voice was almost gone, I had to skip reading to the children for a few days.}
2. Go to a baseball game and musical production as a family.{Jesse took the children to both of these since I wasn’t feeling well.}
3. Write a love note to Jesse.Personal Goals
4. Finish reading Escape from Saddam. StartThe Referral Engine.
5. Run at least five times. {I only managed three times.}
6. Listen to 2 hours of The Little Big Things.
7. Sleep for at least 7.5 hours every night.Home Management
8. Follow my Freezer Cooking plan and blog about it. {I did every day but one. I’m making that up this week!}
9. Make Homemade English Muffins.Business Goals
10. Write one article for another site. {Worked on this, but didn’t get it quite finished.}
This week’s goals:
Family/Mothering Goals
1. Finish reading Quest for Truth:Taken (reading to everyone), Winnie the Pooh (reading to Kathrynne), and The Courage of Sarah Noble (reading to Kaitlynn).
2. Attend our local homeschool convention and buy our curriculum and other things for next school year.
3. Write a love note to Jesse.
Personal Goals
4. Finish reading Radical.
5. Run at least five times.
6. Listen to 2 hours of The One-Minute Entrepreneur.
7. Sleep for at least 7.5 hours every night.
Home Management
8. Follow my Freezer Cooking plan and blog about it.
Business Goals
9. Finish writing one article for another site.
10. Prepare for speaking/having a booth at the Virginia Homeschool Conference next week.
How did you do on last week’s goals? What are your goals for this week? I’d love to have you share your progress on last week’s goals and your goals for this coming week in the comments. Of, if you’ve blogged about it, leave your direct link below. Let’s cheer each other on to live purposeful and productive lives!
You can download a free customizable weekly goal-planning sheet here.
My Money Saving Mom® Inspired Cleaning Schedule

Testimony from Victoria of Snail Pace Transformations:
Back in April, I decided to join Crystal in her 4 weeks to a More Organized Home series. To be honest, I did not start the program with a great attitude. I knew my home needed help but I had so much else on my plate.
Looking back however, I know the series helped me manage that plate more effectively. Plus, I discovered my cleaning groove that I had been trying to find for 17 years of housekeeping!
After the 4 Week Challenge was finished, I used what I had learned from it to create my own customized cleaning routine.
My New Cleaning Routine
(Those that followed Crystal’s daily assignments will see many similarities.)
- Get dressed.
- Follow my Morning Routine — For me that is starting the kettle for tea. Cleaning off the kitchen counters. Getting the laundry going and having my time of morning prayer and bible reading.
- Write a list of 7 to 10 things to do for the day — This list includes my 15-Minute Daily Cleaning Assignment and the 15-Minute Room of the Week Assignment.
- Write a list of chores for the children to do.
- Do the 15-minute Daily Cleaning Assignment.
15-Minute Daily Cleaning Assignments
Cleaning doesn’t really take long. Often I was spending more time dreading a chore than it took to do the chore. Now I set the time for 15 minutes each weekday and work on the following:
Monday: Master Bedroom
Tuesday: Upstairs Bathroom
Wednesday: Wild Card Day (I pick an area that is the most cluttered.)
Thursday: Downstairs Bathroom
Friday: Master Bedroom
15-Minute Room of the Week Assignment
In addition to the Daily Room Assignment, I also spend 15 minutes each weekday focusing on cleaning a specific area of my home.
Saturday Assignment
Every Saturday, I pick one area of the home and attack it for 30 minutes. I save Saturdays for bigger projects, such as reorganizing a closet or book case.
Additional Weekly Assignments
- Designate 5 items to sell or toss — less stuff really does equal less mess to clean up. This can happen any time during the week or on Saturdays, depending upon that week’s schedule.
- Spend one hour listing things to sell — I have a lot of stuff in piles that I have been saying I will sell, but the project just seemed too overwhelming. Now I set the timer for 60 minutes, and start posting my items (on Craigslist or eBay) or start pricing them (for consignment sales or stores). When the timer goes off, I pack up the unlisted or untagged items and put them away until next week.
The benefits of this new schedule have been numerous:
- I no longer fear someone just dropping by because I know my bathrooms can be quickly cleaned up with just a few wipes.
- I am adding to my family’s income — I made $190 off of my first one-hour selling session!
- Our master bedroom is now truly the oasis I always wanted it to be.
Victoria is a wife and homeschooling mom of three. She loves running marathons and training for an annual sprint triathlon. Victoria considers herself a snail pacer in life. She grows in inches not in leaps hence the name of her blog Snail Pace Transformations.
Note from Crystal: Looking for some motivation and ideas for creating your own cleaning routine? Be sure to check out my post on How to Stay Motivated to Get the Housework Done.
This week’s menu
 Chicken Broccoli Rice Casserole ready to go in the freezer
I’m so thankful for a freezer full of food! We’re gearing up for our local homeschool conference this weekend and for speaking/having a booth at the Virginia Homeschool Conference next week. So I’m relying a lot on food that’s already prepped and won’t take me long to prepare.
Breakfasts
Granola bars
Cereal
Baked Oatmeal (from the freezer)
Green Monster Smoothies
Morning Glory Muffins, hard-boiled eggs
Omelets in a Muffin Tin, fruit
English Muffin Bread (toasted), scrambled eggs, fruitLunches
Peanut Butter & Jelly Sandwiches from the freezer
Leftovers x 2
Chicken Broccoli Rice Casserole, carrots, fruit
Salad, Hard-boiled eggs, toast, fruit
Snack-y lunch
Brown Bag BurritosSnacks
Fruit/veggies
Popcorn
Banana BreadDinners
Dinner with extended family
Memorial Day Cookout: Marinated Chicken, wild rice, corn on the cob, fruit salad, s’mores
Southwest Rollups from the freezer, steamed veggies, sliced oranges & apples
Barbecued Meatballs, sweet potatoes, steamed veggies, fruit
Dinner out
Ham & Cheese Pockets from the freezer, fruit salad, steamed veggies
Lasagna Casserole, English Muffin Bread (toasted), steamed broccoli, fruit
What’s on your menu this week? Share details and/or your link to your menu plan in the comments.
Do-It-Yourself: A Month of Bread Machine Mixes

ThriftyAndThriving.com shows you how to make an entire month’s worth of bread machine mixes.
Do you have a fun and frugal DIY idea to share? I’d love to hear about it! Read the submission guidelines and submit it here.
5 Ways Free Samples Save Us Money

Guest post from Jennifer of When Pigs Fly
I used to disregard free samples, often wondering what I would do with such a small quantity. However, I quickly changed my thinking when late one night we were in need of a particular over-the-counter medication. I recalled seeing that exact product being offered just weeks prior in an online free sample offer.
From that point on, I decided to submit for every free sample offer that came my way, tucking it away for future needs!
Here are 5 ways that free samples have saved us money, making life that much easier:
1. When there is a need for a quick, over-the-counter remedy, I am able to take care of the issue immediately. This avoids running to the store late at night, and paying full price for an item that you may only use once.
2. By requesting samples for hair care, oral care, lotion, and soap, I am able to pack more efficiently when traveling. It also saves from buying full-size products, potentially wasting it on those shorter trips.
3. My family is able to try new products prior to purchasing them, thus reducing potentially unused or unwanted items.
4. I have been able to create gift baskets for events like house warming, get well, and baby showers. By using themed samples to create these gifts, I have saved money in my gift-giving budget.
5. I have encountered situations where I ran out of laundry detergent or other household items, where I was able to grab a back-up sample to hold me over until my next shopping trip. This has saved me gas money, avoiding last-minute trips to the store.
As an added bonus, most samples come with a high-value coupon, saving you even more money on future purchases.
How has signing up for free samples saved you money?
Jennifer Van Dahm is a stay-at-home mom, who knew there was more to life than laundry and dishes! Her motto, “Taking the ordinary out, of everyday living”, is shown throughout her website, When Pigs Fly. There, she highlights her passion for teaching others how to live fuller lives through health, cooking, finance, family, and spiritual wellness. Her goal is to refresh families and help them get out of their rut- physically, mentally, and spiritually!
How Sticking to a Budget Transformed Our Life

Testimony from Sue
When my husband and I got married over five years ago, we were a financial mess. We allowed bad habits to get worse by charging everything to our handy credit card.
Three years and two children later, a friend forwarded me an email about a website called MoneySavingMom.com. We didn’t know it then, but that email would change our lives.
I read Crystal’s blog faithfully each morning. She inspired me to read The Total Money Makeover by Dave Ramsey, and I was so excited that I read it in two days. My husband Ben read the book also and we dove head-first into creating a budget. These changes enabled us to live a comfortable, more budget-friendly lifestyle:
1. We stopped using credit cards and paid cash for everything.
Ben and I adopted the radical financial practice of paying cash-only. We found that we spent much less on average by using cash rather than using our debit cards. Although it took time to get used to, practice made perfect.
Our rule is once the cash is gone, it’s gone. No more spending.
2. We began shopping at discount and second-hand stores for everything.
Clothing, home decor, bread; we had to get creative! I found our local bread outlet to be a great deal. We stock up every few months and keep the excess in our chest freezer. Also, since our house is a “fixer-upper,” we found that shopping at our local Habitat for Humanity ReStore is a useful resource for supplies and hardware.
3. I couponed like crazy.
As a stay-at-home mom, couponing became a much like a part-time job to save money for our family. MoneySavingMom.com made this step so much easier by outlining the drugstore game, highlighting creative ways to get coupons, and listing store match-ups by region.
4. We learned to say “no.
Difficult as it was, we learned to say “no” to family and friends for restaurant outings or vacations in order to stick to our budget. We also learned to enjoy the art of entertaining from our home. It is a great way to spend time with others in a comfortable, budget-friendly environment.
5. We stuck to our convictions and tweaked our plan.
Throughout this change in our lives, Ben and I have relied heavily on God and his provision in our lives. We continued to tithe 10% of our income and manage our money the best we knew how.
Our plan to pay off debt has changed with our circumstances, but our budget has stayed the same. In the past three years of living on a budget, we have saved for an emergency fund, paid off one vehicle, and paid cash to complete my college education!
Living on a budget has not only blessed our family financially, but it has allowed us to live freely and peacefully within our means. We may not know what God has for our future, but we have found great joy in a simple life today.
Sue is a full-time mom, proud wife of a firefighter, and a recent college graduate. She has a passion for saving money and living simply. Sue and her family live in Milwaukee, Wisconsin.
Ask the Organizer: Tips to Simplify Summer Schedules

Earlier this month, I posed the question, What are your biggest challenges with organizing busy summer schedules? And today, I’m excited to read Andrea’s tips to help us simplify and organizer our crazy, busy summer months!
Summer is almost here… and I can’t wait! My husband is a teacher, so it’s no surprise that our summer days are a lot more relaxed than the busy school months. However, even with more time for relaxing, the “lazy days of summer” can often start to feel pretty hectic and disorganized if we don’t have some sort of plan

If you can relate, here are a few ways to get organized and still enjoy your summer.
1. Know your schedule.
Before you even start trying to simplify and organize your summer, you’ll want to take 20 minutes and look through your calendar for June, July, and August.
- Are you planning any vacations?
- Will you need to take time off work?
- Do you have any weddings, anniversaries, birthdays, or baby showers to attend (and buy gifts for)?
- Are you planning any home renovation projects that will take up lots of extra time?
- Will your kids be going to summer camp, sports camps, music camp, Bible school, etc.?
- Will your kids be participating in sports teams or in any sort of group projects?
Your answers to some of these questions will help determine how you spend a good chunk of your summer. And depending on how busy you want to be, you might decide to say no to some activities after looking over your schedule.
2. Decide on a summer routine.
No, I don’t think your summer days should be as structured as the rest of the year, but I can almost guarantee you and your children will be happier if there is some sort of daily/weekly routine you follow during the summer.
We all know that our homes will not magically clean themselves and meals won’t be prepared without some effort on our parts; so try making these events a family affair. Maybe you play inside during the morning, then everyone helps to clean up before lunch, and then you go out and do a fun activity in the afternoon.
Or maybe you can plan your weekly menu as a family and then let each child (age-appropriate, of course) help make the meal one night a week.
Here are a few more ways to implement a loose routine…
- If your family loves sleeping in, allow everyone to sleep in five days a week, but then wake up “on time” the other two days. This will allow you get get a little more done on those days without spoiling all the fun.
- If your family loves going to the beach, have a “beach day” once a week. You could even make this day a reward for cooperation throughout the rest week!
- If you enjoy family BBQ’s or picnics at the park, plan your weekly menu accordingly and try to implement at least one picnic lunch a week.
- Allow your children to plan an event one day a week. Of course, you’ll want to help them plan the details, but this will give them something to look forward to, and force them to be creative.
By having some sort of general plan, everyone will be a bit less restless during the long summer days.

3. Plan ahead to avoid boredom.
It’s almost inevitable that your children will get bored at some point during the summer.
To avoid the constant “what can we do now” questions, plan ahead and create a list of things they can do if they get bored. Some examples might be:
- Play outside
- Read a book
- Watch a movie
- Play a game with siblings
- Ride their bike around the neighborhood
- Go on a scavenger hunt and look for ________
- Make an obstacle course in your backyard
Try to put at least 20-30 items on your list and you might want to make separate lists for different age children.
Then (this is important so listen up), at the bottom of the list, put “Ask mom if she needs help with anything”. That way, if they complain they’re bored and have already done everything on your list, you can say, “well, you haven’t asked me if I need help with anything, so why don’t you go __________”. Fill in the blank with any number of household chores.
This way, if your kids continue to complain about being bored, you’ll at least get a clean house out of the deal!
4. Keep your vehicle packed.
Even with a general routine to your day, summer is the time for spontaneous beach trips, picnics in the park, or fun outings with friends.
However, if you need to take the time to pack and worry about forgetting something at home, you’ll waste lots of valuable time. Instead, keep your vehicles packed with summer essentials:
- Suntan lotion
- Sunglasses
- Beach towels / beach toys
- A cooler (obviously, you’ll have to add ice and food at the last minute)
- Extra water bottles
- Extra diaper bag — if applicable
- Restaurant, fast food, and ice-cream coupons (just in case!)
- Park passes
- Non-perishable snacks
- Stroller or even small bikes
Keeping these essentials ready and waiting will save you lots of time and allow you to literally drop everything and do something fun.
5. Don’t forget yourself.
See if you can swap babysitting services with a friend, relative, or neighbor, hire a house-cleaning service for the summer months, or implement other ideas to make sure you have some margin in your schedule and are not running yourself ragged. It doesn’t have to be expensive, but if you schedule in time for things that energize you, you’ll most definitely be a better parent to your children for the rest of the summer.
What are your tips and suggestions to keep things calm, organized, and simpler this summer?
 |
Andrea Dekker is a wife, mom, blogger, organizer, speaker, and founder of Simple Organized Living. Her goal is to motivate and encourage others to “create their best life” through simplicity and organization. |

Morning Glory Muffins Healthy Recipe
These Morning Glory Muffins are super easy to make and are a great healthy breakfast recipe! Whip up a batch ahead of time to have on hand for a quick on-the-go breakfast idea!

Why You’ll Love These Healthy Morning Glory Muffins
These muffins are delicious and nutritious. When my friend, Angie, brought us some one day, I took one bite and knew they were winners.
They are packed with fruits and veggies (yes veggies!) and have some good healthy fats too. Plus, they are delicious!

Morning Glory Muffin Ingredients
- 2 cups whole wheat flour (can also use white flour or a mixture of whole-wheat and white flour)
- 3/4 to 1 cup raw sugar (or sugar)
- 2 teaspoons baking soda
- 2 teaspoons cinnamon
- 1/4 teaspoon salt
- 2 cups shredded carrots
- 1/2 cup raisins
- 1/2 cup unsweetened flaked coconut
- 1 apple, peeled, cored, and shredded (or chopped)
- 3 eggs
- 1 cup coconut oil, melted (or melted butter)
- 2 teaspoons vanilla extract

How to Make Healthy Morning Glory Breakfast Muffins
1. Preheat oven to 350ºF.
2. Line 12 muffin cups with paper liners.
3. In a large bowl, mix flour, sugar, baking soda, cinnamon, and salt.

4. Stir in the carrots, raisins, coconut, and apples.

5. In a separate bowl, beat together eggs, coconut oil, and vanilla.

6. Stir egg mixture into the carrot/flour mixture, just until moistened.

7. Scoop batter into prepared muffin cups.

8. Bake in preheated oven for 20 minutes, until a toothpick inserted into center of a muffin comes out clean.

9. Eat and enjoy!

Morning Glory Muffins Healthy Tips
I’d recommend using muffin liners as they seem to help these be a bit more moist.
Also, make sure your oven is fully preheated before baking the muffins.
Morning Glory Muffins Recipe Variations/Substitutions
As always, try to use what you have in the house before going out to buy a specific ingredient just for one recipe.
For example, I used pureed carrots instead of shredded carrots this time around as that is what I already had in the freezer. Shredded carrots probably would have worked better as the batter wouldn’t have turned out so orange, but they tasted fine and I saved myself a trip to the store!
You could also likely sub applesauce for the shredded apples, but you wouldn’t get that nice burst of flavor when biting into a chunk of apple.
Feel free to mix up the spices (nutmeg might be nice!) and you could even try subbing out some of the sugar for a bit of honey.

How to Serve Healthy Morning Glory Breakfast Muffins
These muffins are a great mid-morning or afternoon snack and they pack really well in school lunches.
They are also a fantastic side dish (or even dessert) for almost any meal.
And of course, they would make a quick and easy breakfast, especially if you paired them with a fried egg or some fruit.
How to Store Whole Wheat Morning Glory Muffins
Let muffins cool completely before putting them in an airtight food storage container or ziptop bag.
Store at room temperature for 2 days or freeze for up to 3 months.
To thaw: Pull out the desired number of muffins and thaw at room temperature for an hour or so. You can also warm them in the microwave.

Morning Glory Muffin FAQs
Using enough oil and sugar is key to keeping muffins moist and tender. Also, make sure your oven is hot enough, and try not to over-mix the batter.
These muffins are very sticky, so don’t forget the liners! Also, try not to over-mix the batter as that can cause tough muffins. Make sure all your ingredients are fresh, and if you have time, let them all sit at room temperature before mixing them together.
While it’s not essential (especially if you’re short on time) letting muffin or quick bread batter rest for 15 minutes or so will allow the flour to absorb more moisture from the eggs and liquid in the batter, resulting in a thicker batter that produces “higher” fluffier muffins.

Healthy Morning Glory Breakfast Muffins
Ingredients
- 2 cups whole wheat flour can also use white flour or a mixture of whole-wheat and white flour
- 3/4 cup raw sugar or sugar
- 2 teaspoons baking soda
- 2 teaspoons cinnamon
- 1/4 teaspoon salt
- 2 cups carrots shredded
- 1/2 cup raisins
- 1/2 cup unsweetened flaked coconut
- 1 apple peeled, cored, and shredded (or chopped)
- 3 eggs
- 1 cup coconut oil melted (or melted butter)
- 2 teaspoons vanilla extract
Instructions
- Preheat oven to 350ºF.
- Line 12 muffin cups with paper liners.
- In a large bowl, mix flour, sugar, baking soda, cinnamon, and salt.
- Stir in the carrots, raisins, coconut, and apples.
- In a separate bowl, beat together eggs, coconut oil, and vanilla.
- Stir egg mixture into the carrot/flour mixture, just until moistened.
- Scoop batter into prepared muffin cups.
- Bake in preheated oven for 20 minutes, until a toothpick inserted into center of a muffin comes out clean.
Nutrition
Love this recipe?
Make sure to share and save it on your favorite platform below!
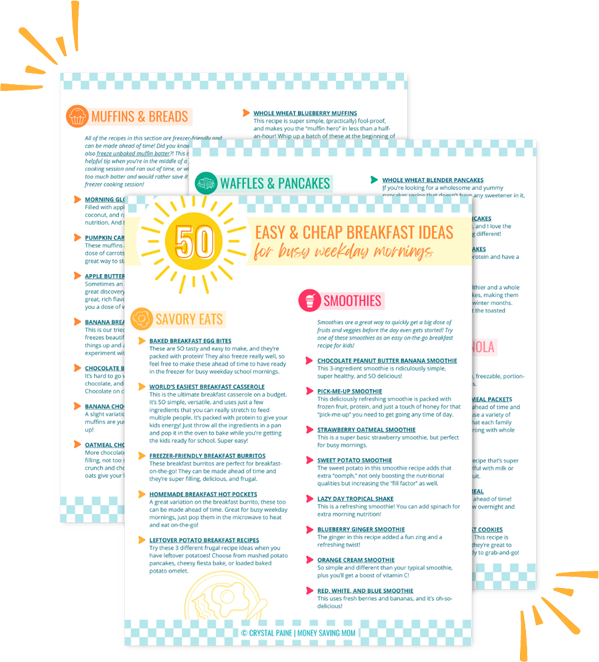
FREE 50+ Easy and Cheap Breakfast Ideas!!
Mornings just got so much easier with this FREE list of 50+ Easy & Cheap Breakfast Ideas for Busy Weekday Mornings!
OVER-SPENDING EVERY SINGLE MONTH?Grab these FREE Budgeting Sheets!
Click here to download!
We Paid Cash: A Living Room Set
 A testimony from Amanda
My hubby and I recently paid off our mortgage — YAY!
We had planned to use our first month of post-mortgage “payment” to purchase a couch to replace the very loved, mostly broken, and odd-smelling couch currently in our living room. As we headed to the various furniture stores to scout out our potential new furniture (a first-time experience for us since we generally purchase used), we finally settled on a two-piece set that was a floor model.
Because it was a floor model, the store was offering a 50% “buy now” discount. We headed up to purchase our furniture only to be told that our set would be available for pick up or delivery for nearly two weeks. Confused about why we couldn’t take home our “buy now” discounted furniture when we had cash in hand for the total amount, we asked for another sales representative. And she gave us the same odd story.
This time, she added that we couldn’t remove the furniture until the new floor model was in, assembled, and ready to take its place. Out of desperation, we sought the help of a manager, who listened intently to our dilemma.
His reply? “These people have CASH…take their money and give them their furniture!”
We backed up our trailer, loaded our couch and loveseat, and chuckled the rest of the way home!
Amanda lives in rural central Nebraska with her hubby of 15 years, nine kids, and one spoiled schnauzer.
Have you saved up and paid cash for something — large or small? Submit your story for possible publication here.
How I Reduced Our Grocery Bill By $80 In One Month

Guest post from Rebecca of D & R Tabb
For the past year or two, I have regularly spent $80 per week on groceries (not counting household items) for our family of two (that recently became of family of three!)
The only preparation beforehand included menu planning. I did minimal coupon-clipping and only occasionally price matched on milk.
I decided to spend four weeks trying to reduce my grocery budget — just to see if I could save money without a huge investment of time.
Here’s what happened:
My totals before and after looked like this:
Before
$80 week x 4 = $320/month on groceries
After
4 weeks of shopping sales = $240/month on groceries
Savings: $80
Here’s how I did it:
I switched stores.
I was a loyal Walmart shopper, not because I liked shopping there, but because I was convinced it was the cheapest option. A friend of mine told me she saved money shopping at Kroger. After shopping there for four weeks I believe this made a big impact in my savings, but only if I shopped the sales.
I used the ads.
Every week I got out the circular and looked at it before planning my dinner menu. This forced me to plan recipes based on ingredients that were marked down that week.
I stopped being brand loyal.
I started buying a different brand of chicken that is regularly on sale for $0.99/lb for split, bone-in breasts, or $1.99 for boneless, skinless breasts. When it was on sale, I bought several packages to last me until it was on sale again.
I used the sales.
I only bought produce that was on sale, usually for $0.99/lb. I have occasionally even found organic produce on sale for less than regular produce. For example, this week organic oranges are on sale for $0.99/lb. I had to laugh when I saw regular oranges listed at $1.29/lb. just a few feet away!
I bought the side items for our dinners (i.e. corn and other vegetables) that were on sale.
I have been very pleased with the impact I have been able to make on our grocery budget with minimal changes. I am planning to put the money we save on groceries toward paying down our mortgage debt. Having this goal gives me an even greater incentive to spend a few hours each week mapping out our grocery trip and meal plans.
I know many people have been able to reduce their grocery budget by much more than this, but I am very pleased to see that little changes can produce big results!
Rebecca is a former educator turned stay-at-home mom. She enjoys exercising, reading, and blogging about her life as a wife and new mom at D&R Tabb.

Q&A: How do you stay motivated to get housework done?

You are always so motivating that I am hoping you can help me. It seems like I try and try to get my “chore list” done each day and it just doesn’t happen. I used to be motivated by my checklist method and I spread the tasks over several days, but that’s just not working anymore. Thoughts? -a reader
1. If It’s Not Working, Change It
At the end of last year, I switched over to a paperless planning system. I really, really wanted to make a paperless system work, as it works so well for my husband and it seems like it’s the “smart” thing to do when you’re running a business. But, after five months of really trying to make it work, it just wasn’t working.
My motto is “Do what works for you”, and while it seems like a paperless planning system works well for many people, it was pretty obvious it wasn’t working for me. So, earlier this month, I gave up on the paperless planning system (at least for now!), pulled out my homemaking binder, downloaded the Motivated Moms Printable Chore List, and started in afresh.
I’ve been amazed at how this changed has re-ignited my love of cleaning! Sometimes, a fresh change of scenery is just the boost you need to get inspired to clean again.
If your current cleaning system isn’t working, try implementing another cleaning system. If you don’t want to start from scratch, at least rotate things around a bit so that it feels new and different.
4 Different Cleaning Systems
1. A Cleaning Schedule for People Who Hate to Clean — A weekly task list you can pick and choose from depending upon your time and motivation each day.
2. 4 Weeks to a More Organized Home — 20 days of simple cleaning tasks to whip your house into shape. You can download a printable list or sign up for daily email reminders.
3. Motivated Moms — A year-long printable list of chores and home management tasks. I just started this two weeks ago and am loving it so far! They also recently released an app, if you’re more of the paperless type than me. 🙂
4. FlyLady — Daily email reminders and tasks to help you get rid of clutter and find more order and peace in your home.
2. Get An Accountability Partner
It’s amazing how effective regular accountability can be! Find a friend or neighbor who is struggling to stay on task with keeping their home in order and ask them to be your accountability partner. Check in daily or weekly via text, email, over the phone, or in person.
Don’t know anyone locally who will be your accountability partner? There are many different online groups you could join to help you stay on task. Or, you could blog, Facebook, or tweet on a daily basis about your successes and failures.
3. Reward Yourself
Set up a reward system to celebrate your success. I’m always much more motivated when there is something to look forward to at the finish line!
My reward for accomplishing my tasks is often relaxing with a good book for 30 minutes at the end of the day. For some of you, that might not sound too exciting, but it’s something I love to do. And I can enjoy it even more when I know that my tasks are caught up!

FREE DOWNLOAD:
2-Hour Cleaning Checklist!
Let me help you get your house cleaned up and ready to ENJOY in just TWO hours with this FREE 2-Hour House Cleaning Checklist!

4 Weeks to Fill Your Freezer: Chocolate Chip Cookie Dough (Day 16)
4 Weeks to Fill Your Freezer: Chocolate Chip Cookie Dough (Day 16)
Frozen chocolate chip cookie dough can be a bit dangerous to have on hand as it’s really yummy to eat straight from the freezer… but if you can have a little self control and wait for the cookies to bake, you’ll see that they taste just as delicious as if you made the dough fresh that day!

My sister concocted this recipe many years ago and it’s long been our favorite chocolate chip cookie recipe. It definitely wouldn’t win the prize for being a low-calorie cookie, but it’s a delicious and hearty cookie recipe.
You will LOVE frozen cookie dough!
If you’re not a fan of most freezer meals, can I encourage you to try making cookie dough and freezing it? I can almost guarantee you won’t be able to tell a difference between frozen cookie dough and fresh cookie dough.
Frozen cookie dough makes it so easy to make a batch of freshly-baked cookies when you have drop-in guests or need to bring a dessert or snack to some event at the last minute.
It’s also very handy for those times when you get a late-night craving for chocolate. Oh wait, I may be the only person who has that happen to them. Ahem. 😉

Ingredients for Freezer-Friendly Cookie Dough
- 1 cup butter or shortening (softened)
- 1/3 cup peanut butter
- 3/4 cup brown sugar (or raw sugar)
- 3/4 cup granulated sugar (or raw sugar)
- 2 eggs
- 1 teaspoon vanilla
- 1 1/2 cups all-purpose flour (you can also use half or all whole-wheat)
- 1 teaspoon baking soda
- 1/2 teaspoon salt
- 2 cups oats (rolled or quick oats)
- 1 12-oz. package chocolate chips
How to Make Freezer-Friendly Cookie Dough
1. In a large mixing bowl, cream together butter, peanut butter, brown sugar, and granulated sugar.

2. Add in eggs and vanilla and whip until very smooth.

3. Add in flour, baking soda, salt, and oats. Mix well.


4. Stir in chocolate chips.
5. Roll dough into 1-1 1/2-inch balls and place on a cookie sheet (either to freeze or to bake.)
To freeze:
1. Place cookie dough balls on a cookie sheet (they can be quite close together) and freeze for one to two hours.
2. Remove from cookie sheet and place in an airtight freezer bag.
3. Freeze for several months (if you have enough self control!)

To bake:
1. Preheat oven to 375ºF.
2. Put desired number of cookie dough balls on a parchment-lined cookie sheet, approximately 3 inches apart.
3. Let sit while oven preheats.
4. Bake in preheated oven for 10 minutes or until done.
5. Transfer warm cookies to cooling rack.
6. Eat and enjoy!


Freezer-Friendly Chocolate Chip Cookie Dough
Ingredients
- 1 cup butter or shortening softened
- 1/3 cup peanut butter
- 3/4 cup brown sugar or raw sugar
- 3/4 cup granulated sugar or raw sugar
- 2 eggs
- 1 teaspoon vanilla
- 1 1/2 cups all-purpose flour you can also use half or all whole-wheat
- 1 teaspoon baking soda
- 1/2 teaspoon salt
- 2 cups oats rolled or quick oats
- 12 oz chocolate chips
Instructions
- In a large mixing bowl, cream together butter, peanut butter, brown sugar, and granulated sugar.
- Add in eggs and vanilla and whip until very smooth.
- Add in flour, baking soda, salt, and oats. Mix well.
- Stir in chocolate chips.
- Roll dough into 1-1 1/2-inch balls and place on a parchment-lined cookie sheet (either to freeze or to bake.)
To freeze:
- Place cookie dough balls on a cookie sheet (they can be quite close together) and freeze for one to two hours.
- Remove from cookie sheet and place in an airtight freezer bag.
- Freeze for several months (if you have enough self control!)
To bake:
- Preheat oven to 375ºF.
- Put desired number of cookie dough balls on a parchment-lined cookie sheet, approximately 3 inches apart.
- Let sit while oven preheats.
- Bake in preheated oven for 10 minutes or until done.
- Transfer warm cookies to cooling rack.
- Eat and enjoy!
Nutrition
Love this recipe?
Make sure to share and save it on your favorite platform below!
Did you do any freezer cooking this week? If so, I’d love to see the results of your efforts! Link up your blog posts below or tell us about your success in the comments.

Want to cut your grocery budget? Go here and sign up (it’s free!) I’ll send you my 10 Easy Ways to Cut Your Grocery Bill By $50.
Ask The Readers: Meatless or inexpensive meal suggestions that guys would love?
Ask The Readers: Meatless or inexpensive meal suggestions that guys would love?

Today’s question is from Alicia:
My family consists of three boys, my husband, and myself. With the cost of food rising, I have let my meat stockpile diminish. I was wondering if your readers have any budget-friendly recipes for meatless or inexpensive recipes that will satisfy and fill the bellies of a house full of meat-eating males!? -Alicia
Do you have a question you’d like to ask Money Saving Mom® readers? Read the submission guidelines and submit it here.