


Saving Families Money Since 2007


Testimony from Crystal of Serving Joyfully
The average American family eats out several times per week — which is something people tend to underestimate until they really examine the numbers.
This is embarrassing, but I’ll confess it — eating out for my family was completely out of hand. We tried to cut back, but there was always justification.
The list goes on.
My husband and I live on a meager budget and are trying to get out of debt. We can’t afford all the meals out (we were spending our entire “spending money” budget, plus “borrowing” from other areas to fund it!)
So this year for Lent, we did something drastic — we stopped eating out.
While there are ways to save money when eating out, a meal out for a family of four will typically cost at least $10 for fast food, and $30 for most sit down restaurants. If you are like us, or like the typical American family, just cutting one meal out per week can save you $520-$1560 per year!
Here are some things that have helped us to significantly lower our eating out budget:
If you eat out for convenience, you can easily cut out one meal out per week by planning your meals. If you have a roast cooking at home in the crock-pot, it’s easy to skip the fast food on the way home.
I make sure to plan quick meals or leftovers for busy days. Sometimes, just knowing you have a plan gives you the will you need to skip eating out.
When possible, I plan errands so we’ll be home for mealtimes. I keep snacks in my van so that if we get hungry while out, we can have a healthy snack rather than fast food.
If we can’t be home at mealtimes, we pack a picnic. Now, instead of eating out after story time, we enjoy a picnic at the park. This even allowed me to reach out to some of the other moms and start a weekly playgroup after story time.
One of our biggest problem areas was date night. Eating out became our date each week, usually at a sit-down restaurant costing $30+ after taxes and tip. Now, our dates are more creative: we’ll have a movie night at home or do something like a $5 Little Caesar’s Hot & Ready Pizza.
For the occasional splurge, we participate in rewards programs like MyPoints or Swagbucks to earn dining gift cards. By doing this, we are able to limit ourselves to spending no more than $5-$10 per week on eating out, which is within our monthly spending budget.
With these changes, we have nearly eliminated eating out from our budget, saving us around $50 per week, or $2600 in a year!
Crystal Brothers is a daughter of the King, wife to a forest ranger, and full-time mommy to two rambunctious little boys. She blogs at Serving Joyfully — a blog dedicated to encouraging and equipping women to serve God and their families with a joyful spirit.

My friend, Amy, a non-spender who is wise with her finances but pretty much has always only used her credit card, is taking the three-month Cash-Only Challenge I outlined in my book, The Money Saving Mom®’s Budget.
She posted about her observations and feelings after one month on her blog today. Whether you love or loathe credit cards, I think you’ll find her post interesting and insightful.
Have you tried a cash-only challenge? If so, I’d love to hear what you learned from the experience.

Playing at the beach – free
Guest post from Tiffany of Don’t Waste the Crumbs
Summer is here!
We moms tend to dread those three words since planning activities for ten straight weeks can be overwhelming and seem expensive. But don’t let a budget ruin your family fun.
Here are some suggestions to help make your budget-friendly summer a little more fun:
Are the kids tired of the same swings and slides? Create a list of local parks and make it a point to visit one for each week that the kids will be off. Include state parks, beaches, playgrounds, hiking trails, and skate/bike parks for the kids that are beyond swings.
Create a chart to put on the fridge with simple graphics and let them rate the park with thumbs up or thumbs down. Maybe you’ll have a new favorite park when the summer is over!
Use a search engine and look up the “10 best things to do” in your city. If your list is relatively short, make it a point to do or visit everything! If your list is long, ask your kids to pick one or two activities that sound interesting to them.
Kids are much more likely to have more fun when they have a choice in the matter. You can even stretch “their” event into “their day” and let the child that chose the activity choose what to have for breakfast, lunch, and dinner!

Visiting Parks in San Francisco – free
Call the event locations, ask your neighbors, email your local chamber of commerce and/or visit your library to see if discounted or free tickets are available for locals. Our local library offers free passes to the aquarium on the first of every month (to locals with a valid ID).
If your friend’s family enjoyed an attraction so much that they bought season passes, there’s a chance your family will enjoy the attraction, too. If your kids have a good time and want to go again, see if your budget will allow the price of season passes.
Most season passes pay for themselves in less than two visits and will last beyond the summer time frame. You can also team up with another family and be their “friend” on a take-a-friend day, or “suggest” season passes to family members as a birthday gift to the kids.

Season Passes to Local Amusement Park – passes were a family Christmas gift and free admittance for kids under 3
As a local, I know I can park for free if I’m willing to walk a few blocks. I also know that walking a few blocks with a car full of kids and gear can be tiring. Ask the parking attendants if locals get discounted parking, or if parking can be validated with certain establishments.
You’d be willing to splurge a little if you were truly on vacation, so loosen the reigns just a little bit. Save by packing a lunch or eating at home beforehand, but have fun with an ice cream treat afterward.
Take board games outside on a blanket or picnic table, spend the day “camping” in the backyard or create a scavenger hunt outside with their favorite toys. Allow the kids to get messy with chalk or finger paint. Dress them in their swimsuits and turn on the sprinkler! Go for a nature walk and create a picture list of things to “find” along the way.

Watching the airplanes take off and land – free
Local theaters often run a summer special where kids movies will play at the same time, the same day of the week. Tickets are usually inexpensive and this could be a great for rainy days, or when you need a break from the sun.
Team up with other moms and take turns planning a home activity each week that involves all the kids. This would give you a day off and the kids are still having fun while being supervised.
Don’t take on planning the whole summer at once. Start small by planning for one or two days each week. For example, make every Monday a park day and every Friday a field trip. Visit a new park each Monday and a new “event” each Friday and see where the fun leads you!
Tiffany is a full-time mom navigating the bumpy road of food, money and motherhood, while trying not to waste (or lose) crumbs along the way. She blogs about her experiences at Don’t Waste the Crumbs.

Want to learn a foreign language? Michele from Saving Money In Real Life emailed in this tip:
I recently learned that my public library has an online foreign language program that I can access for free. There are dozens of foreign languages available that I can learn!
Many public libraries across the country have the same free program. It’s called Mango Languages. If you check their website, you can find out if your local library participates. You can find out if your library participates here.
I thought your readers might enjoy this program especially those who homeschool. My son and I just discovered it last week, and we’ve been having a lot of fun with it! -Michele from Saving Money In Real Life
Have a quick money-saving tip to share? Email it in through our deal submission form and if we end up publishing it, we’ll link to your blog.

PenniesAndBlessings.com shows you how to make an invigorating coffee sugar scrub.
Do you have a fun and frugal DIY idea to share? I’d love to hear about it! Read the submission guidelines and submit it here.

We’re heading to Virginia early, early on Wednesday morning and will be there through Sunday. I’ll be speaking five times at the Virginia Homeschool Conference and we’ll be running a booth in the vendor hall, as well.
So, needless to say, I’m keeping my goals simple this week. That way, I don’t set myself up for automatic failure. 🙂
Last week’s goals:
Family/Mothering Goals
1. Finish reading Quest for Truth:Taken (reading to everyone), Winnie the Pooh (reading to Kathrynne), and The Courage of Sarah Noble (reading to Kaitlynn).
2. Attend our local homeschool convention and buy our curriculum and other things for next school year.
3. Write a love note to Jesse.Personal Goals
4. Finish readingRadical.
5. Run at least five times. {Only managed to run three times.}
6. Listen to 2 hours of The One-Minute Entrepreneur.
7. Sleep for at least 7.5 hours every night.Home Management
8. Follow my Freezer Cooking plan and blog about it.Business Goals
9. Finish writing one article for another site. {I spent all of five minutes on this. Yep, it got shoved to the back burner last week.}
10. Prepare for speaking/having a booth at the Virginia Homeschool Conference next week.
And this week’s six goals:
Family/Mothering Goals
1. Pick out new books to start reading aloud to the girls individually, as well as to everyone.
2. Write a love note to Jesse.
Personal Goals
3. Finish reading The Referral Engine: Teaching Your Business to Market Itself and Without a Word: How a Boy’s Unspoken Love Changed Everything
.
4. Sleep for at least 7.5 hours every night.
Business Goals
5. Finish tweaking workshops and powerpoints for Virginia Homeschool Conference.
6. Travel to Virginia Homeschool Conference with Jesse and Kathrynne for speaking engagement.
How did you do on last week’s goals? What are your goals for this week? I’d love to have you share your progress on last week’s goals and your goals for this coming week in the comments. Of, if you’ve blogged about it, leave your direct link below. Let’s cheer each other on to live purposeful and productive lives!
You can download a free customizable weekly goal-planning sheet here.


Guest post by Kristen from Getting More God
After following MoneySavingMom.com for a while and reading about the Cash Envelope System, my husband and I decided to take the plunge about a year ago. Our bank account was slowly dwindling, even though we had a budget that we tracked each dollar in. We figured being “cash only” was the best way to keep track of where these dollars were disappearing to.
I thought it would be painful, but it has actually been beautiful. We will never, ever go back!
Many of my friends and family think we are crazy for using envelopes and offer up the same concerns I had before taking the envelope plunge. I figured it would be quick and easy to get them all in one place and provide the answers I’ve found since beginning our “Life with Envelopes.”
You determine the restrictions. You look at your income versus your bills and decide exactly how much money goes to each category.
If you love to shop and want to spend $100 per month on clothes, so be it! That just means a little less is going to go to the other envelopes. It all depends on your decisions for where your money goes based on what your family needs and can afford.
Envelopes actually free you. You know things are covered and you no longer have such regret over purchases you weren’t prepared for!
There are many great resources available with guides on just how to do this.
There are still things that we use our card for, and gas is definitely one of those. I would never ask you (or require myself!) to go inside and pay for gas every time. You’re right, it’s a headache!
No, you’re not. But you could be a 35-year-old living at home with your parents if you don’t learn to manage your money well! So, my advice is to look at your month when it starts. Knowing how much money you have for eating out, entertainment, etc. and then decide which weekends you will use it.
If your friends ask to hang out on a certain weekend where you know you’ll be strapped for cash, recommend another weekend or ask if you can hang out at a certain venue you know you can afford. You initiate the invites and then things are much more within your control. And if you find that you are constantly restricted by your envelope, you may need to adjust amounts.
I say this when it comes to exercise, too… You have the same 24 hours in your day that everyone else has. You make time for the things that matter to you.
Look at what you spend your time doing. You can’t deny that those are the things that matter to you, or else you wouldn’t occupy yourself with them. So decide to make your financial health matter to you and get to the bank once a month! It’ll take 10 minutes! Financial responsibility requires some dedication and maturity.
If you are able to keep your finances 100% in check and not have money slipping through your fingers with that system, then more power to you! I’m not saying everyone must do the envelope system, or else you don’t care about stewarding your money well.
I’m simply asking that everyone consider it. Handing someone cold, hard cash is so much more difficult and meaningful than swiping a card and “giving” them this imaginary-feeling money. It doesn’t leave an impression at all. You can easily spend without even thinking about it.
You think twice — or even three times — when you hand someone your hard-earned cash. That’s the benefit. But if your “cushion” isn’t dwindling slowly and you are fine with your system, no need to change!
Ultimately, do what works for your family. Using cash envelopes has completely changed our family (for the better!). They might not work for you, but you’ll never know until you try. Thank you to Money Saving Mom® for introducing this to us.
Kristen is 27-year-old mother of one happy toddler and wife of one great man. She has many earthly passions which she attempts to use to stir her affections for Christ on her blog, GettingMoreGod.blogspot.com. She hopes to see His hand in all of the passions He’s given her here on Earth. She wants everything to point back to Him. That’s the challenge, and she writes about the process of discovering it!

How are you doing on your goals for 2012? I’m excited about the progress I made in May…
Personal
Read through the Bible in a year. {I’ve been keeping up with this faithfully.}
Read through the 24 books on my 2012 booklist. {I’m almost finished with May’s books and have read quite a few other books!}
Listen to 12 audiobooks. {I just finished May’s audiobook and am starting on June’s!}
Run in at least one 5K race. {Finished the Couch to 5K program and am now working on getting my time down. Hoping to sign up for a race soon.}
Complete the Couch to 10K program.
Tackle 12 Do-It-Yourself Projects. {I made English Muffin Bread last week — I’ll blog about it next week!}
Focus on one habit per month. {We made some good headway with consistent bedtimes in May — yay! On to getting places on time — one of the areas I really struggle with!}
Learn to use my new DSLR camera (huge surprise Christmas present from Jesse!!) & improve my photography skills. {I’m excited to be seeing some improvement and progress with this! And I’m also excited that I’m beginning to feel more and more comfortable using my camera!}
Take at least one photo a day and put together a page every week for my Project Life album. {I’m behind on putting my album together, but I’ve been doing good about taking lots of pictures!}
Memorize Colossians using the plan and free download here. {I’m almost caught up with this.}Marriage
Go on the Love Like You Mean It Cruise. {Done–read my recap here.}
Go on two Marriage Retreats (Went to Cincinnati together in April).
Have monthly date nights. {We had one date in May.}
Read four books together. {We’ve done two books so far this year.}
Read at least 3 books on marriage. {I’ve read two so far this year.}Children/Homeschooling
Continue regular dates/outings with each of the children individually. {I went on at least one outing with each child individually in April.}
Continue Grace and Truth memory book. {The children memorized three verses plus one verse of a hymn in May.}
Ice-skating lessons for all three children. {The children finished up their second round of classes and we enrolled them in a third round since they are enjoying it so much!}
Swimming lessons for all three children. {We’re hoping to get all three signed up for this within the next two weeks.}
Finish second grade, begin third grade with Kathrynne. {Kathrynne finished second grade in May — woohoo!}
Finish kindergarten, begin first grade with Kaitlynn. {Kaitlynn finished Kindergarten in May and is excited about beginning first grade soon. I’m excited because her reading and spelling have taken off in the last month — she’s quite self-motivated which helps tremendously!}
Start preschool with Silas. {Started this in April.}
Go on at least one field trip every month. {We went on one field trip in May.}
Go on at least one family vacation. {We have one planned for July.}
Finish at least 15 read-aloud books. {We’ve finished 14 read-alouds so far this year.}Ministry/Friendships/Extended Family
Write at least two handwritten notes every month to encourage someone. {I wrote & mailed five handwritten notes this month.}
Continue being involved in our local church, homeschool group, young couple’s group, and blogging accountability group. {Ongoing}
Continue with weekly get-togethers with both sides of our extended family. {Ongoing}Business/Blogging
Continue to take Sundays off from blogging/business work. {Ongoing}
Continue keeping strict Office Hours for the business/blogging time each day. {Still plugging away on this!}
Switch to a paperless planning system. {This is the one goal I think I’ve officially decided to drop this year as it just wasn’t working for me. Back to the paper.}
Follow my weekly blogging plan. {I stuck with my blogging plan all but three days in May, if I’m remembering correctly — woot!}
Plan blog posts out at least a month in advance. {I made some great progress in this area in May!}
Write and schedule blog posts at least a week in advance. {Making some headway with this, though I’m far from where I want to be!}Financial
Continue to tithe 10% of our income. {Ongoing}
Give generously to needs in our community and around the world, as God prompts us. {Ongoing}
Pay cash for a new-to-us vehicle to replace our family’s van. {We’re still looking and haven’t found anything we love in our price range yet!}
Finish saving for and purchase a rental property with cash. {We’re in the process of investigating our options in our price range right now and deciding if we want to go ahead and purchase something or continue saving.}
If you’ve posted goals for 2012, I’d love for you to post an update on how things are going and share your link in the comments. If you don’t have a blog, feel free to just leave your update as a comment. Let’s encourage one another to live lives of intention and purpose!

I stopped by Target earlier this week and here’s what I picked up:
2 2-liters of Sierra Mist — on sale for $1.33, used $1/1 coupons = $0.33 each after coupons
4 bags of frozen vegetables — priced at $0.99 each, used $1/4 coupon = $0.74 each after coupons
1 International Delight Coffee Creamer — priced at $3.14, used free coupon = free after coupon
1 gallon milk — $2.99
1 Up & Up Ibuprofen — priced at $0.99, used $1/1 coupon = free after coupon
3 Revlon nail files — priced at $1.69, used $2/1 coupon = free after coupon
1 Up & Up Baby Shampoo — priced at $1.52, used $1/1 coupon = $0.52 after coupon
1 Up & Up Baby Wash — priced at $1.52, used $1/1 coupon = $0.52 after coupon
1 6-pack of Dannon Pure — priced at $1.99, used $0.75/1 Target coupon = $1.24 after coupon
1 Up & Up Liquid soap — priced at $0.99, used $0.50/1 coupon = $0.49 after coupon
Total with tax: $10.05

Guest post from Sarah
My husband and I are debt-free except for our house and live within our means. Until last year that was enough for us.
Then I stumbled upon Money Saving Mom®. One year later I can’t claim to be an expert, but there are a few things I’ve learned along the way.
Time to learn the lingo. Time to know a good deal when you see it. Time to find a system for coupons. It even takes time to make some mistakes and learn from them.
Don’t expect to be a pro in a few months. Start slowly so you don’t burn out. You can’t change everything about your household expenditures in a month.
At least when you’re starting out. At first I thought we absolutely had to buy a deep freeze if we wanted to save money on groceries.
We delayed this purchase, and for us that was a great decision. We’ve made our side-by-side refrigerator/freezer work. Sure, it’s a challenge to stack and shove it all in, and sometimes I’ve had to ask family members if I can store a little in their freezers.
That may not be an option for you, but try being creative before you dive in to an investment designed to save you money.
I don’t play the drugstore game. Am I missing out on some great deals? Probably, but I’m doing what works for me.
I shop with my kids, and the stress of handing over coupons in a specific order and making complicated shopping scenarios seems like more than I can handle with them in the cart. Although, it is an adventure I’m excited to tackle sometime down the road!
Sure, you can save money by making things from scratch, and I do more of that than I did 12 months ago. But like Crystal says in her homemade tortilla post, some things aren’t worth the effort.
You have to put a price on your sanity and quality time with your family. Don’t waste those precious gifts on saving only a few pennies.
You have a life beyond saving money. At times I’m making a grocery list or printing coupons and my sons need a snack or help washing their hands.
This can seem like a major interruption. Can’t an 18-month old realize I’m printing coupons?
My kids are my job. Looking for deals is something I need to do as I can and not let it consume me.
A year ago we were content with our level of giving. We wanted to give big, but it was something to do later. After I return to work. After college funds are fully funded. After the house is paid off.
Crystal has challenged those thoughts. We’ve been able to increase our giving over the last year, and I’m excited to see where God leads us in this area in the future.
Sarah is a writer turned stay-at-home mom with two boys, ages 5 and almost 2. In an effort to stay in the writing game, she’s dabbling as a freelancer between loads of laundry, potty training, playing super heroes and saving money.
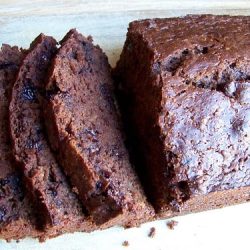
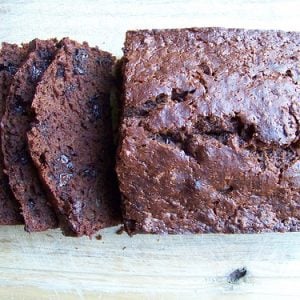
If you need another idea to use up over-ripe bananas, this is your recipe! It’s loaded with delicious bananas and lots of chocolate. Plus, it’s freezer-friendly!

We made it to Day 20 — woohoo! If you’ve followed along and joined me in any or all of the daily freezer cooking challenges, you deserve a huge congratulations for making it this far.
My recipe for Chocolate Banana Bread is so simple to whip up — we’ve been making it for years and years (as is evident by this picture of teeny-tiny toddler Silas “helping” me!)

It uses frugal ingredients we almost always have in the house, it’s deliciously moist, and it’s more nutritious than desserts (but it tastes just as rich).
Plus, it’s a great way to use up over-ripe bananas (here are a bunch of other ideas to use up ripe bananas too.)
The bananas should be quite ripe (lots of brown spots or even black) as over-ripe bananas are much sweeter.
You can also peel over-ripe bananas and put them in a zip-top bag in the freezer for later. Just defrost however many you need for your recipe.
Usually, bananas can not be “too ripe” for bread — however, if they are moldy or smell sour, you should probably throw them out.

You can substitute some or all of the flour for whole wheat flour — but the bread won’t be as light and fluffy.
You can also substitute 1/4 cup of applesauce for half of the melted butter.
And if you really want to healthify this recipe, you can swap 1/2 c. honey for the full cup of sugar (honey is sweeter than sugar).
1. Preheat oven to 350ºF.
2. In a large bowl, stir together flour, cocoa powder, sugar, baking powder, baking soda, and salt.

3. Add in the mashed bananas, eggs, melted butter, and vanilla.
4. Carefully fold the banana mixture into the dry ingredients until just combined.
5. Mix in the chocolate chips.

6. Pour into a greased 9″x5″ loaf pan and bake in preheated oven for 55 to 65 minutes until the bread has risen and a toothpick inserted in the center comes out clean.


7. Let the bread cool for 5-10 minutes in the pan, then release it from the pan onto a cooling rack.

8. Enjoy this delicious bread warm… or let it cool completely and freeze it for later!
If your oven is true to its temperature, a 9″x 5″ loaf of bread should bake in around 55-60 minutes — although you can check it for doneness around 45 minutes if you’re concerned.
The bread will rise significantly while baking and it should have a nice domed top.
You can also insert a toothpick into the center of the loaf and if it comes out clean, the bread is fully cooked all the way through.

Technically, putting bread in the fridge will dry it out — it’s best left on the counter or in the freezer. However, in warm summer weather, I tend to refrigerate banana bread, just because it’s so moist.
This bread is so yummy, you’ll most likely eat it long before it has a chance to go bad.
That said, you should probably plan to eat it within 5-6 days — or freeze it for later.
Let the bread cool completely to room temperature, then wrap it tightly in plastic wrap AND tinfoil and place it in the freezer.
Alternatively, you can slice the bread before freezing it and place it in a zip-top bag. This way, you can simply remove one or two slices whenever you want!
If you notice a bummy texture to your bread (specifically if the center of the bread is gummy) it’s most likely under-baked.
In general, quick bread is not considered a “health food” although it is more nutritious than chocolate cake! If you make the substitutions mentioned above (honey, applesauce, whole wheat flour) banana bread can actually be quite nutritious.
One factor might be that your baking powder and/or baking soda is no longer active — meaning, it won’t give your baked goods the rise you desire. Also, using whole-grain flour will produce a denser loaf. Finally, over-mixing the batter could also create a more dense bread.
Make sure your bananas are over-ripe and very mushy — this will help the bread stay extra moist. Also, don’t use too much flour, and don’t over-bake your loaves.
Make sure to share and save it on your favorite platform below!
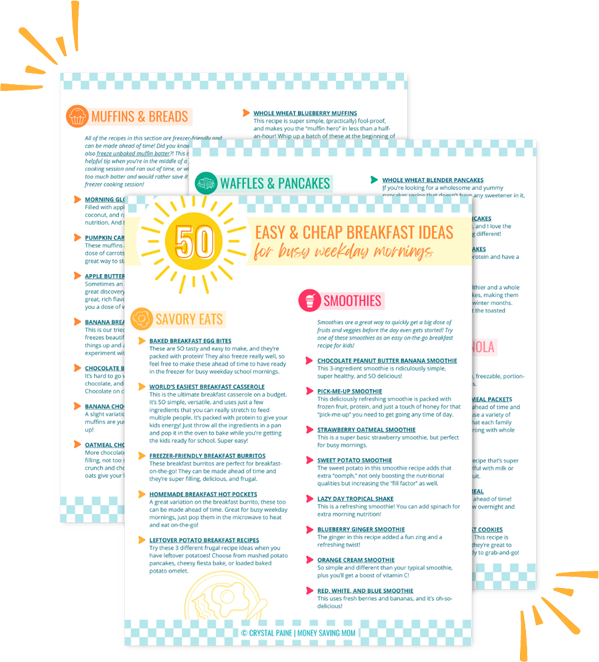
Mornings just got so much easier with this FREE list of 50+ Easy & Cheap Breakfast Ideas for Busy Weekday Mornings!

Here are the freebies I’ve gotten over the past week:
2 Gevalia Coffee samples
Larabar sample
Ecover sample
International Delight Iced Coffee coupons
Tampax Pearl samples
Tampax Gift Bag
Tresemme samples
What freebies have arrived in your mailbox this week?
By the way, if you want to start getting great freebies in your mailbox, just start signing up for the freebies I post every day that interest you. Within 4-6 weeks, your mailbox will start filling up with great freebies!

Today’s question is from Jerilyn:
Our children sleep on the second floor and it gets really hot up there! Last year we used several fans but they have since broken and I always worried that they were too hot. I am looking for an efficient way to cool our hot and humid 2nd floor besides a window air conditioning unit .
Do you have a question you’d like to ask Money Saving Mom® readers? Read the submission guidelines and submit it here.

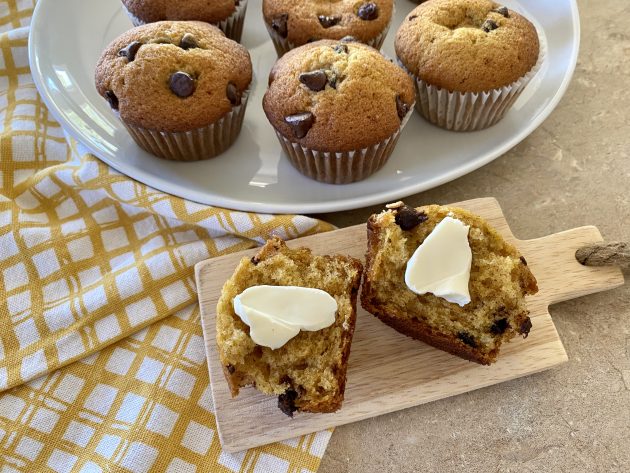
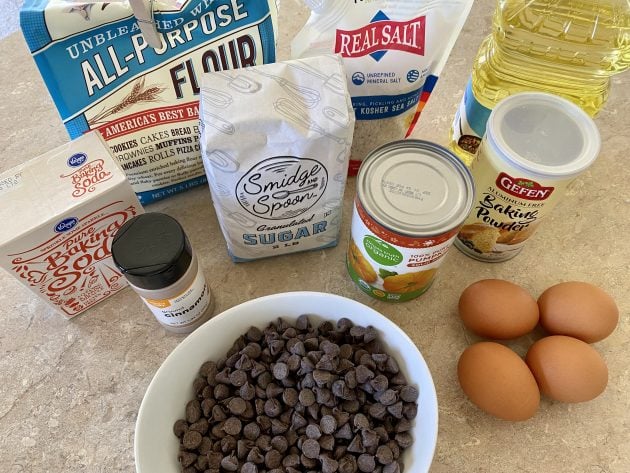
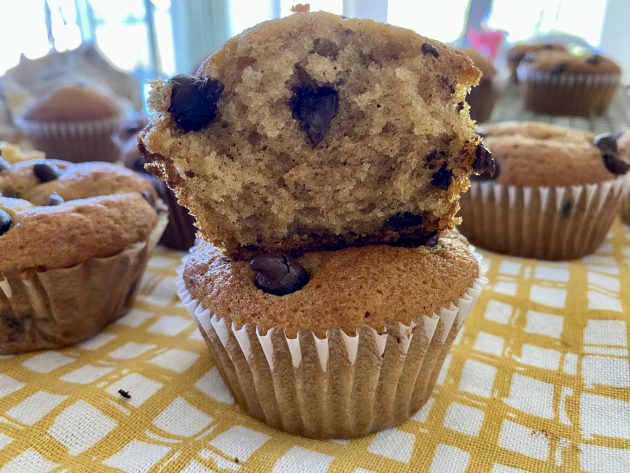
These Pumpkin Chocolate Chip Muffins have been a go-to recipe at our house for as long as I can remember! The best part? They a frugal AND they freeze beautifully!!

Pumpkin Chocolate Chip Muffins are a longtime family favorite at our house — they are so delicious!
If you can stock up on the staple ingredients and canned pumpkin at a rock bottom price when it’s on sale (or at Aldi), these pumpkin muffins can be rather economical too!
1. Preheat oven to 400ºF.
2. Grease two 12-cup muffin tins, or fill with paper liners.
3. In a large mixing bowl, beat eggs, sugar, pumpkin, and oil until smooth.

4. Add in dry ingredients and mix until just combined.

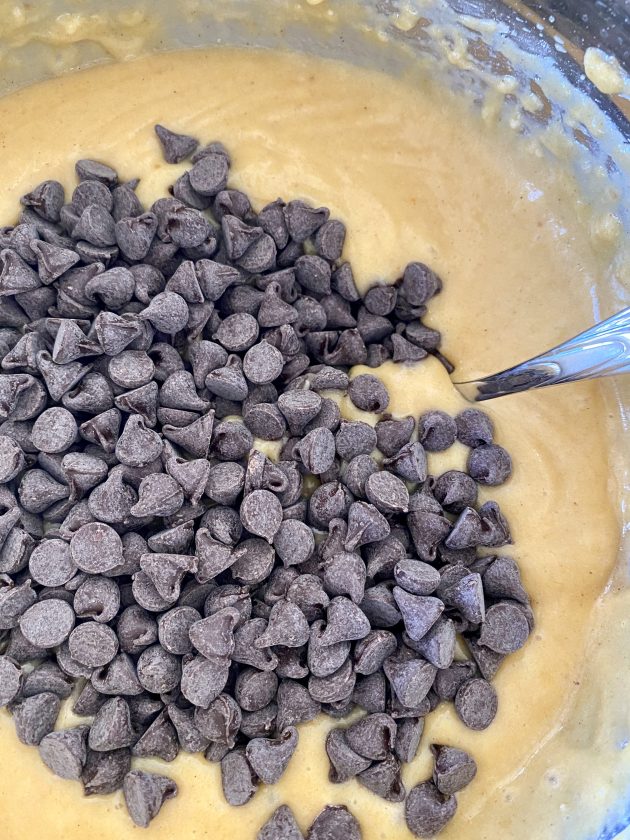
5. Fold in chocolate chips.
6. Fill muffin cups 3/4 full.


7. Bake in preheated oven for 16-20 minutes, or until toothpick inserted in muffins comes out clean.

Let muffins cool thoroughly and store in an air-tight food storage container on the counter for up to 5 days, or freeze for longer.
To thaw, simply let muffins sit at room temperature for 30 minutes to an hour. Or, defrost individually for 1 minute in the microwave (this makes the chocolate a little gooey!)
Yes! Muffins freeze wonderfully with and without chocolate. Just follow the instructions above when you’re ready to defrost them.
We love to eat pumpkin muffins for quick snacks or for a special breakfast treat.
They’re also a great dessert to add to a sack lunch. Just pull a frozen muffin out and stick it in a baggie and by lunchtime, it’s all thawed and ready to eat! (This used to be one of Jesse’s favorite things for me to pack in his lunch when he worked outside the home full-time.)

Often, overmixing the batter is the main reason for dense muffins. We suggest mixing the wet ingredients well, and then incorporating the dry ingredients just until the powderiness disappears.
Using whole grain flour will also cause denser muffins than if you use all purpose flour.
Baking in an oven that’s not hot enough is another cause — which is why we recommend preheating your oven to 400º for this recipe.
And finally, you’ll want to verify that your baking powder and baking soda are fresh and still active. You can do this by scooping a small amount of baking soda into vinegar and scooping a small amount of baking powder into hot water. If they fizz and bubble, they are still active. If not, you should replace them.
Yes… these are interchangeable for this recipe (and any other recipe).
You do NOT want to use “pumpkin pie filling” though, as that already has added sugar and spices.
Refrigerating bread products dries them out faster than letting them sit on the counter. So since pumpkin muffins don’t have any uncooked ingredients (like cream cheese frosting) they are fine if left out on the counter. However, if you don’t plan to eat them in the first few days, they will stay freshest in the freezer.
Either is ok, but milk can make muffins softer and more moist — which sounds like a good thing, but you can actually have muffins that are too moist. Since pumpkin is very dense and moist, we recommend sticking to the recipe and using water for this recipe.
The short answer: No, you don’t have too. Your muffins will taste great if you bake them immediately.
The longer answer: You can choose to let your muffin batter sit in the fridge overnight to allow the gluten structure to more fully develop. This resting time is thought to produce higher “domed” muffin tops.
So if you’re short on time, just mix and bake. Or if you want to save time in the morning, you can mix up the batter at night, let it rest in the fridge, and bake it in the morning.

Make sure to share and save it on your favorite platform below!
Did you do any freezer cooking today? If so, I’d love to see the results of your efforts! Link up your blog posts below or tell us about your success in the comments.