

StayAtHomeMadeMom.com shows you how to make homemade mod podge.
Do you have a fun and frugal DIY idea to share? I’d love to hear about it! Read the submission guidelines and submit it here.

Saving Families Money Since 2007


StayAtHomeMadeMom.com shows you how to make homemade mod podge.


Welcome to October’s series on 31 Ways to Earn Extra Cash Before Christmas. In this series, I’ll be highlighting simple and legitimate ways you can earn extra cash in the next three months for those of you who could use a little extra cash to help you pay for Christmas — or just for your living expenses if you’re in a tight spot right now.
Many of these will be things we’ve discussed here at one time or another, but I thought it would be good to have them all in one complete series. Plus, even if you’ve been reading here for a few years, it’s easy to forget posts that were published months ago!

Jingit is a newer income-earning program that pays you to watch ads online. You can also earn money for downloading the mobile app, scanning items at Walmart, and answering a couple of questions.
How Do You Sign Up?
To sign up, just go here and click on “sign up now.” You’ll need to create an account, input your phone number, and type in the verification number they text to you.
How Do You Earn Cash?
Once you’re signed up, you can begin watching videos or doing store check-ins. You should be offered at least a few videos you can watch right away. It looks like they add a few new videos each week.
Plus, if you have a smartphone, you can download the Jingit app and get paid to scan grocery UPC codes while you’re in store.
How Do You Get Paid?
To get paid, you just register for a Jingit Visa Debit Card (costs $3 from your Jingit balance to request it) and then add cash for your online Jingit balance to the Visa card.
How Much Can You Make?
There is an earning limit of $15 per week. When you initially join, you’ll have a lower earning limit but this can be raised to $15 by inviting friends to join.
It looks like most people are only making $3-$5 per week with it, but that’s only by spending a few minutes of time each day — or less. So it’s not a bad hourly wage!
Candi commented on my post about Jingit last week and said:
I have tried it and found that it is really very easy to make a couple of bucks. They videos you watch are super short, so it really doesn’t take too much time. I have also done the “check in” feature which has you scan in items Walmart and answer a couple of questions and you get money instantly! Fairly simple, but I have had it not scan a couple of items. I will only scan items in store if I need to be at Walmart anyway, you are only going to make a buck or two at a time so it is in no way worth the trip to the store for that. -Candi
(Note: The link in this post is my referral link. Read my disclosure policy here.)

So, as I mentioned on Friday, I tend to be the kind of person who avoids spending money on myself. I have a few select things I splurge on, I love to buy things for other people, but when it comes to myself, I usually always talk myself out of it.
I’ll re-wear something over and over again until it has holes in it. I’ll make do with what I already have. Or, I’ll just find a way to do without.
But it’s rare that I go and spend money on myself — especially on the spur of the moment. However, after reading Love Does, I’ve been inspired to be a little more spontaneous.
Now remember, I’m the Type A gal who enjoys spontaneity only when it is carefully planned. For me to even be remotely spontaneous is a big deal. And it’s even a bigger deal when the spontaneity involves spending money, too.
So you can imagine Jesse’s surprise the other night when he walked in the door and I met him at the door beaming to tell him my surprise, “Honey, I bought something today. And it wasn’t something I needed and I didn’t even have it on my list.”
You should have seen his shocked expression. Like who are you and what have they done with my wife??
“Guess what it was?” I went on.
He had no idea — or maybe he was just still reeling from amazement at my wild side. 😉
I finally spilled the beans, “I bought a candle at Hobby Lobby!”
We both had a good laugh at me as I proceeded to tell him how I had stood there in the Hobby Lobby check out lane with my one item that I’d gone in to purchase and then I’d seen the fall candles on display. I love candles — especially fall candles — and they were on sale, too.
It was everything against my nature to even consider buying one when it wasn’t on the list. But I reminded myself that I had plenty of blow money and that it would make our house smell good. And I reminded myself of how I’ve been trying to not be so tight-fisted when it comes to occasionally spending money on little things that would make me happy.
After a lot of inner dialogue at the checkout lane, I finally talked myself into paying a whole $1.99 for that candle. Y’all I think I just might be getting a spontaneous streak or something. 😉
P.S. Please tell me I’m not the only one who agonizes over a $1.99 purchase that’s not on the list. I’ve always been like this and I think some of us might just be born Frugal Weirdos. And yes, the Spenders just don’t get us… but we sure help save them a lot of money! 🙂
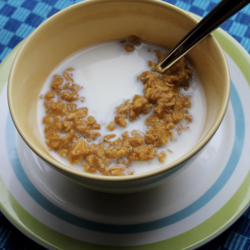
Looking for an easy yet hearty breakfast that will keep you full all morning while packing lots of delicious fall flavors? This Pumpkin Pie oatmeal is just what you need!
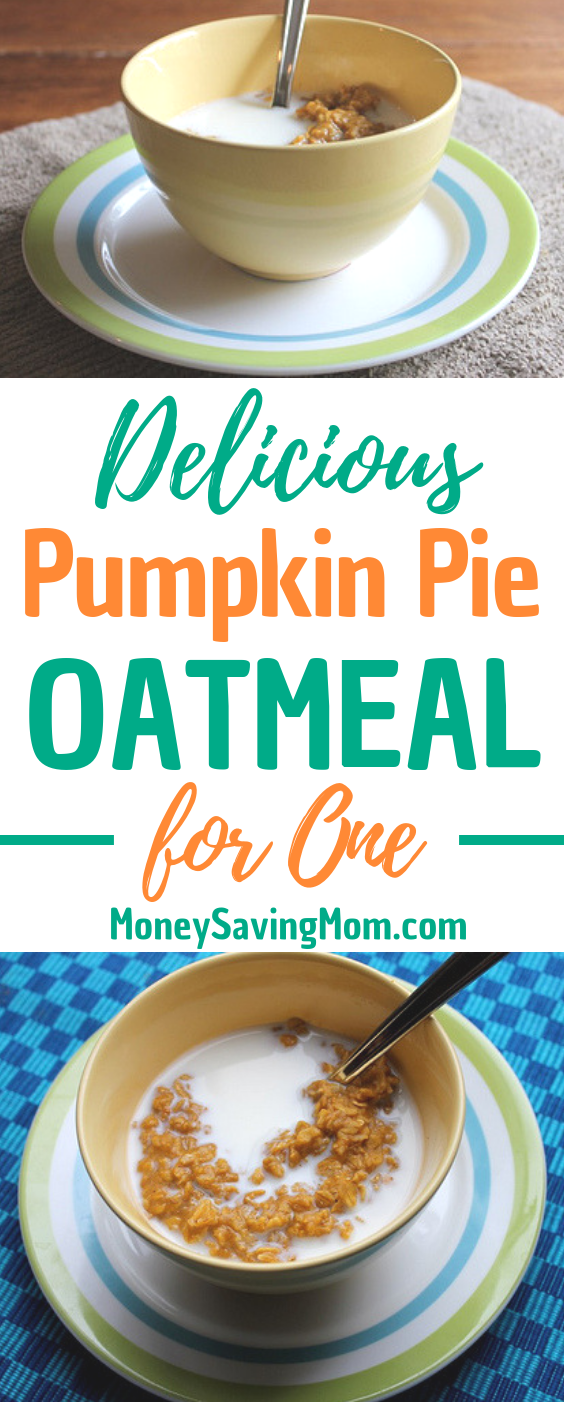
It was very simple to make — and it was very filling, too. Best of all, it is packed with lots of nutrition… the perfect way to start off a crisp fall morning!

**Note, this recipe makes enough for one serving… but it can be easily adapted for a larger crowd by tripling, quadrupling it — or multiplying it by even more.

1. In a small saucepan, mix oats, milk, water, and spices together.
2. Bring mixture to slow simmer.
3. Stir in the pumpkin and cook until done (approximately 3-4 minutes).
4. Scoop into a bowl and sprinkle with sugar or drizzle with honey or maple syrup and serve warm with milk.


Make sure to share and save it on your favorite platform below!
What are your favorite creative twists on regular oatmeal? I’d love to hear!
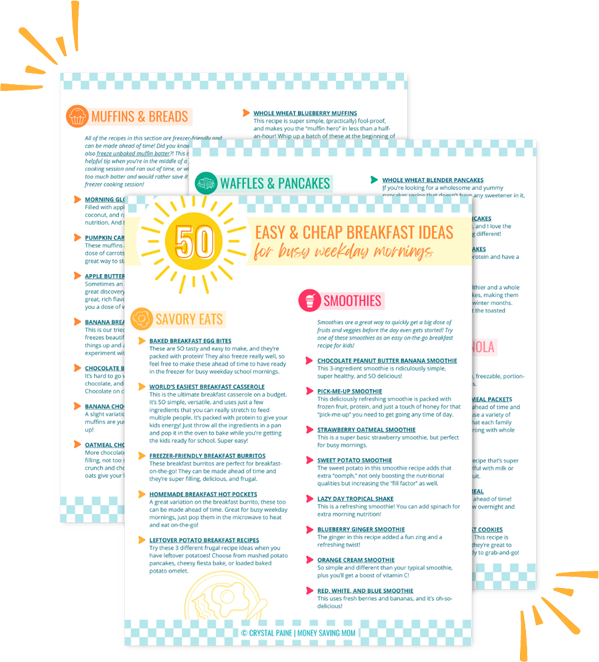
Mornings just got so much easier with this FREE list of 50+ Easy & Cheap Breakfast Ideas for Busy Weekday Mornings!

Guest post from Jenetta of Frugal Freebies and Deals
I started my gluten free journey four years ago. It was for health reasons. A couple years after I started eating GF we adopted two girls with special needs due to trauma. My doctor immediately recommended putting them on a GF which was no problem.
But about a year later, she recommended removing dairy and corn. Not corn! We live off corn, I thought, and it is in everything.
But I knew I could do it. I was good at the whole GF thing so I could be good at this, too.
If you are new to any dietary restriction I know where you are at. Just the diet change part makes you want to throw in the towel but adding in the “new budget” aspect is enough to make you want to go over the edge. I was there walking out of the health food store with the tiniest bag of groceries ever… and I paid $100 for it.
Plus, I knew I would need to come back and do it again in 3 days! Talk about frustration.
However, I have come up with some tricks to keep your budget in check. We keep our monthly budget for four (mind you the girls are just 6 and 7) at between $200-250 a month without a lot of coupons.
Here are some things that help us:
This will be different for everyone. For me, it took thinking about my food and what I really enjoy about it. Unless bread is really good I don’t care for it much, so I started eating burgers and sandwiches as more of a salad or lettuce wrap.
Stop trying to replace the food from your former diet with equal non-allergenic counterparts. Instead, start thinking outside the box for new, less expensive (and maybe more nutritious) foods.
This sounds like a lot, but I have around 20 possible stores I shop at. Weekly, I try to shop at 3-4 of them.
The health food store might have markdowns on GF bread, non-dairy milks, and yogurt. Local grocery outlets have lots of cheap GF, dairy-free, and corn-free items. We have the $0.99 Only chain in our area and I routinely pick up organic produce and non-allergenic snacks for $0.99 (this store is on my weekly route). Local Asian markets sell GF pasta and flour for around $1.
This trick is going to be individual to you and your area. You need to remember that deals change often so you will have to be willing to buy what is available.
This is my biggest money-saver. You need to have money set aside for stock-ups.
If I find boxes of non-allergenic organic granola bars at the $.99 Only Store, I can purchase 20 boxes because I have stock-up money set aside. That deal is not going to last and it might be a while before such a good deal comes up again.
This goes for meats, flours, anything that you find at great price. Buy as much as you can use, afford, and store.
You don’t always get the best deal online, but there really are some finds. We try to eat a lot of grain-free meals, so we eat a good amount of nuts.
Recently I bought 30 pounds (yup) of pecans online because they were 1/3 of the price I can get them locally. They just went in the freezer and are already half gone. Vitacost, Amazon, and even Ebay are good sources for occasional great prices.
Don’t feel like you have to suffer. There are wonderful recipes online for GF and other dietary restrictions. You can even try making nut milks and then use the nut pulp for baking.
Those are the tricks I use to keep our allergy-free diet in line with our budget. You can use these ideas for any type of similar diet. I know you can do it.
Jenetta is a wife and mother of 2 daughters adopted from foster care. She blogs over at Frugal, Freebies and Deals as well as Thrifty Wifey.

Breakfasts
Homemade Instant Oatmeal Packets, Cereal, Toast, Eggs, and/or Fruit
Lunches
Lunch at church function
Snack-y lunch, fresh carrot/orange juice
Mac & cheese, veggies, fruit
Cheese Quesadillas, oranges, carrot sticks
Corn Dog Muffins, veggies, fruit
Leftovers x 2Snacks
Fruit/Veggies
Cheese/Crackers
Pumpkin RecipesFreezer Cooking
Dinners
Dinner with extended family
Taco Soup, Bread Machine Buttery Rolls, fruit, veggies
Homemade Chicken Salsa Pockets, fruit, steamed veggies
Steak, Twice-Baked Potatoes, Steamed Veggies, Fruit
Keilbasa/Potatoes/Carrots/Onions in the Crockpot, Soft 100% Whole Wheat Dinner Rolls, fruit salad
Dinner with friends
Dinner with extended family
What’s on your menu this week? Share details and/or your link to your menu plan in the comments.

Guest post from Chelsea of Stay-At-Home{MADE} Mom
Planning a birthday bash every year for every child can be exhausting, hard on the budget, and leave us with cluttered boxes of party supplies and toys. So in order to simplify, my husband and I adopted the birthday tradition he grew up with. We have chosen to throw only four large birthday parties for each of our children – 1st, 5th, 10th, and 16th.
During the years that we don’t throw a large party, we will have a simple cake and ice cream celebration with family. We also plan to implement a couple more traditions (like their favorite dinner or breakfast in bed) to make their day more special.
So whether you choose to throw an extravagant party every year or not, here are five more ways you can save money and simplify.
Instead of buying princess everything, buy one princess product to branch off. For example, you can buy a princess cake, but choose to buy paper products in a solid pink. Or, buy princess plates, but make a simple cake at home and decorate it inexpensively.
Make a birthday banner by hand with pictures you scored for pennies. Sprinkle color-coordinating confetti on plain table cloths. Blow up balloons that double as décor and a game. Save leftover decorations for future parties or donate them to a family who can’t afford their own.
While it’s tempting to invite everyone you know, it’s best to have enough space and food for everyone. It’s important to figure out how many people you can realistically afford to host and stick to that number.
In my opinion, party favors aren’t even essential, but if you want to provide them, keep it simple! Kiddos don’t need an entire bag filled with trinkets and candy. Some of my favorite ideas are cellophane-wrapped chocolate-dipped Oreos, a boxed cupcake, or some fun pencils tied with a ribbon.
If family members or close friends come to you for gift ideas, consider suggesting that they “go in” with you on a bigger gift. A new bike, zoo memberships, a telescope, or something else that you know would get a lot of use. I find that most people are very open to this idea since it saves them the hassle of finding and wrapping a gift.
However you decide to celebrate, when it comes down to it, there are only a few things a child truly wants on his or her birthday:
If you accomplish those three things, whether frugally or elaborately, it will be a memorable day. Find what works best for your family, and enjoy celebrating one another!
Chelsea is a blessed wife, mommy, and child of God. In her free time, she loves crafting, cooking, and blogging at Stay-At-Home{MADE} Mom about her budget-friendly creations.

Reader tip from Amanda who blogs at Simple Revelations:
I love my slow-cooker. Soups, casseroles, meats, bread, breakfast — what’s not to love about a contraption that can do it all, and save me time?
One of my favorite money-saving crockpot recipe is Shredded Chicken. It’s a lean, protein-rich basis for meals and it only requires around 10 minutes of active involvement to make.
Plus, depending on where you live, you’ll probably be able to find chicken breasts for around $2 a pound. Compare that to the typical $7 a pound for deli lunch meat, and you’re saving a bundle on sandwiches using chicken salad on your sandwiches instead of deli-bought ham or turkey.
How To Make Shredded Chicken in the Crockpot
- Purchase a large package of boneless, skinless chicken breasts
- Put as many as you like (I’d do 10 or so) in your slow-cooker, cover with water (boiling water if they’re frozen, to get them cooking faster) and sprinkle with a few seasonings. I often use a dash each of lemon pepper and Montreal chicken seasoning
- Cook on high for 4 hours or so, or low for 6 hours or so, until they are cooked through and literally falling apart at the touch.
- Remove the chicken from the slow cooker and put in a large pan.
- Shred with 2 forks.
- Let cool and store in the refrigerator for use all week long.
Variations: During cooking, substitute the water out for your favorite BBQ sauce or green salsa, and use the meat for BBQ chicken sandwiches/pizza, or a tender and flavorful fajita meat. This is great for dinner guests when you don’t have lots of time to prepare.
Ways to Use Shredded Chicken
Use your supply of shredded chicken for lunches and dinners throughout the week. Some favorite meals ideas are:
- Soups (chicken noodle, Matzo ball, coconut chicken, buffalo chicken soup)
- Waldorf Chicken Salad (to eat as salad, sandwich, or wrap)
- Chili
- Avocado-bound Chicken Salad
- Fajita/Enchilada/Taco meat
- Pizza topping
- Buffalo Chicken burgers (just mix the meat with a good dash of Frank’s Red Hot sauce, to taste)
- Salad topping
- Quesadilla filler
- Any other recipe that calls for cooked chicken
What’s your favorite way to use the slow-cooker?
Amanda Dykes is a historical romance author who aches to share God’s grace. She’s a spastic shutterbug, unabashed word nerd, and lover of truthful writing that resonates. She can be found scribbling words on her blog and her online Christian Fiction Book Club.

Note from Crystal: Thanks so much for joining me for the Lunchbox Freezer Cooking series. It’s been a fun adventure! For the last post in this series, Michelle from The Willing Cooking is sharing an allergen-free recipe for those of you who have food allergies in your home.
Guest post from Michelle of The Willing Cook
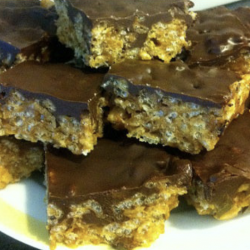
A good friend of mine makes Peanut Butter Scotchies on occasion — a delicious and calorie-loaded recipe. I have had the pleasure of indulging myself in this treat a few times, and let me tell you, there is a reason why she doesn’t make them very often. 🙂
Since we have wheat, dairy, egg, soy, corn, and a few other allergies at house, I would be the only one who could eat Peanut Butter Scotchies if I made them. While I’m sure I can enjoy an entire pan of these bars, I certainly don’t need to. So, I embarked upon a mission to make an allergen-friendly (and a little healthier) version that my family can share with me.


My first attempt at these bars, while delicious, almost sent us on an emergency dentist trip because they were so hard. I couldn’t leave them alone though — the taste was amazing! After a bit more tinkering, I finally got the recipe down and I’m thrilled to share this recipe with you today.

(makes a 9″x13″ pan of bars)
These bars are so good, you’ll never guess they were allergen-free!
Michelle is blessed to stay home with her three children (ages 10, 7, and 4), while her husband works to provide. When she’s not experimenting with allergy-friendly meals, she’s blogging about it at The Willing Cook. Through the Willing Cook, her hope is that you gain peace of mind in your kitchen (and your pocket book) and are able to serve those you love who suffer with food allergies.
Are you joining us for Lunchbox Freezer Cooking? If you’ve blogged about a lunchbox recipes you’ve made for your freezer, leave a link to your post and recipe below. I can’t wait to see your yummy recipes and ideas!

I don’t know about you, but I am so excited that it’s finally fall. It’s my very favorite season of the year for a lot of different reasons, one of which is that pumpkin is in abundance!
In celebration of the beginning of fall, I’m going to be featuring A Week of Pumpkin Recipes starting on Monday. I’ll be trying quite a few new recipes and can’t wait to share photos and details of how they turn out!
Can’t wait until Monday for pumpkin recipes? Check out Andrea’s Pumpkin Recipes round-up post. And you can also get a sneak peek at some of the recipes I’m considering making over on my Pinterest page.

As you well know, I tend to be just a little bit frugal. Er, well, maybe more like a lot frugal. My husband says that if I were left on my own, I’d never spend any money on myself. I love to spend money on others, but when it comes to me, I’ll just keep using and re-using whatever I already have.
That’s not always a bad thing… especially considering all of the money it has saved us over the years. Sometimes we lose sight of just how much these simple things we do really benefit our lives. And it’s time that we celebrated the simple savings!
Welcome to Frugal Photo Friday! For the next month I am partnering with Rebekah from SimplyRebekah to bring you a fun series dedicated to inspiring others and celebrating our simple savings. We’ll be sharing photos each Friday of simple ways that we save money. And we’d love for you to join us!
How it will work:
Each Friday in October Rebekah and I will share pictures on our blogs that demonstrate ways that we save money. At the end of our posts we’ll have a link-up where you can share a link to your own blog post. Your Frugal Photo Friday post should include at least one photograph along with a brief caption or story that explains how you saved money.
We will have themes for each Friday. Feel free to share photos that fit either of the themes for that week.
October 5 – Kids, Bath & Beauty
October 12 – Food & Fun
October 19 – Home & Decor
October 26 – Anything Goes!The Details:
- No blog? You can also share your pictures on Twitter or Instagram using the hashtag #FrugalPhotoFriday.
- Frugal Photo Friday posts will go live on Friday mornings and the link-up will stay open until Sunday night at 11:59 PM.
- You will only need to share your link on one of our blogs and it will automatically be displayed on both blogs.
- Please link directly to your Frugal Photo Friday post and not to your homepage.
- Feel free to grab the Frugal Photo Friday button to use in your post.
- Please include a link back to Money Saving Mom or Simply Rebekah in your post so others can be encouraged by all the savings.
- There is no time limit on your savings. We want to see things that saved you money this week, last month, last year, or beyond!
To kick things off, Rebekah and I are each sharing a photo of a simple way we save. Here’s mine:
 Making Starbucks at Home
Wait, you don’t think Starbucks coffee is frugal? Well, let me tell you, it’s a whole lot cheaper to make your own Starbucks at home then to buy it at the coffee shop.
Sure, I’d save even more money if I gave up coffee altogether. But brewing my morning cup puts a smile on my face. I sit and savor it — and it just starts my day off on the right foot.
After lots of practice, I’ve learned how to make coffee at home just exactly how Jesse and I love it. In fact, we both agree that I can brew a better cup of coffee than any coffee shop we’ve visited.
So not only have we saved a lot of money by making coffee at home, we just plain think the coffee we make at home is better. Win-win!
Head over to SimplyRebekah for her photo and tip on how she saves money on gift wrap.

These roll-ups are something fun and a little different to include in those school lunches. They also are an attractive, can’t-go-wrong addition to any table of finger foods.

Guest post from Brigette Shevy
This “recipe” is so simple that I don’t think it can even be called a recipe.
This is a great basic idea to be creative with. Sometimes I add chopped olives or flat leaf spinach for more variety and color (just make sure you don’t add anything wet or bulky). You can also make these up several hours (up to a day) in advance and keep them covered in the refrigerator until you are ready to serve them (although I can’t vouch for the make-ahead factor if you’ve added in extra ingredients).
I make these look a little more like “pinwheels” (or flowers, or windmills, or whatever you think they resemble!) for my children’s lunches at home by arranging them with apple/orange slices and a carrot stick (see photo below). They love it! So much so, that I gave up on trying to get a photo I was happy with – it was just too traumatizing for my 19-month old to see “his” lunch and not be allowed to touch it. 🙂

They should stay secure without a toothpick.


Make sure to share and save it on your favorite platform below!
Meal time just got so much easier!
Brigette is a full-time wife and mother who is blessed with three amazing bundles of energy (ages 5, 3 and 1). She enjoys music, experimenting in the kitchen, homeschooling her children, finding great deals, long-distance running, and anything chocolate.

I find a lot of great ideas on Pinterest… but pinning something doesn’t do anything unless I actually, you know, try the idea. So I thought it’d be fun to challenge myself to do at least one Pinterest experiment every week — and blog my results. You can follow my personal Pinterest account here, if you’re interested.
Update: So it looks like this isn’t really that effective of a cleaning agent after all, according to this post. You’d probably just be better off sticking with vinegar or baking soda.
I saw this recipe for Homemade Toilet Bomb on Pinterest and knew I had to try it. It just looked plain fun — plus, it looked so simple.
Well, apparently I forgot what I had learned back in grade school about the reaction you’ll get when you mix baking soda and vinegar. Um, yup, I ended up getting my toilet and my kitchen table cleaned out of the deal. 😉

Truthfully, the recipe worked great, but I think it would work just as well to scrub the toilet with baking soda and/or spray it with vinegar. But if it makes you feel better to clean with something that looks kind of like Scrubbing Bubbles (versus straight vinegar or baking soda), then this is your recipe.
But learn a lesson from me: either mix it up in a big container, directly in the toilet, or cut the recipe in half. 😉
1/4 cup baking soda
1/4 cup white vinegar
5 drops essential oil
Mix together in a large container, dump into the toilet, and scrub away. 🙂
Original recipe from How Does She
Have you tried any ideas or recipes you’ve found on Pinterest recently? If so, I’d love to hear how they worked out for you. Feel free to leave your blog link in the comments if you blogged about your experiment!
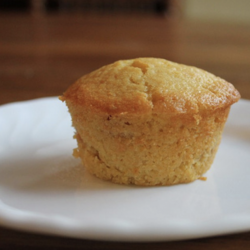
Looking for a fantastically frugal and delicious lunch or after-school snack for your kids? Try these quick and easy corn dog muffins!

There’s a big debate over whether or not corn bread should be sweet or not… if you’re in the camp that says it should not be sweet, then this recipe probably isn’t for you. 🤣
But if you love a good piece of sweet, moist cornbread, you have got to try my World’s Best Honey Cornbread recipe. Because you know I don’t dub something “world’s best” unless I believe in all sincerity it is.
I took that cornbread recipe and used it to make these easy and delicious “Corn Dog Muffins”, which are basically just a much easier way to make homemade corn dogs.
You don’t get to eat these on a stick like a typical corn dog, but the taste is exactly the same.
Last time I made Corn Dog Muffins, I put in a big chunk of beef hotdogs in the center of each muffin.

I decided I wasn’t completely sure that I loved that idea, so this time, I cut the beef hotdogs into chunks and then put a spoonful of batter on the bottom of the muffin tin, some chunks of beef dog, and topped it with another spoonful of corn bread batter.
The results were delicious and kid-approved!


1. Preheat oven to 400 degrees. Grease a 12-cup muffin pan and set aside.
2. In a large bowl, cream sugar and butter.
3. Add in eggs, honey, and milk and mix well.
4. In a smaller bowl, mix flour, baking powder, corn meal and salt.
5. Carefully stir dry ingredients into wet ingredients (Do not overmix — the batter will be lumpy.)
6. Put a large spoonful of batter at the bottom of each muffin cup..
7. Spoon several chunks of hotdogs over the batter.

8. Cover hotdogs with another spoonful (or two) of batter.

9. Bake in preheated oven for 10-12 minutes, or until cooked through.


Make sure to share and save it on your favorite platform below!
Are you joining us for Lunchbox Freezer Cooking? If you’ve blogged about a lunchbox recipes you’ve made for your freezer, leave a link to your post and recipe below. I can’t wait to see your yummy recipes and ideas!
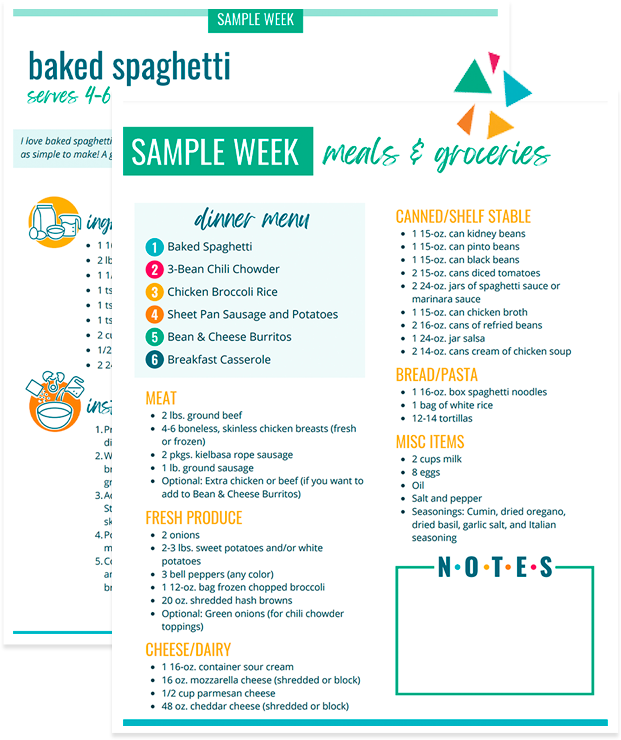
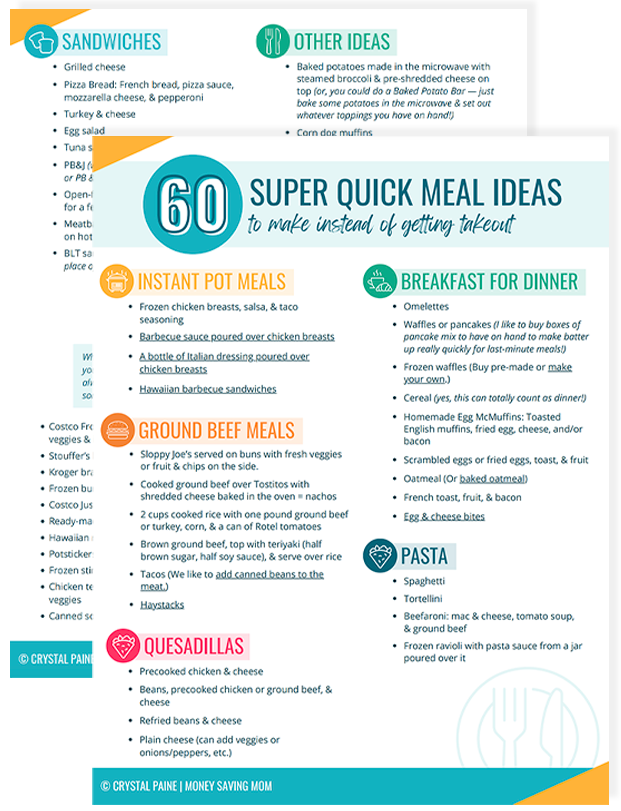
Done-For-You Dinner Recipes With Simple Ingredients and a Grocery Shopping List!

