


This Cheeseburger Meatloaf recipe is such a yummy, easy-to-make comfort meal!

Cheeseburger Meatloaf
Meatloaf is one of those comfort foods that everyone looks forward to eating. It’s also a great make-ahead meal that’s easy to throw in the oven on a busy weeknight or dress up a little for weekend dinner guests.
Why You’ll Love Meatloaf with Cheese
For starters… who doesn’t love the idea of pairing classic meatloaf with cheese!?! Delicious!
It’s a great way to enjoy ground beef when it goes on sale.
Cheese Meatloaf Ingredients
- 1 lb. ground beef
- 1 cup shredded sharp cheddar cheese
- 3/4 cup uncooked old-fashion oats
- 1/2 cup milk
- 2 Tbsp. minced onion
- 1 large egg
- 1 tsp. Worcestershire sauce
- 1/2 tsp. salt
- 1/2 dry mustard
- 1/4 tsp. garlic powder
- 1/4 tsp. pepper
- 1 cup BBQ sauce
How to Make Cheeseburger Meatloaf
1. Preheat oven to 350ºF.
2. In a large bowl, combine all ingredients except BBQ sauce. Stir just until blended.
3. Shape the mixture into a loaf, and place it in an ungreased 8×4-inch loaf pan.
4. Bake in preheated oven for 30 minutes.
5. Pour BBQ sauce over the meatloaf, and bake another 15-30 minutes, or until meat is no longer pink in center.
6. Let stand for 10 minutes.
7. Drain grease off meat and cut into 8 slices.
How to Make Cheese Burger Meatloaf Ahead of Time
If you use ground beef that has not yet been frozen, you can freeze this uncooked. When you’re ready to eat, thaw, and follow the instructions above for cooking.
If your ground beef has already been frozen, bake the meatloaf without sauce on top, then freeze. When you’re ready to eat, thaw the meatloaf. Pour sauce on top and heat in oven until hot.
Cheeseburger Meatloaf Recipe Variations & Substitutions
For a different taste, use half ground ham or ground turkey.
You can also mix up the seasonings you add to the meat mixtures — as well as the sauces you pour over the top. Try Chili sauce, Ketchup, or even salsa.
And you can use a variety of cheeses too.
Tips for this Meatloaf Recipe with Cheese
How to Serve Cheese Burger Meatloaf
One of my favorite things about meatloaf is how versatile it is. You can really change the feal of the meal based on what you serve it with.
Go with mashed potatoes and veggies for a more classic meal, or serve it sliced on toasted homemade bread for a delicious meatloaf sandwich.
Serve it with baked beans, a salad, and potato chips for a summery meal, or go with scalloped potatoes and roasted veggies for winter comfort food.
How to Store Cheese Meatloaf
Refrigerate or freeze leftover slices and enjoy for lunches throughout the week.

Cheese Meatloaf
Ingredients
- 1 lb. ground beef
- 1 cup shredded sharp cheddar cheese
- 3/4 cup uncooked old-fashion oats
- 1/2 cup milk
- 2 Tbsp. minced onion
- 1 large egg
- 1 tsp. Worcestershire sauce
- 1/2 tsp. salt
- 1/2 dry mustard
- 1/4 tsp. garlic powder
- 1/4 tsp. pepper
- 1 cup BBQ sauce
Instructions
- Preheat oven to 350ºF.
- In a large bowl, combine all ingredients except BBQ sauce. Stir just until blended.
- Shape the mixture into a loaf, and place it in an ungreased 8×4-inch loaf pan.
- Bake in preheated oven for 30 minutes.
- Pour BBQ sauce over the meatloaf, and bake another 15-30 minutes, or until meat is no longer pink in center.
- Let stand for 10 minutes.
- Drain grease off meat and cut into 8 slices.
Notes
Nutrition
Love this recipe?
Make sure to share and save it on your favorite platform below!
Cheeseburger Meatloaf Recipe FAQs
Use beef with a slightly higher fat content (around 15%) to keep your finished meatloaf moist. Also, if your recipe calls for breadcrumbs, use fresh as stale breadcrumbs can absorb a lot of moisture.
The egg is key in keeping your meatloaf together. The oats will also help as well.
If you’re planning to use a loaf pan, glass or ceramic are best. And if you like your meatloaf to have a caramelized “crust” it’s a good idea to use a larger 9 x 13 pan so the grease drains away from the meatloaf.
You can use oatmeal (like this recipe calls for). That’s a great gluten-free option. You can also used cooked rice, crushed cracker crumbs, crushed pretzels, or even crushed cornflakes.
One reason meatloaf might burn is if you’re using a sauce with a lot of sugar content. If so, add your sauce in the last half of the cooking time (like we suggest in the recipe above). Also, make sure you’re using a quality pan, and keep your meatloaf on the middle rack of the oven.

Freezer Cooking Day: Prep Work, Blueberry Pancakes, and oops, we ran out of bowls!
Freezer Cooking Day: Prep Work, Blueberry Pancakes, and oops, we ran out of bowls!
How’s the Freezer Cooking Day going at your house? My sister Gretchen, came to help me and we began our cooking around 9:15 a.m.
(After I made out my plan, I started panicking a little because I wasn’t sure how I could pull off making 25 meals in five hours with three little children underfoot. So I “bribed” my sister to come by telling her I’d send some of the food home with her so she wouldn’t have to cook as much in March! I’m sure she would have come without the bribe–because she’s nice like that–but I’m sure the bribe didn’t hurt anything!)

I got started on the Prep Work list while Gretchen started in on making the Butterhorns since those are a little more time-intensive.

We decided to double the Butterhorn recipe, which probably wasn’t the best idea seeing as it made a massive amount of dough and was a little hard to knead and work with. But she managed to pull it off.
While the dough was rising, Gretchen finished mixing up the Blueberry Pancakes. I already had the dry ingredients mixed up for her, so she just had to add in the wet ingredients. I told her to let me know how many eggs the recipe took since we were running short on eggs and I wanted to make sure we had enough to go around. That’s when we both realized the recipe didn’t list eggs as one of the ingredients (Do you see eggs listed here? Are we going blind?)

I finished up all the Prep Work and then got ready to make the Cheeseburger Meatloaf. Only there was one big problem: we realized that my two big bowls were up on top of the refrigerator with dough rising in them. So there was nothing for me to mix up the meatloaf in. Oops. I guess that I’m not really set up for this two-people-working-in-the-kitchen thing. Maybe I should look for some more big bowls the next time I’m at the thrift store?
Since I couldn’t sit around and wait for the dough to finish rising, I finally opted to mix up the meatloaf in a 9×13 pan. It worked, albeit not quite as great as a bowl would.

Next up: Brown-Bag Burritos and Chicken and Red Bean Burritos
Freezer Cooking Day: Grocery Shopping
I’m so excited about Freezer Cooking Day! I’m ready to fill up our getting-close-to-empty freezer again!

To start things off, here’s a picture of all the groceries we bought for Freezer Cooking Day. All totaled, we spent $64.61. It seems a little high but considering about $20 of that was spent on meat and $12 on tortillas, I’m happy with it. And I felt even better when I realized that all of that coupled with the food we already have on hand should make about 25 dinners for our family.
However, next time around, I’m going to try and do a better job of buying more groceries ahead of time because I hated paying full price for a few of these items that I know I can often get for pennies on the dollar if I plan ahead. I haven’t done a good enough job recently of following my own advice to Buy Ahead, I guess!
I’ll be back later with an update on our progress.
Super Savings Saturday

We didn’t do much shopping at all this week aside from a quick trip to the store for milk and ice cream (the essentials, you know!). Some friends of ours made a trip to a nearby town’s bulk foods store and picked up some unbleached flour, sucanat, and turbinado for us as well. And that was the extent of our shopping.
So all totaled, we spent less than $20 on groceries this week bringing our total spent for the month a little shy of $160.
We’ll be doing a big stock-up trip for our Freezer Cooking Day and I’ll post about that on Monday, along with our Freezer Cooking Day play-by-play.
___________________________________________
 Did you snag any great deals or bargains this week or save money in other ways? If so, be sure to post about them on your blog and leave your link below. Please remember that this weekly round-up is to share deals you personally got and/or money you were able to save this week. In order to keep this weekly round-up focused on helping and inspiring others in their efforts to save money, links which have little-to-no content other than promoting affiliate links, etc. will be deleted. Also, to make it easy for everyone to navigate quickly through the links, your link must link directly to your Super Savings Saturday post.
My Freezer Cooking Master Plan (and come link up yours, too!)

Are you ready for another Freezer Cooking Day? Since I only did a smaller Freezer Cooking Day last time around, our freezer is especially empty right now. So I’m very excited to get it filled up again!
Here’s the Master List of recipes I plan to make:
–Cheeseburger Meatloaf (recipe from Busy Moms Weeknight Favorites
cookbook)
–Chicken and Red Bean Burritos (recipe from The $5 Dinner Mom Cookbook
)
–Lemon Chicken (recipe from The $5 Dinner Mom Cookbook
–White Bean and Chicken Chili (recipe from Eat Well, Save Big Cookbook)
–Taco Meat
–Make Ahead Butterhorns
I found some extra recipe inspiration from a few new cookbooks I’ve received in the mail recently. But not all the recipes are completely new to us, in fact, the Make-Ahead Butterhorns are one of our family’s favorite rolls ever. The recipe is a little time-consuming, but SO worth it. I’ll share it on Monday along with pictures and details on how our cooking day goes. And don’t forget to come back on Tuesday to link-up your post(s) about your cooking accomplishments.
If you’re new to Freezer Cooking, be sure to check out my post on How to Plan a Freezer Cooking Day and FishMama’s post on Making Freezer Cooking Work for You.
Are you participating in March Freezer Cooking Days? If so, post about your cooking plan on your blog and then come back here and leave your direct link below so we can all be inspired! Please note: links which do not link directly to your freezer cooking post or which do not contain your freezer cooking plan will be deleted.
Make Freezer Cooking Work for You Even if You Don’t Like Casseroles
Make Freezer Cooking Work for You Even if You Don’t Like Casseroles


Guest Post by Jessica from LifeAsMom
Freezer cooking has been touted as a great way to save money, time, and energy. Also known as Once-A-Month Cooking (OAMC), it offers the home cook a respite from daily kitchen tasks as the freezer is stocked with an assortment of pre-made frozen meals. Since freezer cooking involves one large grocery shopping trip, often buying items in bulk at a reduced rate and then cooking the meals all at one time, this method of meal planning can produce great savings in the pocket book and on the schedule.
Typically when people think of frozen meals, images of stacks and stacks of casseroles come to mind. But, what if you don’t like casseroles? Or what about that small freezer of yours? Thirty meals are not going to fit. Maybe you just like having some flexibility at dinnertime and don’t want to commit to a 30-day meal plan. You might think that freezer cooking’s just not for you.
Au contraire!
You can still reap the benefits of bulk buying and bulk cooking without having to eat Lentil Sausage Surprise for the next month or having to buy a deep freeze. You can have your freezer meals and be creative, too.
Freezer cooking is ultimately making your own convenience foods, tailored to your family’s budget, size, and tastes.
You can easily adapt the standard “OAMC” methods to your own preferences. Think about the meals you regularly prepare and then consider how to make part of that meal ahead of time.

Prepare “dinner kits” for easy to assemble meals such as tacos, burritos, or pizza. Cook and season the meat. Portion the cheese. Cook and season dry beans. Cook up a pot of rice. You can even mix up the pizza dough. Package each of these components in meal-size portions and place all the bags for a certain meal in a larger bag. Be sure to include tortillas. Label and freeze. The work is practically done for you come dinner time. You can easily make kits for sloppy joes, hamburgers, or chili dogs. Just prepare all the components and stash them in the freezer.
If you’re pressed for space in the freezer, you may not have room to bundle each component. Instead, store the items in the best space-saving way and keep track of what you have.

Love to cook outside? Is your family a bunch of meat eaters? No problem. Trim your cuts of meat, season or marinade and seal in a ziptop bag. Label and freeze. On the day of serving, dump the roast in the crockpot, arrange the chicken in a baking pan, or throw the steaks on the grill. Your dinner prep is half done! Add a side dish and a vegetable and you’re good to go.

Assemble baking mixes for pancakes, muffins, scones, biscuits, brownies, or quick breads. Label a ziptop bag with the recipe name, list the wet ingredients to add later as well as the baking instructions. Measure out the “dry” team into the bag, seal it, and store in the pantry for later use. You’re halfway to homebaked goodies which will be tastier and less expensive than store bought mixes.
Freezer cooking is very adaptable to however you like to feed your family. With a little creative thinking, you can most definitely make freezer cooking work for you. Ready to get started? Check out this step-by-step freezer cooking tutorial.
What is the biggest challenge for you in making freezer cooking serve you best at dinnertime?
— Jessica Fisher, also known as FishMama, regularly feeds her freezer so that she can feed the hungry masses who call her “Mom.” She posts daily about life’s joys and challenges at LifeasMOM and shares delicious ways to act your wage at Good Cheap Eats.
How I Plan My Freezer Cooking Day + Free Planning Worksheets!

Planning is key in pulling off a successful Freezer Cooking Day. Believe me, I’ve tried winging it before and it just doesn’t work. Many of you have asked questions on how I actually go about planning a Freezer Cooking Day so I thought it’d be fun to share a little peek into my planning process this time around:
1) Shop The Cupboards
I always start my planning by opening up my cupboards, refrigerator, and freezer. I’m always amazed at how much inspiration I find just from the ingredients I already have on hand.
Jot down a list of ingredients you already have to work with and possible recipe ideas as you go along. If you have an odd assortment of ingredients and are stumped for ideas, check out the Ingredient Search feature on AllRecipes.com.

To give you an example, I went through my cupboards and freezer this morning and found the above ingredients: canned tomatoes, whole-wheat pasta, and cream cheese. I immediately remembered FishMama’s lasagna and added that to my list.
2) Consult The Sales Fliers
If your cupboards don’t produce enough ideas or recipe fodder to work with, the next step is to consult the sales fliers. I often combine both the ideas from my cupboards and what is on sale to make up my Master List of Recipes.

3) Make A Master List and Grocery List
Take the recipe ideas you jotted down and narrow them down to 4-10 different final choices (or more, if you want to be a SuperWoman like FishMama!). Shoot for some variety in the main dishes you choose (I doubt you want to eat three weeks of nothing but chicken casserole!) and keep in mind how much time each will take. I usually try to pick a few simple meals and a few more time-intensive dishes.
Once you have your Master List of Recipes, read through each recipe and note what you’ll need to buy at the store. Since you’ll likely need duplicates of many items, you can just write onions and then in make a mark next to them as you go through the recipes for how many onions you’ll actually need. Like this:
Onions – I I I I (this means I’ll need to buy 4 onions)
Cheddar Cheese – I I I I I I I (this means I’ll need to make sure and have enough to shred seven cups of Cheddar cheese)
And so forth…
If your list starts to get really messy and you’re afraid you might not be able to decipher it when you’re shopping, re-write it on a clean sheet of paper once you’re finished with the rough draft.
Match up any coupons to items you’ll be buying and put these in an envelope along with your final Grocery List.
4) Make a Freezer Cooking Day Prep List
Once your grocery list is completed, go through your recipes and quickly write down what things you need to prep in bulk next to the recipe. These would be things like shredding cheese, chopping onions, browning ground beef, cooking and chopping chicken, and so forth.
For instance, if I were doubling the lasagna recipe, I would write it like this:
Lasagna x 2 — recipe on LifeAsMom.com
Brown 2 pounds of ground beef, Grate 24 ounces of mozzarella cheese
I might have three other recipes which also take browned ground beef and four which take mozzarella cheese. So once I’ve written the prep work next to each recipe, I can make a Master Prep List which combines all the prep work for all the recipes together.

My Prep List for next week’s Freezer Cooking Day.
I recommend then also making a final Master Plan which includes the order of events for your Freezer Cooking Day. First, you’ll do all the items on your Master Prep List and then you’ll actually put together all the meals. You’ll save a lot of time and effort by doing all the prep work first. And when you get to the actual putting together of recipes, you’ll just fly through them.

My Master Plan for next week’s Freezer Cooking Day.
I always try to put the most time-intensive recipes first and the easiest recipes at the end. That way, if I’m starting to drag halfway through the cooking, I know that I’ve saved the easiest for last and it gives me renewed energy!
So there you have a simple explanation of how I plan a Freezer Cooking Day. My planning method might not work for you at all, but hopefully it will give those of you who are completely new to cooking in bulk some inspiration and ideas to get started.
Free Downloadable Freezer Cooking Day Planning Worksheets
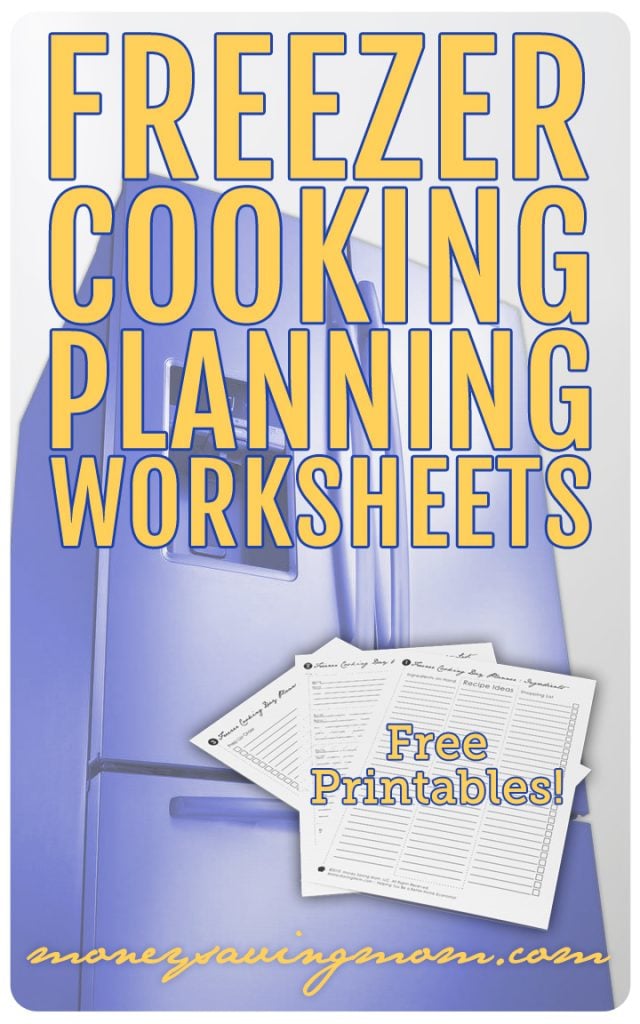

Just for fun, I asked Joy to put together some free downloadable Freezer Cooking Planning Sheets which you are welcome to use, if you find them helpful. I’ve always used a simple notebook in the past, but I’m excited to finally have something a little snazzier to use.
A) Freezer Cooking Day Ingredient Planner
This simple worksheet has space for you to jot down ingredients you have on hand, recipe ideas, and ingredients you need to buy. Download the Freezer Cooking Day Ingredient Planner here.

B) Freezer Cooking Day Master List
This worksheet is a place for you to write down your final list of recipes, where they are located (cookbook, website link, etc.), and all of the prep work each recipe requires. Download the Freezer Cooking Day Master List Planning Sheet here.
C) Freezer Cooking Day Prep List
Once you’ve decided on your recipes, made your shopping list, and jotted down all the prep work each recipe requires, you can create your final list, the Freezer Cooking Day Prep List. This is where you’ll put the planned order of events for your Freezer Cooking Day. Check things off as you go and be encouraged by your progress and accomplishments! Download the Freezer Cooking Day Prep List here.
I’ll post my Freezer Cooking Day Master List and Prep List later on today along with a link-up for you to share yours, as well. I’m excited to get our very bare freezer filled up again! For more ideas on how to pull off a Freezer Cooking Day, be sure to stop by and read FishMama’s post called Freezer Cooking Basics.
Saving 100% Down for a Home: Part 3

A New Job in a New City
Jesse started his new job the beginning of 2007 with high hopes. 2006 had been a difficult year of finishing law school, preparing for the bar, taking the bar, waiting for the bar results, morning sickness and then spending a few months not knowing whether he was going to have a job at the beginning of the year or not.
We were very ready to get back into a “normal” routine after months of upheaval and uncertainty. And we were excited to start saving in earnest after years of depleting our savings.
But within the first month at his new job, Jesse realized this job was going to be a lot harder than he had anticipated. The learning curve was steep, the hours were long, the work was stressful and the office environment was tense.
It begin to wear on Jesse and within a few months, he was almost continually exhausted and stressed. More big projects arose and he had to put in longer hours. Jesse, the always easy-going, fun-loving guy, was so overloaded at work that he rarely smiled or enjoyed life anymore.
I knew it was becoming too much for him and I felt powerless to help him. I tried to make our home a welcoming haven for him, I tried to encourage him as best as I knew how, but the pressure he was dealing with at work was enormous.
He was working so many hours and was so focused on keeping up with his job that he wasn’t home much anymore. And when he was home, he wasn’t very “present.” It was a hard, hard time. He hated being “absent” from our family, but he also had to keep up with things at work lest his job be in jeopardy.
The stress trickled down to me and I began neglecting my own health. Soon I started experiencing issues in my pregnancy. I became very anemic and ended up in the hospital for five days when I was 34 weeks along. They were worried I was going to have to be induced early since my hemoglobin and platelet counts were so low. But God intervened and I was able to carry Kaitlynn to 38 weeks before being induced.
These health issues felt like the last thing Jesse needed to be dealing with. And I felt so bad that I was adding extra burdens to his already-overloaded plate. But God used it for good, because it was a wake-up call to both of us to realize something major needed to happen in Jesse’s job situation, or he needed to quit.
The thought of him quitting scared us though, as we desperately needed the insurance benefits from his job — especially now that I was having so many health issues. It was a vicious cycle and we felt trapped.
We prayed and talked about it a lot. More and more it felt like it was the right thing for Jesse to turn in his resignation. And yet at the same time, what about our financial goals and hopes and dreams? Wouldn’t it be completely shooting ourselves in the foot to voluntarily cut off most of our income?
And how would we survive if Jesse wasn’t able to get a new job right away? We had been working hard to try and save money, but after all the medical bills from my health problems, we only had enough in savings to live on for a few months. And my income from my online business was certainly not enough for us to survive on.
It seemed like it would be foolish to resign just because a job was too stressful, so we tried to come up with ways to restructure things in our home and lives to relieve as much stress as we could. We figured if we could just ride this out for a few more months, things would probably get a lot smoother.
But then very unexpectedly, Jesse was asked to resign. While this came as a complete shock to us because no one had any idea we were praying about him resigning, we took it as God’s clear direction for us. But we didn’t know what the next step might be, or how we were going to live if Jesse didn’t find a job very quickly.
So without much warning, we were left without our primary income source — in a new city with little support, few friends and even fewer business contacts.
At first, we were pretty confident finding a new job wouldn’t be too hard. After all, we were in a big city and Jesse had his law license. How hard could it really be to find something which would pay the bills?
Well, apparently it was a whole lot harder than we’d initially envisioned. The days turned into weeks and the weeks turned into months.
We applied for just about every job under the sun. We prayed harder than we’d ever prayed before. We contacted anyone and everyone who might have a possible job lead. We followed up with every application and did our best to leave no stone unturned.
And yet, no one was even calling to offer Jesse an interview, let alone a job.
I wish I could say that I kept a cheerful attitude through all of this. On the contrary, I woke up every morning with a sick feeling in my stomach wondering how much longer things would go on like this. And I’m very ashamed to admit it, but I often found myself angry at my husband.
I felt alone, scared and stressed, and I took out my frustrations on my husband — which was the last thing he needed at one of the lowest points in his life. Our marriage started feeling the toll, and during those months of unemployment, there were times when it was only hanging on by a thread.
[Just a short side note: A few months after all of this took place, God really convicted me of how wrong my attitudes were during this whole experience and I went and humbly asked for my husband’s forgiveness — which he graciously gave to me, even though I didn’t deserve it. I’m thrilled to report that our marriage is much stronger today as a result of all of these trials and I believe beyond any shadow of a doubt that I am married to the most wonderful man in the whole wide world! He has stuck by me through thick and thin and loved me no matter what. I’m so blessed to be Jesse’s wife!]
Gratefully, we didn’t have any debt and we were still living on a strict budget, so the job loss didn’t plunge us into complete financial ruin. I can’t even fathom what it would have been like had we piled up a bunch of debt in law school or followed the advice offered by many following law school: to go buy a house and live extravagantly now that my husband was officially a lawyer.
While our marriage was in bad shape, we did make one good decision — to be as creative and resourceful as we could in order to avoid dipping into our Emergency Fund unless we absolutely had to.
At this point, I had an online bookstore and a small personal blog which I’d slowly been growing. I had recently written a course on Supermarket Savings and we decided to experiment and run a big blow-out sale. We set up an affiliate program for the sale and notified as many of our online friends and companies about the sale.
By God’s grace, the three-day sale on our ebook package earned enough money for us to live on for a few months. We could hardly believe it! That was a huge bright spot in the midst of tremendous discouragement.
We started to really think outside the box when it came to our income: Jesse took on some contract jobs, we got a newspaper route and I continued to bring in some supplementary income through the online bookstore.
It was also during this time that the idea for MoneySavingMom.com was born. There weren’t any blogs listing weekly deal match-ups for drug stores at that point and many people who had purchased my Supermarket Savings ecourse were writing and asking for more help and counsel.
I’d learned a lot about blogging and monetizing a blog over the past few years and I figured starting a frugal, money-saving blog might be a great opportunity to test some of those ideas out. Jesse was excited about the idea, so we brain-stormed a name and set up the site.
At that point, I was hoping the site would provide a place for me to practically help people learn to live on less by sharing things which had allowed our family to stay out of debt and live on a beans-and-rice budget. Little could we have dreamed that MoneySavingMom.com would someday soon be earning a full-time income and help us be able to save and pay cash for a home!
Unbeknownst to us, while it seemed like we were getting nowhere in the job search, God was doing some pretty amazing things behind-the-scenes to lay things out for our lives to be turned upside-down — in a very wonderful way!
Coming in March: Freezer Cooking and 31 Days to a Better Grocery Budget
Coming in March: Freezer Cooking and 31 Days to a Better Grocery Budget
 I’m excited! So many of you have asked for me to do a step-by-step tutorial on how to cut your grocery budget. Now that the blog transition is done and I have more time for writing, I’m tackling a big project during the month of March: 31 Days To a Better Grocery Budget.
This series will give 31 tips and ideas for how you can significantly cut your grocery bill without sacrificing quality or quantity. Some of the ideas might be ones you’re already doing, but I hope everyone is able to pick up a few new things to further maximize the mileage of your money at the grocery store.

And March 1-2, 2010 (that’s Monday and Tuesday of next week–believe it or not!), I’ll be hosting another Freezer Cooking Day marathon right here, with FishMama’s help. If you’d like to join in, we’ll have a link-up on Friday (February 26, 2010) for you to share your plan and recipes.
I’ll be sharing details tomorrow on how I make up my Freezer Cooking Day plan on a budget and how you can, too. I plan to share a play-by-play of my cooking day on Monday and then finish up with a Freezer Cooking Day Accomplishments link-up on Tuesday.
If you’re planning to join us, be sure to sign up on our Facebook Event Page and follow along with the Twitter hashtag #oamc. If you’re new around here and wondering what Freezer Cooking is all about, you can check out some of my previous Freezer Cooking Day posts here.
Where in the world has Money Saving Mom been?
 My darling little children who see to it that there is rarely a dull moment at our home!
Wow! Is it already closing in on March? That seems impossible, but the calendar says it’s true.
At any rate, a number of you have mentioned recently that you’ve missed my more personal posts the last few weeks. You’re so kind to even notice, and I thought you all deserved an explanation of what’s been happening behind-the-scenes at MoneySavingMom.com.
I’ve purposed to do my best to stick with the computer time slots in our schedule–and that’s been going great! However, it hasn’t been extremely conducive to a major blog change like switching for Typepad to WordPress. Or at least it’s meant that pretty much 80% of my computer time has been swallowed up in making this transition.
We knew that switching blog platforms was going to be a fairly big deal. However, like usual, it turned out to be a much bigger and more time-consuming deal that we could have initially ever imagined. In fact, it took five professionals (none of whom were me!) around 70 hours combined to pull it off. Yes, I’d say it was a rather audacious undertaking.
But it’s done–finally! And while a few of you are still experiencing a few glitches here and there, for the most part, it’s been smooth sailing for about a week. So I’m happy to say that I think the move was successful.
A huge thanks to Joy from FiveJs who has invested hours and hours and hours to make this switch happen. She’s been amazing to work with and my hat is off to her incredible expertise and diligence to see this move to it’s finish. It’s certainly not been a task for the faint of heart!
As the site has grown this past year and we’ve begun homeschooling and had our third child, I’ve begun to feel rather strapped for time. I often found myself spending so much of my computer time taking care of nitty-gritty details which had to be done in order to run this blog that I was barely able to churn out many worthwhile posts, if any at all.

My husband and I spent a lot of time praying and discussing direction for this site over the last six months. Neither of us felt like it was time to let it go, but neither of us also felt like I could single-handedly keep up with the load of work it was producing and still have my priorities as a wife and mom in their proper place.
After much discussion, we’ve decided it’s time to take the plunge and hire skilled people to help carry some of the load. God has blessed the blog far beyond our wildest dreams and now that we’ve saved up enough to pay cash for our house, we feel like we can invest some of the earnings from the blog back into it. So as of last week, my sister, Amy, and Joy are all working part-time behind-the-scenes to help MoneySavingMom run smoothly and be as user-friendly and helpful as possible.
They’ve taken a big load off of my shoulders so that I can focus on being a wife and mother, homeschooling, and writing blog posts. This change will, hopefully, make this blog much better than I could make it on its own and also free me up to spend my computer time writing, not dealing with tech problems and so forth.
We have some really wonderful new features we’ll be rolling out next week, thanks to their help. I can hardly contain my excitement, but I will try to keep my mouth shut until next Wednesday. Stay tuned!
In the mean time, thank you for your patience with the blog switchover and for being patient when I haven’t been able to respond to many of your emails or write as many personal posts as I’ve hoped to. I’m really excited about the great things in store for this next year–especially now that I am freed up to focus more on bettering this blog! I still can’t promise I’ll be able to personally respond to all the emails I receive, but I am very hopeful that you’ll be seeing a lot more content posts here beginning this very week.
Tired of Missing Deals?Join Our Hot Deals List!
Click here to sign up
Look what we got from Amazon.com today!

The girls were delighted to open up a box from the UPS man today to discover five entire pounds of YummyEarth organic suckers that I’d ordered from them for a surprise.
Thanks to a tip from The Thrifty Mama, I got them at a steal on Friday. All five pounds were only $14.88–which is a fraction of the price we’d pay at the health food store. Plus, I used some of our Amazon gift cards that we’d earned from Swagbucks so we didn’t pay anything out of pocket for them.
It’s a HUGE bag of lollipops and will make for lots of special treats for the girls… and maybe even some for mom, too! Thanks, The Thrifty Mama!
Menu Planning Makes a Difference

Rhonda recently emailed me about her menu-planning success:
I GET IT! I always thought meal planning was a waste of time. As long as I had plenty of variety in my freezer and pantry and fresh produce and milk, why meal plan?
To be honest, I couldn’t understand why you and many others did this. Well now I get it. I started meal planning as a New Year’s Resolution. I thought I’d try it for a month and prove it made no difference and quit.
Was I ever so wrong!
On Sunday each week, my husband and I now plan our meals for the entire week. I then do an inventory of what we have available. Then I make my shopping list to get the items I need to complete the meals on our menu. Of course, I also pick up a few extra items if they are free or nearly-free to stockpile.
Our weekly menu is posted up on the refrigerator, so there’s no more “What do you want for dinner?” “I don’t know”-type conversations. The amount of time and money I save meal planning is unbelievable. Why didn’t I do this sooner? -Rhonda
I wholeheartedly concur that planning a menu (or even a basic sketched out plan) makes a world of difference in our grocery budget, how well we eat, and just in my overall sanity. If you’ve never planned menus before, I’d challenge you to consider doing what Rhonda did. Commit to doing it for a month and see how it works for you. You just might be surprised!
Speaking of which, here’s this week’s menu plan:
Breakfasts
Oatmeal, fresh carrot/apple/orange juice
Cereal
Whole-Wheat Blueberry Pancakes
Bread Machine Cinnamon Rolls, fresh orange juice
Our Favorite Banana Bread, fresh orange/carrot juice
Lunches
Open-Faced Tuna Sandwiches, carrot sticks
Whole-Wheat Pasta sprinkled with cheese, oranges
Peanut Butter & Honey sandwiches, carrot sticks
Beans and brown rice with cheese, avocados, oranges
Baked Potatoes, cheese, broccoli
Leftovers x 2
Dinners
Homemade Pizza, cantaloupe
Barbecued Beef, Homemade Buns**, peas, oranges
Italian Chicken over rice, steamed broccoli, grapefruit,
Chicken Stuffing Casserole, Bread Machine Buttery Rolls, mixed green salad, peas, fruit salad
Broccoli Ham and Cheese Casserole, fruit, Whole-Wheat Blueberry Muffins
Dinner at Friend’s House
Dinner Out
**I’m looking for a really good Homemade Hamburger Bun recipe which can be made in the bread machine for tomorrow night’s dinner. Does anyone have a link for an excellent recipe to share?
Photo credit: Jen_Maiser
Crockpot Italian Chicken

My friend Connie, from Smockity Frocks, is hosting a “What’s In Your CrockPot?” link-up today! Head over to her blog for all sorts of yummy crockpot recipes and ideas.
It’s hard to say whether I love my crockpot or my bread machine more. Both of them are invaluable tools in my kitchen that I use again and again and again.
Italian Chicken
- One bottle of your favorite Italian salad dressing
- 6 Chicken Breasts
Stick the chicken breasts in the crockpot and pour the Italian Dressing over them. Cook on high for 4-6 hours until completely cooked through. Serve over brown rice.
For variation, you can add in a bag of frozen veggies halfway through.
Recently, I’ve been making Italian Chicken and serving it with Bread Machine Buttery Rolls and some fruit on the side. You can make this complete dinner from start to finish in 15 minutes. How’s that for simple? Plus, if you get the chicken on a good sale, the Italian dressing for almost-free, and use fruit that’s in season and on sale, it’s also very much a budget meal, too!
Super Savings Saturday
After taking the week off from grocery shopping last week, we did more stocking up this week. Here’s what we bought:

My husband took my coupons–and children!–to the store earlier in the week and came home with the above. Get this, he only spent $27.12 and he saved $71. Yep, he’s quite the bargain shopper. And he had both girls with him, too. I’m impressed–as usual!

I went to the health food store, Aldi, and Walmart later on in the week and got all of the above for just under $20–which I was very happen about considering quite a bit of it was organic! (The girls asked if they could be in the picture and then they had fun posing with silly faces!)

Since we saved up enough to pay cash for a house a few months ago, one of the few budget changes we’ve made was adding a gym membership for my husband. It’s not something our frugal natures ever thought we’d do, but it works out much better for my husband’s schedule and it also has been a much greater motivation for him than trying to exercise at home.
He loves it and I love that he’s putting forth a lot of effort to be physically fit and healthy. The only thing is that he also needs to add more protein into his diet, so I ordered the above for free using Amazon gift cards I earned through Swagbucks.
All told, we’ve spent around $115 total on groceries this month. The $45 left in our grocery envelope should easily last us through the end of this month.
________________________________
Did you snag any great deals or bargains this week or save money in other ways? If so, be sure to post about them on your blog and leave your link below. Please remember that this weekly round-up is to share deals you personally got and/or money you were able to save this week. In order to keep this weekly round-up focused on helping and inspiring others in their efforts to save money, links which have little-to-no content other than promoting affiliate links, etc. will be deleted. Also, to make it easy for everyone to navigate quickly through the links, your link must link directly to your Super Savings Saturday post.
Olympic Athletes and Financial Success

I don’t watch TV. Ever.
Except for something historically monumental–like the presidential elections–or, when the Olympics are on. I find the Olympics to be incredibly inspiring and interesting, unlike 99.9% of the rest of what airs on television.
As I’ve been watching the Olympics these past few days, I can’t help but notice so many financial lessons which can be gleaned from the success of these highly-trained and experienced athletes. The principles which they’ve applied to achieve athletic success can be equally as helpful when it comes to finances:
1) Success Requires Strategy
None of the Olympic athletes woke up one day last month and decided they’d compete in the Olympics. No, they’ve spent days, weeks, months, years, and even decades preparing, planning, and practicing.
I read the autobiography of Michael Phelps last year and found it fascinating that he and his coach had set exact goal times–down to the hundredth of a second–that they were aiming for him to hit in each of his Olympic races in 2008. They practiced for these times over and over and over again, and they were forefront in Phelp’s mind at the Olympic games. I have no doubt that having a clearly mapped out strategy is one prominent reason Michael Phelps brought home eight gold medals from Beijing.
If you want to be financially successful, it’s not enough to say, “I’m going to get out of debt.” Or, “I want to save to pay cash for a car.” No, you have to have a clear-cut game plan. You have to have goals and then break those down into attainable, bite-size objectives.
2) Success Requires Sacrifice
Olympic athletes make phenomenal sacrifices. While the rest of us are sleeping, or vegging, or shopping, or eating, they are in the gym training. They don’t live a normal life or participate in many of the social activities that most in our culture do because so much of their focus and energy must be devoted to physical training.
If you want to succeed financially, it’s also going to require sacrifice. You’ll likely have to give up some of the societal “norms” if you’re working your way out of debt or living on a beans-and-rice budget in order to save for a big purchase or stay out of debt. You might be driving an old car, wearing thrift store clothes, and clipping lots of coupons. Your friends might not understand or think you’re weird. That’s okay. In the long run, those sacrifices and your counter-cultural living will pay off with big dividends.
3) Success Requires Self-Discipline
No athlete ever makes it to the Olympics without exerting enormous self-discipline–probably more than most of us can fathom! They push themselves through pain, injury, exhaustion, and excruciating fatigue.
They don’t give up when the going gets tough. Winners aren’t quitters.
I believe self-discipline is one of the greatest keys to financial success, as well. If you’re not willing to stick with a budget, to say “no” to what you can’t afford, and to stop living beyond your means, you’re never going to get ahead.
If you keep going, keep plodding along, keep sticking with your budget, keep pressing forward when it seems like you’re not getting any traction, you will reap the fruit of your efforts.
An Olympic medal is probably not a reality for most of us, but implementing the principles of Olympic athletes in our personal and financial lives can result in amazing success–which will hopefully be much more long-lasting than a one-time Olympic victory.
photo credit: Shazz Mack