

Here’s a super easy dinner idea that makes use of that oh-so-versatile slow cooker! The homemade pico de gallo takes this recipe up a notch and is a fantastic way to use up some of those amazing garden tomatoes that are quite prolific right about now.

Guest post from Brigette Shevy
I’m always looking for meals that are healthy and budget-friendly. This one definitely makes the cut!
If you add the optional beans and corn (see the money-saving tip below), you can get a lot of mileage out of two pounds of meat!

Ingredients for Chipotle Burritos
- 2 lbs. boneless, skinless chicken breasts
- 16 oz. salsa
- 1 teaspoon chili powder
- 1 teaspoon dried oregano
- 1 canned chipotle pepper in adobo sauce*
- Flour or corn tortillas
- Pico de gallo (see recipe below or use your favorite store-bought salsa)
- Optional toppings: shredded lettuce, sour cream, shredded cheese, black olives, avocado, etc.
How to Make Chipotle Burritos
1. Place chicken or beef pieces in a 3 or 4-quart crock pot.
2. In a blender, combine the salsa, chili powder, oregano, and chipotle pepper.
3. Blend for a few seconds until well mixed and pour over meat.
4. Cover and cook on low for 6-8 hours.
5. Shred meat with 2 forks.
6. Serve on tortillas with pico de gallo and optional toppings.
Money Saving Tip: To stretch this meal even further, stir in one can drained black beans and 1 cup corn to the cooked, shredded meat. Heat through.
If you don’t have the time or ingredients to make your own homemade Pico de Gallo, you can substitute with your favorite salsa. However, if you want to give it a try, here’s the super simple recipe!

Ingredients for Pico de Gallo
- 2 medium/large tomatoes, chopped
- 1/3 cup chopped sweet onion
- 2-4 Tablespoons chopped fresh cilantro (if you don’t like cilantro, use 1 teaspoon dried oregano)
- 2 garlic cloves
- 1-2 Tablespoons fresh lime (or lemon) juice
- 1 teaspoon chili powder
- ¼ teaspoon sugar
- Salt to taste
- Cayenne pepper or finely chopped jalapeño to taste, optional (I don’t use it)
How to Make Pico de Gallo
1. Combine all ingredients in a bowl, or if you prefer a smoother texture, you may pulse the ingredients together in a blender for a few seconds.
2. Chill for several hours before serving to allow flavors to blend.

These recipes are so easy — and the perfect way to serve a hot meal without heating up your kitchen!

Slow Cooker Chipotle Burritos with Homemade Pico de Gallo
Ingredients
Ingredients for Chipotle Burritos
- 2 lbs. boneless chicken breast
- 16 oz. salsa
- 1 teaspoon chili powder
- 1 teaspoon dried oregano
- 1 can chipotle pepper in adobo sauce*
- Flour or corn tortillas
- Pico de gallo
- shredded lettuce, sour cream, shredded cheese, black olives, avocado, etc. optional
Ingredients for Pico de Gallo
- 2 tomatoes chopped
- 1/3 cup sweet onion chopped
- 3 Tablespoons fresh cilantro chopped
- 2 garlic cloves
- 2 Tablespoons lime juice
- 1 teaspoon chili powder
- ¼ teaspoon sugar
- Salt to taste
- Cayenne pepper or finely chopped jalapeño to taste optional
Instructions
How to Make Chipotle Burritos
- Place chicken or beef pieces in a 3 or 4-quart crock pot.
- In a blender, combine the salsa, chili powder, oregano, and chipotle pepper.
- Blend for a few seconds until well mixed and pour over meat.
- Cover and cook on low for 6-8 hours.
- Shred meat with 2 forks.
- Serve on tortillas with pico de gallo and optional toppings.
How to Make Pico de Gallo
- Combine all ingredients in a bowl, or if you prefer a smoother texture, you may pulse the ingredients together in a blender for a few seconds.
- Chill for several hours before serving to allow flavors to blend.
Notes
Love this recipe?
Make sure to share and save it on your favorite platform below!
Brigette is a full-time wife and mother who is blessed with three amazing bundles of energy (ages 5, 3 and 1). She enjoys music, experimenting in the kitchen, homeschooling her children, finding great deals, long-distance running, and anything chocolate.
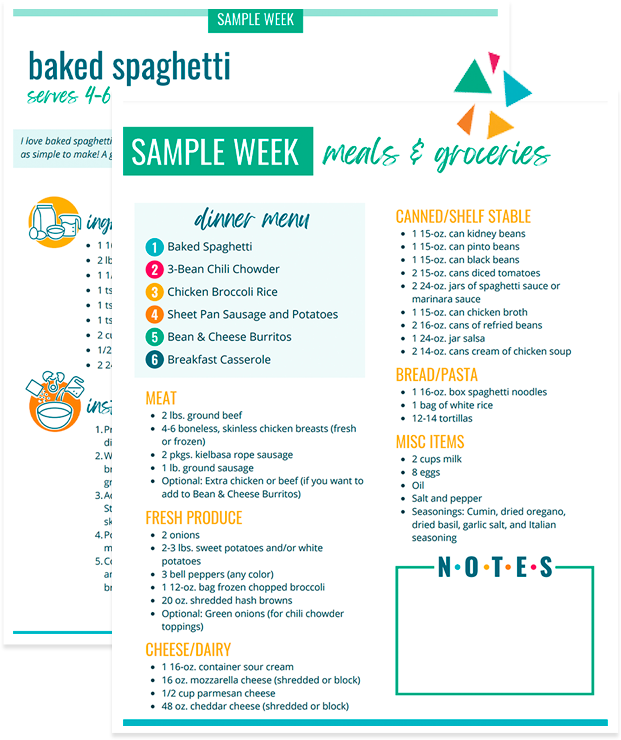
FREE One Week Menu Plan!
Done-For-You Dinner Recipes With Simple Ingredients and a Grocery Shopping List!

Paying Off Debt = Pain With Purpose
Testimony from Jessica of The Abundant Wife
When my husband and I got married in 2005, we had $70,000 in student loan debt. We promptly bought a duplex with an 80/20 mortgage for $150,000 and a used truck for $18,000. We had barely been married a year, and we were already looking at $238,000 in debt!
Now fast forward six years. I have become a loyal follower of Dave Ramsey and Money Saving Mom®. Despite leaving my job to stay home and care for our two kids, we have paid off our truck and our two smaller student loans. Soon we will pay off the second mortgage on our home.
Today we owe less than $143,000. We have paid off $95,000 in debt!
It’s not always easy to live like no one else. Many people think we’re pretty weird. We cloth diaper our kids, and we got by for years without a dryer.
We haven’t had texting on our phones since 2007, and we sold our second car last year. We’ve never paid for cable, and we gave away our television. We rarely pay for “date nights” but instead spend time together at home after the kids have gone to bed.
We don’t buy paper towels, and our cupboards look bare because we make most of our meals from scratch, wasting very little. I get more excited about finding new strategies to save or make money than I do about new purchases.
Before my children were born, I would ask my mother if it hurt to deliver a baby. She would tell me, “Yes, but it’s pain with a purpose.”
Pain without a purpose feels meaningless and unending. When pain has a purpose, you know it is leading you toward your final goal.
When I feel hopeless about our debts, and wonder for the umpteenth time why we are doing the things we are doing, I look at our goals. And I look at how far we have come.
Paying off our debts is pain with a purpose. As Dave Ramsey is fond of saying, “Live like no one else now, so you can live like no one else later.”
When it comes to eliminating your debts and saving money, there are probably things that seem painful to you. Organizing, budgeting, couponing, taking on extra jobs, and making sacrifices can be a challenge.
Change is painful at times. No one said it would be easy. But remember, it’s pain with a purpose. Keep your eyes on your goals, and remind yourself how far you’ve come.
Jessica and her husband Brad left their teaching jobs in 2007 to enter full-time ministry. In six years of marriage they have lived in six different places, including China, Maryland, Minnesota, and now California. Jessica blogs at The Abundant Wife about family, faith, and finances.
Sorry! I lost my superwoman cape in the dirty laundry pile!
It’s been one of those weeks. Among other things:
–Silas’s asthma flared up and he’s been up a lot at night almost every night.
–My allergies aren’t liking the weather we’re having. Or the pollen count. Or something. Those of you with allergies can probably commiserate!
–The toilet backed up and, after much effort and sweat, is finally going to be handed over to the services of a plumber because we plain give up on trying to fix it. I’ll spare you further details, but, suffice it to say, I’ve gotten really attached to the plunger the past few days. 🙂
–Someone broke a jar of jelly all over the kitchen floor.
–Jesse’s had to work late multiple nights.
–Kathrynne got tubes in her ears/her adenoids out today. She was such a trooper and the surgery was successful, but it was rather stressful morning for weak-stomached me. Just ask Jesse. 😉
All in all, I’ve felt like I’ve been chasing my tail all week. Staying really busy putting out fires, but not really going anywhere or accomplishing anything. But I have to remind myself that sometimes what seems of little importance, is actually what matters much more than my to-do list.
And not only that, but I think sometimes God gives me weeks riddled with interruptions to remind me how much I need Him and how I so do not have my act together. It cracks me up that I just so happen to be reading Unglued this week. It’s kind of fitting for how I’ve felt much of this week! 🙂
At any rate, Jesse sensed my frazzled-ness (did I just coin a new word?) tonight and sent me to Barnes & Noble for the evening to catch my breath, get caught up on emails, work on a couple of projects that have been looming over my head, and prep for my trip to Illinois tomorrow. (He’s so good to know when “Mama needs a little breathing room!” ;))
So I set aside my plans of freezer cooking this evening and instead enjoyed a relaxing evening getting caught back up. I’ll get back to freezer cooking next week, for now I’m enjoying just a few more minutes of quiet before the store closes.
Not only did I skip my planned freezer cooking posts for tonight, but I also had all these visions of other posts I was going to write this week, none of which made it out of my head and onto the blog. I had a Q&A post on living on $460 a week that I’ve been hoping to finish, I wanted to share with you about my slam-dunk Kroger shopping trip last night, and I’ve been meaning to get my 2012 goals update posted for August.
But some weeks, you just gotta set your grand ambitions aside and focus on the more pressing things… like a hopelessly clogged toilet. 🙂 Thank for your patience as I deal with real-life here. I appreciate you sticking with me even when I don’t always get posts up in the most timely manner. You all are the best!
Join me in Bloomington, IL on Saturday for the Living Well Women’s Expo
Join me in Bloomington, IL on Saturday for the Living Well Women’s Expo

I’ll be in Bloomington, IL, on Saturday (September 8, 2012) speaking at the Living Well Women’s Expo and I’d love to meet you there!
I’ll be giving a presentation at 11 a.m. on 25 Ways to Cut Your Grocery Bill Without Using Coupons. It’s a fun, practical, and fast-paced presentation — and it’s geared for anyone who wants to save money on their grocery bill.
Admission to the Expo is $5 per person. From what I’ve been told, it sounds like it will be a $5 well spent as there will be lots of samples, freebies, and giveaways — plus fun stuff like free massages, food sampling, health screenings, tea tastings, and even face painting (I think I might skip that one — but a free massage? Sign me up!)
I’ll be sticking around after my presentation for a meet and greet and I would love the opportunity to meet some of my Illinois readers. Truthfully, meeting readers face-to-face is one of my very favorite things in all the world. So if you live near Bloomington and you’re free on Saturday, stop on by the U.S. Cellular Coliseum!
Oh and just for fun, if you come, be sure to tell me that you’re a reader and that you saw this post. I have a little freebie for you. 🙂
Don’t live in Illinois? See my upcoming speaking engagements for 2012 through 2013 here. I’d love to get to meet you at one of them!
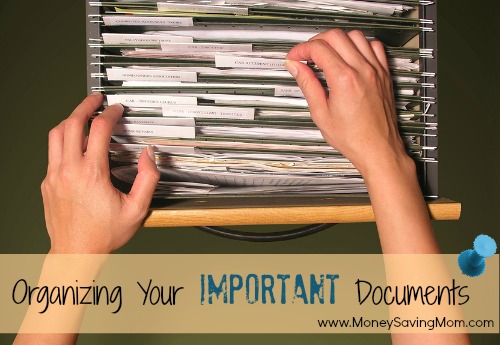
Organizing Your Important Documents: Finances & Other Accounts (Part 3)
Organizing Your Important Documents: Finances & Other Accounts (Part 3)
Missed the other posts in this series? Read them here.
Guest post from Mandy White
Today, we are going to work on Financial & Other Accounts. The “Other Accounts” refers to accounts you may have that don’t require a monthly payment, such as email, Costco, or the library.
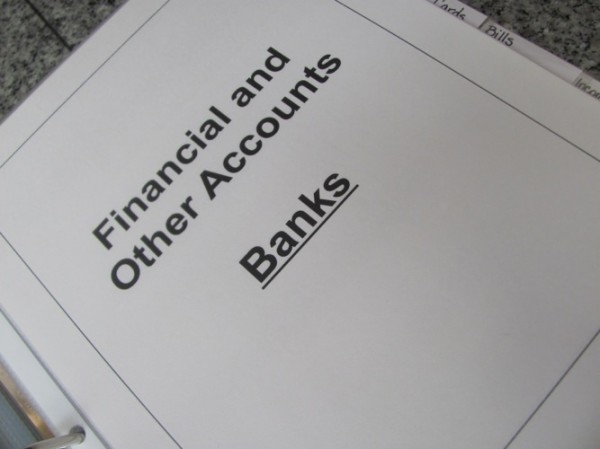
Again, we are working with very sensitive information, so only use a secure computer, or hand-write your information.
Banks
Bank contact information, closest location, bank routing number
List of all accounts with full account number, website, log-in information, and answers to security questions
Note: I found it easiest to put all accounts with each particular bank on one page, such as credit union accounts on one page, ING accounts on another page.
Any other bank information (like safe-deposit boxes)
Debit Cards / Credit Cards
List of all debit cards. For each one, list:
Bank and account the card is for
Description of card (ie: blue and gold with the bank logo on it)
Account number
Security code (on the back)
PIN
Major backing company (ie: Visa or Master Card)
Emergency phone number (usually on the back)
Website, log-in information, and answers to security questions
Copy of the front and back of the card
Bills
List of all bill accounts. For each one, list:
Company name and contact information
Account number
Website, log-in information, answers to security questions, and online bill pay information
Copy of your typical monthly budget
Income, Retirement, and Investments
Sources of income, pay frequency, company contact information, Payroll/HR contact information
List of all retirement accounts
Company name and contact information
Account number
Website, log-in information, answers to security questions
Most recent account statement
All pertinent information regarding non-retirement investments, including most recent account statements, list of property holdings, etc.
Other Accounts or Memberships
List of all other accounts or memberships
Note: Basically, if it requires a user name and password, and you haven’t already listed it somewhere else in the book, then it goes on this list. I found it easiest to create one spreadsheet with 5 columns: Company, Account Number, Website, User
Name, Password. Everything from email to the library are listed alphabetically on this one sheet.
Professional Service Contacts:
Professional services contacts (accountant, lawyer, financial adviser, insurance agent, etc.)
The Big Three
Contact information for Equifax, Transunion, and Experian
Copy of most recent credit report from annualcreditreport.com
Note: Most financial professionals advise getting one credit report every four months, using AnnualCreditReport.com. This way, you can monitor your credit report throughout the year. I found it hard to remember when I needed to check it again, so I started writing it on the calendar. Be sure to note which company’s report you are checking during which month.
Any other Big Three documents (ie: Fraud Alert letters, etc.)
Income Tax Information
Copy of your most recent tax return
PIN’s for signing returns electronically
Any tax information or documents collected throughout the year
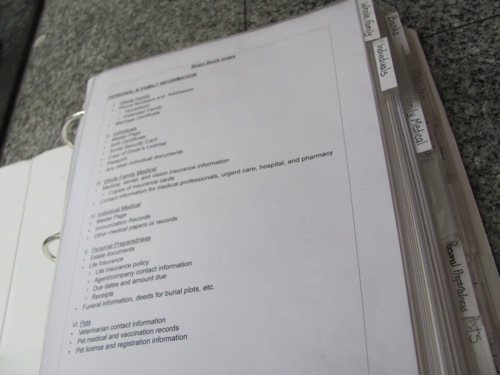
If you like, you may download a printable version of this index (for personal use only).
Tomorrow, we will start the Property section.
Mandy White is blessed to be a stay-at-home wife and mother. She and her amazing husband have three amazing kids. She loves to serve others, and her favorite time of year is fall. Unfortunately, in Arizona, fall doesn’t start until November!
We Paid Cash: A Disneyland Vacation
 A testimony from Kiersten who blogs at The Aspiring Mom
My husband and I have two children, ages 4 and 6. We have longed to take them to Disneyland for years now. However, vacations haven’t been a possibility due to mismanaged money.
In January of 2012, my husband and I decided to change the way we spend money: we started a budget! We used Dave Ramsey’s “Total Money Makeover” program and it has revolutionized our finances!
When planning this vacation we came up with a budget amount that included gas, tickets, fun money, treats, eating out, hotel, parking, and so on. We found tickets for two days for $99/person and, because my mom was going to come with us and help cover some of the parking and hotel expenses, we estimated a total round trip cost of $850 for our family.
We only had about $200 saved for this trip in January. We wanted to go in March, so we knew we would have to come up with something clever!
We decided to go through our home and garage to find things to sell. The smaller items we sold at our local Swap Meet. We listed the larger, more valuable items on Craigslist.
Believe it or not, we made $300 at the Swap Meet in just one day. We came up with the remaining trip money by setting aside our blow money from our budget and selling items on Craigslist.
I’ll be honest, it wasn’t as magical as it may sound. In fact, it was a lot of hard work, posting and re-posting items, scheduling with people, and so forth. But it was worth it!

At Disneyland, we paid cash for everything! We planned our meals wisely: eating breakfast at the hotel, bringing pre-made snacks, and eating dinner at Disneyland. (I had made sandwiches for lunches, but accidentally left them left them at home! However, we managed to eat lunch and dinner in the park while staying within our budget!
We had all of our trip expenses divided into separate spending envelopes: Parking money, food money, fun money, and coffee money. The kids also each had three envelopes of their own: $7 for a treat, $15 for a toy/accessory, and $20 for a toy/accessory. They had two days at the park and only this amount of money to spend.
They were so happy to have their own money and buy their items. They spent a lot of time looking and deciding what they would like the best, and trust me, those items are precious to them! I was impressed with their decisions and how this cured the “give me” attitude.
My husband and I are so pleased with our new lifestyle! It’s liberating to take such an amazing trip without incurring a penny of debt or financial burden!
Kiersten is a wife and stay-at-home-mom of two beautiful kids, ages 6 and 4. She is also a Masseuse who loves running trails, hanging out at the beach, and taking in the beauty around her! She blogs at The Aspiring Mom.
Have you saved up and paid cash for something — large or small? Submit your story for possible publication here.
Do-It-Yourself: Faux Photo Canvas

KerenThrelfall.com shows you how to make a homemade faux photo canvas.
Do you have a fun and frugal DIY idea to share? I’d love to hear about it! Read the submission guidelines and submit it here.
Reader Tip: How I save money on cheese

Kimber emailed in the following tip:
I have always purchased mild cheddar cheese, and I go through it fairly quickly, especially when I am using it to add flavor to a dish. Recently, I discovered that if I buy sharp cheddar instead, I only use about half as much, and still get great flavor! I have tried it in casseroles and in potato soup, and the results are wonderful. -Kimber
Ask the Readers: Homemade holiday gift ideas?
 Today’s question is from Jennie:
I know Christmas is several months off, but I am considering making some or even most of the gifts we give to our extended family this year. I would love to have your readers’ suggestions for gifts that would be inexpensive to make but greatly appreciated by the recipients. Ideas for men would be especially welcome! -Jennie
Do you have a question you’d like to ask Money Saving Mom® readers? Read the submission guidelines and submit it here.
Organizing Your Important Documents: Family & Personal Information (Part 2)
Organizing Your Important Documents: Family & Personal Information (Part 2)
Guest post from Mandy White
Now that you have all your necessary supplies, the next step is to start gathering all your information. Today, we’ll start with the first section of your binder: Family and Personal Information. This includes everything from phone numbers, to birth certificates, to estate documents. It is a lot of gathering and typing, but it is crucial to have this information readily available.
This is also the section to put any priceless letters or documents. I have a letter from my mom that she wrote to me when I was two years old. She died a few years ago, and this is a priceless treasure to me, so I keep it in my personal section.
NOTE: Please be sure to use a secure computer, or even hand-write things, as this is very sensitive information!
Whole Family Information
Marriage Certificate
Phone Numbers and Addresses
Note: Include any anyone that you frequently contact or would need to contact in an emergency. I split ours into two pages. The first is phone numbers that are important to our household (schools, doctor’s offices, etc.). The second is a sheet of extended family phone numbers and addresses (limited to our siblings and parents). I printed a second copy of both pages for the side of our refrigerator.
Individuals Information
Master Page: Create a master page for each family member that includes his or her full name, birth date, social security number, driver’s license number, and passport number. File each person’s individual documents in sheet protectors following the master page.
Birth Certificate
Social Security Card
Copy of Driver’s License
Passport
Any other individual documents (adoption records, military papers, transcripts, certifications, etc.)
Whole Family Medical
Medical, dental, and vision insurance information
Copies of insurance cards
Contact information for medical professionals, urgent care, hospital, and pharmacy
Individual Medical
Master Page: As before, create an information page for each person that includes his or her full name, birth date, medical conditions, drug allergies, and major surgeries/medical events. File individual medical documents in sheet protectors following each person’s master page.
Immunization Records
Any other medical papers or records
Personal Preparedness
Estate documents (wills, trust, etc.)
Note: We keep all of our estate documents together in a separate binder. If you choose to do the same, simply put a note in this section stating where the information can be found. Remember, this section isn’t for you; it is for those that will be left behind if something should happen to you.
Life Insurance
Life Insurance policy
Agent/company contact information
Due dates and amount due
Receipts
Funeral information, deeds for burial plots, etc.
Pets
Veterinarian contact information
Pet medical and vaccination records
Pet license and registration information
If you like, you may download a printable version of this index (for personal use only).
Come back tomorrow for the next section: Finances!
Mandy White is blessed to be a stay-at-home wife and mother. She and her amazing husband have three amazing kids. She loves to serve others, and her favorite time of year is fall. Unfortunately, in Arizona, fall doesn’t start until November!
OVER-SPENDING EVERY SINGLE MONTH?Grab these FREE Budgeting Sheets!
Click here to download!
Make the Most of Your Mornings: Remember What Really Matters (Day 15)
Make the Most of Your Mornings: Remember What Really Matters (Day 15)

Well, it’s been three weeks that we’ve been focusing on making the most of our mornings. I’ve developed some good habits, been challenged to implement more self-discipline in my life, and been so encouraged by those of you who have left comments or sent emails sharing about the progress you’re making!
In this final post, I want to talk about the why behind making the most of our mornings. Because if we don’t have a reason for doing what we’re doing and making big changes, it’s a lot harder to find the motivation to stick with them.
It’s Not About Getting Up Early
Throughout this series, I noticed that many people equated “making the most of your mornings” with getting up early. While I’m a fan of early rising, I don’t think you need to get up early in order to make the most of your mornings.
Sure, many people (myself included) have found that the day is much smoother and more productive if you get an early start. But honestly, what time you get up is not the point. In fact, some of you have said that your mornings go better when you sleep in.
Find out what works for your family, your body’s clock, and your season of life — and then run with that!
It’s Not About Running Around Like a Productive Machine
Getting more stuff done should be a means to an end, not the be all, end all of life. On my deathbed, it’s not going to matter how many hundreds of things I crossed off my list if I ran everyone over and ran myself ragged for the sake of productivity.
It’s About Making the Most of Our Life
The reason for using our mornings well is so we have time for what matters most. If I can work toward more order in our home and more self-discipline in my personal life, it frees me up to have more time to invest in serving and loving other people, more time to savor the beauty of nature, more time to spend enjoying my family and friends, more time to stop and share a kind word with a stranger or someone in need, and more time to make a difference in someone else’s life.
Making the most of our mornings doesn’t always mean we add more to our plate, become a powerhouse of productivity, or cross more things off our to-do lists. But my hope is that some of the things you’ve learned from this series and some of the habits you’re working on developing will allow you to be able to have time and energy each day to focus more on doing what matters most.
Final Project
1. Think back over the last three weeks and leave a comment telling us what you learned and hope to carry with you as a result of this challenge.
2. Consider what matters most in your life and contemplate how you can cut back on the unimportant to make room for the important. I’ve found that it’s helpful to routinely step back and ask myself, “Is this going to matter in 25 year from now?” This simple question helps me gain clarity when I’m struggling with prioritization.
10 goals for this week

Last week’s goals:
Family/Marriage/Mothering Goals
1. Finish reading Missionary Stories From Around the World. Finish Little House in the Big Woods (reading aloud to Kaitlynn). Continue reading one chapter of The Borrowers aloud at dinner each night.
2. Write a love note to Jesse.
3. Read together with Jesse before bed at least three nights.
Personal Goals
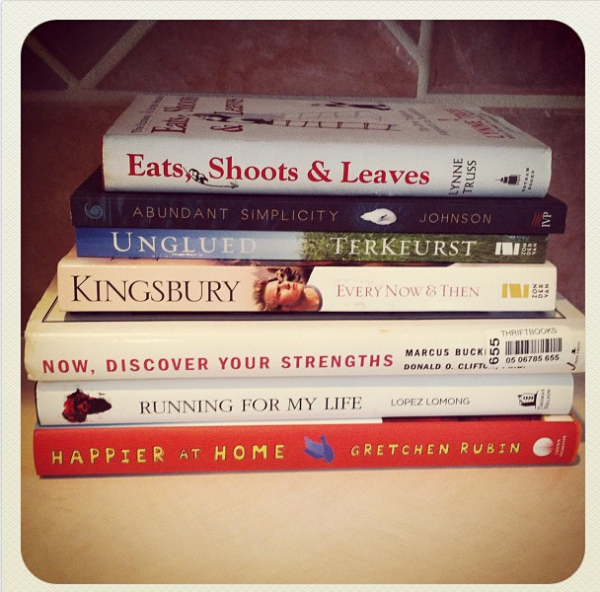
4. Finish reading Running For My Life and Eats, Shoots, and Leaves. Start and finish reading Now, Discover Your Strengths, Unglued, Abundant Simplicity, Happier at Home, and
Every Now & Then. {Started or read some in all of these. Only finished one, though. Gotta work on finishing books before I start any new ones… even though I’m itching to dive into some of the others that are calling my name on my book shelf!}5. Listen to two chapters of Switch: How to Change Things When Change Is Hard. {Only listened to about one chapter.}
6. Exercise goals: Follow P90X workout schedule (Jesse and I are doing this together — so much fun!)Homemaking Goals
7. Try at least two new recipes.8. Finish at least half of the scarf I’m working on knitting. {Didn’t get half done, but I am at least 1/8th of the way done… hey, progress is progress, right?! :)}
Business Goals
9. Write at least two articles for other blogs/sites.
10. Do the final edits to my new ebook on self-discipline.
This week’s goals:
Family/Marriage/Mothering Goals
1. Start reading A Way Through the Sea aloud to the kids. Continue reading one chapter of The Borrowers aloud at dinner each night.
2. Write a love note to Jesse.
3. Read together with Jesse before bed at least three nights.
Personal Goals
4. Finish reading Running For My Life, Eats, Shoots, and Leaves, Now, Discover Your Strengths, Unglued, Abundant Simplicity, and Happier at Home.
5. Listen to two chapters of Switch: How to Change Things When Change Is Hard.
6. Exercise at least five times.
Homemaking Goals
7. Try at least two new recipes.
8. Finish at least 25 rows on the scarf I’m working on knitting.
Business Goals
9. Write at least two articles for other blogs/sites.
10. Prep for my speaking engagement in Bloomington, IL on Saturday.
How did you do on last week’s goals? What are your goals for this week? I’d love to have you share your progress on last week’s goals and your goals for this coming week in the comments. Of, if you’ve blogged about it, leave your direct link below. Let’s cheer each other on to live purposeful and productive lives!
You can download a free customizable weekly goal-planning sheet here.
This week’s menu
Making Brown Butter Banana Waffles last week
One of our children is having outpatient surgery this week and I’m also flying to Bloomington, IL to speak at the Living Well Women’s Expo on Saturday (I’d love to get to meet you there, if you live in the area!), so we’re keeping meals pretty simple this week…
Breakfasts
Homemade Instant Oatmeal Packets, Cereal, Toast, Eggs, and/or Fruit
Lunches
Spaghetti, Bread Machine Bread Sticks, Green Salad, Fruit
Snack-y lunch
Cheese quesdillas, carrot sticks, apple slices
Peanut Butter & Jelly Sandwiches from the freezer, veggies, apple slices
Mini Deep Dish Barbecue Chicken Pizza Muffins, raw veggies, peaches
Leftovers x 2
Snacks
Fruit/Veggies
Brown Butter Banana Waffles
Crunchy Peanut Butter CupsFreezer Cooking in An Hour (I’ll post details and photos on how this goes on Thursday.)
Homemade Bagels
Homemade Wheat ThinsDinners
Dinner with extended family
Breakfast for Dinner: Brown Butter Banana Waffles, scrambled eggs, fruit
Sausage, steamed veggies, toast, fruit
Spaghetti Pie, Bread Machine Bread Sticks, Steamed Veggies, Fruit Salad
Baked Potato Bar with Outback Steakhouse Baked Potatoes
Jesse and the kids have dinner out while I’m in Illinois
Dinner with extended family

What’s on your menu this week? Share details and/or your link to your menu plan in the comments.
Organizing Your Important Documents: Introduction (Part 1)
Written by Mandy White
The need for knowing exactly where your important papers are, and having them organized and easy to locate, can’t be overstated. A friend of mine lost her husband to cancer, and said that one of the best things he did for her before passing away was to put together a notebook of all of the papers and accounts she would need.
So, what constitutes an “important document”, anyway? I look it as anything that:
a) Would be a big problem if it were lost, stolen, or destroyed
b) Would be a huge pain-in-the-neck to replace, or is irreplaceable
c) Would need to be found quickly in the event of an emergency
There are many places online to buy ready-made binders or kits for your important documents, but it is actually really simple, and a lot less expensive, to create your own.
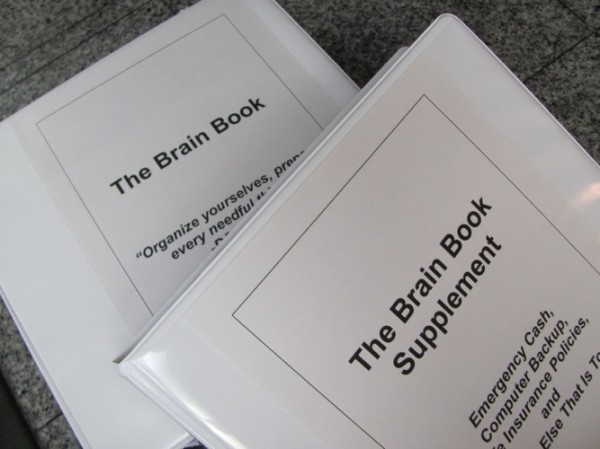
Two years ago, for Christmas, I mass-produced these binders for my and my husband’s siblings. I gave ours the name “The Brain Book” because it is everything that’s in my brain that my husband would need to know if something happened to me, or that I simply can’t remember all of the time.
You can name yours whatever you like! So, let’s jump in!
Supplies You’ll Need:
A large, heavy-duty notebook (at least two-inches, though three-inches would be preferable)
A large pack of plastic sheet protectors
Stick-on divider tabs (they will stick onto your sheet protectors and can be written on or have a label inserted)
Paper
Recommended Supplies:
A fire-proof safe (These are exactly the types of documents you want to protect from fire or theft!)
Cardstock (for the section dividers)
A second, smaller notebook (I use a two-inch one) for bulky items
Clear, three-ring zippered pouches to hold bulky items
A large-memory flash-drive, or travel hard drive for backing up your computer
Multi-page sheet protectors (they hold up to 50 pages each) to hold things like Life Insurance policies (I had to order mine off of Amazon.)
A scanner or copy machine (don’t go out and by one if you don’t already have one, but see if a trusted family member or friend has one you might be able to borrow for a day)
A shredder (You can get a small, fairly inexpensive one at Target or Wal-Mart.)
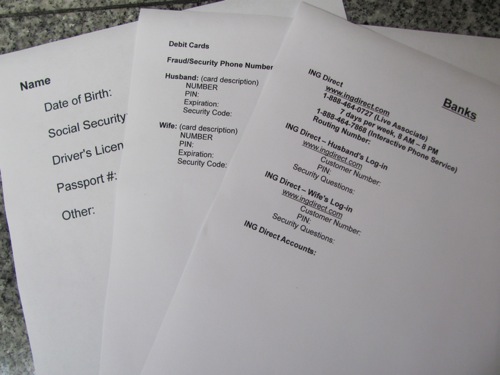
That’s it! Gather your supplies, and we will get started assembling your binders tomorrow.
Mandy White is blessed to be a stay-at-home wife and mother. She and her amazing husband have three amazing kids. She loves to serve others, and her favorite time of year is fall. Unfortunately, in Arizona, fall doesn’t start until November!
Do It Yourself: Homemade Wrinkle Release Spray
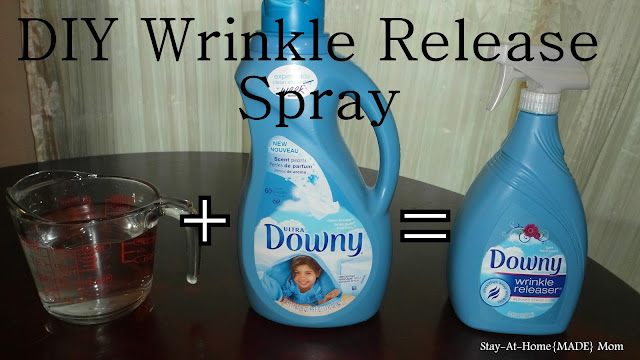
StayAtHomeMadeMom.com shows you how to make homemade wrinkle release spray.