

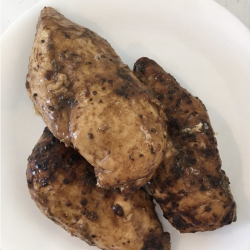
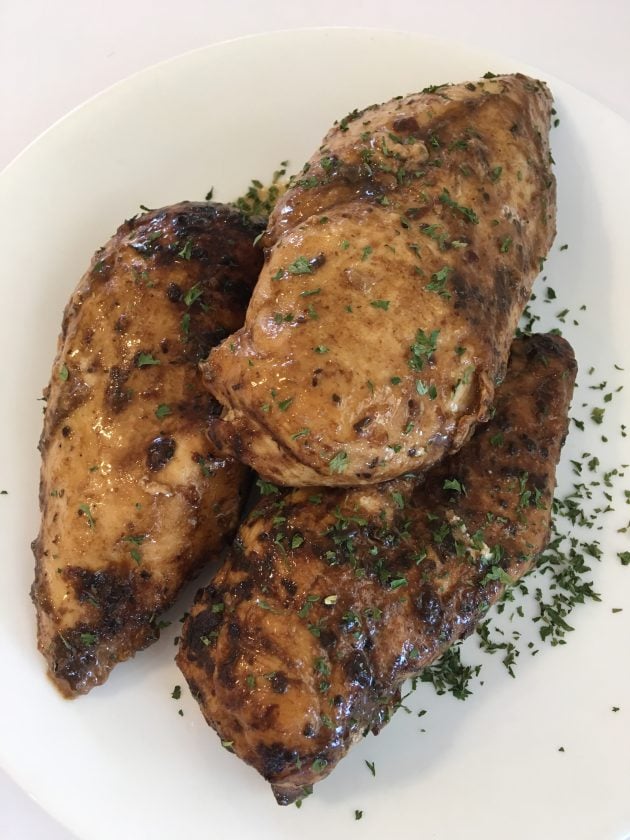
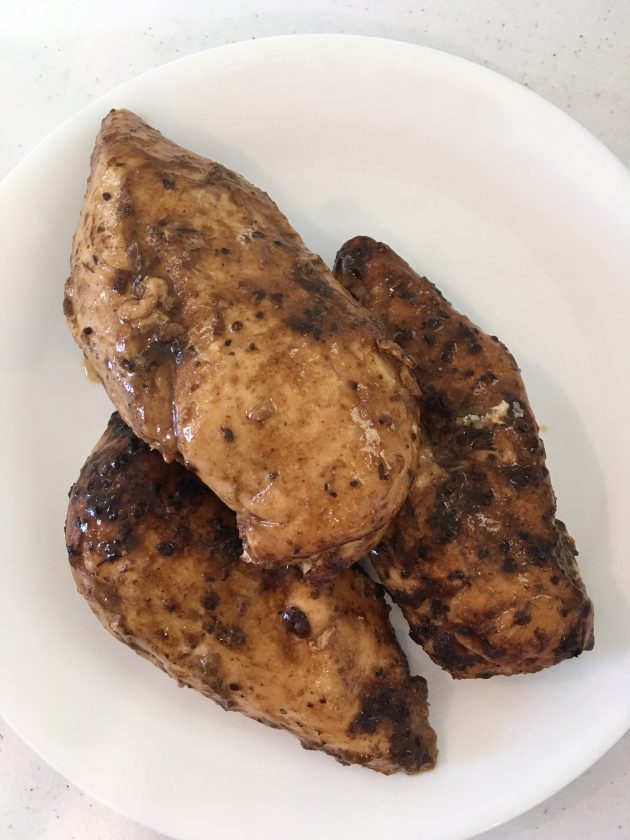
Looking for a delicious but super simple chicken recipe? This World’s Easiest Marinated Chicken Recipe is it.

You will love this Marinated Chicken Breast
I’m pretty sure you can’t beat it in simplicity — there’s only a few minutes of hands-on time to prepare this delicious chicken.
Best of all? Since salad dressing is often on sale for less than $1 per bottle, you probably have some of it in your stockpile most of the time.
NOTE: This is the freezer-friendly version of my Crockpot Italian Chicken. I was going to try and explain how to freeze that and decided it might just be easier to do a separate recipe post for it!
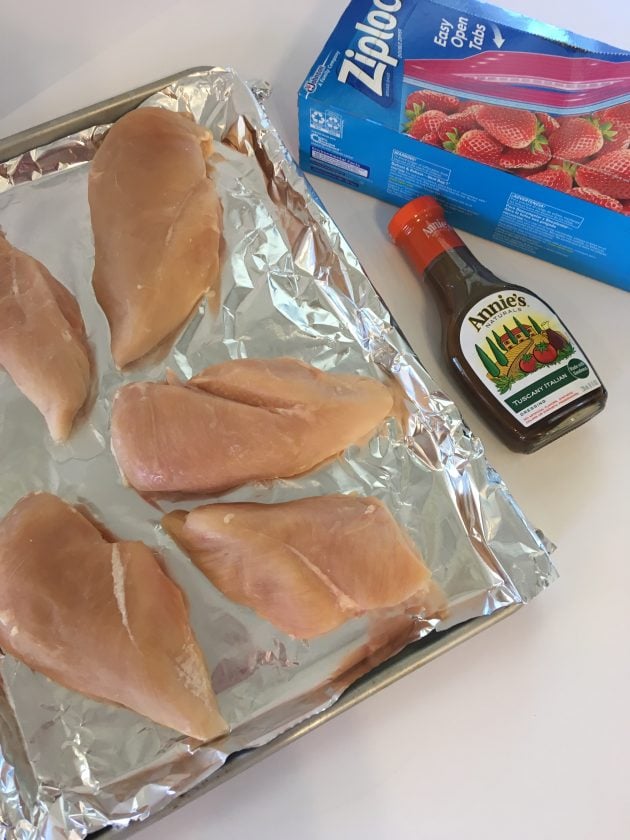
Italian Marinated Chicken Recipe Ingredients
- One bottle of your favorite Italian salad dressing
- 6 frozen boneless, skinless chicken breasts
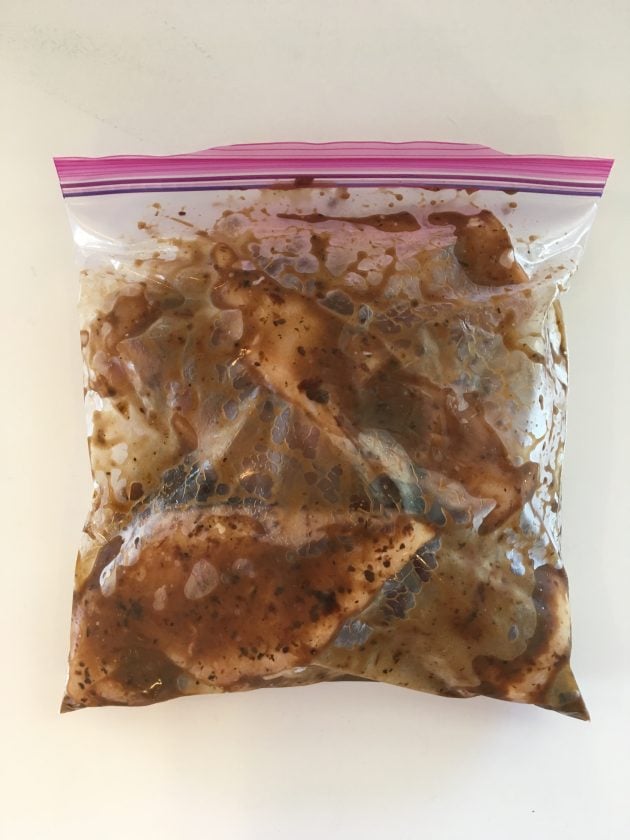
How to make Chicken Marinated in Italian Dressing
1. Put the chicken in a gallon-size zip-top freezer bag.
2. Pour the Italian dressing over the chicken.
3. Squeeze the air out of the bag, seal it, and place it in the freezer.
Directions to thaw and bake Italian Chicken:
The Quick Method:
1. Preheat oven to 350º F.
2. Pull frozen chicken out of the freezer and run the freezer bag under hot water to thaw slightly.
3. Pour all the contents of the bag into a 9×13-inch baking dish.
4. Bake in preheated oven for 45 to 60 minutes, or until chicken is fully cooked.
Longer Marinating Method:
1. Pull frozen chicken out of the freezer, place the bag in a bowl, and let it thaw in the refrigerator for up to 24 hours.
2. When ready to bake, preheat over to 350º F.
3. Pour all the contents of the bag into a 9×13-inch baking dish.
4. Bake in preheated oven for 45 to 60 minutes, or until chicken is fully cooked.
Crock Pot Method:
1. Pull frozen chicken out of the freezer and run the freezer bag under hot water to thaw slightly.
2. Pour all the contents of the bag into the crock pot.
3. Cook on high for 4-6 hours, or until chicken is fully cooked.
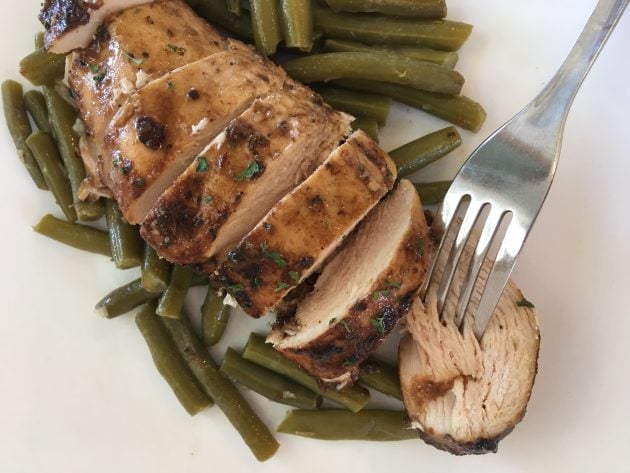
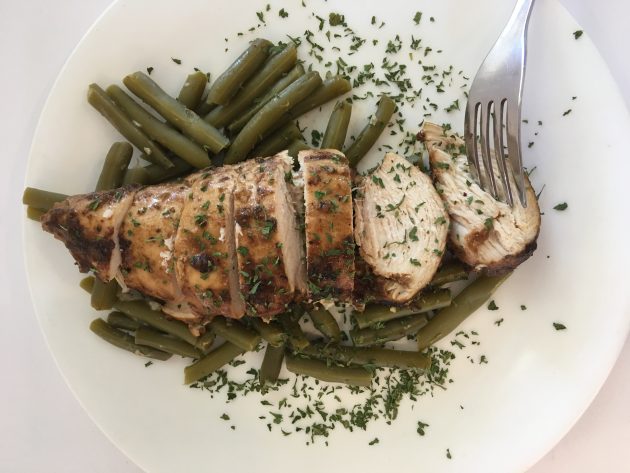
What to serve with Italian Dressing Marinated Chicken
This is delicious served over rice with steamed vegetables on the side.
It’s also really yummy with mashed potatoes, baked beans, and corn on the cob… and it pairs well with butternut squash too.
Marinated Chicken Recipe FAQs
Bone-in chicken requires a longer marinating time than boneless chicken — but in general, anywhere from 2 hours to 24 hours is adequate. Of course, the longer you marinate, the more flavorful the meat will be. However, marinating for longer than 48 hours could cause the marinade to break down the meat fibers, making it mushy.
It’s a great combination of seasonings and flavors that work especially well with chicken. Also, the oil in the dressing keeps the meat moist during cooking, and the vinegar helps to tenderize the meat.
No, you definitely don’t want to rinse the marinade off the chicken before baking it. However, you can toss any extra marinade in the bag as it has been in contact with raw meat.
This is more of a taste preference. Usually the marinade provides all the seasoning, but you may certainly sprinkle your chicken with a little salt, pepper, or other seasonings either before or after baking it.

Italian Marinated Chicken
Ingredients
- 12 ounces Italian salad dressing
- 6 frozen chicken breasts boneless & skinless
Instructions
How to make Chicken Marinated in Italian Dressing
- Put the chicken in a gallon-size zip-top freezer bag.
- Pour the Italian dressing over the chicken.
- Squeeze the air out of the bag, seal it, and place it in the freezer.
Directions to thaw and bake Italian Chicken:
The Quick Method:
- Preheat oven to 350º F.
- Pull frozen chicken out of the freezer and run the freezer bag under hot water to thaw slightly.
- Pour all the contents of the bag into a 9×13-inch baking dish.
- Bake in preheated oven for 45 to 60 minutes, or until chicken is fully cooked.
The Longer Marinating Method:
- Pull frozen chicken out of the freezer, place the bag in a bowl, and let it thaw in the refrigerator for up to 24 hours.
- When ready to bake, preheat over to 350º F.
- Pour all the contents of the bag into a 9×13-inch baking dish.
- Bake in preheated oven for 45 to 60 minutes, or until chicken is fully cooked.
The Crock Pot Method:
- Pull frozen chicken out of the freezer and run the freezer bag under hot water to thaw slightly.
- Pour all the contents of the bag into the crock pot.
- Cook on high for 4-6 hours, or until chicken is fully cooked.
Nutrition
Love this recipe?
Make sure to share and save it on your favorite platform below!
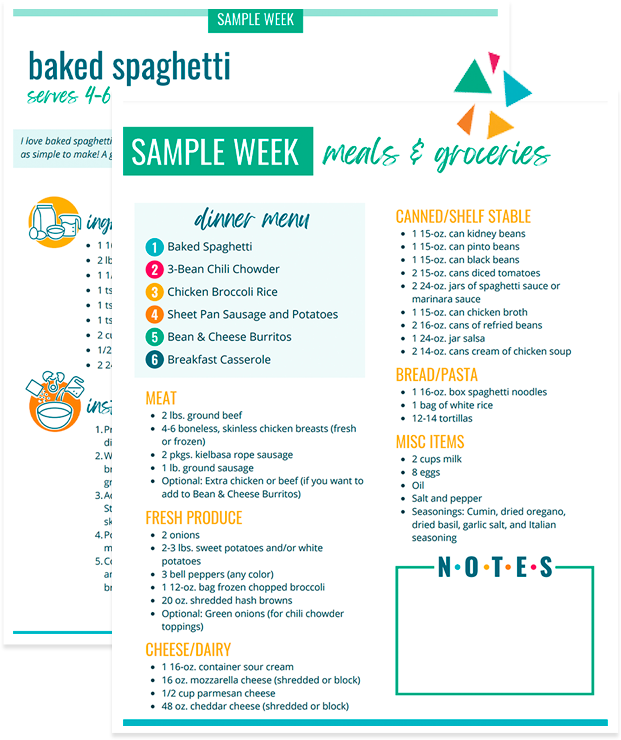
FREE One Week Menu Plan!
Done-For-You Dinner Recipes With Simple Ingredients and a Grocery Shopping List!

Whole-Wheat Chocolate Chip Oatmeal Cookie Recipe


This is a recipe my older sister created many years ago and it’s been a family staple ever since. It’s not a low-fat recipe (I think I gained a pound just making these yesterday!), but it’s delicious.
It’s a hearty cookie and it blends two of my favorite foods together — chocolate and peanut butter. And the whole-wheat flour and oats might help balance out the sugar and fat… or at least I like to tell myself that! 🙂

This cookie dough freezes well and is perfect to have on hand for last-minute guests or a mid-afternoon snack.
Whole-Wheat Chocolate Chip Oatmeal Cookies
- 1 cup shortening or butter (softened)
- 1/3 cup peanut butter
- 3/4 cup brown sugar*
- 3/4 cup sugar*
- 2 eggs
- 1 teaspoon vanilla
- 1 1/2 cups whole wheat flour
- 1 teaspoon baking soda
- 1/2 teaspoon salt
- 2 cups oats (rolled or quick oats)
- 1 12-oz. package chocolate chips
Preheat oven to 375 degrees. Cream together first six ingredients. Add flour, baking soda, salt and oats. Mix well. Stir in chocolate chips. Roll into 1-1 1/2-inch balls. Place on greased cookie sheets and bake for 10 minutes or until done. Makes approximately 40 cookies.
Freezer-Friendly Instructions:

Roll dough into balls and place on a cookie sheet. Freeze for 1-2 hours.

Put frozen cookie dough balls into a plastic freezer bag and seal tightly. When ready to bake, pull out the desired amount of balls and place on a greased cookie sheet for 30-45 minutes to thaw. Bake at 375 degrees for 10 minutes or until done.
*I use 1 1/2 cups raw sugar.

How to Make Money Blogging: 5 Ways to Set Your Blog Up for Success
How to Make Money Blogging: 5 Ways to Set Your Blog Up for Success


If you missed part 1 of the How to Make Money Blogging series, read it here.
1. Pick a Great Name for Your Blog
Your blog name should encompass your blog’s mission and should clearly articulate your blog’s purpose. Don’t hurry through the process of picking a name: it’s your brand and you want to make sure you love it and it’s something you’re going to love for years to come.
Take a week or two to consider potential names. Ask a few trusted friends to give their input. Toss around ideas and, when you land upon ones you like, check to see if the domain name (the www website address) is available on GoDaddy.com before jumping ahead and settling on any one name.
Important note: Blog names can be federally trademarked. This means that an individual or company owns the federal rights to a particular name or phrase and it cannot be used by others or you will be subject to fines and required to discontinue using the name. To be safe, search thoroughly online to make sure no one is using the name you come up with or a very similar variation of it.
2. Purchase the Domain Name and All Variations
As soon as you land on the blog name you love and have double-checked that no one is using it, buy the domain name immediately. It usually costs around $10 to $20 per year for this and it’s worth every penny to have your own domain name for your blog.
I always purchase domain names from GoDaddy.com just because, well, that’s what I’ve always done. However, if you are planning to set up your blog through Blogger (see point 3), it’s much, much easier if you purchase the domain name directly through Blogger rather than through a separate domain name service as it will be automatically set up for the domain name to point to your Blogger blog rather than you having to go through some complicated process to manually input the code and do it.
I also suggest, if you want to think long-term and hope to turn your blog into a successful business, that you purchase all variations on your domain name. That way, you don’t have to worry about someone else setting up a site with a domain name very similar to yours.
3. Choose the Right Blog Platform From the Get-Go
Not too long ago, I was asked what is the one thing you wish you had done differently when setting up your blog. I instinctively replied, “I wish I had started with WordPress.”
I started with Blogger because that was pretty much the only blogging platform in existence. I moved to TypePad when the Blogger SPAM bots marked my blog as SPAM in 2008 and I was locked out of my Blogger blog for 10 days.
Near the end of 2009, my blog outgrew TypePad and I was forced to switch to WordPress. Making the leap from TypePad to WordPress was daunting and tedious. We had to move thousands of posts and hundreds of thousands of comments. There were all sorts of glitches and it was a big learning curve.
Truth be told, though it was a major headache, it was one of the best blogging moves I’ve ever made. WordPress has allowed me to have a much more organized blog and offer many features I couldn’t with TypePad and Blogger.
So, if I were to suggest a blog platform, I’d highly recommend WordPress. It’s more expensive, but it gives you many more options than other platforms offer. Plus, you don’t have to worry about your blog getting locked or outgrowing TypePad.
Another big perk of WordPress is that it has much more sophisticated SEO capabilities (i.e. SEO stands for Search Engine Optimization and basically refers to optimizing your site so it comes up high in search engines. People will find you a lot more easily if you come up on the first page or two of Google rather than page 133!). I don’t do a lot for SEO at this point, but I’m all about doing small things to help improve where MoneySavingMom.com shows up when you search for “money-saving blogs” or “grocery budget”. WordPress makes it extremely simple to accomplish this.
4. Hire a Designer
Back in the “olden” days when there weren’t many blogs, if you had great content and updated regularly, you’d have a good number of readers — even if you had a basic, free Blogger blog design. Today, because there are so many more blogs, great content is paramount, but a nice designer and ease-of-use is also very important. If people find your blog design dull or your layout disorganized, they are much more apt to just go find another blog.
Now, please don’t let this discourage you. You don’t need a fancy-schmancy blog with lots of bells and whistles. Just a clean design that is easy to navigate can make a world of difference. And paying someone to set this up for you may be every bit worth the money.
If you can’t afford a designer, at least consider paying to have someone design your header and then take the time to learn some basic HTML so you can tweak your sidebar.
5. Plan Your Posts Ahead of Time
I can’t tell you how many times I’ve seen a new blog advertised and been all excited to check it out, only to find there were a whopping three posts on it! If you want people to stick around, you need to have depth and series and a variety of posts.
Before you “open your doors to the public”, go ahead and post 10 or 15 posts, plus plan out and write another 15 to have in queue to post after you start “advertising” your blog. Not only will this allow you to “get your feet wet” and get accustomed to blogging before you have a real live audience, it also provides some great content for people to check out when they visit your blog.
I love Google calendar for planning out post series long-term. I also have recently begun printing out a monthly calendar to pencil in specific posts for each day. This gives me accountability, inspiration and organization — well, at least it’s better than my former “blog-by-the-seat-of-my-pants” routine!
Next week, we’ll talk about five tips for producing creative content.
If you’re a blogger, I’d love to hear your top tip for setting up your blog for success. And, if you’re brave, I’d love to hear what you wish you had done from the get-go.
Yesterday’s Dillon’s Shopping Trip

And finally, we stopped at Dillon’s yesterday and got some great deals! I double-checked the ad and it looks like all of these (except the marked down milk!) are running through this coming Tuesday.
1 American Beauty Pasta – $0.49 each when you buy 10 participating items
Used 1 $0.55/1 American Beauty Quick Cook Pasta coupon from the 4/10 SmartSource insert (There are also $1/2 coupons here.)
Free after coupons + overage2 Quaker Quakes Rice Snacks — $0.79 each when you buy 10 participating items
Used $0.55/1 coupon from the 5/21 Moments to Save insert (“doubled” to $1 off)
$0.29 each after coupon2 half gallons of milk — marked down to $0.99 each
6 bags of Boulder chips — $0.99 each when you buy 10 participating items
Used 3 $1/2 coupons
$0.49 each after coupons1 box Mom’s Best Naturals cereal — $0.99 when you buy 10 participating items
Used $0.75/1 coupon (“doubled” to $1 off)
Free after coupon2 Better Oats Oatmeal Packets — $1.35 each
Used 2 $1/1 coupons
$0.35 each after coupons
My total after coupons was $7.11.
Yesterday’s Dollar Tree Shopping Trip

We also stopped by Dollar Tree yesterday to pick up some supplies for the Busy Bag Swap we’re participating in (more details/pictures on that along with a free Busy Bag pattern/download coming next week!). While there, I also picked up a few groceries:
3 boxes of bags (some of these we are using for the Swap, the rest will be for freezer cooking!) — $1 each
2 bags of Nature’s Own hot dog buns — $1 each
1 package of cups — $1
1 canister of sea salt — $1
Have I mentioned how much I love Dollar Tree? It’s so great to not even have to worry about looking at price tags and just to know everything is $1!
Yesterday’s Aldi Shopping Trip: Wherein I discover that almost all the Aldi prices have been raised!
Yesterday’s Aldi Shopping Trip: Wherein I discover that almost all the Aldi prices have been raised!

Is it just my Aldi store, or has your Aldi store raised almost all the prices by at least $0.25 in the last few weeks? The girls and I stopped by there yesterday and cheese was up to $1.99 from $1.79. Milk was $3.28! And I noticed all sorts of other price increases.
Overall, their prices are still lower, but if they keep this up, it won’t be long before they aren’t anymore! I feel so badly for those of you who are on extremely tight budgets to be dealing with all these price increases. 🙁
However, I don’t mean to be complaining as I know that many of you don’t even have the luxury of an Aldi and are stuck with one over-priced grocery store. It just struck me yesterday how costly it seems basic necessities are becoming. And I’m more inspired than ever to try and do better about buying ahead when prices are at their lowest!
Now for what we bought:
1 canister oats — $1.99
2 loaves of honey wheat bread — clearanced to $0.69 each
2 packages of sweet corn — $0.99 each
3 bags of chicken breasts — $5.49 each
2 bags of apples — $2.89 each
1 jar of peanut butter — $1.49
2 packages of strawberries — $1.69 each
2 packages of baby carrots — $0.99 each
1 cantaloupe — $1.69
1 8-oz. cheddar cheese — $1.99
1 can orange juice — $1.09
My total with tax was $41.97
31 Weeks to a Better Grocery Budget Video Series: 4 Ways to Get Coupons for Free
31 Weeks to a Better Grocery Budget Video Series: 4 Ways to Get Coupons for Free
This Week’s Menu Plan

Drinking a Blueberry Ginger Smoothie while I finished planning my menu for this week.
Breakfasts
Energizing Smoothie
Cereal/Milk
Waffles, scrambled eggs, fruit
Steel Cut Oats with raw sugar and milk
Blueberry Ginger Smoothie
Scrambled Eggs and Fruit
Mango LassiLunches
Leftovers x 3
Peanut Butter & Jelly, Carrot sticks
Tuna Salad, broccoli
Mac & Cheese, peas
Cheese Quesadillas, fruitSnacks
Chocolate Chip Cookies
Popcorn
Fruit/Veggies
Frozen Banana/Chocolate Almond Milk SmoothiesDinners
Barbecued Meatballs, mashed potatoes, frozen veggies, fruit salad
Wild Rice and Chicken, frozen veggies, fruit
Steak on the grill, Sliced Baked Potatoes (recipe coming soon!), frozen veggies
Fettuccine Alfredo, Marinated Chicken, steam broccoli, fruit salad
Orange Chicken with rice, frozen veggies, fruit
Dinner out
Dinner with extended familyFreezer-Cooking-In-An-Hour Plan (I’ll share pictures/details on how this goes on Thursday!)
Whole-Wheat Chocolate Chip Oatmeal Cookie Dough
Marinated Chicken Breasts
Waffles
What’s cooking at your house this week? Share your menu plan link or a great recipe you’re making in the comments!
How to Transition to Working at Home

Guest post by Heather at Work at Home Market
When my husband, and I were first married, we decided I would continue working for six months. During that time, I worked over 35 hours a week, and spent many hours commuting. As the six-month mark neared, I found myself exhausted, often falling asleep hours before bedtime.
My desire to work from home increased with each day. I wanted the liberty to prepare my husband’s breakfast and lunch in the mornings without being late for work. Most of all, I wanted to enjoy our married life without the exhaustion.
We were a bit leery if I would be able to work from home successfully, but we started praying about it and asking the Lord to bless our desires. Amazingly, before I even left my job, my brother offered me some part-time work that could be done from my home! I also pursued two separate business ventures. Now, over a year later, I have nearly replaced my former income, and have the flexibility I need to stay home!
Here are some things I’ve learned that have helped me be successful in working from home:
1. Set a timeline for yourself for starting to work from home. In two months? Four weeks? This is just a simple way to motivate yourself in looking for home based work.
2. Create a polished cover letter and resume. Make sure your cover letter explains that you are looking for freelance and contracted work. Send this letter to businesses you would love to work for. Hopefully, this will allow you to connect with someone who may be willing to hire you for home-based work in your field of choice.
3. Build a solid website that is a host to your resume and portfolio. This is a great way to display services that you can offer (photography, writing, editing, etc.). Include your website address in your cover letter to provide an easy way for interested clients to check out your work. If you don’t already have work experience in your field, offer to take on some jobs for free in order to build your portfolio and work experience.
4. Get the word out that you want to work from home. A simple e-mail to a few friends and family can go a long way in connecting you with potential job leads.
5. Make sure you avoid scams. As a rule of thumb, never pay to work for a company. Whenever you are offered a job, do your research on that company and ask advice from those you trust.
6. Advertise. Advertise your services in newspapers, websites and even on Facebook. For my freelance business, over 50% of my clients find out about my work through Facebook.
This is not an extensive list, but I hope it gives you a starting point. If you are serious about working from home, I encourage you to make goals for yourself and do something to pursue your work-at-home career each day, until you have found the job you are looking for. Having a home-based business does take a lot of work upfront, and even a few tears (trust me, I know!), but, as I’ve found, if this is what you’re supposed to be doing, the right job option will come along. Be patient and don’t give up!
Heather is a freelance webmaster, writer and photographer. She currently runs Work At Home Market, a site dedicated to helping others find freedom and flexibility by working from home. In her spare time, she loves spending time with her husband, cleaning & organizing their home, and traveling the world. You can e-mail her at [email protected].
Do you have an idea for a guest post? I am always looking for high-quality,original (i.e. not published anywhere else online) content with tips and ideas Money Saving Mom® readers can use. If you would like to submit a guest post, please follow the Guest Posting Guidelines.
Reader Testimonial: “I was chosen as one of the HopScout editors!”
Reader Testimonial: “I was chosen as one of the HopScout editors!”

I was so thrilled to read this email from Jill this morning:
I just wanted to write a quick email to say a HUGE THANK YOU to you for posting about Hopscout’s Stay-At-Home-Millionaire campaign. I found out about it because you posted about it on April 11th. I submitted a video, got into the top 20, and then actually was chosen as one of the new SAHM editors!!!
I’m still on cloud nine from the news that was announced yesterday! This is a huge blessing in my life and couldn’t have come at a better time. Your site was a major step in the process for me and I wanted you to know the role you played.
Thanks again for your informative, helpful site. It literally changed my life! 🙂 -Jill
Congratulations, Jill! I’m incredibly excited for you!
OVER-SPENDING EVERY SINGLE MONTH?Grab these FREE Budgeting Sheets!
Click here to download!
Super Savings Saturday

I stopped by Dillon’s on Thursday and got the following:
1 Silk Pure Almond (half gallon) – $1.99
Used $1.25/1 Silk coupon
$0.74 after coupon1 Kellogg’s Raisin Bran cereal – $1.98
Used $0.70/1 Raisin Bran coupon available when you register (“doubled” to $1 off)
$0.98 after coupon5 American Beauty Pasta – $0.49
Used 1 $0.55/1 American Beauty Quick Cook Pasta coupon (“doubled” to $1 off) plus 2 $1/2 coupons
Free after coupons + overage2 Ronzoni Pasta — $0.99
Used 1 $1/2 coupon (there are also coupons in the 4/10 SmartSource insert)
$0.49 each after coupon1 Dannon yogurt — $1.50
2 bunches of marked down organic bananas — $0.29 per pound
1 quart of half & half — marked down to $0.99
2 Uncle Ben’s Rice $1.25 each
Used 1 free coupon, used 1 $0.75/1 coupon that came with the free coupon (“doubled” to $1 off)
Free and $0.25 after coupon
My total after coupons was: $9.27
I also made a stop at Dillon’s earlier in the week. See the full details on that shopping trip here. Plus, Jesse stopped at Aldi to pick up fruit, vegetables, cheese, milk and butter.
Would you like to know what the best deals and coupon match-ups are for your local stores? Be sure to check out the Store Deals section of our site where we post the best deals and coupon match-ups each week for over 100 different stores across the country. You can sign up to receive the top deals in your email inbox each week as soon as they are posted!

 Did you snag any great deals or bargains this week or save money in other ways? If so, be sure to post about them on your blog and leave your link below. Please remember that this weekly round-up is to share deals you personally got and/or money you were able to save this week. In order to keep this weekly round-up focused on helping and inspiring others in their efforts to save money, links which have little-to-no content other than promoting affiliate links, etc. will be deleted. Also, to make it easy for everyone to navigate quickly through the links, your link must link directly to your Super Savings Saturday post.
Monthly Financial Check-up

We’re excited because, after we paid our taxes a few weeks ago, we had some extra money in our tax savings account to throw towards our savings goals. This allowed us to be able to fully fund the amount of educational savings we’ve decided to set aside for Kathrynne. Since she’s our oldest, we’re setting aside the most for her as she won’t have as much time for the interest to compound on the money.
So now we just need to save for Kaitlynn and Silas and then we can move onto our final two financial goals for this year. I have no idea if we’ll actually be able to hit both of them, but we’re at least going to try!
We also have been doing a lot of talking about our upcoming goal of saving to invest in real estate. We were initially planning to invest in commercial real estate, but the more we’ve studied, read and talked, the more we’re leaning towards residential real estate. We’re hopeful we might be able to pay cash for our first piece of real estate by the middle of 2012. We’ll see!
Our Family’s Financial Goals for the Summer of 2010 through December 2011
1. Significantly increase our giving to needs in our community and around the world. This is an ongoing goal, so we’re keeping it uncrossed off from the list.
2. Pay cash for a replacement washer and dryer for our very used set.
3. Pay cash for a replacement for Old Blue Van.
4. Pay cash for a couch for our basement family room.
5. Pay cash for bunk beds for the girls.
6. Fully fund our IRAs (for 2010).
7. Bump up our retirement savings to 10% of our income.
8. Fund our children’s educational savings — Kathrynne’s is finished
9. Double our Emergency Fund Savings (Instead of having around six month’s worth of expenses set aside, we’re planning to set aside a year’s worth of expenses.)
10. Save 40% towards our real estate investing goal.
We’d love to hear about your recent financial goals and successes! You can post about it on your blog and leave your link in the comments. Or, just share about your progress/goals in the comments. Let’s all keep each other accountable to be better stewards of our resources!
We Paid Cash:: Belated Honeymoon Cruise

A testimony from Emily
Background
My husband and I were married on April 12, 2008 and moved to a new city 200 miles away the very next day! Our “honeymoon” was spent unpacking, getting to know the city and working. Not at all romantic, I must say!
My parents surprised us with an all-major-expenses-paid family (their children and spouses) cruise in January, 2010. We were stoked! It was my husband’s first cruise, and he came away hooked!
Our Goal
My husband turned 30 this year, so for his big day I wanted to do something special. Since he was now hooked on cruising, I (with his help, of course) decided to book one for just the two of us as a birthday celebration/belated honeymoon. We paid cash for the deposit in March and then devised a plan to pay the rest of the cruise with cash, by that October.
How We Did It
My husband picked up as many “over time” shifts humanly possible! He sometimes worked seven days straight, for several weeks at a time. I agreed to babysit for a few friends to make as much extra spending money possible.
We cut back on things we really didn’t have to have: monthly hair appointments at $40+ a pop (appointments every two months work just fine), NFL package with Direct. etc. We transferred money from each paycheck into our “cruise fund” and did not transfer back a dime no matter what! (This was really hard — especially when other “things” pop up!) We also continually talked to reassure each other that we were on the same page, and to remind each other that paying with a “card” wasn’t an option!
The Result
After working extremely hard and saving every dime possible, we paid cash for the $1200 (plus tax/fees) cruise fair, $600 (plus tax) air fare and $500 for onboard expenditures! We had the time of our lives that trip and it was made even sweeter by only having memories and not debt to come home too!
Emily and Ben live in the suburbs of Memphis, Tennessee. She is a pre-K teacher and he is a Police Officer. They have two dogs and hope to soon become parents! They are striving to be completely debt-free (minus house) by the end of 2011!
Have you saved up and paid cash for something — large or small? Submit your story for possible publication here.
3 Inexpensive Ways to Make Exercise Fun For Your Children

Guest post by Kristin at Children’s Church Ministry
I’m always looking for fun and inexpensive ways to encourage my children to be active. Here are a few of my favorites:
Roll the Dice
I made “Fitness Dice” set by taping cardboard with clear packing take on large blocks we had on hand. One block contains the numbers 4, 6, 8, 10, 12, 14. The other has exercises listed on each side: crunches, push-ups, arm rolls, jumping jacks, squats and toe touches. We take turns rolling the dice and doing the number of repetitions of whatever exercise we roll.
Play With a Parachute
Remember those fun parachute games we used to play in elementary school and at summer camp? I ordered a six-foot parachute from S & S Worldwide for our family, but an old flat or fitted bed sheet would work for most of the 39 different parachute games detailed here.
Pick a Card
We have a really fun set of Superman Fit Deck cards with activities listed on each card. Each child can pick a card and then we do the activity/exercise. You you could easily make your own deck of fitness cards. Just use 3×5 index cards and write out lots of exercises and fun little activities that can actively be done in an enclosed space (leg lifts, lunges, bunny hop, back extensions, “swimming,” etc.).
I don’t want my kids to struggle with laziness or obesity and the character and health problems that are accompanied by those, so I am trying to overcome my own bad habits and instill in them a love for great health and fitness. The biggest points I try to emphasize for myself are to set a good example, do healthy activities with them (not just watch from the sidelines), and have fun!
What are your favorite ways to make exercise fun for your children?
Kristin McPherson and her husband Chris head up the children’s ministries at Union Baptist Church in Florien, LA. They have six kidlets of their own, ranging from six months to eight years old. Kristin runs the website Children’s Church Ministry.
Why You Don’t Need to Pay for Cable

Guest post by Jenae at I Can Teach My Child
How much do you spend on cable each month? Stop reading this post, go get your last bill and say it out loud. Now, multiply that number by 12. Wowza…that’s a lot of money in a year’s time, huh?
Let’s just say that it’s an even $50 each month (which is probably a very conservative number), if so, this means you are spending $600 each year on cable. That’s money you could have saved to pay off your house, to pay for your kid’s college or to spend on a brand-new dining room table!
There are so many alternatives to paying lots of money for cable each month. Here are three we’ve found to be helpful for our family.
High-Definition Antenna
What if I told you that you could still watch most of your favorite shows for free? ABC, NBC, CBS, FOX, PBS and even a few other random channels can all be received for free in most areas* with a high-definition antenna. After a little upfront cost, you can watch these channels for the rest of your life. All you need is a converter box (if your TV does not already have an HDTV tuner — every new TV has one) and a high-definition antenna (which can go in your attic, wall or outside).
High-definition antennas range from $40-$150. You can purchase them at your local home-improvement store (Lowe’s or Home Depot). You can also go here for more information and to purchase one as well. And if you’re really handy (or you know someone who is), you can supposedly even make your own HDTV antenna for less than $10! It might be worth a shot!
If you own a TV that was manufactured after July 1, 2007, it should already have an HDTV tuner. You only need a converter box if your analog TV is older than that. Converter Boxes start at $40 and go up from there. Go here and here for a few converter box options.
*I realize that good reception depends in large part due to where you live. If this isn’t an option for you, you could still opt for the cheapest plan from your cable or satellite provider and implement the other two suggestions.
Netflix & Redbox
Many of you know that you can receive unlimited DVDs in the mail for about $10 a month from Netflix. But did you also know that they have thousands of movies on instant play as well? We’ve watched entire series of very popular shows instantly. You can stream it to a Blu-Ray player, XBox or Wii, or you can just watch it on your computer. Netflix is also a great resource for children’s television shows. The best part is that there are no commercials.
Redbox (a $1-per-night video rental kiosk that can be found outside many McDonald’s, Walgreens, and Walmarts locations) offers at least one free rental each month (usually the first Monday of every month) when you create an account on their website.
Borrow
Libraries are not only a great resource for books, most libraries also have movies as well! And the best part is that it’s free! You can browse most titles on your library’s website. Another option is to borrow movies from friends.
We’ve gone without cable for our entire married life (almost seven years). At first, we simply couldn’t afford cable and opted for bunny ears. Now that our income has increased and we could afford if we really wanted to, we still choose not to. We enjoy enough television and movie time without spending all that money every month!
Jenae is a wife, mother of two boys’ ages 3 and 15 months, and former first-grade teacher. She loves spending time with her family and sharing fun and educational activities for young children on her website, I Can Teach My Child.
Do you have an idea for a guest post? I am always looking for high-quality, original (i.e. not published anywhere else online) content with tips and ideas Money Saving Mom® readers can use. If you would like to submit a guest post, please follow the Guest Posting Guidelines.