
Preparing to sell your home? Here’s a free printable checklist to help you get your home looking as organized and presentable as possible.

Saving Families Money Since 2007


Preparing to sell your home? Here’s a free printable checklist to help you get your home looking as organized and presentable as possible.

Before I get into this post, I wanted to remind you that I share this to help those of you who are struggling with organization in your life. If however, life is going smoothly for you or you just don’t need something else added to your life right now, just skip over this post, okay? The last thing I want to do is heap guilt or more things to do onto your plate!
Once you’ve determined your big rocks and mapped out the basic framework for your day, it’s time to plan the Time Blocks in your routine. Here’s how I recommend doing that:
Take your list of priorities and follow the instructions in this post to come up with a time budget for the 24 hours in your day. (See my time budget from 2010 here for an example of how this will look.)
Once you have your time budget created, take those blocks of time and put them in a set order for the day. Do not stress over doing this perfectly, just think of how to order the time blocks so things would flow fairly smoothly in your home.
For instance, here’s what my current routine looks like:
My Current Routine
Up, Bible, coffee
Run
Shower, dress
Clean up bathroom/bedroom, start laundry
Blog
Children up, baths, hair fixed
Breakfast, Bible Time, clean up kitchen
Chores, switch laundry, dinner out from freezer
Homeschooling
Reading together
Lunch, read alouds
Afternoon Routine
Homeschooling
Blogging
Free hour
Dinner, Bible Time
Evening Routine
Time with Jesse, read
If you’ll notice, I have an hour of free time built into my routine. This gives some “padding” in the routine to allow for the inevitable interruptions and things that come up throughout the day. Plus, it also provides a time block for extra projects.
Don’t make the mistake of trying to pack your day so full that you end up overwhelmed and burnt out. It’s better to do fewer things and actually finish them, than to attempt a massively-long list and end up frustrated. Stick with the basics and don’t forget to focus on the big rocks first.
We never follow our routine exactly. I view it as a guideline, not a strict slave master. It’s there to keep us moving in the right direction, but it can be shifted and rearranged somewhat depending upon how the day is going.
Now, if you start shifting things too much, you’ll defeat the purpose of having a routine, but do give yourself some grace and don’t feel like you need to follow it to a tee or you’ve failed. Good enough is always better than doing nothing at all.
A good routine is like a good budget: you keep tweaking it as your needs and life changes. If something isn’t working, change it!
Practical Application
1. Sit down and create a time budget.
2. Take your time budget and your big rocks list and develop a simple routine for your day. Type it up so you can easily tweak it, as need be.
If you create a routine or already have one, I’d love to have you share yours in the comments section.
Tomorrow we’ll talk about how to stick with your routine, now that you’ve created it! 🙂


I’m trying to declutter my home. I have two children, a daughter (5) and a son (1 1/2). My husband and I aren’t sure if we are done having children.
So what to do with all the outgrown baby and kid stuff? I gave away all of my daughter’s girly stuff to friends of ours who had a baby girl. But there’s the crib that my son will soon outgrow, the stroller, baby car seat, bouncers, Bumbo, baby toys, baby clothes (I kept the neutral ones), cloth diapers, and my maternity clothes.
Currently it all sits in my basement in plastic storage bins. But it piles up! I’ve really gotten rid of a lot, donating to a maternity resource center and passing things along. But what I have left still takes up a lot of space.
If you’re not sure whether your family is complete, how do you handle all the outgrown baby, kid, and maternity stuff?
-Jessica
Great question, Jessica! And I think the answer will look different for different people. But here are some of my thoughts:
If you didn’t use it repeatedly with your last child, there’s a very good chance you won’t be using it much with your next. Instead of letting it hog up storage space, pass it on, sell it, or donate it.
Don’t hang onto clothes or baby items that are worn out, stained, or ripped. Ditch items that are broken or have missing parts–unless you’re absolutely sure you will fix or replace the parts should you need them again. If you’re not 100% sure you’ll go to the effort to fix or repair an item, don’t hang onto it.
Better yet, if you want to hang onto something and it needs repair, go ahead and just fix it before putting it in storage. If you’re not willing to go to effort to fix it now, there’s a good chance you won’t be motivated to fix it when you need it, either.
If you don’t have a lot of storage space, only keep the basic necessities. In my Having a Baby Without Breaking the Bank series, I wrote:
First off, we must start by asking ourselves, “What does it really take to raise a baby?” I believe our society has become so materialistic and consumer driven that we hardly know how to even think in basic terms.
Aside from lots of love and nurturing, here are the essentials I believe you truly need:
–Clothes (For starting out, I think you can get by just fine with around six onesies, six sleepers, a few pair of socks, a few hats, and 4-6 blankets.)
–Bed (unless you’re planning to co-sleep)
–Car seat
–Stroller
–Diapers/wipes (either cloth or disposable)
(And if you are unable to nurse–as I know happens on occasion, or if you are adopting, you would also need to add formula to this list.)
And that’s about it, folks. Seriously. There are other things that are nice to have, such as a swing, a sling (or ERGO), a few nicer outfits for baby to wear out of the house, a diaper bag, and so forth. But none of those things are absolute necessities.
If you love it and used it repeatedly with your last baby, ask yourself how much it’s worth. If you could easily and inexpensively replace or borrow something, it might not be worth hanging onto it for months or years–especially if you’re not sure you’re going to use it again.
If you’re really short on storage space, pare down to the basic minimums. It’s just not worth it to keep items you aren’t using if you don’t have anywhere to store them.
If you’re not using an item, you might as well loan it out to someone who could be using it. That way, you’re not having to store it, it’s not sitting somewhere unused, and it’s saving someone else from having to buy it!
Do you hang onto all your outgrown baby items and maternity clothes?

Want to get a head start on your garden for the spring? Reuse gallon milk jugs to start seedlings for your garden.

Life Blessons shows you how to make homemade whole wheat hamburger buns.
Do you have a fun and frugal DIY idea to share? I’d love to hear about it! Read the submission guidelines and submit it here.

I didn’t completely follow the menu plan last week since we were sick. I just didn’t feel like cooking at all, so we made it through Thursday and then I gave in and Jesse brought home takeout on Thursday and Friday evenings. Sometimes you just gotta do what you gotta do and not feel guilty. 🙂
At any rate, I didn’t do my freezer cooking plan, so I moved some of that to this week.
Does anyone have great gluten-free, dairy-free lunch ideas? I feel like I’m running out of inspiration–we’ve been doing a lot of eggs, veggies, and fruit recently and I feel kind of stuck in a rut.
Breakfasts
Cereal, orange juice
Chocolate Peanut Butter Smoothie (we’ll sub the chocolate milk for homemade chocolate almond milk)
Fresh orange juice, cereal
Coconut Flour Waffles, scrambled eggs, fruit
Oatmeal with brown sugar and raisins
Cereal
Flourless Oatmeal Raisin Cookies, fruitLunches
Scrambled eggs, carrot sticks, salad (for me), gluten-free cookies
Hard boiled eggs, sweet potato chips, applesauce
PB&J on rice cakes, carrot sticks, apple slices
Egg & Potato Hash, veggies
PB&J Milkshakes, carrot sticks
Leftovers x 2Snacks
Fruit/veggies
Flourless Oatmeal Raisin Cookies
German Fudge BitesDinners
Meatloaf, potatoes, steamed broccoli, gluten-free bread
Crockpot Chicken Fajitas, fruit
Goulash, tossed salad
Crockpot Chicken Tacos (we’re going to serve the chicken over corn chips with taco fixings)
Dinner out
Dinner with extended family x 2Freezer Cooking
What’s on your menu this week? Share details and/or your link to your menu plan in the comments.

Last week all of us were sick at one time or another (or all week long!), so I had to set aside some of my goals for the week and just focus on taking care of the sick ones and getting well myself. I’m grateful that we are finally on the road to recovery and am hoping to get back to more normal life this week!
Last week’s goals:
Family/Mothering Goals
1. Finish reading In Grandma’s Attic and read at least 3 chapters of Corrie Ten Boom aloud to the children.
2. Begin our Countdown to Easter study as a family.
3. Write a love note to Jesse.Personal Goals
4.
Finish reading 7: An Experimental Mutiny Against Excessand Rekindling the Romance: Loving the Love of Your Life.5. Complete week 6 of the Couch to 5K program.
6. Start listening to The 10 Habits of Happy Mothers.Home Management
7. Finish going through house from top to bottom and clear out clutter.8. Finish Andalutheean Knitted Dishcloth.
9. Make Homemade Naan.
Business Goals
10. Finish writing article for MomLifeToday.com and RooMag.com.
This week’s goals:
Family/Mothering Goals
1. Finish reading The Boxcar Children and read at least 3 chapters of Corrie Ten Boom aloud to the children.
2. Continue our Countdown to Easter study as a family.
3. Write a love note to Jesse.
Personal Goals
4. Finish reading Rekindling the Romance: Loving the Love of Your Life and Leadership As An Identity.
5. Complete week 6 of the Couch to 5K program.
6. Listen to at least one hour of The 10 Habits of Happy Mothers.
Home Management
7. Implement our tweaked morning, afternoon, and evening routines.
8. Finish Andalutheean Knitted Dishcloth.
9. Make Homemade Naan.
Business Goals
10. Outline my talk for the MomLife Bootcamp in March.
How did you do on last week’s goals? What are your goals for this week? I’d love to have you share your progress on last week’s goals and your goals for this coming week in the comments. Of, if you’ve blogged about it, leave your direct link below. Let’s cheer each other on to live purposeful and productive lives!
You can download a free customizable weekly goal-planning sheet here.

The following is a guest post from Tessa of The Recreational Word Slinger
Before I got married, I used to buy anything and everything I wanted when I went shopping. I was working part-time, going to school, and indulging my every want. You can imagine the shock that I experienced when I was married and had to stop buying things for myself!
I struggled with “little” purchases when I would visit Target or Kohl’s every now and then. I told myself that this $10 top or book would not affect our budget much, so I would stick it in my cart and go on my merry way. As you know, that type of thinking is dangerous. Those small, insignificant purchases tend to add up over time to one significant deficit in the budget.
After the concept of spending cash only was introduced in our marriage, I realized that I was much more satisfied with having less than I originally thought was possible.
1. Expect less.
Stop expecting to buy something every time you run an errand. I was so guilty of this before we switched to using cash. I would think that I deserved a little treat for having to get out and grocery shop or run errands. Direct your thinking towards expecting less.
2. Ignore the urge for more, more, more.
This is easier said than done in today’s society. We are constantly bombarded with different advertisements telling us that we need more. We have to retrain how we listen to or pay attention to such ads. When you become immune to advertising, you might find that your desire for more decreases.
3. Look at what you do have.
This idea is by far the one that has helped me get over my obsession with stuff. One way to do this is by verbally thanking our Creator for what He has given us. When I am more mindful of the blessings that I have been given, then I find that I am less mindful of my humanistic desire for more.
Tessa Hardiman is a wife, daughter, cat lover, bibliophile, novice runner, substitute teacher, and the Recreational Word Slinger. She blogs daily at The Recreational Word Slinger.
Guest post from Heidi of OperationOrganization-MN.com
Do you want to have a more organized home or workspace but feel limited in your pursuits due to lack of funds to purchase supplies? Below, you will find a list of some of my favorite organizing solutions using common household items as well as some innovative ideas using re-purposed containers you are probably bringing into your home on a regular basis.
Having trouble keeping all those little things together? Muffin pans, egg cartons, or ice cube trays are a perfect solution to utilize in a drawer to help corral even the tiniest necessities.

Joyful Homemaking demonstrates using a muffin tin to organize office supplies.

The Krazy Coupon Lady shows you how to use an egg carton to organize office supplies.

Kiss and Tell Scrapbooking suggests using a muffin tin to organize scrapbook supplies.

I posted about using an ice cube tray to organize earrings.

Family Fun suggests pairing these simple plastic cups (that stay in place with the help of adhesive magnets) with a muffin tin for a creative craft caddy.

Create a craft caddy out of tin cans like this one by Martha Stewart.
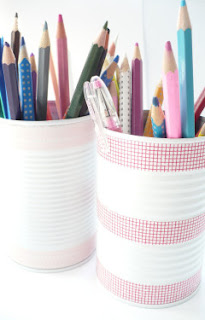
It’s easy to decorate cans with paint or scrapbook paper to match any office or studio décor like these featured at Stylelist Home.

Jars are ideal for holding all sorts crafting supplies as shown in this photo by Andrew McCaul on Good Housekeeping.

The Home in Paradise shows how to pretty up a pantry by using sauce jars of the same size and shape to hold dry goods.

Create a streamlined spice collection using baby food jars like Frugal Decor Mom.
Begin thinking ‘outside the box’ for possible uses of other containers, once purchased products are used up.

A cardboard soda holder is a perfect caddy for sunscreens, lotions, sprays or larger medication bottles.
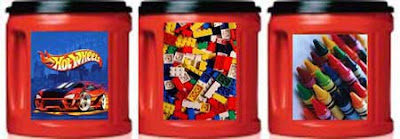
Visit Heart of Wisdom for ideas on how to use coffee canisters to hold toys with pesky small pieces.
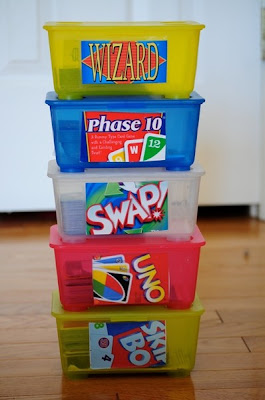
How about using a diaper wipe case to hold card games like Jazzie and Tahlia?

I’ve been using one to hold our supply of crayons for years!

Finally, if you feel a little crafty like Autumn at Space for Living, create a handy desktop organizer out of cardboard food boxes!
Heidi is a Professional Organizer & Family Manager Coach. She is passionate about helping others bring more order and peace to their home, office and life. Learn more by visiting her website, OperationOrganization-MN.com.

If you missed it, be sure to read part 1 of this series here.
Once you know what your big rocks are, it’s time to develop a basic framework for your day. This is not a detailed play-by-play of exactly how your day should look like, this is just how to big rocks fit together.
The first step to getting a good routine in place is to determine your wake-up time, bed time, and meal times. These are not set-in-stone times, but if you have a general guideline to follow, it helps bring order and structure to your days.
Try (as much as is possible) to stay within at least an hour or so of the time you have planned for your wake-up, bed time, and meal times. If your house is anything like ours, stuff comes up and sometimes your plan goes out the window. When that happens, be flexible, roll with the punches, and then get back up on the wagon as soon as you’re able!
If you have no order or structure at all in your life right now, just getting up and going to bed at the same hour every day and eating your meals at the same hours throughout the day will give you a tremendous new sense of order and flow in your days. Plus, it will probably guarantee that you get more sleep and skip fewer meals–something that will definitely affect your overall health in a good way!
I suggest picking realistic times–especially for getting started. If you’re not a morning person, don’t plan to get up at 5 a.m. every morning unless you want to set yourself up for failure.
I first learned of the concept of morning, afternoon, and evening routines from FlyLady. And I’m amazed at what a difference this simple change in one’s life can make.
If you’re unfamiliar with morning, afternoon, and evening routines, it’s basically just coming up with 3-5 simple things that you do in the same order when you first get up, after lunch, and right before bed. Simple is key here.
Sample Morning Routine
1) Wake up, make coffee, read Bible/pray.
2) Exercise
3) Shower, get dressed, straighten bathroom and bedroom.
4) Start a load of laundry.
5) Check email.
Sample Afternoon Routine
1) Clean up kitchen.
2) Switch laundry to the dryer.
3) Fold one load of laundry.
Sample Evening Routine
1) Clean up kitchen.
2) Do a quick 10-minute house pick up.
3) Lay out clothes for next day.
4) PJs on and face washed.
If you’re brand-new to the concept of routines, start with a morning routine only and make it a priority for three weeks before adding anything else to your routine. Once you feel comfortable with a morning routine, then add in an afternoon routine and then an evening routine.
Take it slowly and don’t rush developing these habits. Even if it seems like you’re not making much progress, it’s better to inch forward in the right direction than to try to add all these new things in at once and burn out.
Practical Application
Take 30 minutes this weekend to write down your proposed wake-up time, bed time, and meal times. Also, write down a simple morning routine, afternoon routine, and evening routine.
Put this paper in a very conspicuous location and review it often. You can even set up reminder alarms on your phone, if you find that sort of thing helps you!
I’d love to have you share your proposed morning, afternoon, and evening routines in the comments, if you’re willing.
Begin following your wake up time, bed time, and meal times starting immediately. Add in the morning routine, as well, if you feel up for it.
Now you have a very basic structure for your day in place. On Monday, we’ll talk about filling in the rest of the day, making sure that you get your big rocks in first.
Want some practical help with setting up your day for success? It all starts the night before! Be sure to grab a copy of my brand-new online course, Make Over Your Evenings.
This 14-day online course includes videos, a workbook, and step-by-step projects and is designed to help you maximize your evenings in order to experience more success in your life, more order in your home, and more joy in your soul.
It’s time to stop sleep-walking through life and wake up to the amazing excitement and fulfillment that comes when you follow my simple plan to Make Over Your Evenings.
I used to pride myself on the fact that we didn’t have a junk drawer.
Then, I had my third child. And pretty much everything I prided myself on went out the window. 🙂
I know some of you have told me that having your third child was a breeze. For me, the actual labor and delivery was a walk in the park (1.5 hours of labor, no complications, and feeling back to my normal self within 24 hours!). But after the “babymoon” phase wore off, three children has been a whole lotta work.
Don’t get me wrong, I love my three precious children like crazy, but I no longer have this put-together, pristine life. And it’s been a good thing for me.
I’ve learned to relax more, roll with the punches, and embrace this sometimes messy and chaotic life I’m living. We’ve got a lot of love, creativity, and laughter going on around here, and I’ll take that over perfection any day!

But, I’ll admit it, the overflowing junk drawer was getting to me. So I set out to tackle it today.

And guess what? After only ten minutes’ worth of work, it was transformed.
It’ll probably be this messy again in a few months (or even weeks or days!), but knowing that it can be overhauled in such a short time period makes it not seem like such a big deal.
It’s amazing what can be accomplished in just a short amount of time when you set the timer and attack the clutter with gusto!
Did you do any clutter clearing this week? If you posted about it, link directly to your blog post below. We’d especially love to see before and after pictures, if you’re brave.

I kept hearing great things about this book called 7: An Experimental Mutiny Against Excess. The title alone was enough to have me intrigued, but the rave reviews convinced me to buy a copy.
And I’m so glad I did. Jen Hatmaker is an engaging, funny, and convicting author. I’ve never read anything by her before, but, after reading this book, I want to read Interrupted and Barefoot Church, as soon as I can get my hands on a copy of them!
7: An Experimental Mutiny Against Excess chronicles her seven month seven-things experiment. Each month, she chose a different area to focus on and then pared down the excess in that area.
For instance, the first month, her focus was food. So she limited herself to just eating seven different things during that 30-day period.
Yes, only seven foods.
The second month she only wore seven items of clothing for the 30-day period.
And so on.
Try to step back and just think for a minute what it would be like to only eat seven things or only wear seven clothing items for 30 days. For more of us, that seems almost impossible to even imagine. And yet, think how many millions of people around the world would consider it a luxury to have a choice of seven different foods each meal or seven different clothing items.
Jen didn’t set out on this experiment just to have great book subject matter; she did this seven month experiment because she wanted to challenge her own long-ingrained entitlement mentality. In this book, she writes candidly about her experiences–victories, failures, and hilarious stories along the way!–in order to challenge others to take a step back and really examine our own hearts when it comes to needs versus wants and what truly matters in life.
The book is thought-provoking, for sure, but it’s not guilt-invoking. And it’s well worth the read.
Other recent good reads: From Dust and Ashes, Symphony in the Dark, Between a Rock and a Grace Place, and Arms of Deliverance.
Have you read any good books recently?

Mooberry-Farm.com shows you how to make a homemade dish scrubber from an onion bag.

Do your days feel chaotic and disorganized? Do you feel like you’re always behind and always running around in circles?
You need a routine. It will calm your chaos and bring rhythm, order, and peace to your days.
A routine is a plan for the flow of your day. It can be very basic and bare bones or it can be more specific. However, it is not a regimented schedule with detailed time blocks for how you’re supposed to spend every minute of every day.
While a rigid schedule works well for some, we’ve found that a routine is much more doable for our family–especially since our children are younger and my husband and I both have our own businesses. No day is exactly the same, so the flexibility a routine provides is perfectly suited to allow for the interruptions that inevitably arise.
{In the middle of writing that last sentence, Kathrynne came running upstairs from the basement to let me know that Silas had just thrown up all over the couch. So I spent 20 minutes bathing him, cleaning up the couch, and taking care of the soiled clothes. Yep, this is a classic example of why a flexible routine works better for us than a rigid schedule!}
1. Start With the “Big Rocks”
You’ve probably seen or heard the illustration about putting the big rocks in first:
A popular story describes a time-management professor who demonstrates the importance of prioritizing by filling a five-gallon mason jar with fist-size rocks and asking the class if the jar is full. Since another big rock wouldn’t fit, the class answers, “yes.” However, the professor proceeds to pour a pitcher of gravel, then sand, and finally water into the jar before it is finally full.
The point of the story is not that you can cram much more than you ever dreamed into any given day. The point is this: “If you don’t put your big rocks in first, the fillers of life will take up your day and you won’t fit your big rocks in at all.”
If you want to get things done that truly matter, you must focus on the big rocks. Ask yourself: What are the most important things I want to be prioritizing in my life right now?”
If you feel like you still don’t have clarity, consider what will matter to you in 25 years from now. This helps you strip away the non-essentials and focus on what you really want to be devoting the bulk of your time to.
Develop your daily routine with the big rocks in mind. You’ll likely be able to find time for some pebbles and sand, too, but begin with what matters most.
Practical Application
Take 10 minutes to consider what your “big rocks” are (ask your spouse for input, if you’re married). Write them down on a piece of paper. If you’re willing to, I’d love to have you share them in the comments section on this post.
Tomorrow, we’ll talk about using these big rocks to help craft a framework for your daily routine.
Want some practical help with setting up your day for success? It all starts the night before! Be sure to grab a copy of my brand-new online course, Make Over Your Evenings.
This 14-day online course includes videos, a workbook, and step-by-step projects and is designed to help you maximize your evenings in order to experience more success in your life, more order in your home, and more joy in your soul.
It’s time to stop sleep-walking through life and wake up to the amazing excitement and fulfillment that comes when you follow my simple plan to Make Over Your Evenings.

A testimony by Julie from The Family CEO
Everyone has their challenge when it comes to saving money. For some, it’s shoes. For others, its travel. For me, it’s my house.
I enjoy homemaking and decorating so much and there’s always something on my to-do list. But finances dictate that many of our home improvement projects are going to have to wait for now because we’re tackling two big goals at once: paying down debt and paying cash for college.
Still, some things around the house demand our attention and the master bath was one of them. The flooring was 20-year-old carpet and the brass light fixtures and hunter green accents were screaming to be replaced.
The first thing you should know is that we are not DIYers. We don’t have the time, interest, or expertise. So we hired a handyman to do the work. He was capable, affordable, and on-board with both our budget and our vision.
First, we identified the three things that most needed changing:
And here’s what we did about them:
1. Floor Tile: I chose an inexpensive stock tile from Home Depot. This time I chose a neutral tile in a beige/gray/white pattern, so it wouldn’t look dated in a few years. In the meantime, I can change the look of the room with inexpensive rugs, towels, and accessories.
I also had the floor tile laid on the diagonal for a more interesting look. This cost a little bit more, but I love the resulting more custom look.
2. Tub Surround Tile: Rather than replace all of the tile in the tub surround, I kept the white tile that was there and replaced just the hunter green strip of 2×2 tiles with a strip that matched the floor tile. This saved both materials and labor cost.
3. Fixtures: I replaced the brass light fixtures, cabinet pulls, and door knobs with brushed nickel.
Extras: I had all of the walls and woodwork covered in a fresh coat of paint. Creamy white for the woodwork and beige for the walls. Again, neutrals that I won’t tire of.
Honestly – when it was all done – it felt like a brand new bathroom. And even better because it was paid for with cash!
In 2006, Julie hired herself to save her family money, make extra money, and pay down debt, all while creating a life she loves. She blogs about her experiences at The Family CEO.
Have you saved up and paid cash for something — large or small? Submit your story for possible publication here.