


Keep the heat out of your kitchen with this EASY recipe for slow cooker BBQ sandwiches.

Guest post from Brigette Shevy
A couple of summers ago, I made an important discovery: my neglected slow cooker.
Sure, I knew it was great for cooking all those “winter-y” foods (stews, soups, roasts, etc.), but somehow it always got pushed to the back of my cabinet and forgotten during the long, hot months — the very months that I should be using it to keep my kitchen cool.
This Slow Cooker BBQ is Amazing!
Here is a most decidedly summer recipe that makes use of this not-just-for-winter appliance. It goes together in a matter of minutes, serves our family for several meals, and freezes well.
I love main dishes that don’t require a lot of last minute preparation, and this one definitely fits the bill.
You can use pork or beef for this recipe – whatever your family likes best, or whatever happens to be on sale.

Ingredients for Slow Cooker BBQ Sandwiches
- 3 to 4-pound chuck or bottom round roast OR pork shoulder roast
- 2 carrots, finely shredded, optional (you can’t tell they are in there once it cooks, I promise!)
- 1 small onion, diced or ½ teaspoon onion powder
- 2 garlic cloves, crushed or 1 teaspoon garlic powder
- ¾ cup ketchup
- ¼ cup brown sugar (can use raw sugar or sucanat)
- ¼ cup wine vinegar
- 2 Tablespoons Dijon mustard
- 1 Tablespoon Worcestershire sauce
- 1 teaspoon liquid smoke
- ½ teaspoon chili powder
- ½ teaspoon salt
- ¼ teaspoon pepper
How to Make BBQ Sandwiches
1. Trim fat from roast, cut into several large pieces, and place in slow cooker (For best cooking, your slow cooker shouldn’t be more than 2/3 full).
2. In a small bowl, combine remaining ingredients and pour over the top of meat.
3. Cover and cook on low for 8-10 hours.
4. Uncover the last hour to help sauce thicken, if needed.
5. Remove meat from cooker and shred with two forks in a separate bowl, discarding any bones and fat.
6. Skim fat from remaining liquid in the slow cooker.
7. Return shredded meat to cooker and heat until bubbly (it should be about the right amount of liquid to meat ratio, but drain some liquid if necessary).
8. Serve on hamburger buns or sandwich rolls.

Slow Cooker BBQ Sandwiches
Ingredients
- 4 pound chuck or bottom round roast OR pork shoulder roast
- 2 carrots finely shredded
- 1 small onion diced or ½ teaspoon onion powder
- 2 garlic cloves crushed or 1 teaspoon garlic powder
- ¾ cup ketchup
- ¼ cup brown sugar
- ¼ cup wine vinegar
- 2 Tablespoons Dijon mustard
- 1 Tablespoon Worcestershire sauce
- 1 teaspoon liquid smoke
- ½ teaspoon chili powder
- ½ teaspoon salt
- ¼ teaspoon pepper
Instructions
- Trim fat from roast, cut into several large pieces, and place in slow cooker (For best cooking, your slow cooker shouldn’t be more than 2/3 full).
- In a small bowl, combine remaining ingredients and pour over the top of meat.
- Cover and cook on low for 8-10 hours.
- Uncover the last hour to help sauce thicken, if needed.
- Remove meat from cooker and shred with two forks in a separate bowl, discarding any bones and fat.
- Skim fat from remaining liquid in the slow cooker.
- Return shredded meat to cooker and heat until bubbly (it should be about the right amount of liquid to meat ratio, but drain some liquid if necessary).
- Serve on hamburger buns or sandwich rolls.
Nutrition
Love this recipe?
Make sure to share and save it on your favorite platform below!
What are your favorite summer slow-cooker recipes?
Brigette is a full-time wife and mother who is blessed with three amazing bundles of energy (ages 5, 3, and 1). She enjoys music, experimenting in the kitchen, homeschooling her children, finding great deals, long-distance running, and anything chocolate.
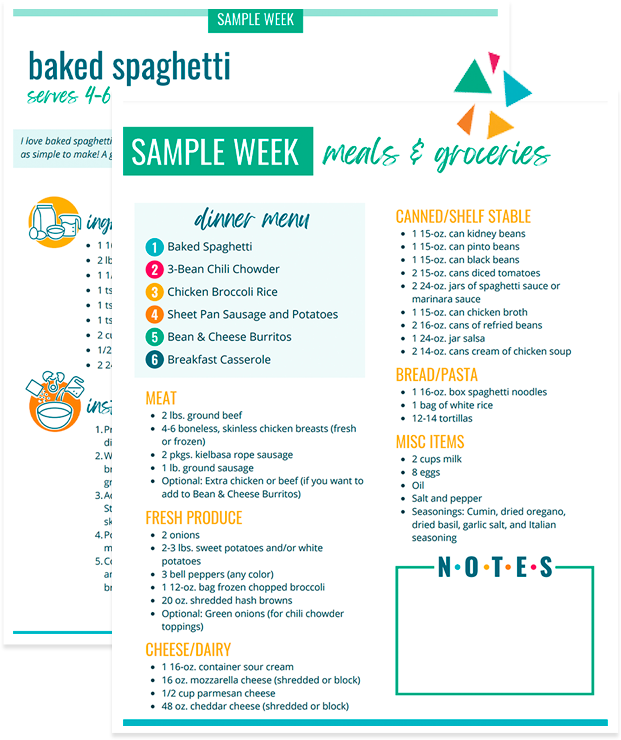
FREE One Week Menu Plan!
Done-For-You Dinner Recipes With Simple Ingredients and a Grocery Shopping List!
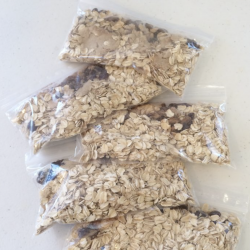
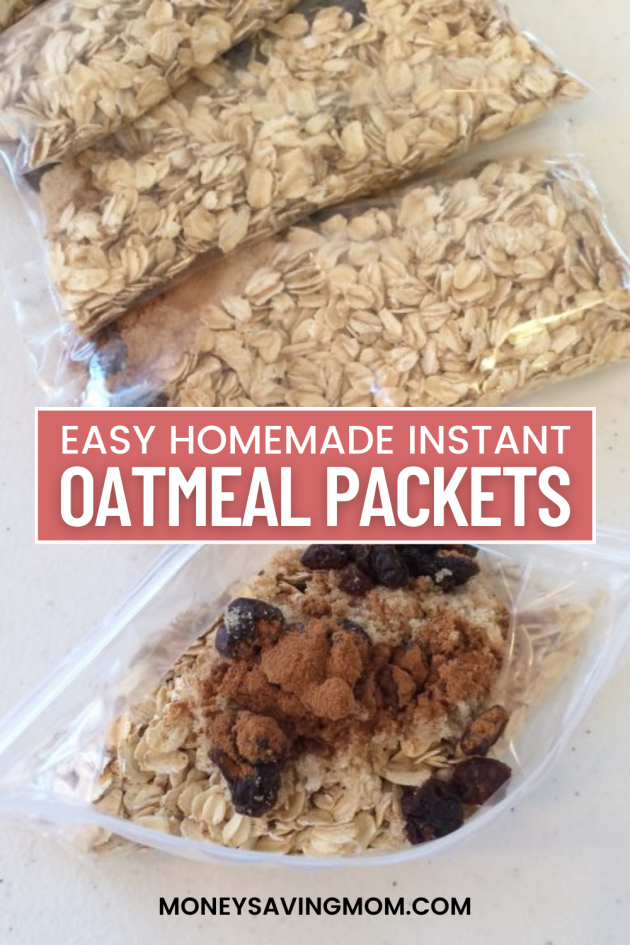
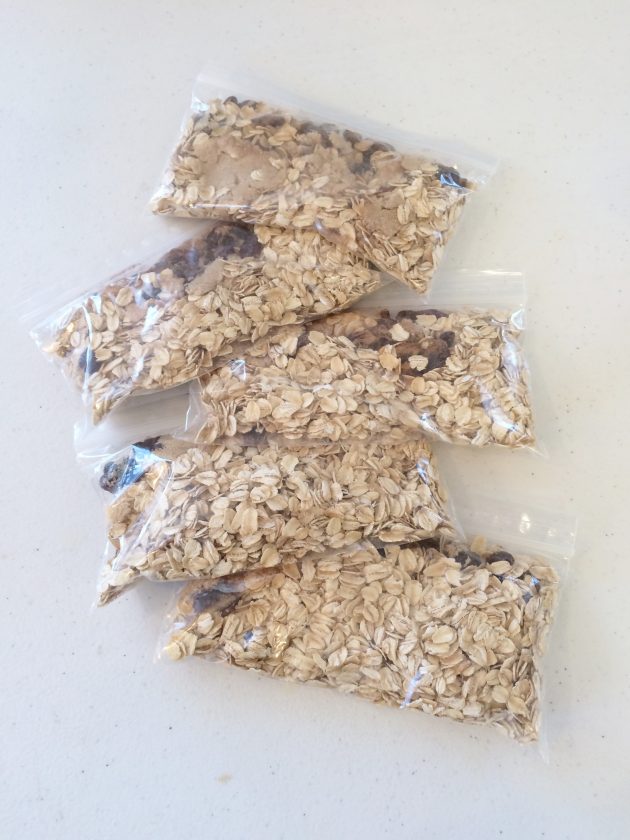
Homemade Instant Oatmeal Packets
Looking for a quick, easy, and frugal breakfast for busy mornings or on-the-go days? These easy homemade oatmeal packets are a huge hit with our family and I know you’ll love them too!
We love these easy, make-ahead instant oatmeal packets!
This is an extremely easy recipe for homemade instant oatmeal packets, and kids always have fun helping out with this one!
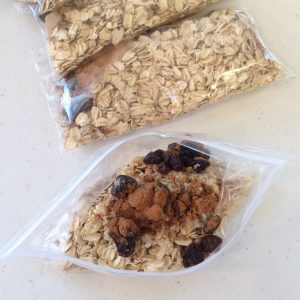
The best part? You can mix it up and use a variety of different add-ins, depending on what your family loves.
You can even make different bags for each family member if everyone likes different types of oatmeal!
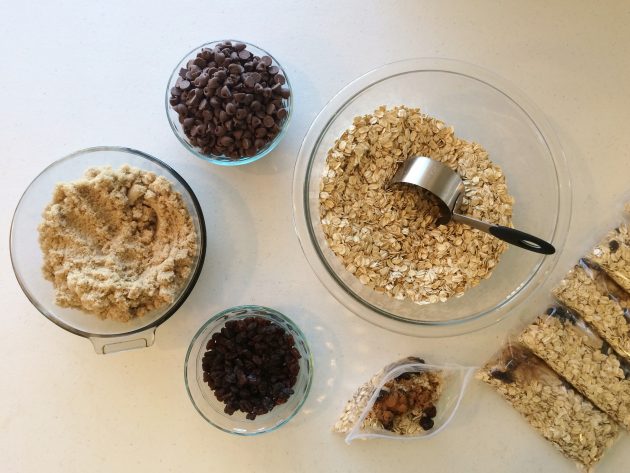
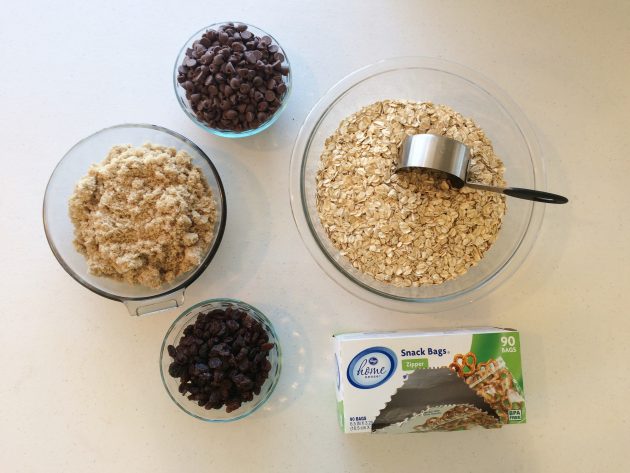
Ingredients for Instant Oatmeal Packets
- 1/2 cup oats
- 1 Tbsp. brown sugar (or raw sugar)
- 1/8 tsp. cinnamon (optional)
- 1 Tbsp. chocolate chips, raisins, or other mix-ins (optional)
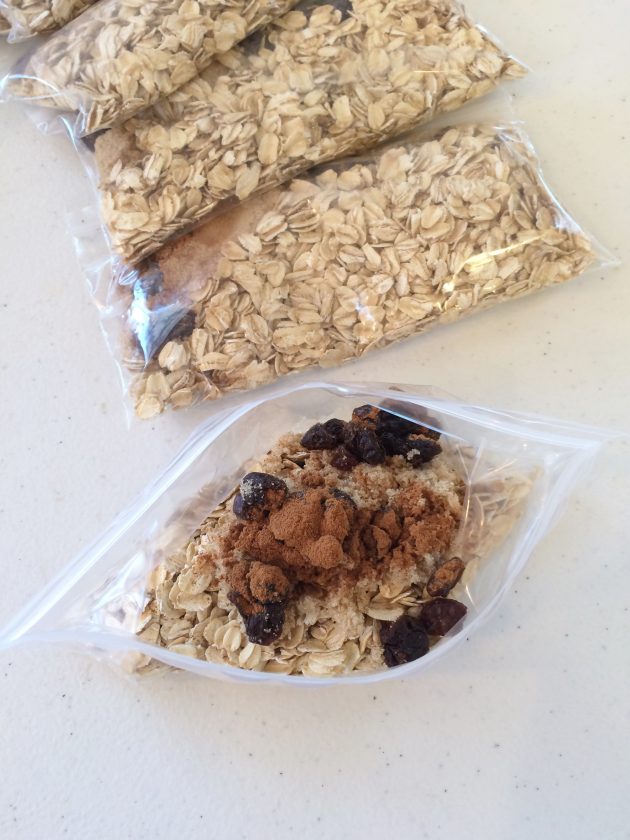
How to Assemble These Easy Oatmeal Packets
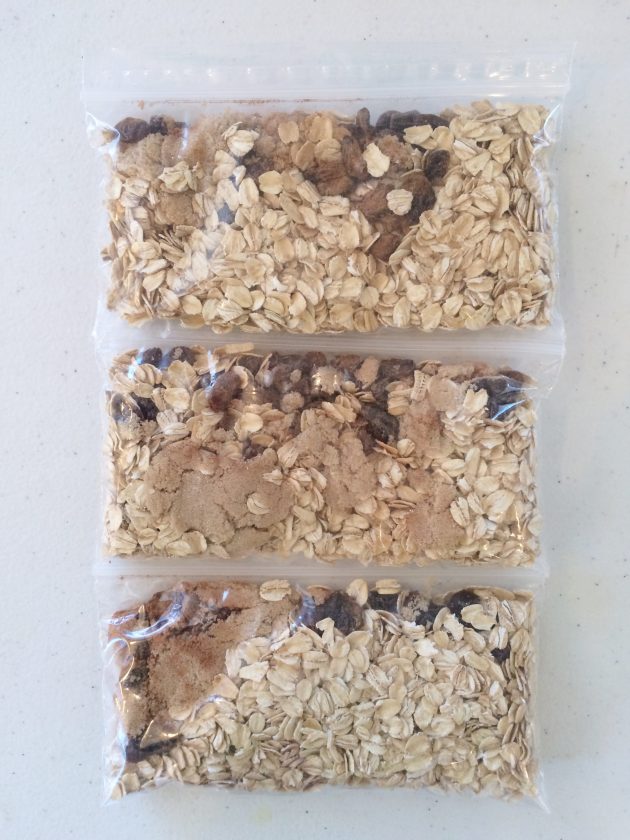
1. Dump oats, brown sugar, and optional add-ins into a snack-size zip-top bag.
2. Repeat with as many baggies as you’d like to make.
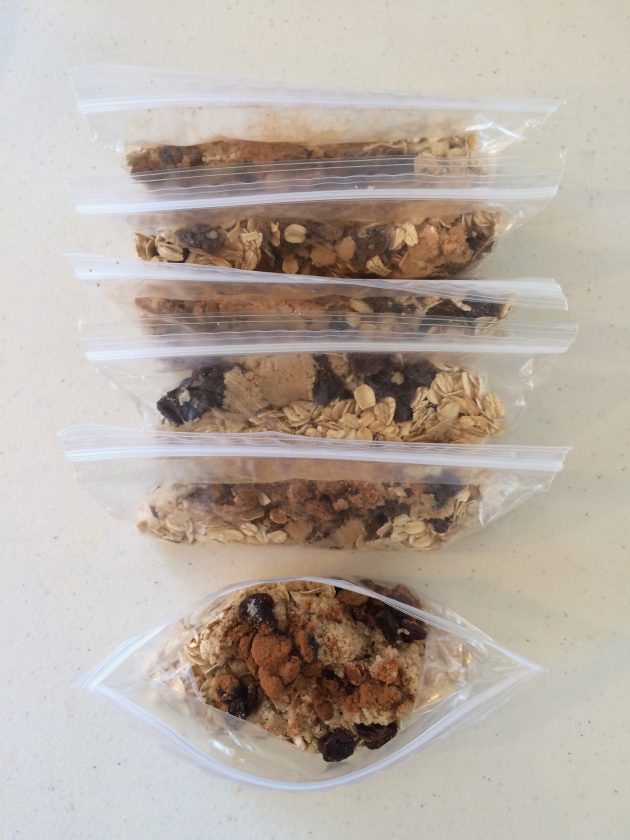
3. Store baggies in an airtight container or freeze them for up to three months.
How to Prepare Instant Oatmeal
1. Pour the contents of one bag into a cereal bowl or very large mug.
2. Add 3/4 cup water or milk.
3. Microwave on high for 1-2 minutes, until cooked.
4. Stir and add additional milk if necessary.
5. Eat and enjoy!
NOTE: You can also cook in a saucepan on the stove if you prefer — but then it’s not “instant oatmeal”!
Easy Instant Oatmeal Packets
Equipment
- Snack-size zip-top bags
Ingredients
- ½ cup oats
- 1 tbsp brown sugar
- ⅛ tsp cinnamon optional
- 1 tbsp raisins or chocolate chips optional
Instructions
- Dump oats, brown sugar, and optional add-ins into a snack-size zip-top bag.
- Repeat with as many baggies as you’d like to make.
- Store baggies in an airtight container or freeze them for up to three months.
To Cook Oatmeal:
- Pour the contents of one bag into a cereal bowl or very large mug.
- Add 3/4 cup water or milk.
- Microwave on high for 1-2 minutes, until cooked.
- Stir and add additional milk if necessary.
- Eat and enjoy!
Love this recipe?
Make sure to share and save it on your favorite platform below!
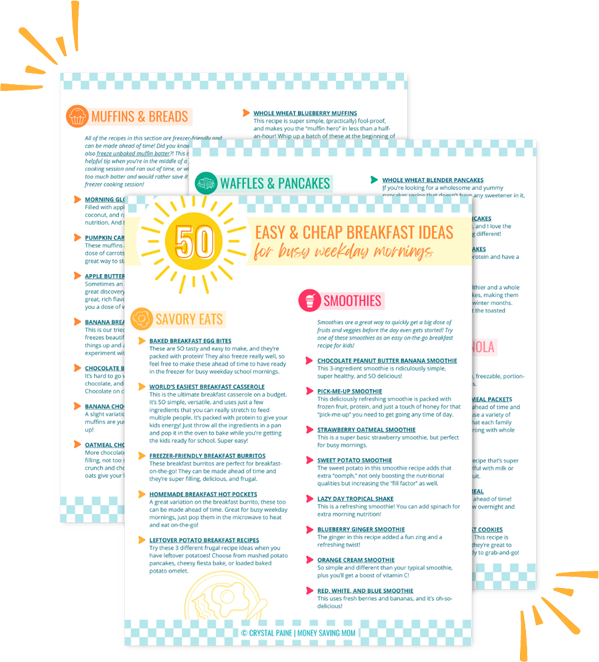
FREE 50+ Easy and Cheap Breakfast Ideas!!
Mornings just got so much easier with this FREE list of 50+ Easy & Cheap Breakfast Ideas for Busy Weekday Mornings!

Make the Most of Your Mornings: Begin Your Day With a Good Attitude (Day 4)
Make the Most of Your Mornings: Begin Your Day With a Good Attitude (Day 4)

Attitude is key to having a successful morning.
When you wake up feeling grumpy, grouchy, and out-of-sorts, it’s going to spill over into everything you do. You’ll probably feel unmotivated and apathetic, and frustrated.
If, on the other hand, you begin your day feeling cheerful, upbeat, and energetic, you’ll probably find that you’re more efficient, productive, and you just plain enjoy life a lot more.
Now, there are times in life when it’s hard to have a good attitude. For instance, if you’re struggling in your marriage, having financial issues, recovering from some sort of traumatic experience, experiencing hurt or loss, or dealing with difficult physical issues or depression, you’re probably waking up with a very heavy heart (if you even slept at all!).
Slapping a bandage on your pain and putting on a pretend happy face is not what I’m suggesting you do. Get help; don’t hide your struggles. The best way to find hope and healing is in reaching out for help from those who care and can provide you with the support you need during a dark time.
However, no matter what you’re going through, it’s never an excuse to mope, pout, and have a bad attitude. A bad attitude is only going to make matters worse.
5 Ways Start Your Day Off With a Good Attitude
Here are some practical ideas of ways to help you start your day off with a good attitude:
1) Listen to Music
Music can lift my mood like just about nothing else. If I’m feeling discouraged, putting on my headphones and turning on some of my favorite upbeat songs is one of the best ways to cheer me up.
Find some music that you love and that lifts your spirits and put together a playlist of it to have ready whenever you need a pick-me-up.
2) Smile
Even when you don’t feel like it, if you make yourself smile at others, it’s almost impossible to stay grumpy for long. Try it sometime and see if I’m right!
3) Count Your Blessings
As I shared recently, beginning my morning by making a gratitude list has helped to transform my attitude. I’d encourage everyone to designate some time during the day (in the morning, before lunch, when you go to bed at night), to recount your blessings.
Focusing on what we do have instead of fretting over what we don’t have is a surefire way to give you a more cheerful outlook on life. And even if you feel like you have very little to be thankful for, when you start looking for blessings, you’ll begin to find many more than you ever realized existed!
4) Hug Someone
When you’re down in the dumps, you might not feel like talking to someone, but make yourself go hug someone and you’re almost guaranteed to feel better. And you’ll probably boost the spirits of the person you hug, too!
5) Express Appreciation
There’s something about telling someone how much you appreciate them that always makes you feel more cheerful yourself. Make a habit of starting the day by telling someone thank you for something — whether it’s your spouse or child, a co-worker, a neighbor, or sending someone a text, email, or card to brighten their day.
Take time to notice and appreciate the little things. It will make your world brighter — and just may mean the world to someone else, too.
The First 30 Minutes of My Day = One of the Best Parts of My Day
I’ve also found that beginning my day by sipping a good cup of coffee, praying, journaling, reading God’s Word, and reading a good devotional is one of the best ways for me to start the day in the right frame of mind. My heart is quieted and I’m refreshed and encouraged for the day ahead. Truly, this first 30 minutes of my day is one of my very favorite parts of the day.
My Day 3 Project Update
Bedtime: Made it to bed by 9:45 p.m. — 5 minutes earlier than yesterday and only 15 minutes past my goal time. Progress!
My Top 5 Evening Must Do’s: Done
Wake Up Time: I decided to make a goal to be up by 6:30 a.m. every morning. I’d really like to be up by 5:30 a.m., but I don’t know that I can realistically pull that off on the weekends. So I’m sticking with 6:30 a.m. This morning, I got up at 6:20 a.m. — right when the alarm went off. Yay!
Day 4 Project
1. Did you determine your bedtime and 5 Evening Must-Do’s? If so, leave a comment telling us how you did on them last night.
2. Did you determine what time you’re going to commit to waking up every morning for the next three weeks? If so, leave a comment telling us how you did this morning!
3. Choose one simple thing that you will do every morning to help you begin your day with a good attitude. Leave a comment letting us know what you chose.
What practical ideas do you have for ways to help you start the day off with a good attitude?
Get the Easy. Homemade. eBook for just $0.99 today!

Guest post from Mandi at Life Your Way
This week I’m excited to release my brand new ebook, Easy Homemade: Homemade Pantry Staples for the Busy Modern Family, which is on sale for just $0.99!
If you’re regularly using coupons and building your stockpile for pennies on the dollar, or free, the idea of making homemade pantry staples may seem silly to you. But while you may find coupons on taco seasoning and ketchup, you may not find them as often on pesto and sour cream.
In those cases, not only does homemade give you more control over the ingredients, but it can also save you a pretty significant amount on your grocery budget as well.
And chances are you can make more things from scratch than you knew!
For example, did you know that you can “expand” your buttermilk by mixing it with milk, which costs a lot less?
Simply mix one part buttermilk to four parts milk and let it culture for 24 hours on the counter. When it’s done, you’ll have five times as much buttermilk for a fraction of the cost!
You can then mix one part buttermilk to four parts heavy cream and let that culture overnight at room temperature, and in the morning you’ll have sour cream!

Or use a gallon of milk to make homemade yogurt for pennies per ounce, a savings of one-fourth to one-tenth of the cost of yogurt, depending on what brands you’re buying and whether you’re using coupons on your yogurt.
For a long time, I thought that the trade off for these savings was the time I would spend, actually making kitchen staples from scratch. What I’ve discovered, though, is that many of these recipes are a lot easier than you’d expect, and since it doesn’t take much more effort to make something in bulk, I can make a few things every week and keep my kitchen well stocked, saving money without investing a whole lot of time.
Katie at Kitchen Stewardship estimates that when she makes yogurt, she’s earning about $35 an hour based on the time she invests in the process and the cost savings she “earns” for her family. Not too bad!
Discover more than 60 recipes for homemade kitchen staples like these in Easy Homemade, which is available for your Kindle, Nook or a full-color PDF to read on your computer for just $0.99 this week only!
Click here to get your copy today.
You’ll also find me sharing more about the what, why and how of homemade pantry staples at these great blogs:
- Real Food Baby Step: Homemade Pantry Staples | Keeper of the Home
- How Cooking from Scratch Has Changed My Pantry | Kitchen Stewardship
- Popcorn (Ultimate Recipe Swap: Afternoon Snacks) | Life as Mom
- Homemade Does Not Have to Mean Gourmet | Simple Organized Living
- Strategies for “Easy” Homemade | The Happy Housewife {8/16 @ 2pm ET}
- Homemade Taco Seasoning | For the Mommas {8/16 @ 8pm ET}
- Baby Steps to Cooking from Scratch | Simple Mom {8/17 @ 2am ET}
- How to Store Bulk Homemade Pantry Staples | I’m an Organizing Junkie {8/17 @ 8am ET}
- Fresh-Squeezed Lemonade | Deal Seeking Mom {8/16 @ 12pm ET}
Mandi Ehman lives in wild, wonderful West Virginia with her husband of ten years and four beautiful, spunky little girls. As a full-time work-at-home, homeschooling mom, she runs Life Your Way, a site that blends intentional and creative living, and Jungle Deals & Steals, where it’s all Amazon, all the time.
5 Inexpensive Ideas for Keeping Kids Occupied on a Road Trip

Have a last-minute summer vacation planned or preparing ahead for a road trip later this year? I shared 5 Inexpensive Ways to Keep Kids Occupied While on a Road Trip on Roo Mag last week:
Planning a road trip before school starts up again? Here are some simple and inexpensive ideas for keeping your youngsters occupied while traveling:
1. Printable Travel Activities
The internet is bursting with free printable travel activities. From Travel Bingo, to the License Plate game downloads, to Road Trip Scavenger Hunts. There’s something for just about every age and interest!
You can also print activities that aren’t necessarily designed just for road trips, but can be lots of fun nonetheless. Things like printable coloring pages, dot-to-dot worksheets, crossword puzzles, mazes, and more can keep children occupied for hours on end.
We like to make a special binder for each child with age-appropriate travel activities that they can do. Add in a zippered pouch with crayons, markers, pens, and/or pencils and you’re all set!
Read the full post here.
photo from Big Stock
Do-It-Yourself: Whole Wheat Pita Bread

Life Blessons shows you how to make homemade whole wheat pita bread.
Do you have a fun and frugal DIY idea to share? I’d love to hear about it! Read the submission guidelines and submit it here.
Q&A: How did you stay determined & stick with it during your lean law school years?
Q&A: How did you stay determined & stick with it during your lean law school years?

I read your post on “If You Want Something Badly Enough” and wondered if you could share about your lean years when your husband was in law school. You were obviously highly motivated. Was there a catalyst for that? Something that moved you to sacrifice so much for so long without yielding?
All of us want to be debt-free, but wanting it isn’t always enough to carry us through the lean times because deprivation hurts! And doing it for an extended period of time requires a tremendous determination. Can you share your source for that determination? Did you have anything that pushed you through when you wanted to give up? -Lori
Thanks for a thought-provoking question, Lori! I don’t hold myself up as someone who has it altogether or has arrived, by any means. I have many struggles and short-comings and there are definitely times when self-discipline is the last thing I feel like practicing!
In thinking this through recently, here are some of the things that I believe were instrumental in keeping us motivated and determined to keep going during those lean law school years:
1) The Grace of God
As Christians, God is our hope, our Sustainer, and our Provider. He has proven Himself faithful time and time again.
Without His grace, I don’t know how we would have made it through law school. It wasn’t easy and there were many, many times when it felt like all we had was each other and God to cling to. Our faith was challenged and strengthened so much during those lean law school years.
2) Our Parents’ Examples
Jesse and I were both blessed to have parents who modeled wise financial stewardship before us. Seeing them make short-term sacrifices in order to achieve long-term benefits was a huge inspiration to us and one of the main reasons why we made the audacious commitment to stay out of debt during law school.
3) Being On the Same Page as a Couple
One of the biggest keys to our financial success has been the fact that Jesse and I are wholeheartedly on the same page when it comes to finances. We are best friends, we talk about everything, we see all of our finances as “ours”, and we set goals together — taking into account both of our needs and wants.
Nagging and dragging your spouse along never works. Believe me, I’ve tried that and it was a miserable failure. Both of you must be willing to communicate and compromise in order to get on the same page and the same team — in finances and in all of life. There is no “I” in team. 🙂
4) Monthly Budget Accountability Meetings
Not only have we set financial goals together since the beginning of our marriage, but we’ve also held a practice of having monthly Budget Accountability Meetings. This is when we both go over our current financial standings — what we spent over the last month, where each of our budget categories are looking like, and where we have a surplus and a deficit.
We talk about areas where we struggled, we discuss possible changes and tweaks to the budget, and we look at our yearly financial goals to see the progress (or lack thereof!). The Monthly Budget Accountability Meetings are not always fun and yes, sometimes there are some hearty discussions (ahem!), but without these regular check-ups, it would be a lot easier to lose touch with where we are financially and it would be a lot easier to get way off course without realizing we were going in a bad direction.
5) Making Room for Microscopic Splurges
We’ve always stuck to a strict written budget and there were many months in the beginning of our marriage when things were tighter than tight (you’ve probably heard me tell the story about the time our fish had to go for two weeks without food because we couldn’t afford to buy the $2 fish food as every penny of that was needed to buy groceries). That said, we made it a point from the get-go to find ways to regularly “splurge” — even if in a microscopic sense.
I worked as a mystery shopper so that we could occasionally get free dinners out at restaurants. I read daily emails from MyPoints in order to rack up enough points to get a few small gift cards each year to Barnes & Noble (too bad Swagbucks wasn’t in existence when Jesse was in law school!). And we saved our change in a jar to use toward $0.50 movie rentals at the movie store or a very occasional meal at a fast food restaurant with coupons.
6) Reminding Ourselves Of How Far We’d Come
It’s easy to focus on how far you have left to go, or how little progress it seems like you’re making. Instead, we tried to focus on how far we’d come.
Sometimes when we were feeling discouraged or overwhelmed, we would sit down and look at our budget and bank account and just be in awe that it had held up for so long and we’d been able to pay all of our bills. That gave us hope to keep holding on and holding out.
7) Visualizing the Rewards at the Finish Line
For us, visualizing ourselves at the finish line having stayed out of debt and survived law school was a huge motivator for us. Sometimes, we’d have fun talking and dreaming about the things we would be able to do when we had a little wiggle room in our budget. And often, we’d remind ourselves how freeing it was going to be to not have to be sending a huge chunk of our pay checks toward school loans.
Remembering why we were making the sacrifices we were making and what our end goal helped us to stay the course even when we were completely ready to give up.
What helps you stay determined to make short-term sacrifices and how do you keep from giving in and giving up?
photo from Big Stock
Make the Most of Your Mornings: Getting Out of Bed On the Right Foot (Day 3)
Make the Most of Your Mornings: Getting Out of Bed On the Right Foot (Day 3)

Now that we have our plan in place for the evening and we have a set bedtime in place, it’s time to take about the first thing that has to happen if you want to start your morning off the right foot… getting out of bed.
For some of you, getting out of bed is simple. You wake up energized, refreshed, charged up, and ready to spring out of bed and take on the world. If that’s you, you can just skip this entire post — you’ve got a handle on this already!
For many people, however, getting up in the morning can be a challenge. You wake up feeling groggy and exhausted. You push the snooze button as many times as possible because you dread trying to pull yourself out of bed in the morning. You barely make it out of bed in time to throw on some clothes, hastily put your hair up in a ponytail, and dash out the door feeling unkempt and behind.
If the latter somewhat describes you, here are some advice and ideas for getting out of bed at a decent hour each morning:
1) Go to Bed at a Decent Hour
If you want to get up feeling refreshed in the morning, your first step is to go to bed at a decent hour so that you can actually get a refreshing night’s rest! If you’re tempted to stay up later than you should, remind yourself of how great you’re going to feel in the morning when you get up. And then go to bed.
Commit to sticking with your pre-determined bedtime faithfully for three weeks. Hopefully, at the end of three weeks, it will have become more of a habit.
2) Make Sure You’re Getting Enough Sleep
If you go to bed on time, but you’re still feeling groggy and out-of-sorts every morning when you wake up, it may be because you’re not getting enough sleep. Try going to bed 30 minutes earlier or sleeping in for an extra 30 minutes each morning for a few days and see if that makes a difference.
3) Do NOT Allow Yourself to Use the Snooze Button
For the next three weeks, the snooze button is off limits. Period. If you need more sleep, set your alarm to go off 15 or 30 minutes later rather than using the snooze button.
4) Make Sure You Have Something to Wake Up For
It’s much easier to wake up excited about the day if you have something you love waiting for you when you get up. I love the early morning hour of sipping my coffee, reading my Bible, journaling, praying, planning out my day, reading, and blogging.
This quiet time refreshes me and energizes me for the day ahead. And it’s something I look forward to waking up to each day.
By the way, I’ve also found it’s much more enjoyable to wake up to a clean room and clean kitchen each morning. There’s just something about being greeted by a shining sink that inspires me. But if I know that my house is a mess, it’s less motivating for me to get up in the mornings. That’s why I try to take time each evening to do a quick clean up — it makes the mornings much more enjoyable!
5) Get An Accountability Partner
Need extra help in pulling yourself out of bed? Team up with a friend who also wants to get up on time and make a pact to text, call, or email each other as soon as you get up each morning. If you know you have to “report in” as soon as you wake up, you’re going to be less apt to roll over and go back to sleep.
6) Get Up and Do Something
Instead of lying in bed making excuses as to why it’s okay for you to sleep in, get up and do something. Even if you feel tired at first, if you get up and take a brisk walk, take a shower, or do 25 jumping jacks, you’ll probably soon forget how much you wanted to stay in bed.
Whatever you do, when your alarm clock goes off in the morning, GET OUT OF BED. It’s the first and most important step to making the most of your mornings. 🙂
My Day 2 Project Update
1. I set my bedtime for 9:30 p.m. Jesse and I both agreed that we think this is a realistic time for me to consistently shoot for. However, I didn’t actually get in bed until 9:50 p.m. last night. But hey, that’s progress over what I have been doing the last few weeks!
2. My Top 5 Evening Must Do’s:
::Tidy Up House
::Get Ready For Bed (Contacts Out, Face Washed & Moisturized, PJ’s On, Take Pills)
::Clothes Laid Out For the Next Day
::To Do List Made For the Next Day
::Read In Bed
Day 3 Project
1. Did you determine your bedtime and 5 Evening Must-Do’s? If so, leave a comment telling us how you did on them last night. If you haven’t decided yet, be sure to take time to do so today and leave a comment on yesterday’s post and let us know!
2. Determine what time you’re going to commit to wake up every morning for the next three weeks. Consider what your pitfalls to consistent waking up are and think about possible ways that you can help yourself be more successful. Leave a comment telling us what time you are committing to get up every morning and also how you’re going to set yourself up for success in this area.
What are your best tips and suggestions for getting up at the same time each morning?
Ask the Reader: Would you recommend a Ninja Blender?
 Today’s question is from Rachel:
I am looking to get my mom a Ninja blender but there are a few different ones and I’m not sure if she needs all the extra stuff. I was wondering, if you have a Ninja, how much do you actually use it and for what type of things? -Rachel
Do you have a question you’d like to ask Money Saving Mom® readers? Read the submission guidelines and submit it here.
Instead of Yelling, Try Helping

I wrote a post over on MomLife last week on a mothering lesson I’ve been learning recently:
Recently, I was frustrated with a few of my children who were dawdling with their room cleaning. As I walked into their still-messy room to reprimand them for being so slow in getting their project done, I was about ready to lose all of my cool.
“Why do I have to constantly repeat myself over and over again? Why can’t they just do what I ask them to do? Why do I have to constantly be checking up on them and making sure they are following through with what I’ve asked of them?”
As my anger reached its peak and began to bubble out in heated words, my heart was pricked as I thought of all of the grace and mercy God has extended to me. And, as a Christian, aren’t I supposed to be imitating Christ in how I respond to others — including my children?
Read the full post here.
OVER-SPENDING EVERY SINGLE MONTH?Grab these FREE Budgeting Sheets!
Click here to download!
Easy Homemade Breadsticks
These yummy breadsticks are super easy to whip up and will have your kitchen smelling delicious! Everyone will love them!

Why we love this Easy Breadstick Recipe
Well for starters — it’s easy!
Also, it only uses a few basic ingredients I always have in the house.
And… they taste absolutely amazing! Everyone will ooh and ahh over these delicious breadsticks — I promise!
We’ve been making these breadsticks forever and ever, and they always get rave reviews.


Ingredients for Bread Machine Bread Sticks
- 1 cup warm water
- 1/4 cup olive oil (or other oil of your choice)
- 3 cups flour (white, whole-wheat, or any mixture of both)
- 1 teaspoon salt
- 3 Tablespoons raw sugar (or brown sugar)
- 2 1/2 teaspoons active dry yeast

How to Make Bread Machine Breadsticks
1. Put all ingredients in the bread machine in the order listed.


2. Turn the machine on the dough cycle setting.
3. Once the dough cycle is finished, roll the dough out onto a 10×12 greased cookie sheet.

4. Cut the dough into 24 slices, cover with a towel, and let rise for an hour.
5. Once risen, bake at 375 degrees for 10 to 15 minutes.
6. As soon as you pull the breadsticks out of the oven, brush them with melted butter and sprinkle with Parmesan cheese and garlic salt.
7. Eat and enjoy!

These are SO easy to make — and absolutely delicious, too. If you haven’t tried this recipe yet, I highly recommend it.
How to store Bread Machine Bread Sticks
On the rare occasion that you have any breadsticks left over, simply store them in a zip-top bag at room temperature for 3-5 days (or freeze them for longer).
How to reheat Bread Machine Breadsticks
You do not have to reheat them to enjoy them as leftovers — but if you prefer warm breadsticks, simply microwave them for 10-15 seconds or wrap them in foil and reheat in a 300º oven for 10-15 minutes.
Here’s my slight adaption of the original recipe from Memories on Clover Lane:

Easy Homemade Breadsticks
Ingredients
- 1 cup warm water
- ¼ cup olive oil
- 3 cups flour all-purpose, whole wheat, or a combo
- 1 tsp salt
- 3 Tbsp brown sugar or raw sugar or honey
- 2½ tsp active dry yeast not instant yeast
Instructions
- Put all ingredients in the bread machine in the order listed.
- Turn the machine on the dough cycle setting.
- Once the dough cycle is finished, roll the dough out onto a 10×12 greased cookie sheet.
- Cut the dough into 24 slices, cover with a towel, and let rise for an hour.
- Once risen, bake at 375 degrees for 10 to 15 minutes.
- As soon as you pull the breadsticks out of the oven, brush them with melted butter and sprinkle with Parmesan cheese and garlic salt.
- Eat and enjoy!
Nutrition
Love this recipe?
Make sure to share and save it on your favorite platform below!
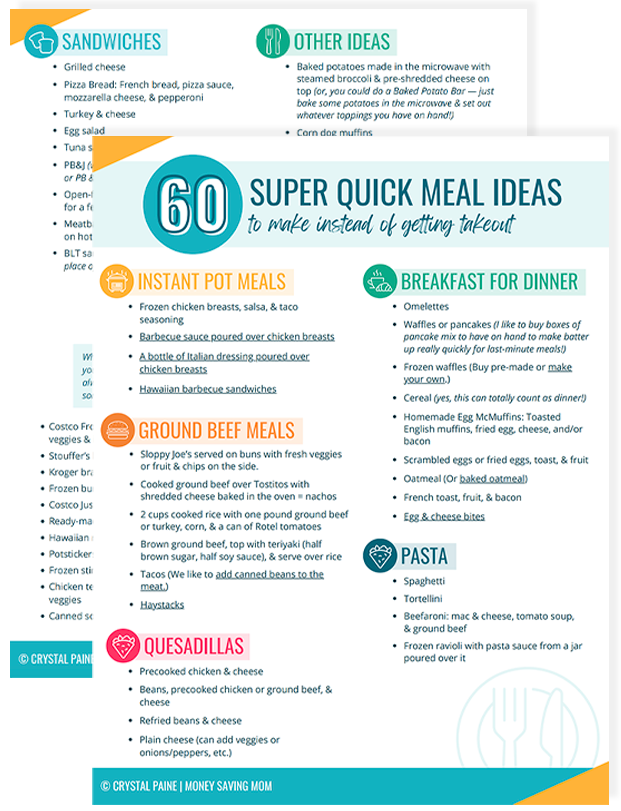
FREE DOWNLOAD: 60 Meals To Help You Avoid Takeout!
Meal time just got so much easier!
Make the Most of Your Mornings: Your Day Starts the Night Before (Day 2)
Make the Most of Your Mornings: Your Day Starts the Night Before (Day 2)

If you want to make the most of your mornings, you can’t just expect to jump out of bed without a plan and somehow have all of the pieces fall into place for a very productive day. No, a productive morning is usually the fruit of planning and preparation. And it begins the night before.
To change your morning, you need to first change your evening.
If you go to bed late and the house is a mess, the dishes are piled in the sink, you’re way behind on laundry, you don’t have food for breakfast or lunches the next day, and you don’t even know what appointments or events are scheduled for the next day, no wonder you wake up feeling frazzled, stressed, and behind!
If, on the other hand, you go to bed at a decent hour, your house is picked up, you have clothes laid out to wear, breakfast is in the crockpot, lunches are made, and backpacks and your purse and keys are by the door, you’ve given yourself a huge head start on a successful morning.
Instead of trying to get up at some too-early hour and cram in a crazy amount of things in the morning, focus on changing your before-bed routine first. You might find that this is the thing that transforms your morning much more than getting up early does.
In fact, if you prep well ahead of time in the evening, you just might be able to sleep in a little bit more in the mornings. (I bet all of you non-morning people just let out a collective shout of “Hallelujah!”)
How to Set Up a Successful Evening Routine
1) Determine Your Bedtime
What time do you need to get up in the morning by in order to be out the door in time or start your day off on the right foot? Write that time down and then count backwards by 8-9 hours. Whatever time you land on is your new bedtime.
This is the time that you must be in your PJs, have everything finished for the night, and be in bed. No ifs, ands, or buts. I’m your new drill sergeant and you must do what I say, okay? 😉
Sticking with a consistent bedtime just might be your number one key to morning success. When you’re well rested, you have more energy, more clarity, and more productivity. Not to mention that you usually are less stressed, less irritable, and life just looks a lot rosier when your sleep tank is full.
2) Pick Your Top 5 Evening Must-Do’s
Once you have your bedtime determined, then it’s time to determine the five things that you are committing to do every evening before bed. I know you might want to come up with a list of 25 things that seem like they’d really be good to do, but let’s keep it simple and just pick the top five must-do’s.
You can make a list of 25 ideas, but promise me you’re going to whittle it down to just the top five for starters. Keep it simple and you’re most apt to actually stick with it and follow through with it. I’ve learned that one the hard way!
Possible Evening Must-Do’s
::Clothes Laid Out for the Morning
::Kitchen Cleaned Up
::Lunches Made For the Next Day
::Breakfast In the Crockpot (Or cereal out and cereal bowls and spoons set out on the table.)
::To-Do List Made for the Next Day
::Quick 15-Minute House Clean-Up
::Everything Together and Set By the Door That You Need For Getting Out of the House the Next Day
Once you have figured out your Top 5 Must-Do’s, write them down on a piece of paper and put them in a conspicuous place. You could even print them off in a cute font, laminate or stick them in a page protector, put this on your fridge, and then use a dry erase marker to mark each item off as you accomplish it each evening.
3) Plan Your Start Time and Stick With It
Think realistically how long it’s going to take for you to accomplish your Top 5 Must-Do’s and then work backwards from your bedtime to figure out your Evening Routine start time. In most cases, your start time is going to be at least an hour before your bedtime. I’d add in some extra time, just to be on a safe side and to give yourself a cushion in case something comes up.
Write this start time down on your Top 5 Must-Do’s List, set a timer or an alarm to go off to remind you when you’re supposed to start, and just do it. Stick with this for three weeks and I promise you’ll start to see some significant improvement in your mornings — and in your days as a whole.
At the end of three weeks, you can tweak your evening routine and even add a few more things, if you’re sure you’re up to it. If you miss a few days or have a few hiccups along the way, don’t be discouraged, just pick back up where you left off the next day. And remember, moving forward — even at a microscopic rate — is still moving forward!
Day 2 Project
1. Determine a bedtime. Follow the steps above to figure out what a good bedtime is for you and commit to go to bed at that time every single evening for the next three weeks.
2. In addition, pick your top 5 Evening Must Do’s, write them down, and commit to following them for the next three weeks.
3. Leave a comment telling us what bedtime you’re committing to stick with and what your you determined were you Top 5 Evening Must Do’s.
Tomorrow, I’ll share my bedtime and Top 5 Evening Must-Do’s and will check in daily here at 1 p.m. EST to tell you how it’s going for me and to see how you’re doing in sticking with it, too.

Want some practical help with setting up your day for success? It all starts the night before! Be sure to grab a copy of my brand-new online course, Make Over Your Evenings.
This 14-day online course includes videos, a workbook, and step-by-step projects and is designed to help you maximize your evenings in order to experience more success in your life, more order in your home, and more joy in your soul.
It’s time to stop sleep-walking through life and wake up to the amazing excitement and fulfillment that comes when you follow my simple plan to Make Over Your Evenings.
Frugal Hostess Gift: Homemade Bread Wrapped in a Tea Towel

Need a quick, practical, and frugal hostess gift? Simply My Kitchen shows you how to gift wrap homemade bread in a tea towel. Such a cute and practical idea!
Free Customizable One-Year Cleaning Checklist

SimplyRebekah is offering a free downloadable and customizable one-year cleaning checklist.
For more cleaning checklists and downloads, be sure to check out my post on How to Stay Motivated to Get the Housework Done.

Change Your Life and Challenge Your Mind By Making Time for Reading Good Books
Change Your Life and Challenge Your Mind By Making Time for Reading Good Books

As long-time blog readers know, I love to read. And this past year, I’ve been seeking to make reading more of a priority. In fact, I set a personal goal to read at least 125 books by the end of the year. (I’ve read 75 books so far, not counting the books I’ve read aloud to the children or my daily Bible reading!)
Reading 125 books in a year might seem extremely ambitious and utterly impossible to some of you — and that’s totally understandable as I’m a quick reader and reading is something that I do instead of many other hobbies. I’m also at a season of life where I have more time to read than I did a few years ago when I was doing good to read 2-3 books per month, if that!
Others of you, like Martha, couldn’t imagine only reading 125 books in one year. She’s a huge inspiration to me when it comes to reading voraciously. Get this, she’s already read 208 books in 2012 alone!
For those of you who don’t read much at all right now, can I encourage you to make reading more of a priority — even if it’s just a few pages of a book each week? Here are two reasons I think everyone should make reading a priority in their lives:
1) Good Books Challenge Your Mind
While I think it’s wonderful to let yourself relax on a regular basis, if all you ever feed your brain is entertainment, it can turn somewhat “mush-y”. Now if you’re in law school or med school or have some sort of mentally intensive job, you probably don’t have any issue with this. But if you don’t have very regular opportunities to sharpen your thinking skills, reading good books is a great way to do so.
I’m an analytical person by nature and am always questioning the reason behind why something is right or true. I never take anything at face value, as my friends well know. 🙂
So that’s why I love good books. They make me step back and reconsider long-held positions, they make me examine things in a different light, and they help me further solidify what I believe and why I believe it.
2) Good Books Change Your Perspective
You might not be an analytical person and you might think that my number one reason for reading good books above is a little on the whack-o side. If that’s the case, that’s okay, I accept that I might just be a bit eccentric in some areas ;). Hang with me here, though, because reading good books isn’t just for the mental exercise.
One of the other excellent reasons to become a reader is because good books open up worlds to you that you might never experience yourself. Reading biographies about single moms and parents of children with disabilities or long-term illnesses helps me to have a deeper understanding of their struggles and trials so I can better reach out to them. Reading books on different cultures and time periods has helped me get a better grasp on history and has made me appreciate so much of the modern conveniences and freedoms we have that many others never experienced.
Books have changed me, challenged me, and shaped me as a person. And they are constantly motivating me as a wife, mother, friend, business woman, writer, and thinker.
The books I’ve read have encouraged me to deepen my relationship with the Lord, helped me learn new concepts, spurred me on to develop more character and leadership skills, exemplified to me creative ways of presenting concepts and communicating points, and have pushed me to think “outside the box”.

Now, you might be thinking, “Of course, I know that it’s good to read books, but I can’t seem to find the time! I’m just trying to figure out how to get food on the table and the dishes washed.” Well, here are five ideas that may or may not work for you:
5 Ways to Fit Some Extra Reading Into Your Everyday Life
1) Read First Thing in the Morning — Before you turn on the TV or the computer, challenge yourself to read a chapter from a book. I’m amazed at how quickly I go through books just by making reading a part of my morning routine.
Note: I recommend reading non-fiction books in the morning. If you’re like me and quickly get sucked into a great biography or fiction book, you might want to save those until after dinner. Otherwise, you might start with a chapter and then end up realizing it’s lunchtime and you’re two chapters away from finishing your book! 🙂
2) Read While You’re Exercising — I run on the treadmill almost every day, so I use my 5-minute walking warm-up to read. You can also read while stair-climbing or doing the elliptical, ask me how I know! 😉
Note: If you typically work out at the gym or walk outside, you might want to skip this tip as you may get some weird looks at the gym or might run into something if you usually walk outdoors! 🙂
3) Read During Commercial Breaks — If you aren’t ready to ditch the TV habit and you don’t have TiVo, consider making a habit to pick up a book during every commercial break. I did this some while we were watching the Olympics and got through a number of chapters just by reading a few pages at a time during commercial breaks.
4) Always Have a Book Going on Your Phone or iPod or E-reader — With the abundance of free book downloads available, there’s no excuse for not having a book handy in your purse at all times — provided you have the technology! I download quite a few of the free ebooks and slowly work my way through them during those unexpected wait times that pop up during the course of the week.
5) Listen to Audiobooks — You can’t talk about creative ways to fit reading in without mentioning audiobooks! I’ve grown to really appreciate audiobooks over the past year.
I usually download 1-2 audiobooks per month onto my phone and try to listen to 10 minutes or so per day — usually while I’m cooking, cleaning, driving, or running. There are hundreds of free audiobooks available in public domain or you can also check your library to see what audiobooks they offer online for free. While not as handy as downloads, many libraries also offer books on CD that work great for traveling or those of you who have regular commutes.
For more ideas of ways I find time to read, be sure to check out my post on How I Find Time to Read. You might also want to check out my post on How I Choose the Books I Read and Recommended Chapter Books for Children.