

Quote taken from Platform University video #1. Lettering and photo done by my wonderful assistant, Erika.

Saving Families Money Since 2007
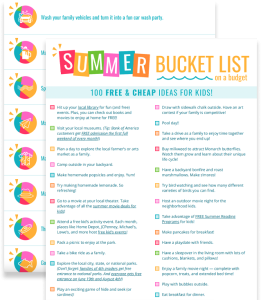

Quote taken from Platform University video #1. Lettering and photo done by my wonderful assistant, Erika.

I skipped setting any goals last week because it was supposed to be a completely “off” week for me. I still exercised, read, and did some writing, but for the most part, I spent the week truly relaxing, soaking up the sun, and just enjoying really amazing conversations and time with my husband.
Now that I’m refreshed and recharged, it’s back to real-life again! And honestly, I’m really excited to hit the ground running this coming week — because I didn’t quite know what to do with myself with so few responsibilities last week. 🙂
Goals from two weeks ago:
Family/Marriage/Mothering Goals
1. Read two chapters of Vinegar Boy: Encounter Christ Through the Dramatic Story of Vinegar Boy
aloud at lunch. Read two chapters of Mrs. Frisby and the Rats of Nimh at dinner.
Read two chapters of The Amazon Stranger with Kathrynne, read two chapters of Little House on the Prairie with Kaitlynn, read two chapters of Eloise Wilkin Storiesto Silas.
2. Write a love note to Jesse.
3. Have friends over for lunch.Personal Goals
4. Memorize Romans 1:7-8.
5. Exercise 5 times.
6. Finish reading Love Has a Face: Mascara, a Machete and One Woman’s Miraculous Journey with Jesus in Sudan, Lessons at Blackberry Inn: Adventures with the Gentle Art of Learning, and The Pursuit of Elizabeth Millhouse.
Homemaking Goals
7. Do a Freezer Cooking in an Hour session.
8. Finish 30 rows of the scarf for Kathrynne.Business Goals
9. Finish editing the final draft of my manuscript and send it out to those who are critiquing it before I turn it into the publisher.
10. Begin working on tweaking my talk for the MAPS event later this month.
This week’s goals:
Family/Marriage/Mothering Goals
1. Read two chapters of Vinegar Boy: Encounter Christ Through the Dramatic Story of Vinegar Boy
2. Write a love note to Jesse.
3. Have a Wii Challenge night as a family.
Personal Goals
4. Memorize Romans 1:7-8 (Must work more diligently on this this week!)
5. Run 25 miles total.

6. Finish reading Uneclipsing the Son, Fit To Burst, A Charlotte Mason Education, and Eve’s Daughters.
Homemaking Goals
7. Do a Freezer Cooking in an Hour session.
8. Finish 30 rows of the scarf for Kathrynne.
Business Goals
9. Have a business brainstorming afternoon to flesh out business ideas and map out business goals for the next few years (We have some amazing folks flying in to help consult us in this! Can’t wait to see what comes of this!).
10. Finish tweaking my talk for the MAPS events & give presentations on Thursday and Friday.
How did you do on last week’s goals? What are your goals for this week? I’d love to have you share your progress on last week’s goals and your goals for this coming week in the comments. Of, if you’ve blogged about it, leave your direct link below. Let’s cheer each other on to live purposeful and productive lives!
You can download a free customizable weekly goal-planning sheet here.
Thank you, thank you, thank you for letting me take almost the entire week off from blogging this past week. It was the first time I’ve ever done something like this and it was so good — despite the fact that I missed you all something fierce. {I ended up composing seven lengthy blog posts in a document while unplugged. Because, well, I just can’t not write!}
We’re in the midst of a lot of changes and big decisions in our family and businesses right now, so this long-planned vacation couldn’t have come at any better time. It was so good to be unplugged… and I wasn’t only unplugged, I was actually completely disconnected with my normal life altogether because we were blessed to get to go on the Love Like You Mean It cruise with Family Life again this year.

We started out the week in Miami. Above was the view from my treadmill during Monday morning’s workout. Talk about exhilarating!

Monday mid-morning, we boarded our cruise ship and spent the afternoon tying up loose ends with our businesses while the ship was still in port and we still had free wi-fi. We got those things taken care of and then we pulled the plug for three days while we took in some beautiful sights, ate delicious food, listened to incredible speakers and musicians, and spent hours just talking and reconnecting as a couple.

Monday evening, we attended a concert by Steven Curtis Chapman. This was by far one of the highlights of the cruise for us. Steven is such a humble, authentic man and his family’s story has impacted our family deeply.

Tuesday morning, we woke up near Key West. I fell in love with this tiny island that we saw from the side of the ship. Can you imagine living there?? I don’t want to imagine how much the houses probably cost, though. 🙂



In Key West, we stopped by Truman’s Little White House, found the Audobon house, and tried to find Earnest Hemingway’s house. In the process, we ended up getting really, really lost in a less than desirable part of town. We were so lost that we thought we weren’t going to make it back to the cruise ship before it was leaving the port.
But I’ll save that slightly dramatic story to share with you next week. You won’t want to miss it — or the lesson we learned from the experience! 🙂

Wednesday, we docked in Cozumel. I was really excited to finally make it to Mexico as I’ve never been before. But unfortunately, they’d only let us see a tiny, tiny part of Cozumel — and that tiny snippet was highly tourist-y. But oh well. At least I can say I’ve been to Mexico now.
We spent Thursday and Friday traveling back to Miami and in Miami and today traveling back to Kansas. The whole week was truly relaxing, refreshing, and rejuvenating. And most of all, we both felt like unplugging completely for a few days allowed us to have in-depth conversations that were so, so good for our marriage. Plus, we just had a lot of fun together — which is also a good thing, too. 🙂
Anyway, that was our week in a nutshell. Thank you for allowing me the time away. I already have a slew of posts written for the next few weeks so I promise I’ll make up my absence to you!


Guest post from Rachel of Nothing if Not Intentional
In the world of photography, Adobe Photoshop is the gold standard for editing software. However, as anyone who has priced this software knows, it can be expensive. Lucky for you (and me!), there are several alternatives that will allow you to edit, create, and manipulate images for free!
Camera phones have come so far that many people have abandoned their regular camera in lieu of their smart phones. If this is you, there are a variety of free phone editing apps. Instagram, PhotoFunia, and Photoshop Express are well-liked options.
For those who prefer a traditional point and shoot or DSLR camera, Picasa (by Google) is one of the most popular and user-friendly choices.
The program is intuitive. Open a picture and then click through several tabs that offer basic edits (such as crop, redeye, straighten), lighting and color issues (like color temperature, fill light, shadows), and fun effects (border, black and white, vignette, etc.).
There is also an option on the toolbar that will allow you to make a photo collage. Click here fo a tutorial on adding text and creating a milestone pictures using picasa.

One of the most powerful image editing options is Gimp. (Many people claim it rivals Photoshop!) With Gimp, you can explore advanced editing techniques like manipulating layers, adjusting color levels, editing with curves, and applying filters.
Do these terms sound unfamiliar or foreign? Unfortunately, since Gimp is a free program, it doesn’t come with customer support or a fancy user manual. However, there is a thriving community of Gimp users online who are happy to share their Gimp-related tutorials.
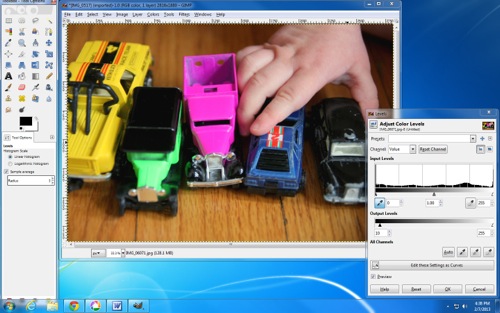
Both Gimp and Picasa are software programs that are downloaded to your computer. If you’d prefer not to download a program, there are several internet-based editing options:
Online programs will often offer basic edits and effects for free and then allow users the option to upgrade and pay for premium features.
So which of these programs is best? For those who remember Picnik, Ribbet will feel and look very familiar. Personally, I prefer PicMonkey and iPiccy. Picmonkey is simple and organized. I often use it to make collages for my blog or Facebook page. Ipiccy is completely free and offers more advanced options (like curves, clone, and levels).

While most professionals will continue to pay for their photo editing software, there are plenty of free alternatives for anyone who simply wants to capture and edit family pictures or even explore photography as a serious hobby without spending money on editing tools.
Nothing if Not Intentional started as a blog to share stories from Nate and Rachael’s ten trips to Guatemala. It is now an outlet for Rachael’s writing (she’s a former English major), and a place to share stories from their travels (Nate’s a pilot) and life with two young girls. Photography is one of their favorite shared hobbies.



Guest post from Brigette Shevy
My family loves these simple muffins!
They consist of only a few staple ingredients, making them extremely frugal and easy to make. They are also a lifesaver for those day-before-grocery-shopping emergencies where you really need something else to serve with dinner, but your cupboards are almost empty (of course, we’ve never had any of those moments at my house. Ha!). Or when you have you realize you have milk about to expire and are looking for a way to use it up.
Just for the record, I also make this recipe when my pantry is fully stocked and my milk isn’t close to expiring – because they’re good.
These muffins are surprisingly moist, even though they don’t have any oil or butter in them. So for those of you trying to watch your fat intake, use low-fat buttermilk, and this recipe can be your new best friend. If you’re not watching your fat, feel free to slather them with butter or coconut oil like some of us do around here.
They are relatively healthy without tasting like it (I LOVE those kinds of recipes!). I adjust the amount of sugar depending on what I am serving them for. For breakfast, we prefer them sweeter. If you’re using them to go along with your dinner, I would suggest decreasing the sugar.
This recipe came from a dear older lady at my husband’s childhood church. She has since gone to be with the Lord, but her legacy and her recipes live on.
The last time I made these, my six-year old said: “Mom, I wish you would make these muffins every single day for the rest of my life!” If your family likes this recipe half as much as she does – it will still be a winner!

Makes 18 muffins
INGREDIENTS:
DIRECTIONS:
Preheat the oven to 350 degrees. Beat the egg and sugar together. In a separate bowl, mix the dry ingredients together. Add to the egg mixture, alternating with the buttermilk, until combined. Put in greased muffin tins and bake 15-20 minutes.
These can be stored in a Ziploc bag at room temperature for 1-2 days (make sure they are completely cooled before putting them in the bags). If storing for longer than that, keep them in the refrigerator or freezer.
*I almost always use homemade buttermilk: I put 2 tablespoons of lemon juice or vinegar in a 2-cup measuring container, and fill the rest with milk.
Brigette is a full-time wife and mother who is blessed with three amazing bundles of energy (ages 6, 4, and 2). She enjoys music, experimenting in the kitchen, homeschooling her children, finding great deals, long-distance running, and anything chocolate.

Rhonda emailed in the following tip:
Our children are grown now, but when our son was little, my husband cut his hair. As they got older, we all went to a cosmetology school where students cut hair at a greatly reduced price. It took longer, but the work was always inspected by the supervisor so you wouldn’t have uneven lengths, etc.
When my hair began getting gray in my 30’s, a friend showed me how to color it myself. I have been doing that every month since then, and have saved thousands of dollars I’m sure, compared to having a stylist color it. I buy a brand I can get at Dollar General, and once a month a newspaper coupon insert will have a $1 or $2 off coupon for it. So I average $3-$4 a month for hair color!
Another idea for haircuts is to check ad circulars that come in the mail. We usually have one for our local franchise hair salon for $6-$9 a haircut. Even with a tip, that’s less than $10 for a quick haircut which I get every 8 weeks or so. My husband has an electric hair trimmer that I use to shave the back of his neck, and he has bought a Flowbee hair system that he uses to cut his own hair. After 10 haircuts, it’s paid for itself.
If you don’t feel comfortable doing your own hair care, then perhaps you have a friend who cuts hair and will barter another service from you for that. Look around — there are many alternatives to high-priced hair care out there! -Rhonda
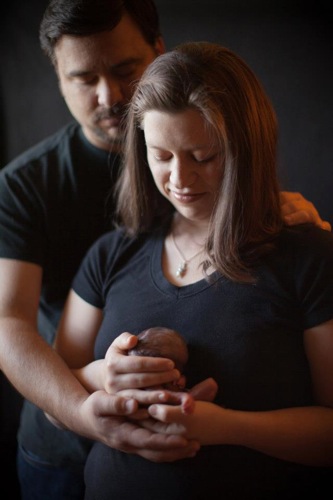
Note from Crystal: Today is Valentine’s Day and I thought this beautiful post was such a great reminder of the importance of not taking any of our relationships with those we love for granted. In addition, it’s fitting because baby Kyle was due today, on Valentine’s Day.
Testimonial from Kim of Kimz Kitchen
I’ve always been a planner. And when we decided to try for our third little baby back in October of 2011, we knew we should begin setting aside cash for our high deductible insurance plan. Using our Health Savings Account, we were able to set aside money (tax free) each week from my husband’s paychecks.
I was also very thankful that we had our Emergency Fund. After two miscarriages and a few medical bills that our insurance didn’t cover, we again realized the importance of keeping that fund stocked at all times.
In June of 2012, we found out we were pregnant again. We were ecstatic! But, in August, we found out our sweet baby boy, Kyle Nathaniel, had a fatal genetic condition that would most likely claim his life before he was even born. This was certainly not in MY perfect plans.
As agonizing as the next several months were, the financial costs of a labor and delivery — immediately followed by a funeral and burial, were not a concern to us.
Little Kyle was born into Heaven after 31 wonderful weeks of life where he knew only love — right into Heaven, where he’ll forever know only love. God allowed his precious tiny body to be born into our arms on December 19th, 2012.
At that point, our HSA was funded to cover our deductible, and our emergency fund was available to cover the costs of the burial 3 days after his birth.
Our little guy had a huge impact on thousands during his short life. Even now, his video is being shown in crisis pregnancy centers and in OBGYN offices around the country. His memorial fund for Compassion International will sponsor a Mother Baby Survival Center in South America for 39 months.
I wouldn’t trade the 220 days we had with him for anything.
Now, as we are recovering, we are working to restock our fund. I’ve kept my grieving mind and and empty hands busy this month de-cluttering our home and selling our things on Craigslist. There are even a few local “yard sale” Facebook pages I’ve had great success with selling things on.
We spent the month of January living on a tight budget, with minimal eating out and only spending money on necessary things, to put all of our extra cash into our emergency fund, and at this point, we’re pretty close to getting it right back to where it was a few months ago.
Sometimes, I think we think of that emergency fund as being a go-to account for flat tires, or blown transmissions, or repairing central heating units. I never planned to use it to bury one of my children. And while our specific case is certainly rare, having an unexpected expense that you haven’t planned for is not. I can’t say enough about the peace of mind that an emergency fund can give when peace can otherwise be very difficult to find.
Kim Rackley is a blogger at Kimz Kitchen. She’s the wife of a very special guy and mother to two girls here and three children in Heaven. She blogs about her life as a mother, homeschooler, and a small potatoes caterer.

Guest post from Leanne of Cooking With the Johstons
When I was a teenager, my parents divorced and I saw first-hand that the number one cause for divorce is money problems. As a young adult, I did what I knew and overspent.
At 24, I overdrew my checking account for the umpteenth time. What was different this time was that I had also gone over my limit on all four of my credit cards. I had no cash, no savings, and no safety net. While I’d spent years overspending and overdrawing, this was rock bottom.
Because of that experience, I created a budget. It was the first time I saw on paper that I was spending far more than I was earning and had absolutely nothing to show for it but a car payment, credit cards, and student loans.
Shortly thereafter, I discovered the Dave Ramsey’s Baby Steps. The concept of living below your means was completely foreign to me. I started to live differently. For the first time in my life, I had peace about money and my future.
Two years later, when I met my husband, I was well on track of being debt free within the year. When we married, my debt turned to our debt. Combined we had $117,000 and were making $40,000 a year; however, we had peace and a plan because we had a budget.
A budget saved our marriage before it even started — here’s why:
My husband and I have incredible peace in our marriage because of our budget. Our plan allows us to give generously, save for our future, and be in control of our money. Our infant son will have the skills necessary to manage his money and make an impact in the world.
Leanne is an organizational whiz working with youth and young adults in Fort Worth, TX. She is a seminary graduate and a walking warrior. She’s the nerd who loves spreadsheets and finding a good deal. She lives in the Dallas area with her husband and infant son, Wesley. Visit her blog, Cooking With the Johstons.
 Today’s question is from Karen:
My family is planning a trip in April and I can order an Entertainment Book for the city that we are going to, but I’m wondering if it would be worth the $20 to buy the book or not? -Karen
Do you have a question you’d like to ask Money Saving Mom® readers? Read the submission guidelines and submit it here.


Guest post from Anne of Modern Mrs Darcy
At my house we love our coffee, and not just any coffee will do. We enjoy high quality, freshly roasted beans — and if you know anything about great coffee, you know that gets expensive, and fast.
But we found a way to cut our coffee costs in half, without sacrificing quality, and I’m shocked more coffee lovers don’t know about it:
The process is simple. You only need two things:
Both methods take 8-15 minutes a batch.
Oven roasting isn’t hard, requires no special equipment, and is cheap to try out. Find directions here.
Air roasting requires more hands-on time and nonstop cranking, but your results will likely be better. Find directions here.
Home roasting isn’t perfect: you’ll probably have to throw out your first batch. Roast level can be inconsistent. Your kitchen will get a little smoky. And you’ll never be able to use that popcorn popper for anything else.
Home roasting is for serious coffee lovers!
Don’t try this at home if all you care about is the cost savings. If you don’t love it, it’s not worth it; you’ll be happier buying Folgers with coupons. But if the craft of coffee roasting appeals to you — if you think roasting your own sounds fun and fascinating — try the DIY route. Many serious coffee geeks enjoy the process, and the savings.
(For further reading, I recommend Home Coffee Roasting: Romance and Revival.)
Anne Bogel loves strong coffee, long books, and big ideas. She puts a timely spin on timeless women’s issues at her blog Modern Mrs Darcy. Head here to get her free ebook Paper Gains: A Guide to Gifting Children Great Books from Modern Mrs Darcy.

Guest post from Kathi Lipp of KathiLipp.com
One of the most frequent questions I get is “I know you leave a lot of notes for your husband, but how do you do it?” It seems some women are intimidated by leaving little, encouraging notes for their man – as if they aren’t going to do it “right”.
So here are a few fun, creative, and inexpensive ways to leave a note of encouragement for your man to get you started:
1. Use Post-it Notes.
As a certified “Office Supply Junkie” I always have a variety of Post-it Notes at my disposal. I leave love notes in his car, in our bathroom, on the fridge, and in his lunch. Anywhere that I can “plant” it in advance for him to find at a later date.
2. Write in Lipstick on Your Bathroom Mirror.
3. Spell “I Love You” With Hershey’s Syrup on a Plate.
Add vanilla ice cream and strawberries for an elegant and tasty add-on.
4. Send A Banana-gram.
When silliness is called for, nothing brings it on like a banana. Just use a Marks-a-lot maker and get creative.
5. Leave Chocolate and a Note on His Pillow.
6. Create a Background On His Computer That Says “I Love You!”
7. Leave a Love Note in His Jacket Pocket.
8. Text Him a Love Note While He’s at Work.
9. Send a Note to His Work Address.
Don’t send a big red envelope with hearts and flowers all over it (unless he enjoys being the center of attention!) but a plain white envelope with some sweet nothings tucked inside would be a welcome break from him day to day work routine.
10. I Love You Because… Mailbox
Come up with your own list of why you love your husband, and then create little messages for each of those reasons. I bought the mailbox in the Dollar Bin at Target and cut up some festive scrapbook paper to create the little notes.
11. Spell it Out on a Scrabble Board or With Pepperoni on a Homemade Pizza.
These are just a few ideas to get you thinking. If you need more creative love note ideas, check out my free “21 Post-it Note Sized Encouragements” download on my Facebook Page
Kathi Lipp is the author of seven books including Praying God’s Word for Your Husband. For more free goodies from Kathi, check out her website at KathiLipp.com

Guest post by Elisha
My husband and I are huge fans of Dave Ramsey. We became debt-free after we got married and used the cash envelope system to stick to our budget.
We strongly believe in the cash system. But when my husband started getting his paycheck directly deposited, I would have to go get cash out to put into the envelopes. It became one more thing to do.
After we started having kids, it became more of a hassle and struggle to count out the cash, get my coupons, make sure I had my price-matching items organized, and control the tots.
This probably sounds like I’m really unorganized — but I’m not really! It’s just that with our 3 kids under 4, life somehow gets a little more chaotic.
A few months ago, we discovered Mint.com. Boy, has it made life easier! Now, we pay for nearly everything using our debit card. No more envelopes….just the checking and savings accounts to keep up with.

If you’re not familiar with Mint.com, it’s is a great, free website that helps you manage your money. There is also an fantastic free app you can download.
Like I said, the cash envelope system helped us tremendously for several years! But this system of only using our debit card and Mint.com is so much easier — especially for this season of life we’re in. If you’re trying to get out of debt and working to follow a budget, this is another great option.
Elisha is more than happily married to her husband of 6 years. They have 3 kids: 3, 2, and 8 months — and she loves being a stay-at-home mom! Her family enjoys the outdoors, gardening, and snuggling.
Just a quick note to let you know that I’m taking a short break from blogging for the next few days. It’s something I’ve been planning since the end of 2012 and it couldn’t be coming at a better time since I just finished my book draft and some other big business projects. I’m looking forward to a few days of being completely offline and unplugged to refresh and recharge (I won’t even be checking email!)
However, don’t worry! There will still be plenty of fantastic posts going up in my absence. I’ve pre-scheduled a number of really thought-provoking and inspiring posts that I know you’ll love and my team will be doing a great job of overseeing all the comments and Facebook posts while I’m offline.
I’ll look forward to reading your comments when I get back online on Friday! Have a wonderful week — and hopefully you’ll get some time to rest and recharge this week, too!

My week was full with a lot of wonderful blessings. One of the biggest things is that first draft of the manuscript for my next book — all 69,000+ words — is DONE! Well, at least the first draft is. 🙂
A book is never truly done until it’s published. And then, once it’s published, there is still a long list of things that you must do to market and sell the books.
But the first draft is off to the beta test group who is reading and critiquing it right now. Then, it’ll be back to another round of edits before I submit it to Thomas Nelson on March 1. Then, it’s another extensive round of edits through their publishing house.
Truthfully, I much prefer edits over crafting the outline and “bones” of the book. In fact, it’s a fun process to see how much better you can make the finished product.
So I’m quite excited to have this much work done already. And I can hardly wait until I can tell you more about the topic. It’s a message that has been years in the making, so I’m really thrilled with how it is coming together.

It was also nice to be home all week this week after a busy few weeks of travel. I spent much of the week catching up on sleep and projects, wearing lounge pants, and hanging out with my family. I love the opportunity I have to travel and speak right now, but I also love being home, too!
Our kids are at such a fun age right now and we’re trying to soak up every minute we have with them. The weather was beautiful this week, so they spent hours outside on their bikes and on the rip stick. They’ve been highly motivated to get all of their school projects finished in a timely manner so they can have more time to play outside.
We also had a playdate with some of Kathrynne and Kaitlynn’s favorite friends. It’s so fun to see them developing close friendships with others — and seeing as I’m an introvert by nature, their more extroverted personalities help ensure that we have lots of social engagements. 🙂
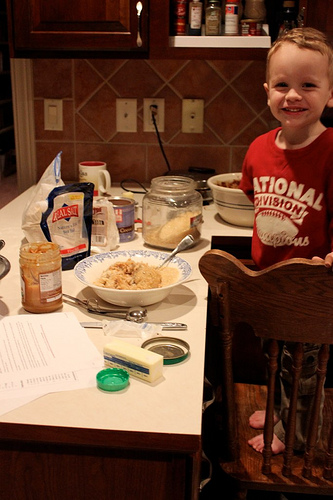
I also did the freezer cooking session — finally. I didn’t get too many pictures of it as I was sort of fitting it around dinner prep and some other things, but this picture is proof that we were busy bees in the kitchen.

This Raspberry Chocolate Cheesecake Pie is SO simple to make and is wonderfully delicious! It makes a fun (and frugal!) fancy dessert you can whip up for special occasions.

Recipe by my sister, Brigette
This is my go-to favorite Valentine’s Day dessert!
You can serve it anytime of the year, of course, but the combination of rich cream cheese, smooth indulgent chocolate, and tangy red raspberries makes it absolutely perfect for this holiday.
This “cheesecake” is much less intimidating to make than a “real” cheesecake. No worries about it cracking or falling apart. It is super easy to put together, but it looks impressive and always wins rave reviews. Most importantly, it tastes amazing!

My family first discovered this recipe in October of 2000 (I called my mom, the Queen of Numbers, to ask about where this recipe came from – and she passed on that little tid-bit of information!) on the inside of a store-bought Keebler pie crust.
Since then, we have served it countless times (actually, my mom might know how many times… but I forgot to ask!) to probably hundreds of people. We’ve used it for banquets, dinner parties, and even our family Thanksgiving celebrations.
People LOVE it!

For the Cheesecake:
For the Topping:
*NOTE: If making your own graham cracker crust, keep in mind that this recipe is designed for an 8-inch pie pan (and many pie pans are 9-inch). If you use a 9-inch, you will probably have to adjust the cooking time (and obviously, the finished product will be slightly thinner).
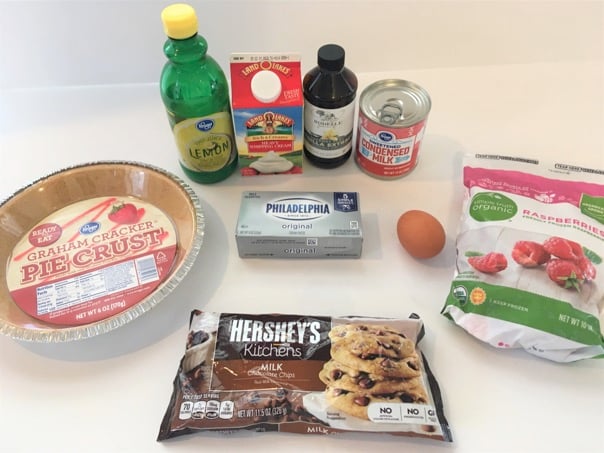
Yes, frozen raspberries work wonderfully well in this recipe — just make sure they are fully frozen (not defrosted) or they will get the crust all soggy.
1. Preheat the oven to 350 degrees.
2. Arrange raspberries on the bottom of the crust (if using frozen raspberries, do not thaw; if using fresh, make sure they are not wet).
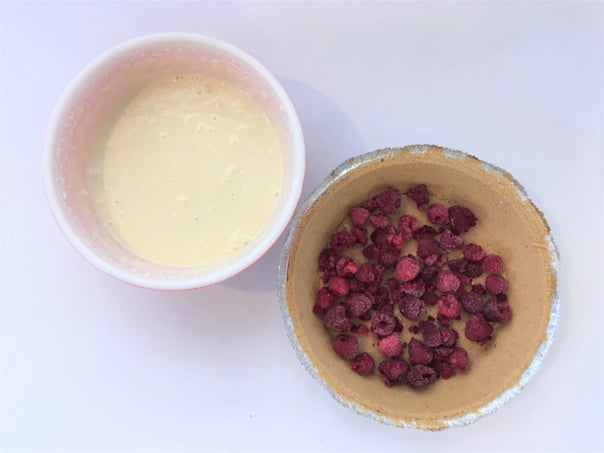
3. In a large bowl, beat together cream cheese and sweetened condensed milk until smooth.
4. Beat in egg, lemon juice, and vanilla. Mix well.
5. Carefully pour on top of the raspberries.

6. Bake in preheated oven for for 30-35 minutes, or just until set.
7. Cool completely.
8. After the cheesecake has cooled, melt the semi-sweet chocolate and whipping cream together over low heat, stirring often (I do this in the microwave).
9. Pour melted chocolate over the cheesecake.
10. Chill several hours before serving (it’s best to chill overnight).
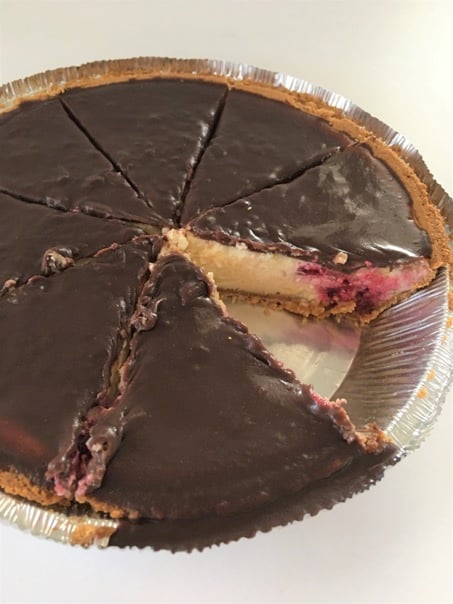
I love to drizzle a little white chocolate over the top of each piece, and then top it with fresh raspberries and mint leaves. However, you can do whatever you like.
Whipped cream is always delicious, sprinkled with a bit of chopped chocolate.
A raspberry glaze or jam would also be extra tasty.


Make sure to share and save it on your favorite platform below!
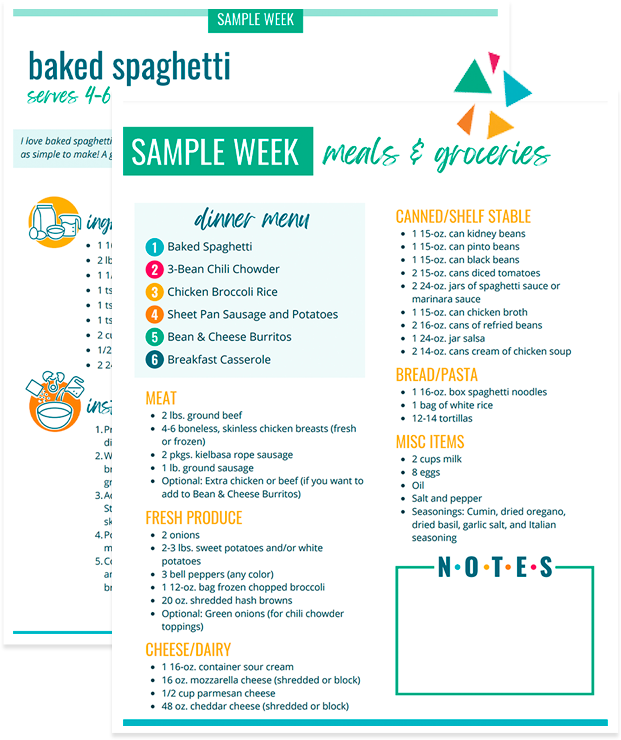
Done-For-You Dinner Recipes With Simple Ingredients and a Grocery Shopping List!