Guest post from Jenny of Suscipio
When our family moved into our current home almost eight years ago, it was in excellent condition, just very outdated. The house was built in 1984 when brown was apparently very popular. It had brown carpet, brown paneling, brown built-in book shelves… you get the picture.
One of the last rooms to be updated in our home was the dining room. Although it is one of the most used rooms in our home and one of the central rooms, it was one of the last I got around to. Why? Because I hate to remove wallpaper and it had wallpaper.
I did not want to remove the old wallpaper and then smooth the walls and make the necessary repairs to cover any and all blemishes. One day while visiting my neighbor, I asked about her textured walls in her kitchen and dinning room. She explained how simple it easy it was to create beautifully texturized walls.
Materials you will need:
- bucket of joint compound
- putty knife to apply the compound
- paint (if you’re removing wallpaper)
- glaze
- rag or old t-shirt
I started by removing the old wallpaper using some solution I bought at the home improvement store. After the walls dried, I painted them a khaki color.
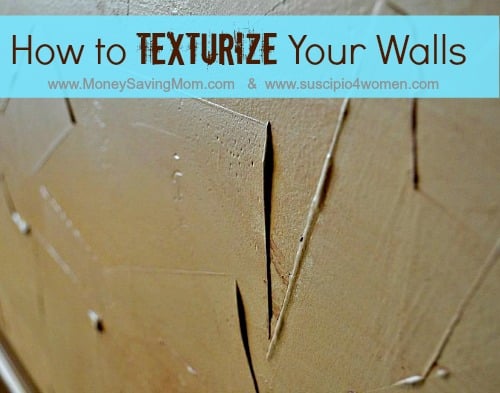
Next, I started applying the compound. Depending on how you want your walls to look — prominently raised edges of compound or more of a smeared on look — depends on how much and with what pressure you apply the compound. I started on a wall that would be behind an armoire to practice.
Scoop out some compound using your putty knife and scrape it on the wall. You may want large semi circle motions or just swipes here and there. I chose swipes with some pressure, but not too much. The more pressure you apply, the deeper the compound grooves will be.
Per my experience, I would not make a very raised and grooved wall in a place where people spend some down time, like by a telephone or the bathroom toilet. The raised ridges of compound will be picked off by bored fingers.
I let the compound dry overnight, and the next day, I mixed together a 2- to-1 ratio of glaze. For our dinning room I used 2 parts Mocha to 1 part clear.
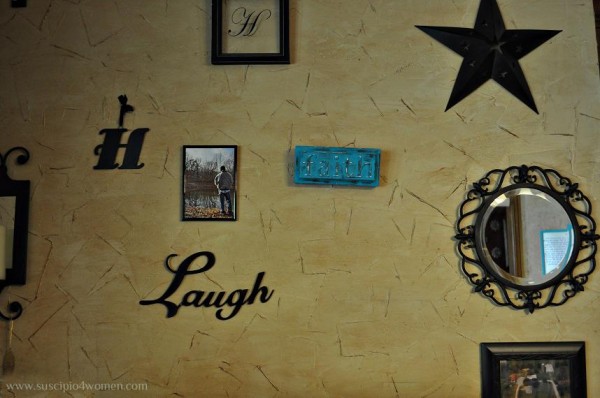
Using a balled-up old t-shirt, I dipped it in the glaze, wiped off the excess and rubbed it over the wall, paying special attention to areas I wanted to look a little darker. The glaze gets darker in the ridges and swipe grooves than on the rest of the wall.

I did this same technique in a laundry room bathroom that had pretty rough looking wall after wallpaper removal. I painted on a can of grayish taupe I found on the ‘oops!’ shelf at my home improvement store, applied the compound and used a metallic like glaze.
Both projects were pretty quick, very easy, and turned out great.
Jenny seriously likes ice water, Lawrence Welk, marching bands, and Nutella on a spoon. She saves her loves for God, her husband of 20 years, and their 7 children — whom she homeschools. She blogs at Suscipio.

Curious… what purpose does painting the wall first serve? I read this as: paint, then cover the paint with compound, then paint/glaze the compound. Is the compound thin enough that the painted wall shows through?
It’s not that the compound is too thin, my purpose was not to cover the entire wall with the compound, but to add texture. The painted wall added a neutral background that could subtly show through where the compound was thinner. Does that make sense?
Oh and the glaze is too thin so the wall would show through, neutral paint or sheetrock.
I have to say, the close up pic drove my perfectionist inside crazy, but the finished product looked amazing:)
A really cheap way to remove wallpaper is to use fabric softener- and the cheapest fabric softener works the best. Just use it like you would the regular spray wallpaper remover. If it’s a colored fabric softener, be careful not to get it on the ceiling though, as it can cause discoloration (I ended up with a little bit of a pink edge on part of the ceiling).
I would keep in mind that textured walls are not everyone’s taste, and may be detrimental when it comes time to sell a home. Just like wallpaper, it can be difficult and time consuming to remove, and that extra work may deter buyers.
Jenny, what kind of glaze did you use for your walls? We’ve used Ralph Lauren glaze on furniture, but worked well for you on walls?
Hi Julie. We used Valspar from Lowes.
We did this 5 years ago in the living room and I am regretting it now, wish we could just cover it up but we may just need to redo the walls entirely.
You are very welcome Candi. In addition to great looking walls, the process is actually kind of fun!
This was most helpful as I have 3 rooms in my house with horrible wallpaper! One thing that really tickled me about this article though, and please don’t take any offense by it….I found myself giggling at the fact that you mentioned all the “brown” in the house and then for the project used khaki, mocha, and taupe which to me are variations of brown. 😀 The wall in the photo looks fantastic though, and I can’t wait to give this a try!
I know too funny huh! Trust me, that fact was not lost on me either. I justify it by explaining the difference between dark brown and Khaki, lol!
I just want to say bravo!! Those walls look great! I am needing to finish my guest bathroom walls and I think I may give this a try! Thanks for the tip!