
This recipe for homemade yogurt is almost too easy — seriously, once you try it, you’ll wonder what took you so long! It’s easy, delicious, and your family will love it!
After my fairly successful attempt at making homemade toothpaste, I was inspired to try homemade yogurt in my crockpot.
I’ve made yogurt on the stove and in a yogurt maker before, but I’ve always worried that it wouldn’t turn out right in the crock pot. Don’t ask me why!
And now I’m wondering why I was scared to try… because folks, if you haven’t done this before, it is SO easy.
It felt almost too easy — like I was cheating or something! 😉

Why you’ll love Making Yogurt in a Crockpot
If you want the nutritional benefits of homemade yogurt without a huge mess or hassle, you will love the ease of making it in a slow cooker!
With almost no hands-on time, you can enjoy a huge batch of homemade yogurt without any extra sugar, additives, or preservatives.
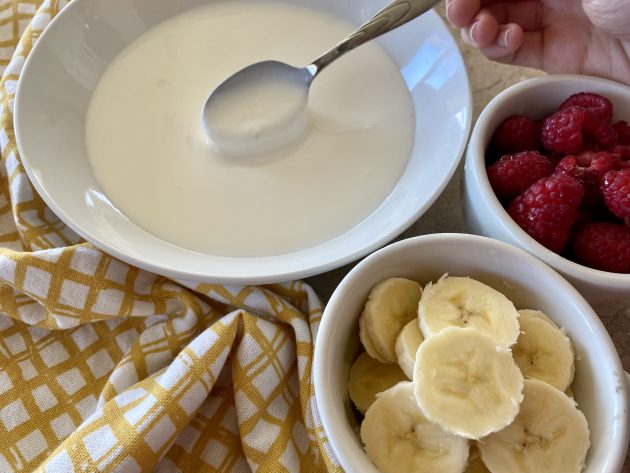
You can eat the yogurt plain, or make flavored yogurt by mixing in your favorite fruits (or even some homemade jam!)
Oh… and it’s SOOOOOO much less expensive than buying organic whole milk yogurt from the store!

Slow Cooker Yogurt Ingredients you’ll need
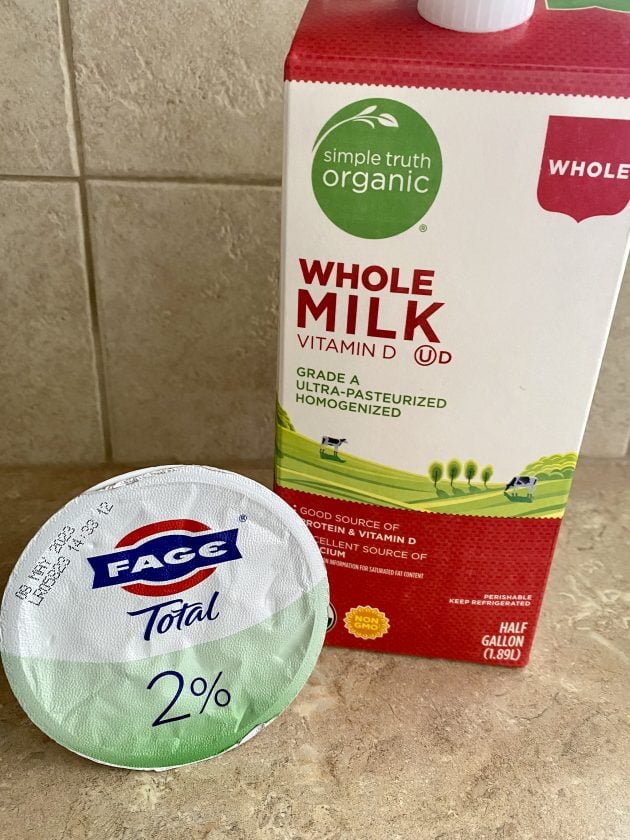
- 1/2 gallon milk (whole milk will make the yogurt thicker, but any milk will work.)
- 1/2 cup plain unflavored yogurt (any kind with live active cultures will work. Be sure to save a half cup of this batch of homemade yogurt to use as a starter next time!)
I’d picked up a half gallon of whole organic milk marked down to $1.99 at the health food store, so I used that for the milk. And I used plain Greek yogurt for the starter because that’s what I had on hand.
How to Make Yogurt in a Crock Pot
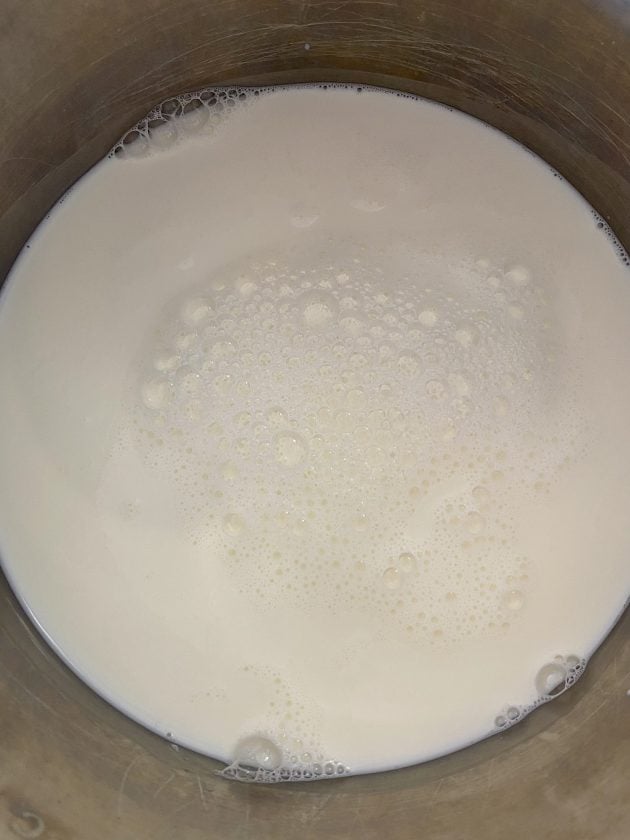
1. Pour the full half gallon of milk into your slow cooker and turn it on low. Cook it for 2 hours and 45 minutes (set the timer to remember to turn it off!)
2. After 2 hours and 45 minutes, turn the crock pot off and let it sit for 3 hours.
3. Spoon a cup of the warm milk into a small bowl and add the half cup of yogurt to it. Mix thoroughly.
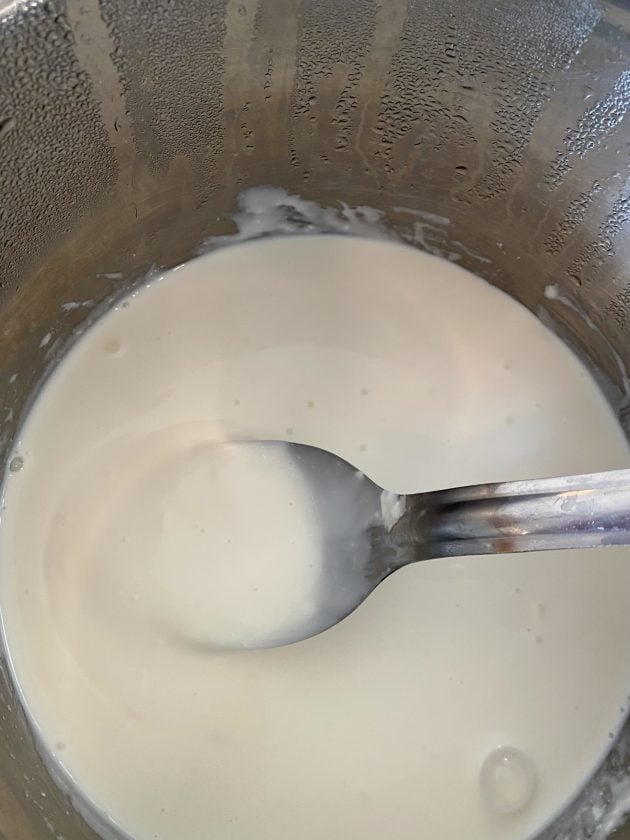
4. Dump this mixture back into the milk in the slow cooker and mix it around well.
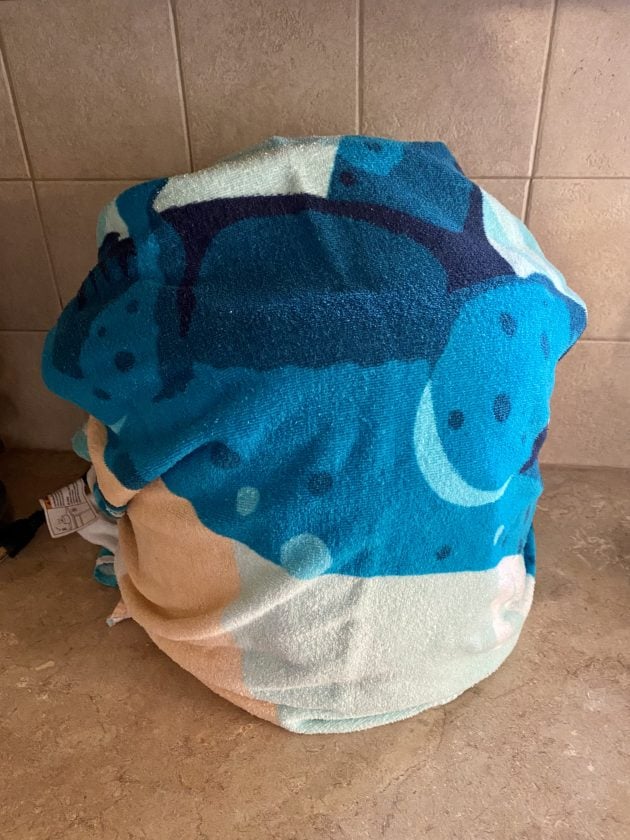
5. Put the lid back on your slow cooker and wrap the crock pot with a large beach towel or blanket (make sure the crock pot is unplugged and turned off!).
Yes, I know, it sounds a little ridiculous to wrap a crock pot with a beach towel, but I did some research online and it seems that the experts recommend this step as it helps keep the heat in the crock pot and allows it to cool more slowly.
6. Let the beach towel-wrapped crock pot sit for 8-12 hours (or overnight). At this point, the yogurt should be thickened.
7. Spoon yogurt into jars or plastic containers and refrigerate for a few hours before eating.

This will keep for one to two weeks in the refrigerator. Be sure to save a half cup to use as a starter for your next batch of homemade yogurt.
The recipe requires very little effort on your part, but it takes a long time to make — I started it yesterday morning and it wasn’t done until I woke up this morning.
So, if you want to try this, I’d recommend doing it on a day when you’ll be home all day.
And you might want to set a timer to remind you when you need to go do something to it. You certainly don’t want to waste a whole half gallon of milk!
Yogurt Slow Cooker Storage Directions
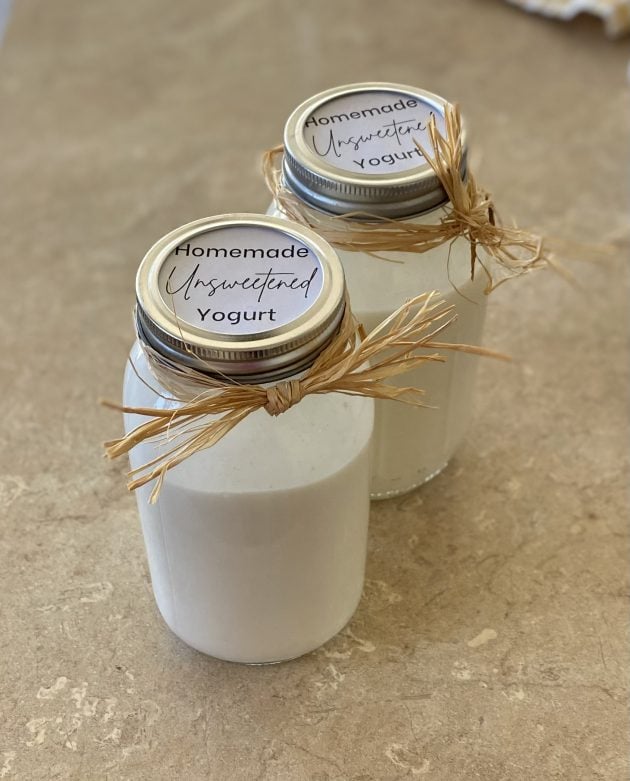
We recommend storing this yogurt in glass food storage containers to reduce the risk of any unwanted bacteria getting into the yogurt. Choose containers that have tight-fitting lids.
You can also store them in mason jars — which is especially pretty if you’re giving them as gifts!
Our favorite ways to serve Slow Cooker Yogurt
We love eating this yogurt with fresh fruit and granola! It’s such a tasty treat! I had some for a snack this afternoon with dried cranberries, sunflower seeds, and chocolate chips sprinkled over it and it was delicious!
Variations of Making Yogurt in a Crock Pot
This homemade yogurt is great to use to make Homemade Go-Gurts!
You can also use these tips from Andrea Dekker to make thicker Greek Yogurt or Yogurt Cheese.
Slow Cooker Yogurt
Ingredients
- ½ galon whole milk
- ½ cup plain yogurt must be unsweetened
Instructions
- Pour the milk into your slow cooker and turn it on low. Cook it for 2 hours and 45 minutes.
- After 2 hours and 45 minutes, turn the crock pot off and let it sit for 3 hours.
- Spoon a cup of the warm milk into a small bowl and add the half cup of yogurt to it. Mix thoroughly.
- Dump this mixture back into the milk in the slow cooker and mix it around well.
- Put the lid back on your slow cooker and wrap the crock pot with a large beach towel or blanket (make sure the crock pot is unplugged and turned off!).
- Let the beach-towel-wrapped crock pot sit for 8-12 hours (or overnight). At this point, the yogurt should be thickened.
- Spoon yogurt into jars or plastic containers and refrigerate for a few hours before eating.
- Save 1/2 cup of this new yogurt to use as the "starter" for your next batch.
Notes
Nutrition
Love this recipe?
Make sure to share and save it on your favorite platform below!
Have you made homemade yogurt before? If so, I’d love to hear about your experience. What is your favorite way to serve/use yogurt?
FREE 50+ Easy and Cheap Breakfast Ideas!!
Mornings just got so much easier with this FREE list of 50+ Easy & Cheap Breakfast Ideas for Busy Weekday Mornings!
Reader Interactions
Money Saving Mom® Comment Policy
We love comments from readers, so chime in with your thoughts below! We do our best to keep this blog upbeat and encouraging, so please keep your comments cordial and kind. Read more information on our comment policy.
Can yogurt be frozen?
I make my own yogurt but I wrap the bottles in a towel, place them in a small cooler bag ( to keep the temp even) and place it in the sun for 6 to 7 hours. I live in the Caribbean so that works for me.
I have made my own yogurt and strained it with coffee filters to get Greek style. I was very happy with the results even though it was a bit of work. The saving was worth the effert.
Does anyone know if I strained this through cheese cloth (or something similar) if I would end up with “Greek” yogurt? Just curious because I really prefer the thickness of the Greek style over regular yogurt.
Similar, yes. The longer you let the whey strain out, the thicker your final product will be.
Just as the others have said check the temperature. It take 4 hours for mine to reach the 180 degrees..You also have to keep the yogurt at a steady temperature (110°F to 115°F), I found that the old fashion heating pads that turned on low and I set it under the crockpot inside the oven with light kept it at the desired temp as well as placing the crock in a cooler with the heating pad on low..To thicken I add one packet of unflavored gelatin powder when I add the starter.
Can someone clarify the directions. Where it says “let the milk sit down 3 hrs…” the way I interpret this is after heating it 2 hrs 45 minutes you wait 3 more hrs until mixing with yogurt. Is that right? Or is it more like wait 15 minutes after the 2hr45 mark until it has been 3 hrs total, not 5 hrs 45 min
Rebecca, it means waiting 3 hours after you have turned off the crock pot (so, yes, a total of 5 hr and 45 min since starting the process). The idea is to allow the milk to cool back down to a temperature that won’t kill the bacteria in the yogurt starter (make sure it says “live cultures”). I’ve only been doing this method for a couple of months, but it has worked great every time!
And for those of you asking, you can flavor the yogurt in the process. Some above commented on using pudding mix, but I use a little sugar (1/2 C for my family) and 1T pure vanilla extract mixed in the milk right after you turn the crockpot off but before you let it sit for the 3 hours. My kids and I LOVE it!
I had dairy goats that I would make yogurt from weekly. When you buy milk from the store, it has already been pasteurized so you do not need to heat to 180 degrees again. When you heat it again, it is then ultra-pasteurized and does not always set up correctly. Take your fresh, unopened gallon of milk and just heat the amount you need to 108-112 degrees, add your culture (also fresh unopened plain yogurt-Dannon plain always worked best for me) and then keep at target temperature (116 degrees) for 4 or more hours. If you like a thicker yogurt, you can hang in cheesecloth to desired consistency.
we make plain regular yogert as follows:- luke warm the milk first in microwave or on slow heat,add one table spoon of plain yogurt, stirrer well with a spoon.Now turn on the light bulb of your electric oven and then put the container with this mixture inside the oven,close the door of your oven. Yougurt will be ready exactly after 12 hours.keep refrigerated immediately.
What about leaving the Crock Pot on the warm setting, rather than wrapping it in a beach towel and covering it with a tea towel instead of the lid? I’ve been trying to find out what temperature “Warm” is on my Crock Pot (I have two – one like yours and one Rival mini one) I was hoping that my mini pot “Warm” setting would be the right temperature, but I can’t find the answer …anywhere …yet! I don’t know why, but I don’t like the idea of wrapping the Crock Pot in a towel. Probably because I can’t control the temperature like I can with my itty bitty yogurt maker (incubator that holds very little).
I do this on the stove in a stock pot.
1 gallon milk
1 cup honey
9 tsps vanilla.
1cup plain yogurt
Slowly heat the gallon on the stove to 180 degrees sporadically stirring with a whisk in the beginning and stirring more as it approaches temp to keep it from burning. Hold that temp for 10 min or longer for thicker yogurt. I usually do 15-20 min. Then take it off the heat and mix in honey and vanilla. The place The pot in the sink with just enough cold water to go over the bottom of the pot stirring the milk occasionally as you bring the temp down. I move the pot up and down and usually change the water once during the process. Once the milk drops down to 112 degrees remove from sink and stir in yogurt starter. Then ladle into mason jars through a strainer. Put lids on and put it into your oven with the light turned on (I usually warm the oven up for a few minutes while I’m ladling it). MAKE SURE OVEN IS OFF WHEN YOGURT GOES IN. Then after 6-12 hours move into fridge to set. The longer you wait the more tart. Once it is chilled feel free to eat.
First two times this worked great! Third time, it didn’t work at all- it tastes like warm old milk. I used wallaby Greek organic yogurt since it was all I had on hand. Would this be a temperature issue? It didn’t seem as warm as I had done it in the past… It is winter, but the pot was on the radiator 🙁 any ideas what to do with slightly rancid milk?
I have gone off the grid here… First, I accidentally read the instructions wrong and added the starter after turning it off BEFORE letting it sit for 3 hours to cool. I also added in 2 vanilla beans to add flavor from the start. From what I’m reading people say to add flavors at the end so I’m wondering if this will ruin anything or not make a difference? My yogurt was extremely runny and then chunky at the bottom once I was done letting it sit wrapped in the towels for 8 hours. I plan on chilling it overnight and then straining it in the morning, but is this batch ruined already since it was chunky?
I thought this was like an easy, can’t mess it up type of a deal. Ha. I’ve learned my lesson!
How would I adjust the time if I made this with a gallon of milk? Would I need to cook it longer?
Hey Christina – I’m making my batch with a gallon of milk. I just add more starter (I don’t measure… just about a cup or so of starter yogurt). I’m towards the end of the recipe, and the yogurt set just the same as it has when I have made it with a half gallon of milk. When I’m finished, I’ll use a large cooking spoon to spoon off the liquid on top. For me, this is easier than straining it to make it thicker… just taking off the liquid on top is good enough (for me). Happy yogurt making! 🙂
I have been making yogurt for a couple of years, and although I have had success with the crockpot method, I feel like I get better results on the stovetop. I boil water in a large stockpot and place my pot of milk over the top to heat. It is like using a giant double boiler – keeps the milk from burning, and you don’t have to watch it as closely. I fill the stockpot with ice water to cool the milk back down to 110. Although, after reading previous comments, I may try making yogurt without heating it first… After I have mixed my starter in, I wrap the yogurt in a large towel and then an emergency blanket (the silver ones that look like aluminum foil). This keeps the yogurt at a consistant temp -again even in the winter when my kitchen gets VERY cold!
I made this yesterday with almond milk (the almond milk with a coupon was cheaper than regular milk) before I read someone else’s comment that hers made with almond milk did not work. I used Dannon nonfat yogurt. I’m so disappointed. It barely thickened at all. I’m planning to freeze for baking, as it didn’t taste soured or like yogurt.
Actually, you dont need to heat the milk these days as most recipes call for unless you’re using fresh whole milk. Back in the olden days, milk wasnt pasteurized and needed to be scalded to kill any bacteria that might be hanging around.
I’ve been making yogurt for about 33 years and in the beginning, I scalded like all the old recipes said, but over the years, talking to others (before computers) who didnt scald convinced me to try it. I dont scald now. Its a waste of time & energy. (again, unless you are using raw milk).
Also if you add half & half to your milk, it will thicken it considerably. Funny thing about it though, is that if you try to make it out of 100% half & half, it will be much thinner than if you just made it from milk. Also, heavy cream doesnt make it thicker either. About 1/2 milk to 1/2 h&h gives the best thickest results but any added to the milk will thicken it.
Thanks for linking to me here and with the toothpaste! I’m glad you like the yogurt!
I agree, making yogurt is so great! I have been making thick Greek style yogurt for the last year. I found an excellent website that explains how to do it. You might want to take a look and see yourself: http://www.salad-in-a-jar.com/making-homemade-yogurt
You can save time by heating the milk in the microwave for about 17 minuets on high or until the temp reaches above 175. Also, putting about 1 tablespoon of your previous yogurt per half gallon of milk is plenty. I have been told that putting in much more than that can have problems because the bacteria needs room to grow.
For a thicker yogurt (which we like), line a colander/strainer with a clean cotton cloth (home-made cotton napkin, or several layers of cheesecloth, or a non-fuzzy dishtowel, etc). Set the colander over another bowl, and pour in the yogurt. Let it drain until it is the thickness you like. You can put this in the refrigerator while it drains. It may take several hours. If you strain for a very long time, it becomes the thickness of cream cheese. You have just made yogurt cheese. 🙂
We find that a gallon of milk makes down to a quart of yogurt. We used a greek yogurt as starter. I recently returned from a trip to Greece & brought home some plain yogurt. Can’t wait to try it as the new starter.
I loved this! I made it for my daughter, whose 3, and she loved it too. We added some fresh strawberries that we had frozen from picking and that was just the best! I did make the frozen also, and put it in the sandwich bags like I read. Delicious and it was so easy!
I have made yogurt before, and what you are doing takes a lot of unnecessary time, counter space and expense (electricity for hours of cooking).
I ‘facilitate’ an international cooking class and bring in a cook from a different country for each class. My friend from Pakistan taught me a long time ago how she makes yogurt which is a staple in their diet. She repeatedly gave me the recipe until I finally insisted she and I make some together. It was indeed as easy as she kept telling me it was. She even gave me a small enamel bowl to make it in. She does not like glass or plastic.
She mixes a few spoons full (no measurements) of her reserved starter-yogurt into some milk, fat or a little fat but for her not skim, and set it on her counter and covered the top with something to keep dust/pests out, that’s it! Left unshaken and not disturbed, in 6-8 hours it begins to congeal and goes into her frige. I think it’s a little thinner than I’m used to, not sure anymore.
I also had someone tell me their climate is cold so they make yogurt in a cold manner. Might have been an Ukrainian friend. That’s all I can remember, sorry.
My Bulgarian friend (Bulgarian is the pinnacle of probiotic yogurts) choses her ingredients carefully and insists you need a large towel to wrap it in. She warms her milk before making yogurt as many do, I assume to speed up the thickening.
We can’t make it in class because it is not to be disturbed after making it so it does not lend well to a class. She demonstrated and sent some of hers home with everyone.
All yogurts will taste different, some more sour and some less. You can adjust the flavor and make a far better product easier and with less expense. Milk is costly, homemade yogurt is not cheap but a much better product. Hope this helps!
Interesting observations from across the world. I think the heating of the milk is beneficial also for killing any bad bacteria in the milk before adding the good bacteria.
I make yogurt every day at home itself using the culture. Almost all Indians do it. Usually we get cultured yogurt from fellow indians if we don’t have it. Any milk would work for it.
Just boil the milk in microwave until it forms a layer on top of it.
let it cool for some time. Add a spoon full of yogurt culture in the warm milk(milk should be warm to touch ). Put them in conventional oven with light on. Do place the lid slant on the pot. Don’t move the pot until it is done. The process usually takes 6-8 hours.
I make yogurt in my crockpot every week following a similar recipe. At the point of mixing the milk and starter yogurt, I take out a cup of the milk and mix it with the store bought yogurt and a package of sugar free /fat free vanilla yogurt. After the eight hours wrapped in the towel, I strain it by pouring it into a cheesecloth covered colander sitting in a large mixing bowl. I cover it and put it in the refrigerator for several hours. The longer it is strained, the thicker it gets. We love this yogurt and eat it pretty fast. I use half skim milk and half 2%. It costs about .09 an ounce which is not a huge difference from on-sale yogurt but we like knowing our ingredients and we love the flavor. It goes with all fresh fruits, granola, etc. And I use it in place of sour cream.
Just curious, if you use greek yogurt as your starter, do you end up with greek yogurt or plain yogurt?
Plain yogurt. You can strain it, though, (with a cheesecloth, I believe) to get Greek yogurt.
Cheesecloth works, but I have purchased a chinois/bouillon strainer from Amazon that is so convenient. It is a bit pricey, but I use it almost every day and I think it is worth it in the long run. Here is the link I used: http://www.amazon.com/Matfer-17360-Exoglass-Bouillon-Strainer/dp/B00069ZUXW/ref=sr_1_cc_1?s=aps&ie=UTF8&qid=1341086998&sr=1-1-catcorr&keywords=chinois
From what I’ve read, there may be two easy things to remember to get thicker yogurt. First, when you stir your starter into the 1 cup of milk, don’t stir much. I only stir 3 or 4 times around. Do this as well when you add it to the warm milk because you just want to spread out the starter, not destroy it. Lumpy is ok. Over stirring can cause it to be runny. The other thing to do is to put your crock pot crock directly into the refrigerator to fully cool, after the towel incubation, before you put it into containers or stir. These two things make our crock pot yogurt thick. Oh, the longer it’s in a towel, the more sour it gets.
Just thought I’d share that if I refrigerate my yogurt before it cools off completely, so start refrigerating after 8 hours, but while the yogurt is still warm, then the yogurt thickens up really nicely, just like store bought!
I’ve tried various methods with inconsistent results, but finally landed on the method using a heating pad posted here.
http://www.simplebites.net/homemade-yogurt-101/
I make 4 quart jars at a time (use 1/2 C. of starter) and omit the dry milk and it has turned out great every time. For me this seems like the simplest way that I’ve tried. Wide mouth quart jars also make for easy storage and serving.
I’ve calculated the cost to be about $2.25 or less for 4 quarts of yogurt. (Costco milk @ 1.98/gal. + starter) plus the cost of electricity
I use this same recipe often but we like it thicker so I have been adding some boxed pudding. Makes the cost a little higher but it is super tasty. We have used vanilla, lemon, and banana cream and have loved it!
I know this comment is from a long time ago, but I’m late in reading it 🙂 When in the process do you add the boxed pudding mix?
I make this weekly, and my only problem is remembering when I started/finished the previous step. The online timer http://e.ggtimer.com/ has helped tremendously! I actually start all 3 timers at the beginning of the process, 1 timer for the initial milk heating, 1 timer for letting the milk cool down, and 1 timer for re-warming after adding the starter yogurt (I don’t think Crystal’s recipe has this step). This way I have all the timers set up front, and can’t forget!
This is part of why I made up a faster recipe (see above). I had a hard time timing all of the steps and coordinating the timing so I didn’t have to get up in the middle of the night to tend to it. With the faster version, I can start it as late as 5 pm and it is done before I go to bed at 10. 🙂
I use a small piece of washi tape on the outside of my crockpot or on the towel with either the day and time I started the item or the time it will be ready. Washy tape peels right off without a residue, so it is really helpful for coooking projects that take a day or more like yogurt (I culture for 24 hours), Chicken broth, apple cider vinegar, and soaked bread.
This homemade yogurt is runnier then store bought yogurt but its PERFECT for smoothies. I throw it in a blender with whatever fruit (frozen or fresh) I have on hand and the kids LOVE it!
Started mine in the crock pot this morning and was wondering what would happen if it started to boil a little. I have turned it off and am now letting it cool for three hours but I am wondering if it is going to be any good???
Second comment, but when you make yogurt on the stovetop, a slight boil is desirable, since it breaks down the milk proteins, which will help the texture. I don’t have a crockpot, so I let the yogurt sit outside (AZ is pretty hot) or in the oven with just the pilot light on. I’ve had the best results using Nancy’s, Straus and Fage as starters.
Crystal:
I wondered if you might want to adjust your recipe directions regarding spooning a “small amount” of the warmed milk into the yogurt starter? When I read that, I was thinking a couple of spoonfuls, which would likely be only a few tablespoons. The original recipe you linked to, as well as the one posted here in your comments by Kim, each list using much more milk (1-2 cups). Is that just my misinterpretation of “small amount”? Did you actually use much less milk than 1 cup when you spooned, meaning no adjustment is necessary?
I fully admit I am not a “cook” (so I might have totally misinterpreted your instructions) and that most might think one cup is a small amount. (It is, compared to how much is in the crock pot!) I’m the kind of person who needs to be told to CRACK the egg for the recipe! c:
I wrote the recipe in the comments. I use a ladle and scoop 2-3 ladles full of the warm milk into the starter (about 1- 1 1/2 cups). Stir, then pour it back into the warm milk in the Crock Pot, then stir again. HTH!
Thank you, I very much appreciate all your wholesome recipes. Please keep them coming!
Does anyone know how this does when you freeze it or how long it will keep in the freezer?
I have used this method before too and it is really good. My only issue it that I sometimes has ‘lumps’ in it that have a wierd texture. Is it just bacteria cultures? I used fresh ingredients so it was not spoiled. I was afraid I was doing something wrong and didn’t want to upset any tummies. Anyone have an idea what the lumps are?
I have used this method before and it worked well! I added vanilla extract to it when it was done and topped it with honey and it was yummmmmmmy!
How long is the starter good for? The recipe looks easy to halve. I want to try it!!
Someone else might know better, but I’d guess that the starter is good for at least 2 weeks.
I would use the new starter within two weeks or buy a single serve carton of plain yogurt. If you reuse the starter from the previous batch a few times, you will need to get a fresh starter or else your yogurt will get progressively runnier with each batch.
Do you know if this recipe can be cut in half? Not sure I could get through all that fast enough.
I think it probably could! Let us know if you try it!
You can do less, but go by temp and not time (like 2 hrs 45 min) as the time will decrease with less volume in the crock.
I made yogurt yesterday, too. Since it was 107 (!) here in NW Ohio yesterday, mine made a little faster by using the same method I used when we lived in central Africa and had consistently warm weather. In my crockpot, I heated the 1/2 gallon of milk (plain soymilk is what I had on hand) to 110 degrees. (My crockpot has a temperature probe.) I then stirred in 1/2 plain yogurt, and replaced the lid. Then, I removed the covered crock and placed it on my back porch in the sun for about 3 hours, then in the shade for another 1-2. Worked like a charm!
We make our yogurt in the crockpot too. So easy! Just remember to keep enough from your homemade batch to start the next batch. This is definitely the cheapest way to have organic yogurt!
Would this work with coconut milk and coconut yogurt as the starter? We have a dairy allergy in the family. Coconut yogurt is yummy but pricey.
Too funny, I JUST made my first batch of homemade yogurt in my yogurt maker yesterday :). It turned out ok, but slightly runnier than I would have liked. This sounds so much easier! I will probably give it a tray next time!!! 🙂
I pulled the recipe from link for homemade go-gurts and started making homemade yogurt in my crockpot this summer and my boys (ages 2 & 4) eat it all within 7-9 days! They love it. We mash up some banana and sprinkle just a little sugar and they drink it as banana smoothies. I haven’t decided if it is really cheaper or not since they consume so much more of it than the store bought yogurt. lol. I also use it in place of sour cream. We really like it. This is yet another recipe I picked up from moneysavingmom. I am now required to keep a supply of slow cooker yogurt, buttery rolls, and bread sticks on hand. Thanks for having so many great recipes. 🙂
How do you store your go-gurts? My kids love eating them and I was trying to think of a kid friendly way to store them so they can eat them, when I attempt homemade yogurt.
I actually haven’t made them as go-gurts. I just used the go-gurt recipe on this blog. In that recipe, the person used snack sized ziplocks and froze them.
I have made yogurt this way, and it turned out great! However, I prefer a thicker yogurt. I put the yogurt in a strainer lined with cheese cloth for a few hours (if you leave it long enough, it becomes Greek yogurt). Delicious! The liquid that strains off is called whey and can be added to smoothies for extra protein.
I make mine in the microwave. I keep one cup of milk out and use 2 tbs of gelatine in it (stir like crazy). I put the rest of the milk in a large container in the microwave and heat until I can put a figure right on top and come away with a light scum (that tells me the milk is scalded enough). I put in 2 tbs of active plain yogurt and the cold milk mix and stir until there are no lumps. I set in a container of warm water, covered for 6-8 hours and then refrigerate.
Has anyone tried this with soy milk and soy yogurt as the starter? We are dairy free! Thanks!
I was wondering the same thing.
We’re SLOWLY going vegan, and I was wondering about coconut milk and coconut yogurt.
(I’ve made it lots of time with dairy yogurt and milk.)
I used soy milk for the yogurt I made yesterday, but had regular (cow’s milk) fat-free yogurt for the starter. I’d guess, though, that as long as you have a starter with live cultures, you’ll be fine. Good luck!
Oh, I’d love to do this for my dairy free daughter! Let us know if anyone does know, thanks!!
Total fail with almond milk (not *quite* what you asked, but close), but apparently there’s a method that uses coconut milk, and tends to be successful.
I would love to try this with coconut milk. Does anyone know anything about that method?
Darn, almond milk would be my choice.
I’ve been using this method for a while and it is great! I have noticed that different brands of milk produce different thickness of yogurt (all other things were the same). It’s a fraction of the cost of buying yogurt and my DD eats it almost straight with just a bit of fruit compote in there. So much less sugar than many brands out there. I have strained it using multiple layers of cheesecloth and it has thickened really well!
Curious as to cost comparison here. How much did this make?? I pay just under $4.00 for a quart of Stoneyfield whole milk yogurt. I don’t think I’ve ever seen it on sale but occasionally get coupons for it.
I’ve wanted to try this for so long, but was terrified I would poison us all or something.
Depending on whether you strain it or not, it should make a bit less than a half gallon. I made it recently (using a different recipe) and I got 3 regular sized Prego spaghetti sauce jars full, lol. I think each jar is something like 20 oz? I might be totally making that up and this comment might be completely useless… so… sorry??
Regardless, it’s a lot cheaper. However, if you strain it to thicken it you get considerably less and the cost difference decreases. I made mine with 2% milk and used it in smoothies and mixing it in sauces in place of sour cream.
Oh, and re: poisoning- my husband was scared of the same thing, but you don’t have to taste it to tell that it’s turned into yogurt, even if it’s still pretty runny. You can definitely tell by the smell. If it smells like sour milk- toss it. But mine definitely smelled yogurty and the hubster agreed. And so it was ingested.
I wondered the same thing & ran the numbers:
–>Organic milk: $5.99 per gallon, which equals $3.00 for 8 c.
–>Organic yogurt: $3.29 per 32 oz. container, which equals $0.42 for 1/2 c.
–>Organic non-fat dry milk (used to help thicken mixture): $6.91 per 12 oz. container, which equals $0.18 for 1 tbsp.
This totals $3.60 & makes 64 oz.! If you strain the yogurt, you’re left w/ roughly half the total, so it would be $3.60 for 32 oz. Greek-style organic yogurt! While more expensive than Stonyfield ‘regular’ yogurt, it is significantly cheaper than buying organic Greek yogurt!!
My recipe & breakdown are here: http://wp.me/p2gGyc-fK.
HTH!!
Did you have any issues with a film forming over the yogurt? Also, when I made this I thought that it was REALLY sour. Thoughts? Suggestions?
You can do the final culturing step for as little as 4 hours according to my research & personal experience! The longer it sits in the last stage, the more sour the taste. The shorter time, the milder flavor. Of course, if it tastes like sour milk then it didn’t work and I’d throw it out. (:
It WILL taste different than store bought vanilla yogurt, because theirs has a ton of added sugar. You can sweeten yours with honey, agave, fruit (fresh or frozen), artificial sweeter (truvia etc.), or sugar. You can also add a drop of vanilla if you like.
If it has a film, it got too hot. If it lumps, it wasnt wisked long enough. I make this weekly, so I’ve had a ton of success and fails! You can add 1/4 dry milk to your starter. It thickened nicely. Or unflavored gelatin, but I don’t. We are gelatin free. When you wisked the milk into the starter yogurt, it should thicken and be smooth. That will tell you the milk is the perfect temp and the cultures are active. Hope this helps someone. Our digestive issues have gone away since eating lots of this. Plus its soo much more natural than yoplait that is filled with fillers and gelatin.
I tried this last year and it was an epic fail. No idea what I did wrong, but you’ve given me inspiration to try it again!
Make sure you get the temperatures right and make sure the starter yogurt has live and active cultures (the cultures should be listed on the ingredients list, not just on the front of the container). If you feel like your Crock Pot was getting too hot or not hot enough, try my method above. Though it requires a couple more dishes to clean, it is MUCH faster and more accurate.
Pam, the first time that I made it, I used a half gallon of Horizon Organic milk and it did not turn out. After reading some more on the internet, I learned that their half gallons of milk are ultra pasteurized and that is why it wouldn’t work. Maybe this is why yours didn’t turn out?
You may want to double check the yogurt you used for starter. I was surprised to see that the brand of Greek yogurt I have been buying lately doesn’t have active live cultures in it. The live cultures are what turns milk into yogurt. I had wrongly assumed that all yogurt contains live active cultures.
If your milk is too hot when you add your yogurt bacteria, it will kill them (much like hot water does to yeast) and thus, runny yogurt! As far as using ultra-pasteurized milk…nearly all organic milk is UHT. It makes it last longer on store shelves, because it doesn’t move as quickly as the regular varieties. Sadly, heating milk to that high of a temperature completely kills all living enzymes, creating “dead milk”. 180 is the minimum temp needed to pasteurize milk any more is redundant and only for profit reasons–not for health reasons. The UHT organic milk will work for making yogurt, but will be slightly less nutritious. But store-brand, non-UHT milk has issues of its own…so it’s a personal decision. I say just buy a cow! LOL
Whole Foods does not ultrapasturize their store brand milk.
Unfortunately, this recipe didn’t work for me. I guess the temperature was off because what I ended up with looked like milk with lumps in it. Oh, well. Back to the drawing board.
I made yogurt for the first time today too! my sister in law gave me the recipe,,, good idea for the sunflower seeds, I will have to get some.
Here is the Stovetop/Crock Pot yogurt recipe I made up as a combination of ideas from various websites. It is MUCH faster than regular Crock Pot yogurt and takes the guess-work out of the timing/heating if your Crock Pot doesn’t heat perfectly (gets too hot or not hot enough).
Quick Crock-Pot Yogurt
by Kim Nevels
Ingredients:
½-1 Gallon whole or 2% milk
2-4 Tablespoons starter yogurt (unflavored plain yogurt with live active cultures- make sure that the cultures are listed on the ingredient list (not just on the front of the container; or may use from a previous batch of homemade yogurt)
Supplies:
Large pot
Thermometer
Measuring cup (2 c. or larger)
Whisk or spoon
Crock-Pot
2 Bath towels
Directions:
1. Pour milk into large pot on the stove and begin to heat on medium-high. Place a thermometer in the pot (not touching the bottom or sides).
2. While the milk is beginning to warm, plug in the Crock-Pot and turn it to low. Put 2-4 tablespoons starter yogurt into a measuring cup (or something similar) and set it on the countertop, so it can warm up a bit.
3. As the milk starts warming, stir constantly to avoid scalding. Heat to 185-190°.
4. Place pot in the sink. Carefully fill the sink with cold water around the pot. Stir and check the temperature often until it cools to 120°.
5. Pour the milk into the warmed Crock-Pot.
6. Spoon out about 1 cup of milk into the measuring cup of starter yogurt. Stir well. Add this mixture into the Crock-Pot of milk. Stir well.
7. Turn off and unplug the Crock-Pot. Wrap it snugly with bath towels.
8. Let Crock-Pot sit undisturbed for 4-10 hours.
9. Pour or spoon off any liquid (the whey). Spoon yogurt into containers and refrigerate. It will thicken a bit more in the refrigerator.
10. If yogurt is too thin for your taste (or you want to make Greek yogurt), strain some of the liquid off using cheesecloth or a clean dishtowel in a colander.
Yum! I love homemade yogurt! This is exactly the way I make it, but I add a little bit of powdered milk when I add in the starter to make it thicker, and I double strain it, to make it “Greek.” I took some to work once, and it was a big hit. Everyone keeps asking when I am making more.
How much is “a little” (per 1/2 gallon milk)?
so i assume it taste like the plain unsweetened yogurt?
Yes. You’ll want to add some fruit, jam, honey, or other sweetener to it after you make it if you don’t like plain yogurt.
I know this may sound crazy but I like to add powdered sugar and lime juice to mine. I swear it tastes just like key lime pie flavored yoplait which is my favorite. I also like to add some nonfat powdered milk at the beginning to make it come out thicker.
What a great idea! How much powdered milk to the 1/2 gallon of milk?
I read another recipe that says 1 cup.
My crock pot seems to cook pretty hot, or at least hotter than my old one. I’m worried it would be too hot, even on low. Is this something that has to be exact, do you think my crock pot cooking too hot would mess up the yogurt?
Katy, you can use a thermometer to check it! Heat to 180 degrees (about 2.5 hours on low) to kill any and all bacteria. Cool to about 110 degrees (around 3 hours with crock turned off) before introducing the good bacteria from a yogurt starter. I also wrap in a towel, but I place in my oven (heat off) with the light on. It has to stay at a constant temp (slightly warmer than room temp) to incubate. If it turns out too runny, you can strain with cheesecloth (save the whey–it’s great for making pancakes in place of milk or water!) or just use the runny yogurt in smoothies. Hope that helps!
Thanks for the info!
Thank you! I used your comment temperature guide along with the recipe and for the first time ever successfully made yogurt! In the past my Crockpot decided to run hot and I got a gallon of curdled milk. As you may imagine not so awesome. This time super delicious yogurt.
I have what I believe to be a very hot crockpot, but I have not had any problems with making yogurt (even though I seem to burn other things in it!). Best wishes!
Thanks!
For anyone who has a gas oven it is even simpler to make. All you have to do is add your yogurt starter to your milk and put it in your oven for 8-10 hours. The pilot light of the oven gives the consistent temperature needed to make the yogurt. So simple
Scroll down for my recipe that does not rely on the temperature of your Crock Pot. It works better for me, since I can carefully monitor the temperatures (the key to success!) and it is much faster than the hours and hours of the traditional Crock Pot yogurt method.
Thank you!